This post is part of the Hand Quilting HQ tutorial series. For the most fluid experience, I recommend starting at the beginning since the posts build upon each other. If you missed any of the previous posts, you can find them here.
We’ve reached the final installment of the Hand Quilting HQ tutorial series! In this segment we’re going to finally dive into the actual technique of hand quilting! I’ll share my favorite supplies, differentiate a few different hand quilting styles, address the question of “to hoop or not to hoop,” and go through the steps you’ll need to take your very first hand quilting stitches. Are you ready? Let’s dive in!
Supplies
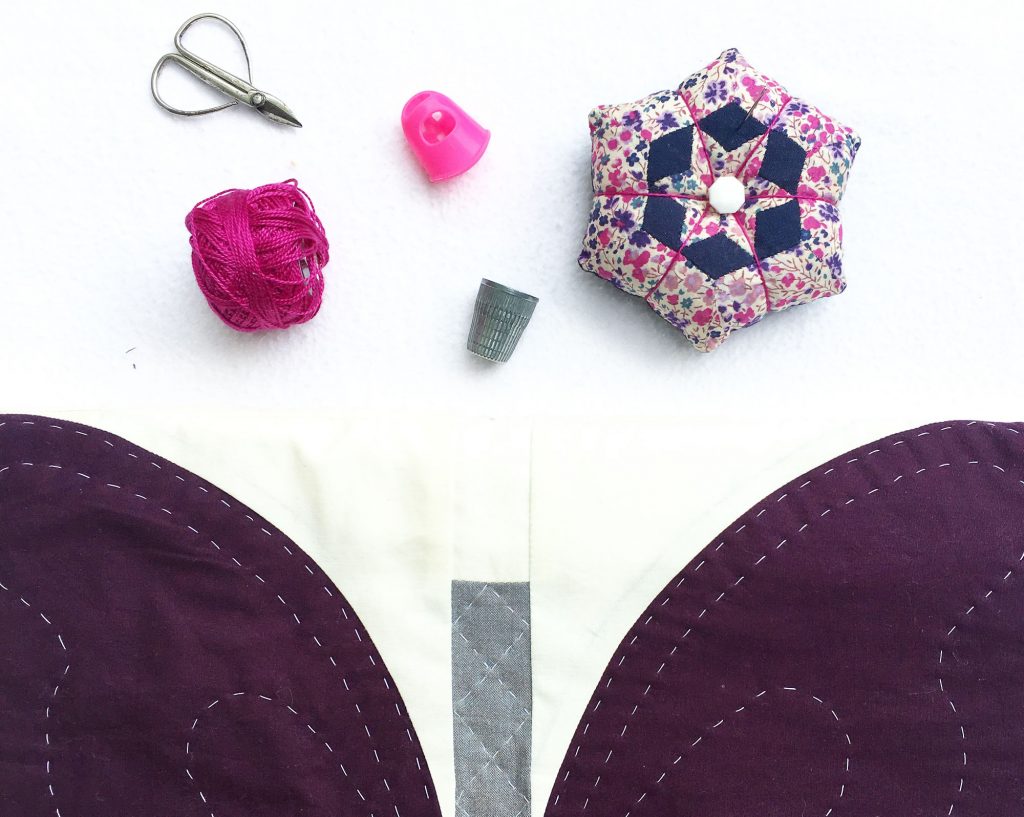
Let’s begin with some basic supplies. I enjoy sharing my favorite supplies with you, but I know how personal stitching is. So, I always encourage you to give several different supplies a try and find which works best for you. Here are a few to get you started.
Thread
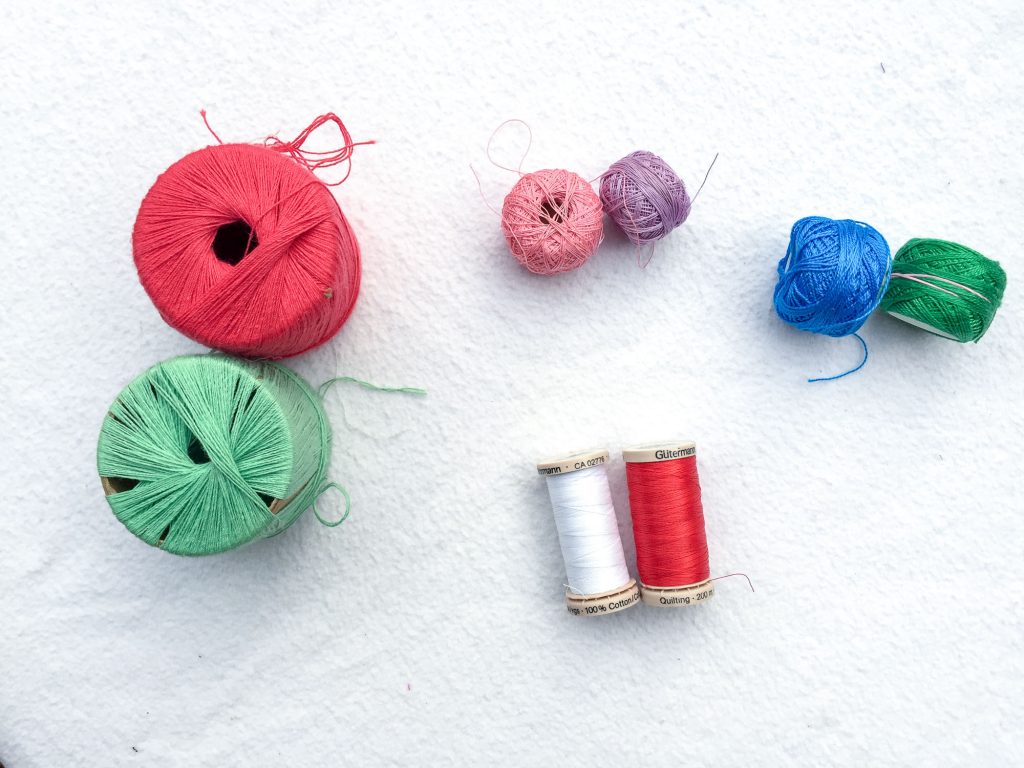
I have used so many different threads for hand quilting. While perle cotton in #8 or #12 is probably my favorite overall, I love giving vintage yarn or tatting thread a second chance at life with hand quilting when I get the chance. I’ve also used embroidery floss on smaller projects, as well.
That said, traditional hand quilters simply use waxed cotton thread for their hand quilting. So, the options are fairly endless for what you use, but for the purposes of this tutorial, I’ll be using DMC Perle Cotton #8, which is my go to.
Needles
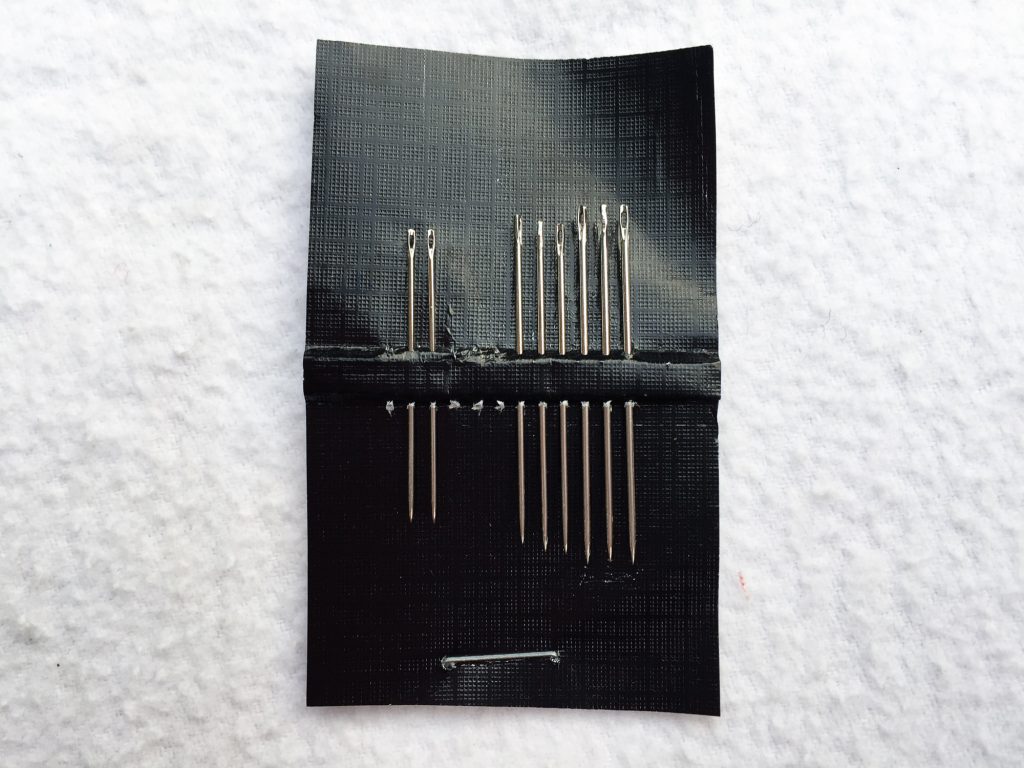
I had a hard time figuring out which needles I like best for hand quilting. Since I prefer a heavier weight thread like perle cotton most of the time, I needed to find a needle with a big enough eye to accommodate the thicker thread. In addition, as I mentioned in the batting to basting segment of this tutorial series, cotton batting can be a bit tough to hand quilt through. As such, I needed my needles to be strong enough to hold up to the repeated rocking motion of hand quilting.
After trying out several different types of needles, I determined I prefer “quilters betweens” needles. They’re shorter than other needles by contrast, and they have a sturdy shaft and decent sized eye. I like having a variety of sizes so I can try out which one suits my batting/thread combination best. I usually get one quilt out a needle before it bends a bit too much for repeated use, depending on the quilting motif of that particular quilt.
However, lots of folks like using embroidery needles for hand quilting. These have a longer shaft and long narrow eye. I find that they bend a bit too easily for the way I hand quilt, but they are so well loved by others I feel compelled to mention them.
Finger Protection
Thimbles
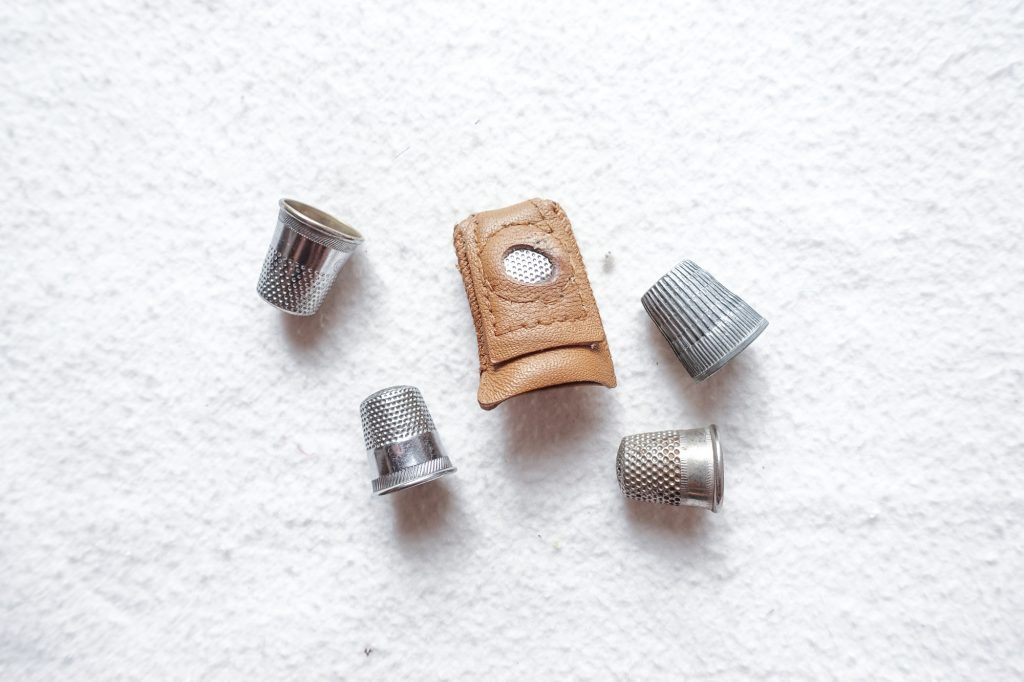
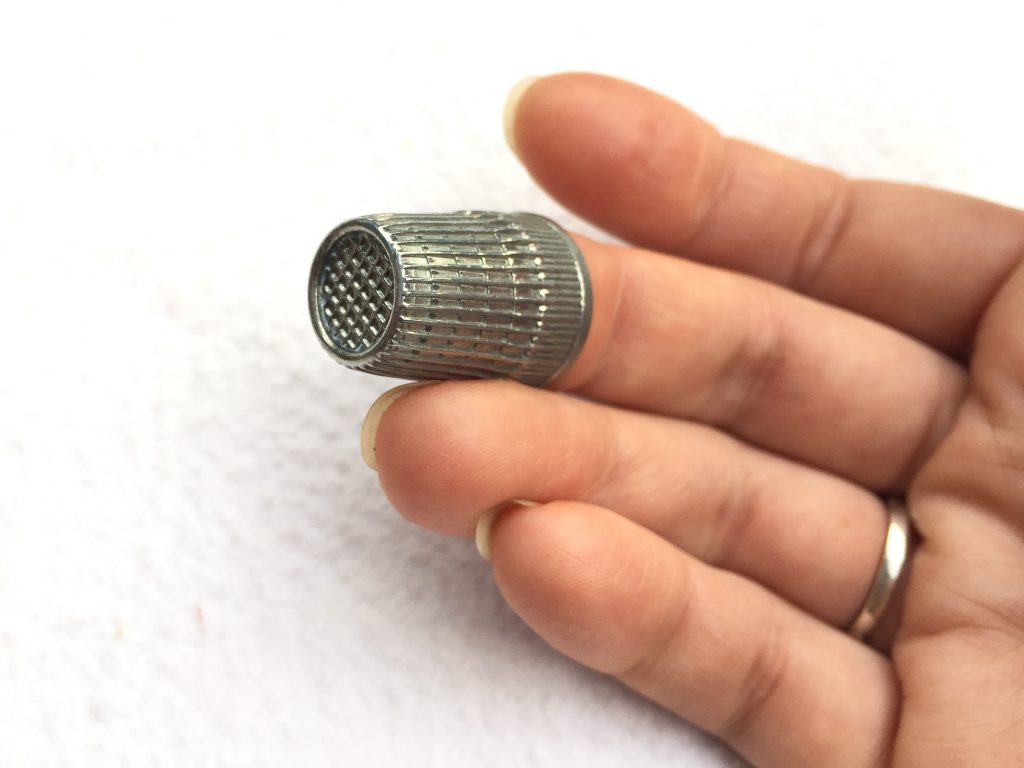
Deciding which thimble worked best for me for hand quilting proved arduous, as well. As I’ve mentioned before, I prefer a leather coin thimble for EPP, but I found that hand quilting destroyed my leather thimble rather quickly from the more aggressive tugging of thread and piercing of fabric layers. So, I tried out some more traditional metal thimbles. These take some getting used to if you’re used to the pliability of a leather thimble, but in the end I love the strength they afford.
My favorite metal thimble is called a “slip stop” thimble. Rather than having divots over the body of it, there are little grooves all along the sides that offer a stopping place for your needle. In addition, the top of the thimble has a little ridge all the way around it which makes it easier to catch the needle as you push it through the fabric. Again, it takes a little getting used to, but I’ve been glad for this discovery.
Needle Grippers
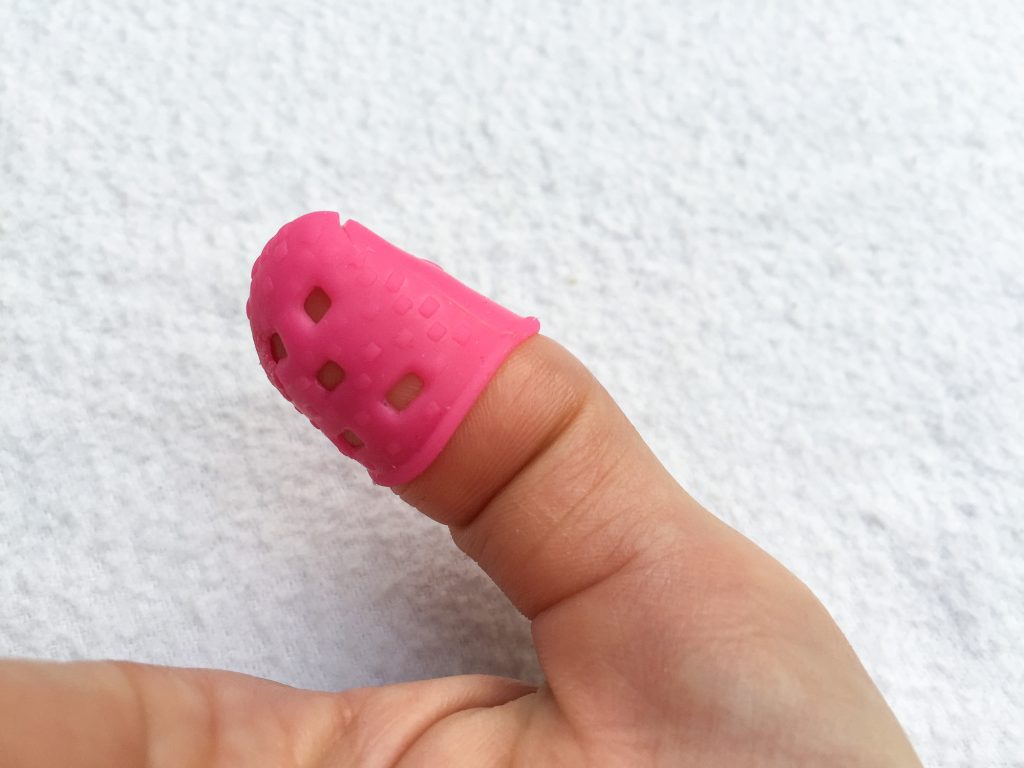
However, my favorite notion discovery for hand quilting is the needle gripper. These little silicone finger tip covers allow you to grip the needle with more traction for greater ease in pulling the needle through multiple layers of fabric and batting. Initially, I used the rubber ones traditionally used for flipping pages, but those wore out rather quickly. Not to mention, I prefer silicone to rubber since I’m sensitive to latex.
Some folks use these silicone needle grippers by placing one on their forefinger and one on their thumb. However, I have had good luck with using it simply on my thumb. Again, try them out and see what works well for you. Overall, these have been a game changer in my hand quilting experience.
The Hoop Question
When I first started hand quilting, I had minimal supplies. As such, I learned how to hand quilt using the most traditional methods of old from thread basting to any old needle and thread I could get my hands on. While I have modified and adapted various supplies, those initial techniques have more or less stuck with me.
Since I did not have access to a quilt hoop when I began hand quilting, I had to make do without one. Thus, I do not use a hoop today. However, I have given it a try, and I can definitely see how it would be a matter of preference. The following are a few benefits of each. Again, I encourage you to give them both a try and see which you prefer.
Of Note:
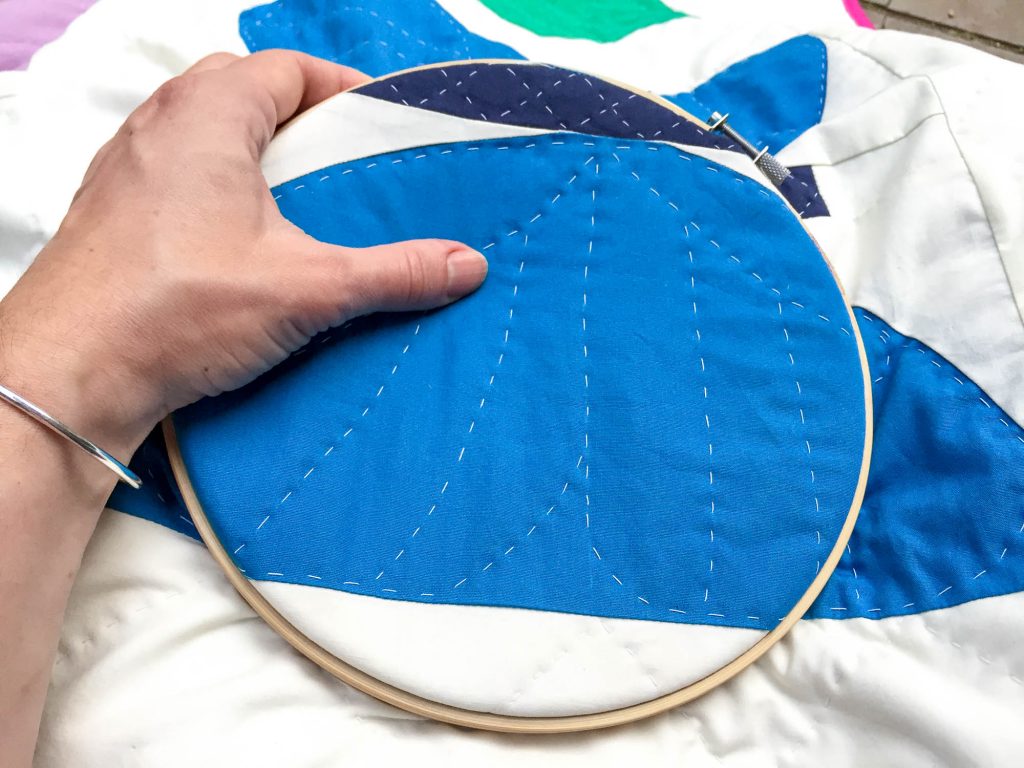
The hand quilting technique remains the same whether you use a hoop or not. However, when using a hoop, it works best when the quilt sandwich has a bit of give within the hoop. Unlike embroidery which uses the hoop to keep the fabric taut as you stitch, hand quilting with a hoop requires that the layers can shift up and down as the needle rocks through them.
One way to achieve this is by pushing the top ring of the hoop over the bottom one so that they don’t line up perfectly. See the photo below by way of example. Please note that the hoop in the photo is a small 8” embroidery hoop. Quilting hoops are much larger to allow for a greater area to work on.
To Hoop
provides a finite area to work on, works best for quilting in rounds rather than long lines
holds the layers taut and decreases risk of shifting layers/twisting
“holds” the quilt for you
thread or spray basting are ideal basting methods for use with a hoop
Not to Hoop
allows for fluid movement around or across the quilt depending on your quilt motif
permits the draping of the quilt for a more natural hold
requires that you keep the back smooth and free of twists
any basting method works well
Follow the Quilt Motif Systematically
As a segue from using a hoop, it feels pertinent to note that your quilting motif may play a roll in determining whether or not you choose to use a hoop. While a hoop can be used for any motif, it provides a finite area to work on. If you are working in rounds or on one block at a a time, then this may work out really well. However, if your motif runs in lines across the quilt, it could become cumbersome to repeatedly move the hoop. This has been the chief reason that has deterred my use of a hoop. As such, it can be helpful to determine a systematic way to approach quilting your quilt motif.
If you recall from the first installment of this tutorial series about choosing a quilt motif, then you’ll remember that there are many different designs to choose from. Let’s discuss a few of the most common variations and some tips for working with each.
Of Note:
Regardless of your motif, a good rule of thumb is to work from the center/middle of the quilt outwards. If your motif is worked in rounds or finite areas, begin in the middle of the quilt. If your motif is worked in lines across the length of the quilt top, begin at the halfway point of one side and move outward across it. This strategy allows the layers to remain smooth as you move outward rather than bunching awkwardly in the middle.
Rounds
Working in rounds can prove one of the trickier motifs to tackle. When working around a block, the quilt must keep moving as well in order to maintain a comfortable position of needle and thread for hand quilting. As such, I can see a hoop coming in handy for this variety of quilt motif. A hoop can keep the layers secure with all of the twisting that rounds require. Regardless, working in rounds is not impossible, it just takes a little patience, but can be well worth the effort.
Lines/All Over
Working along lines across a quilt top is probably my favorite variety of quilt motif. Hand quilting this way requires little stopping and restarting as you move across the top. In addition, if you get creative, even complex quilt motifs can often be worked along continuous lines.
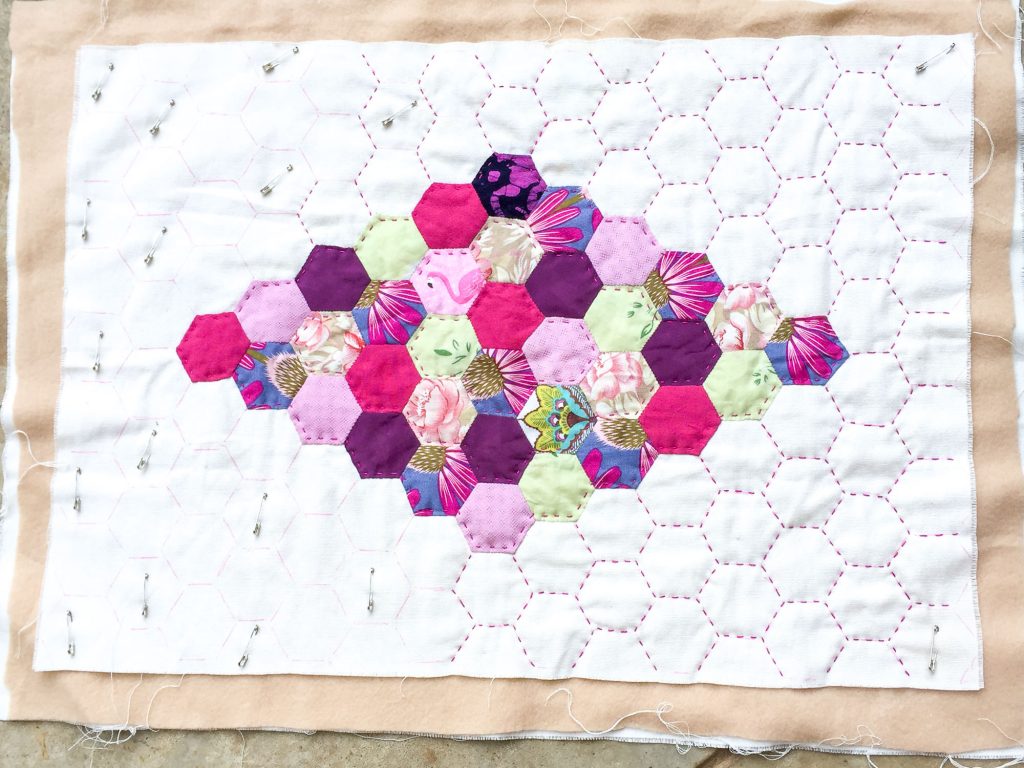
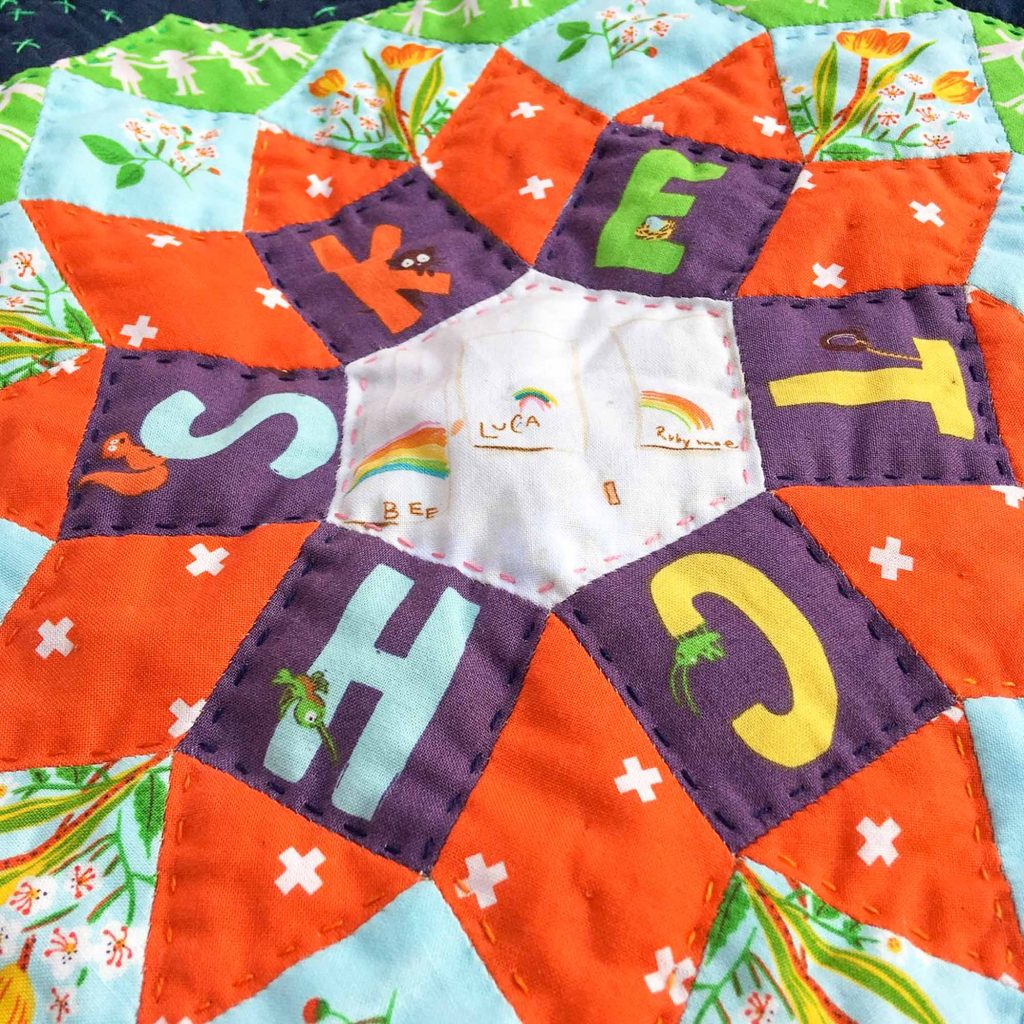
One way to determine if a quilt motif can be worked in a continuous line is to imagine you have a pencil in your hand and you have to draw a line across your quilt motif without lifting it. If you can do this, then you have found the most efficient quilting path. As you can see in the honeycomb motif pictured above, I quilted the zigzag lines first, then went back and filled in the connecting lines using the next strategy I’ll mention.
Travel through the Batting
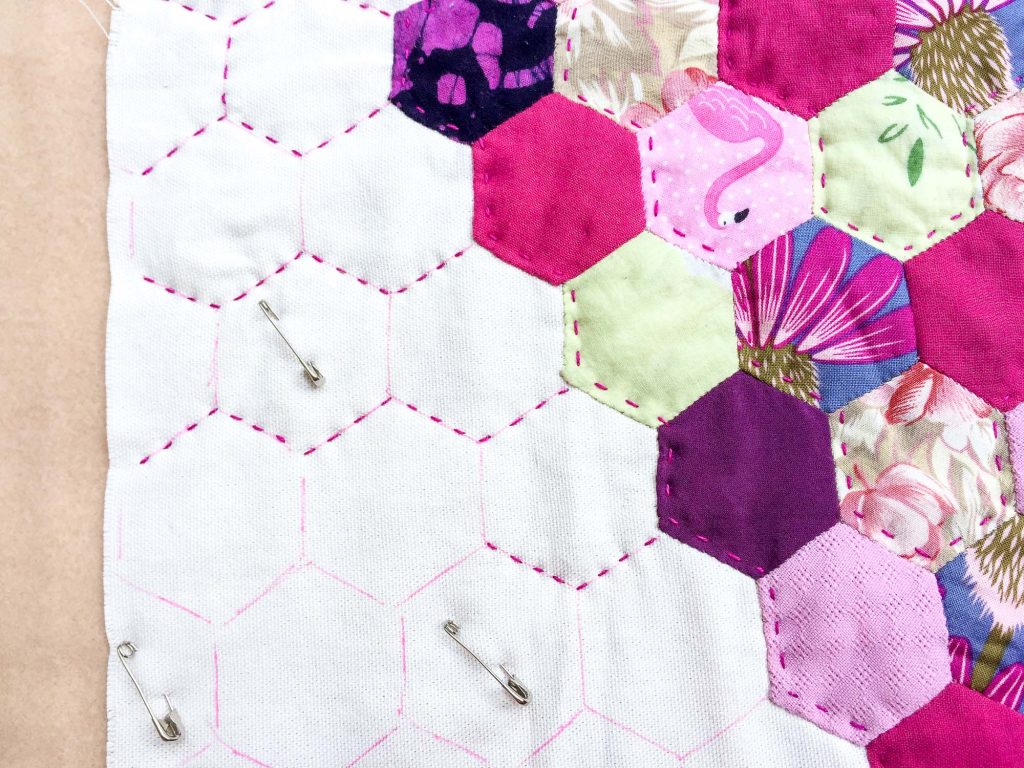
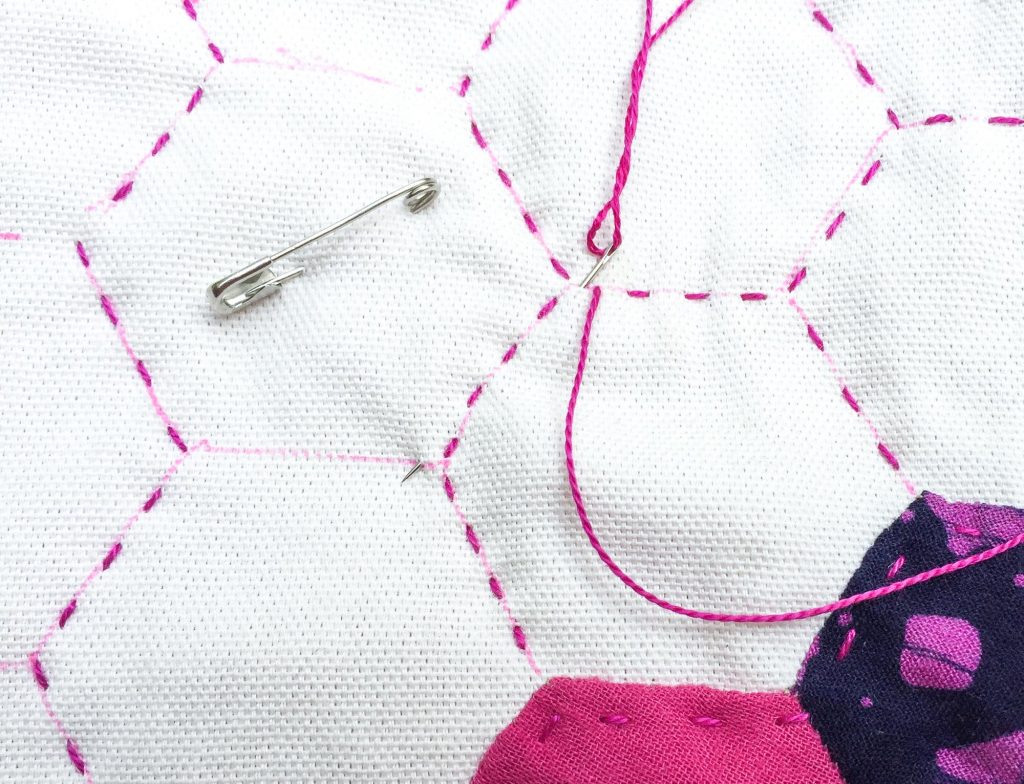
Sometimes quilt motifs don’t connect to each other directly, but they are close enough that you don’t have to end your quilting thread and restart. When a new motif begins an inch or less away from your current thread position you can travel through the batting. Rather than cutting your thread, re-knotting it, etc., simply insert your needle into the batting (not all the way through to the backing) and travel the thread to the location where your next section begins. It saves time and thread in the long run. And, the batting will eventually “felt” around the thread securing it over time.
Hand Quilting Styles
The last topic I want to cover before we finish up with the technique of hand quilting is hand quilting styles. These styles are extremely generalized for the sake of expressing a brief overview within this tutorial. There are of course exceptions, but I have taken note of three general styles of hand quilting popular today. I have opted to call them traditional western stitching, modern/big stitch quilting, and traditional eastern stitching. These are by no means official names or categories, but I hope that they serve to explain some of the variety in style that exists in the big wide quilty world out there.
Traditional Western Stitching
There was an era in western quilt culture when your hand quilting skill was determined by how tiny and consistent your hand quilting stitches were. The quilting was more for texture and subtle design than for making a bold statement. So, regular thread and tiny stitches were preferred. This method creates some utterly stunning designs and is a hallmark of traditional western quilts.
Modern/Big Stitch Quilting
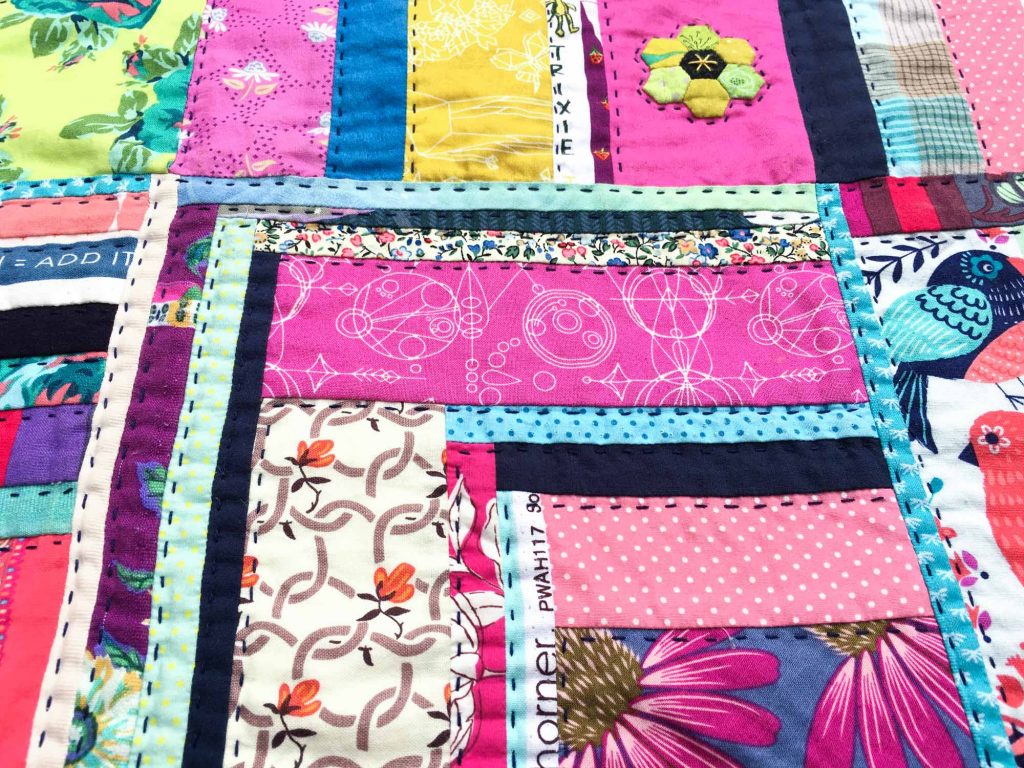
With the advent of machine quilting, particularly long arm quilting, elaborate designs could be achieved with a computerized panto or some skillful free motion quilting, rather than hand quilting. As such, hand quilting has taken on a different tone. It is usually utilized to make a bolder statement or add a personal touch to a quilt. The stitches are typically larger and utilize a heavier weight thread such as perle cotton.
Traditional Eastern Stitching
Interestingly, eastern cultures have utilized these “big stitches” for ages. Indian kantha stitching and Japanese sashiko have long used these larger stitches with thicker threads to create beautiful designs. Kantha style stitching typically runs in long lines across a quilt creating beautiful texture. Sashiko uses the same method of stitching, but directs itself in more elaborate designs. These designs can be used for quilting, but they are more often featured on solid fabrics as a design panel.
No matter the style you choose, hand quilting can add such a wonderfully unique element to your quilt. Not to mention, its meditative quality ticks the same therapeutic box as other variations of hand stitching, which is why it’s my favorite. Shall we see how it’s done, then?
How to Hand Quilt
Of note, I have endeavored to create as aesthetically pleasing a layout as possible with this post in order to enhance readability. As such, desktop users will notice that each step of the tutorial is staggered with an alternating text block and image. If the images appear too small at any time, simply click on the image and a full scale version will pop up.
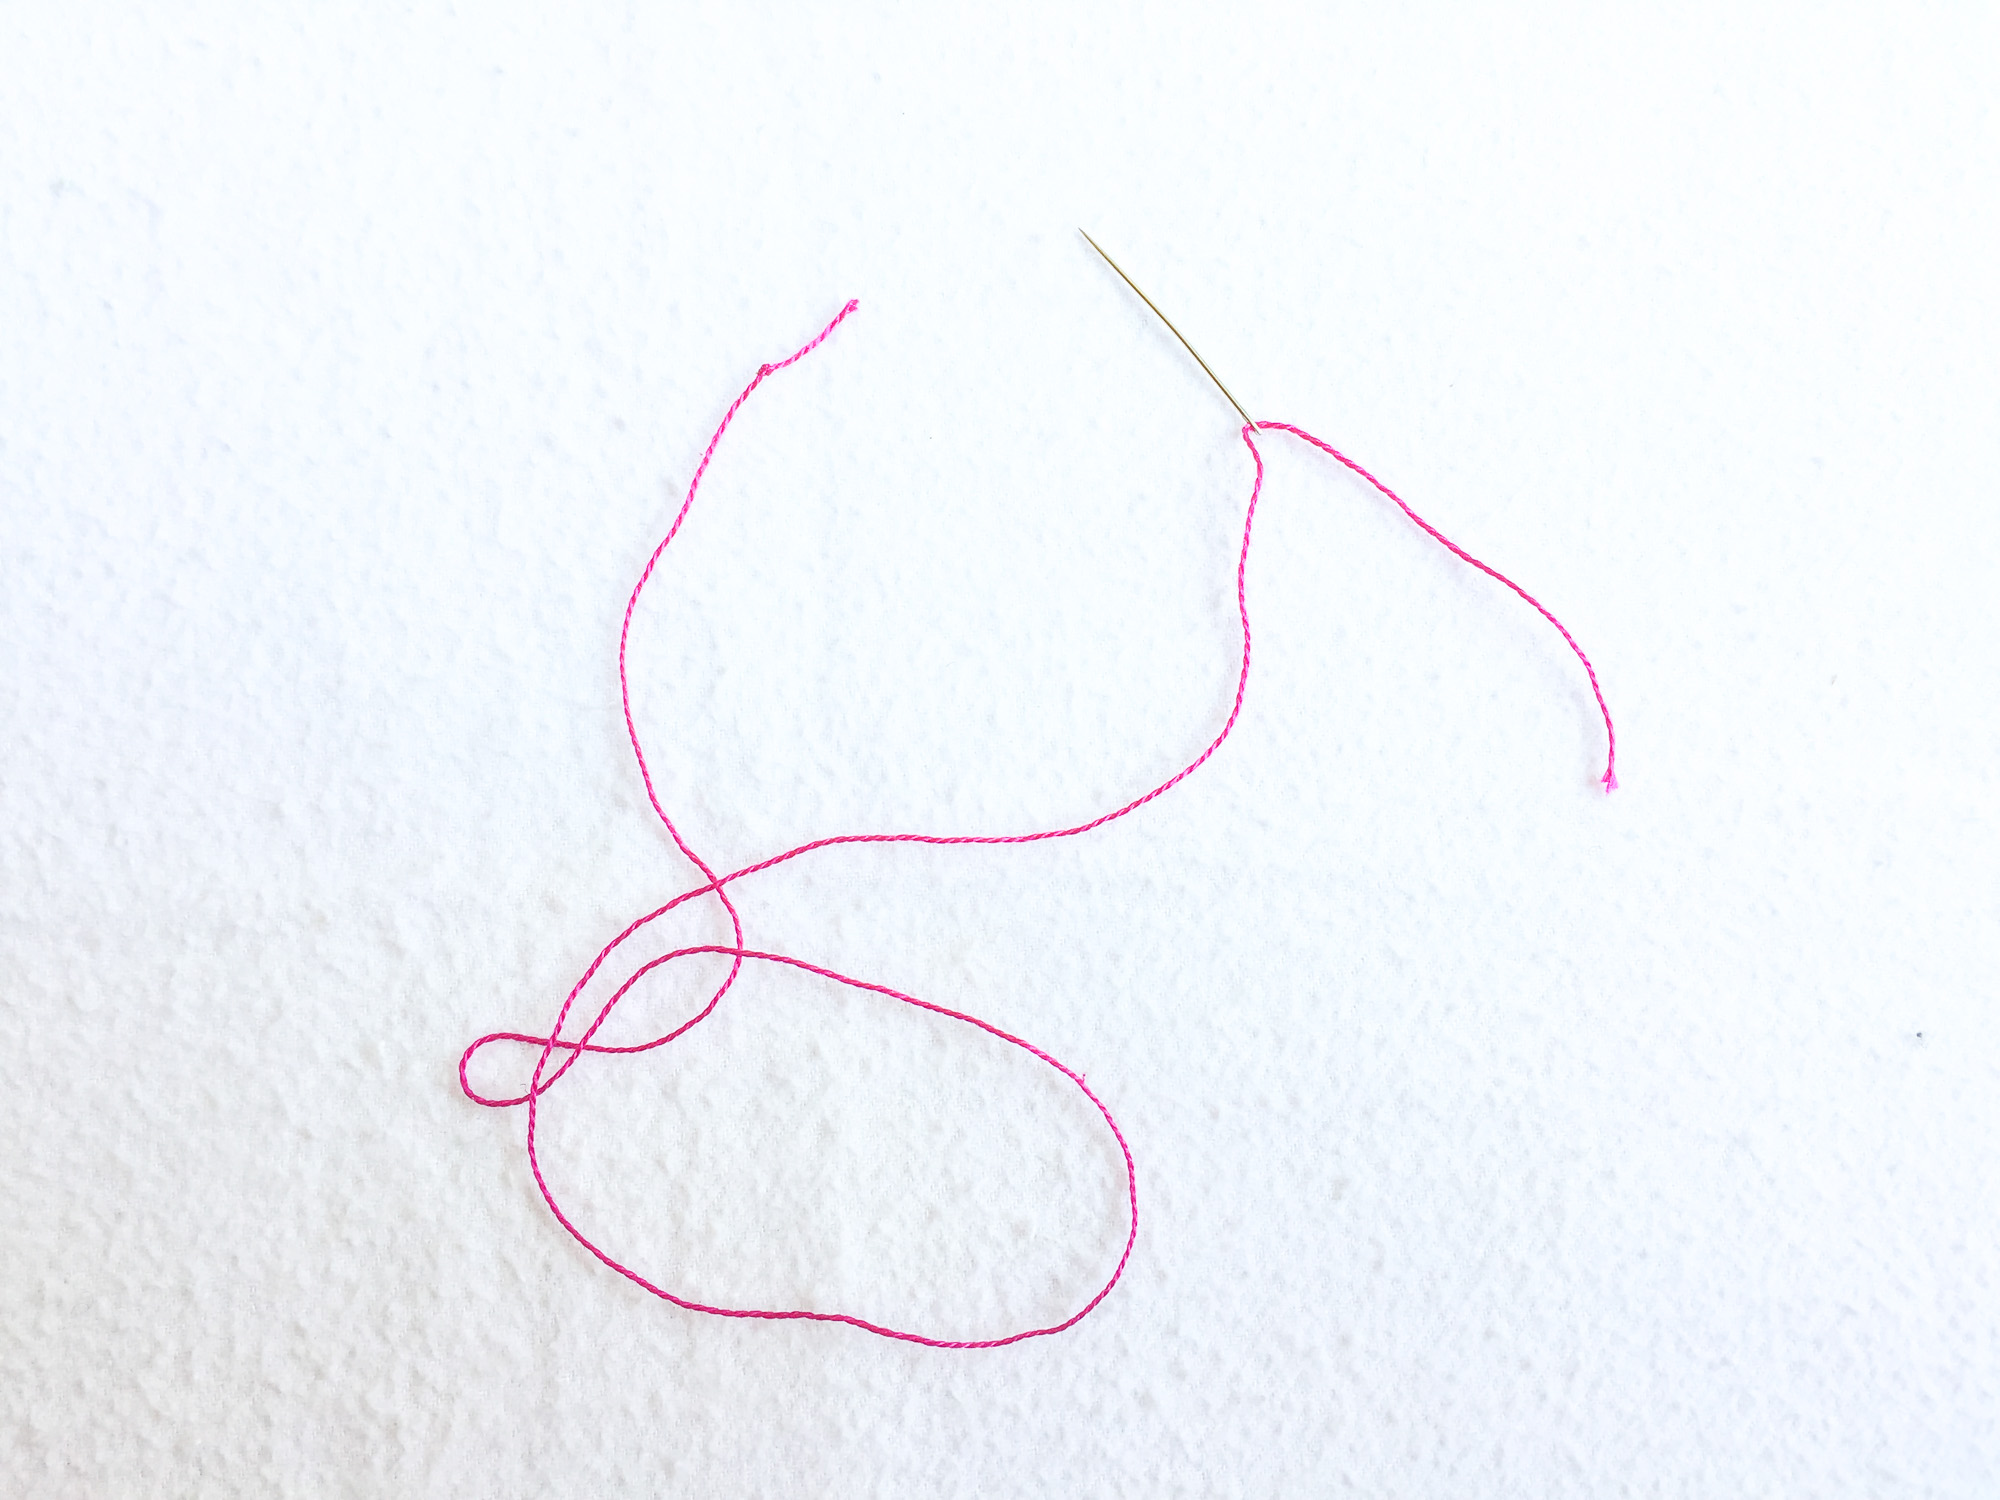
1. Begin by threading your needle with no more than an arm’s length of thread and make a knot at the end. Quilters knots* make a nice smooth knot that can be easily “popped” into the batting layer of the quilt sandwich. The size of your knot depends on the thickness of your thread, the weave of your backing fabric, and the density of your batting. Play around with it until you find a good size for your particular quilt.
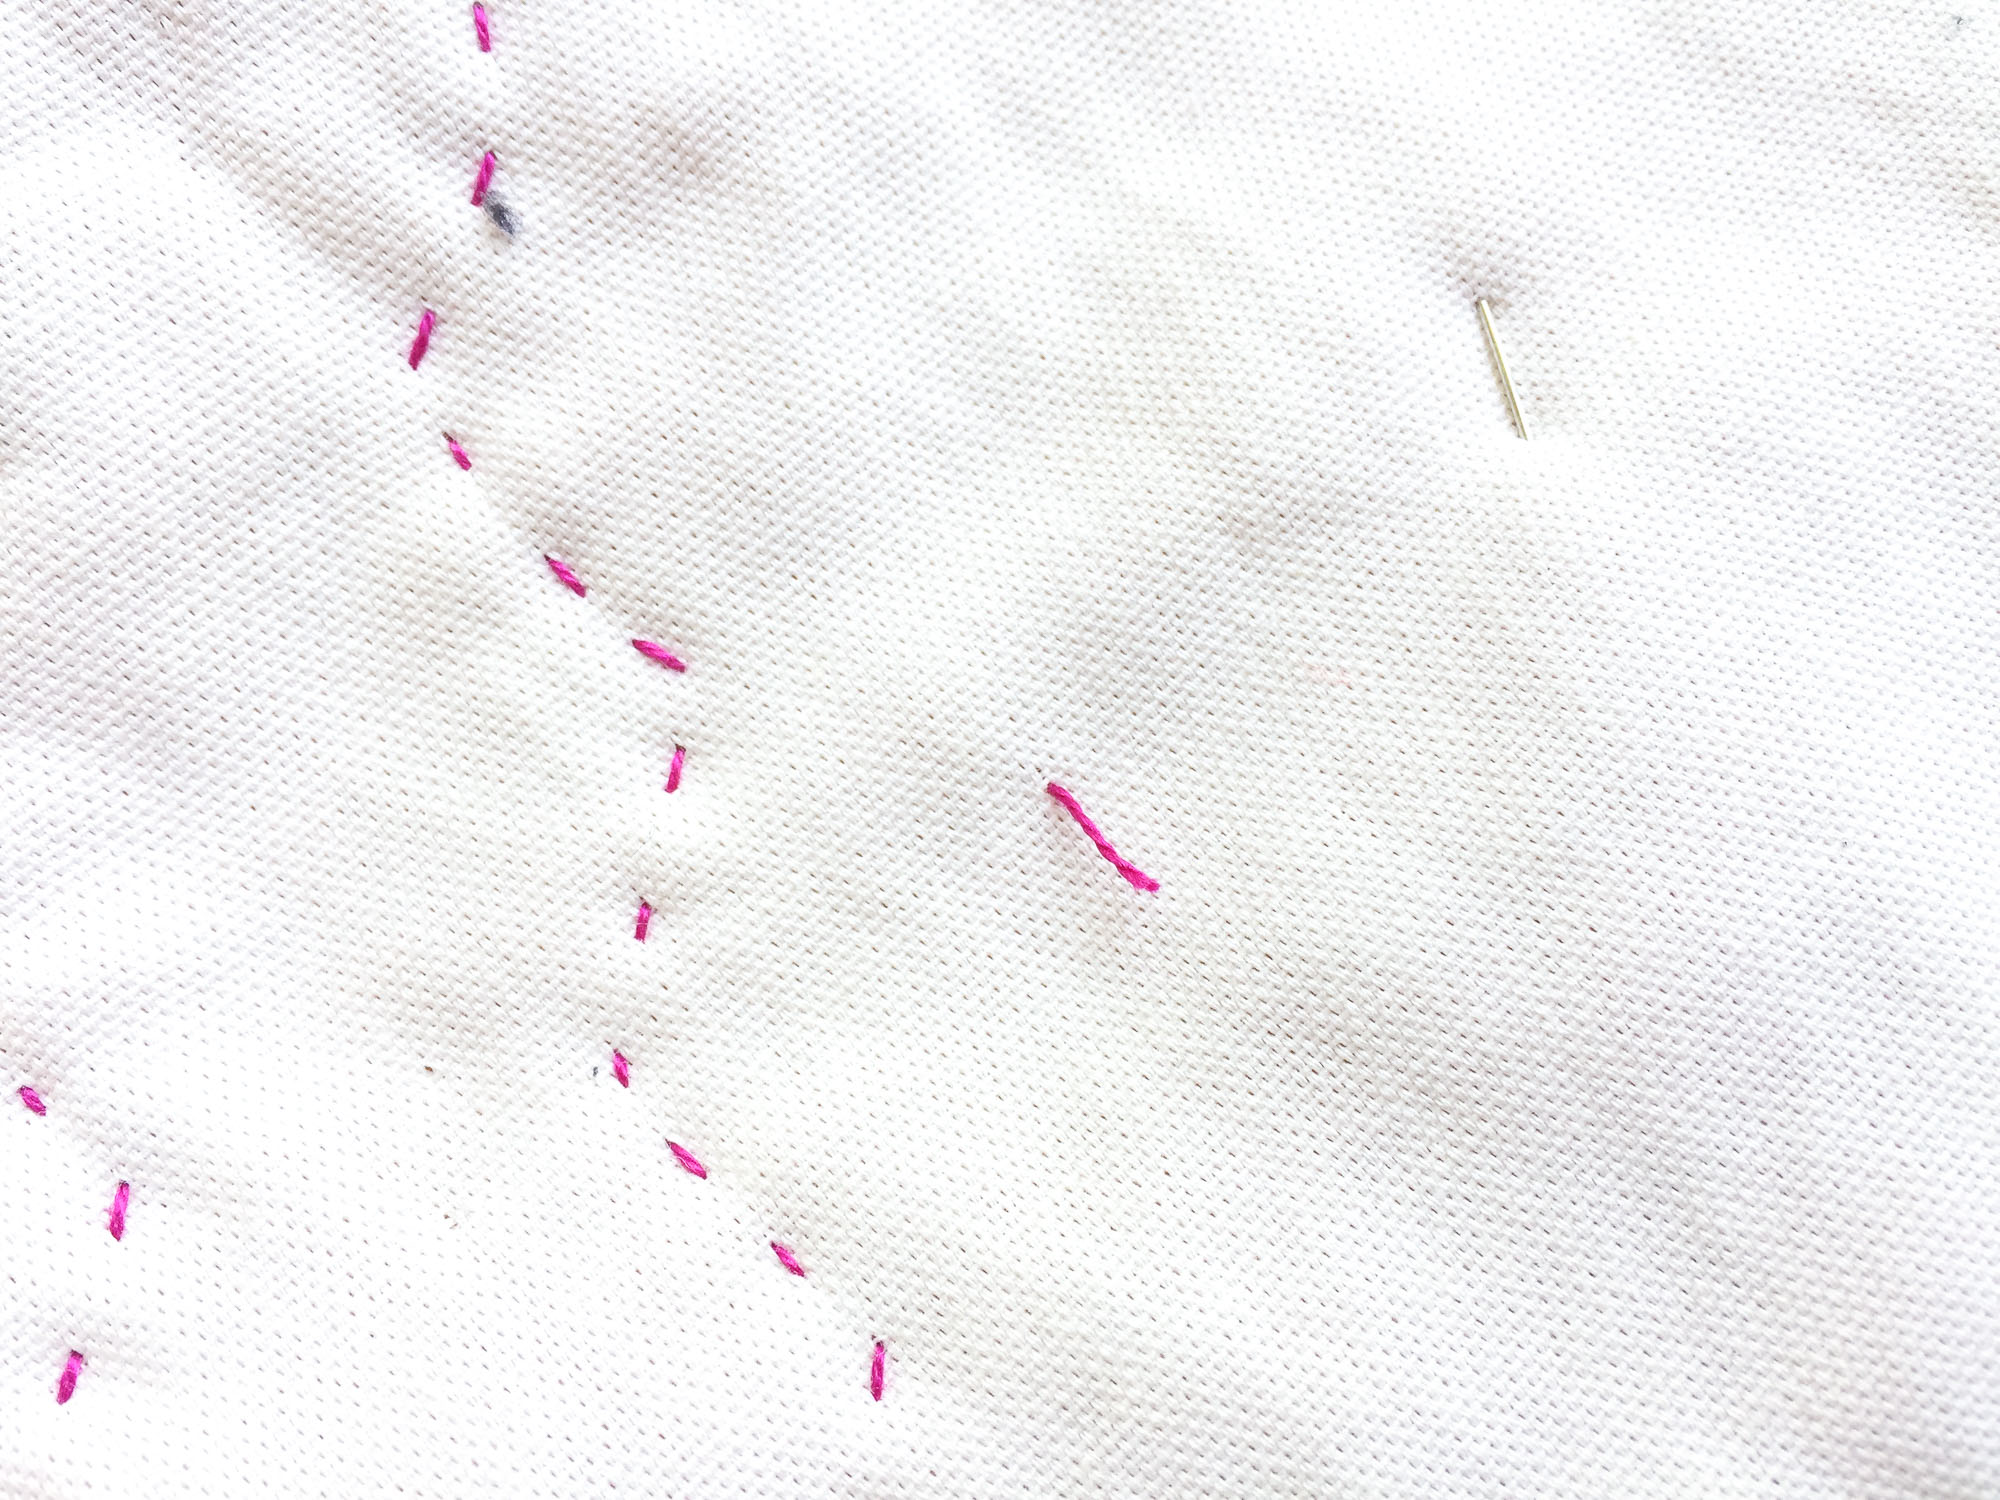
2. Insert the needle from the back of the quilt about an 1/2″ to 1″ from where you plan to begin stitching, then bring the needle up through the front and pull taut.
3. Hide your knot in the batting of the quilt by “popping” it through the back of the quilt into the batting layer, but make sure it doesn’t come through the front. To do this, give a quick tug on the thread until you hear a literal “pop,” indicating the knot passed through the backing and into the batting.
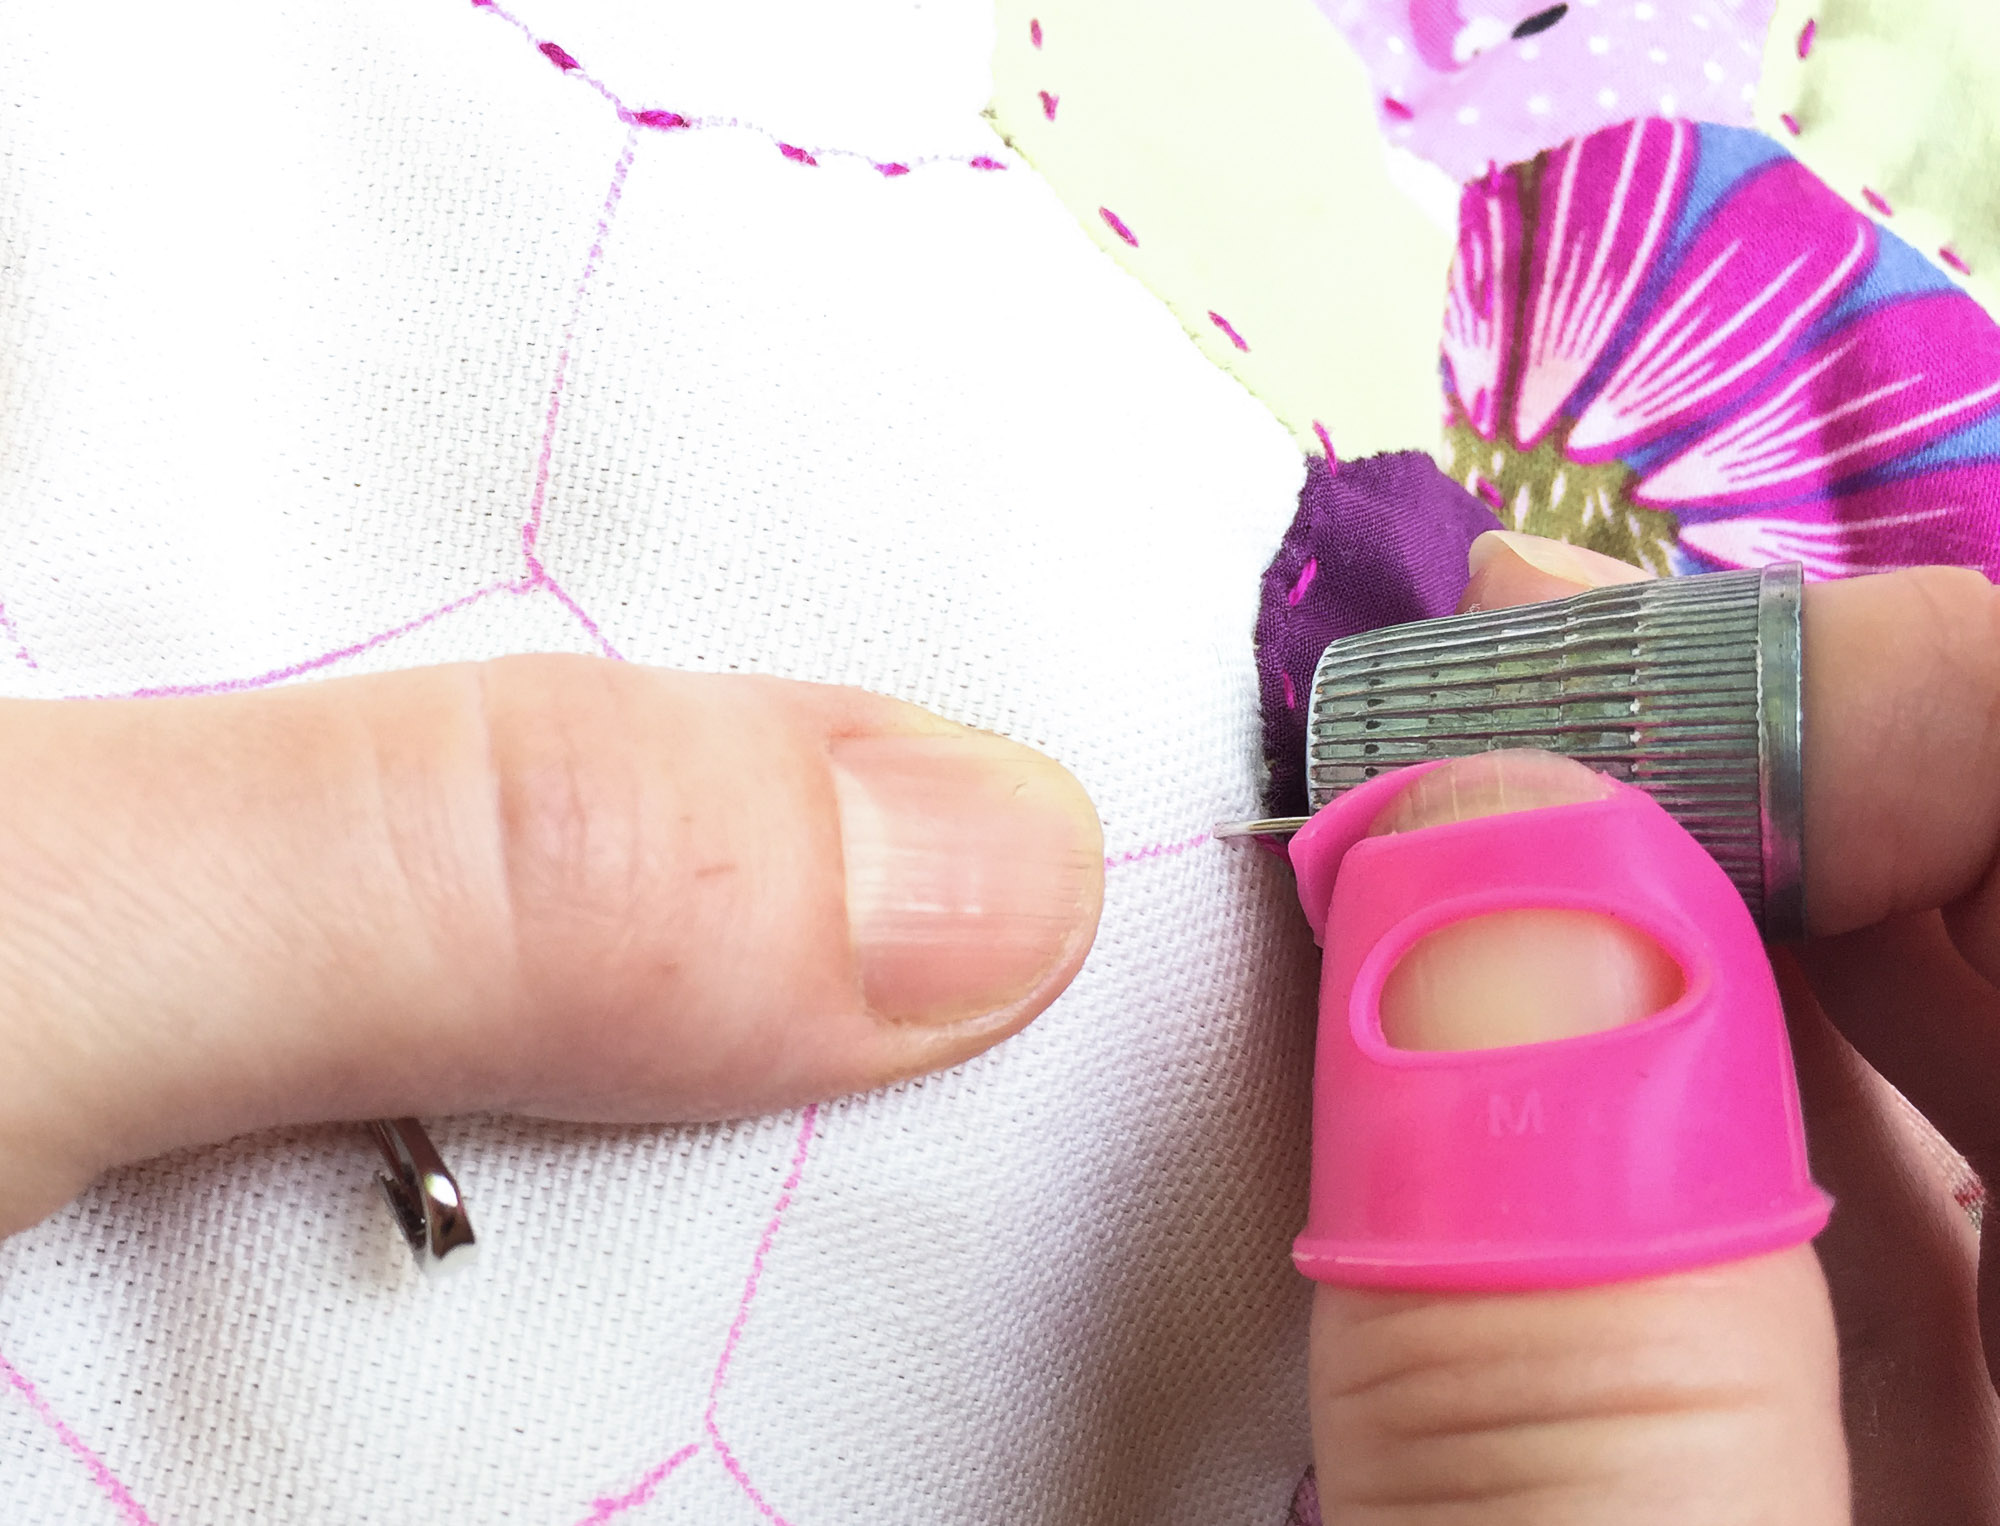
4. Take your first stitch by putting your needle down through the front of your quilt at a 90 degree angle.
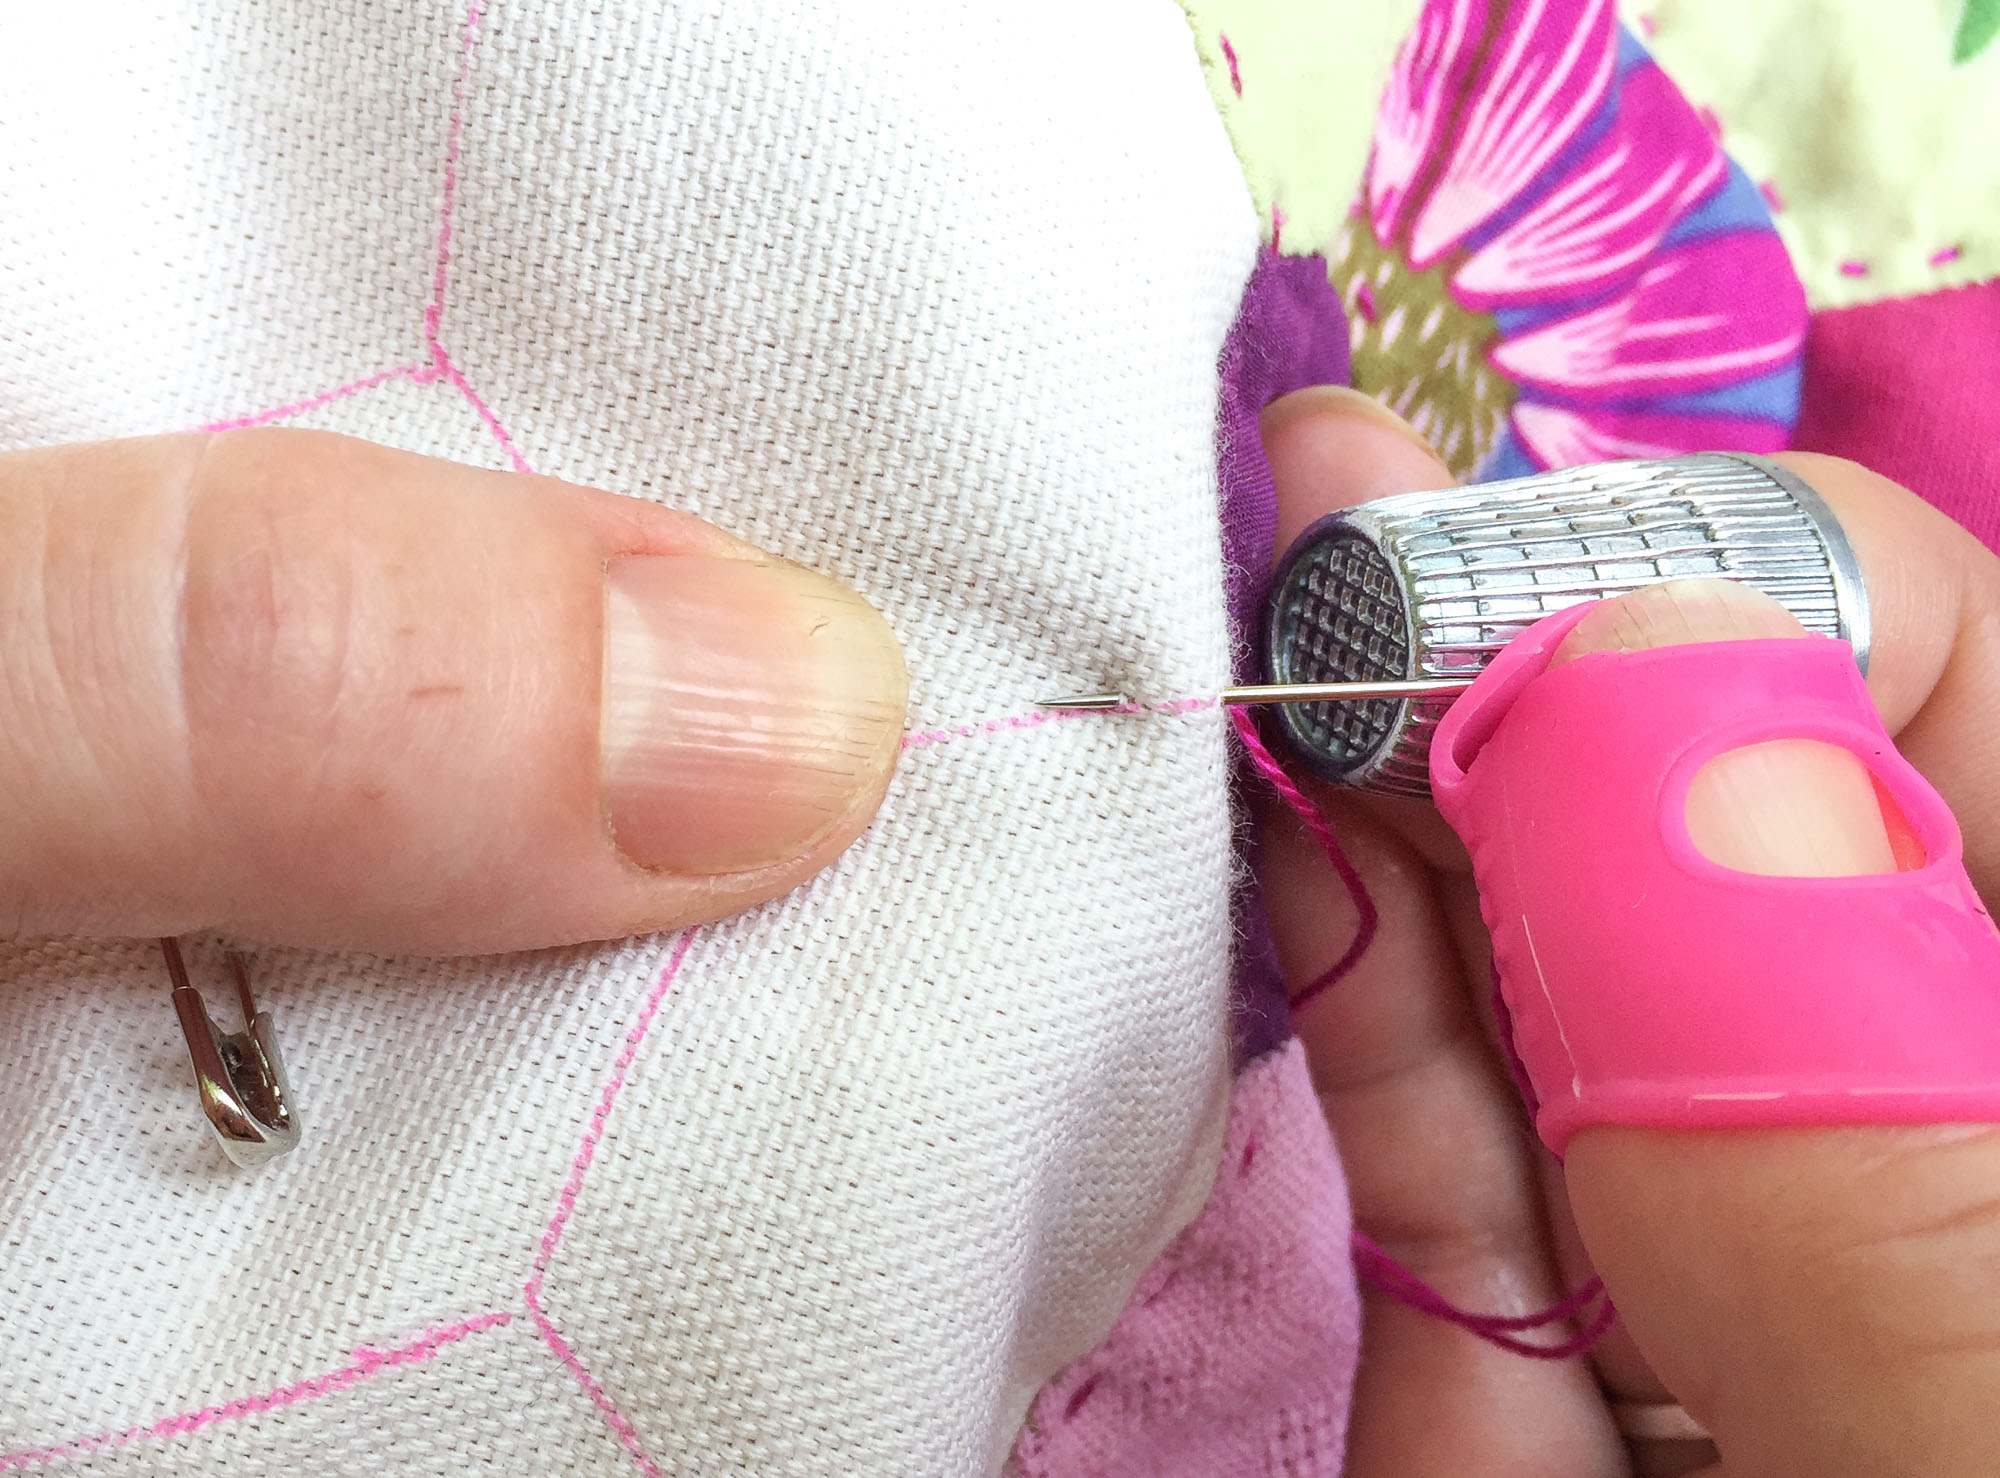
5. Then rock it back up through all of the layers to the top. DO NOT pull through just yet!
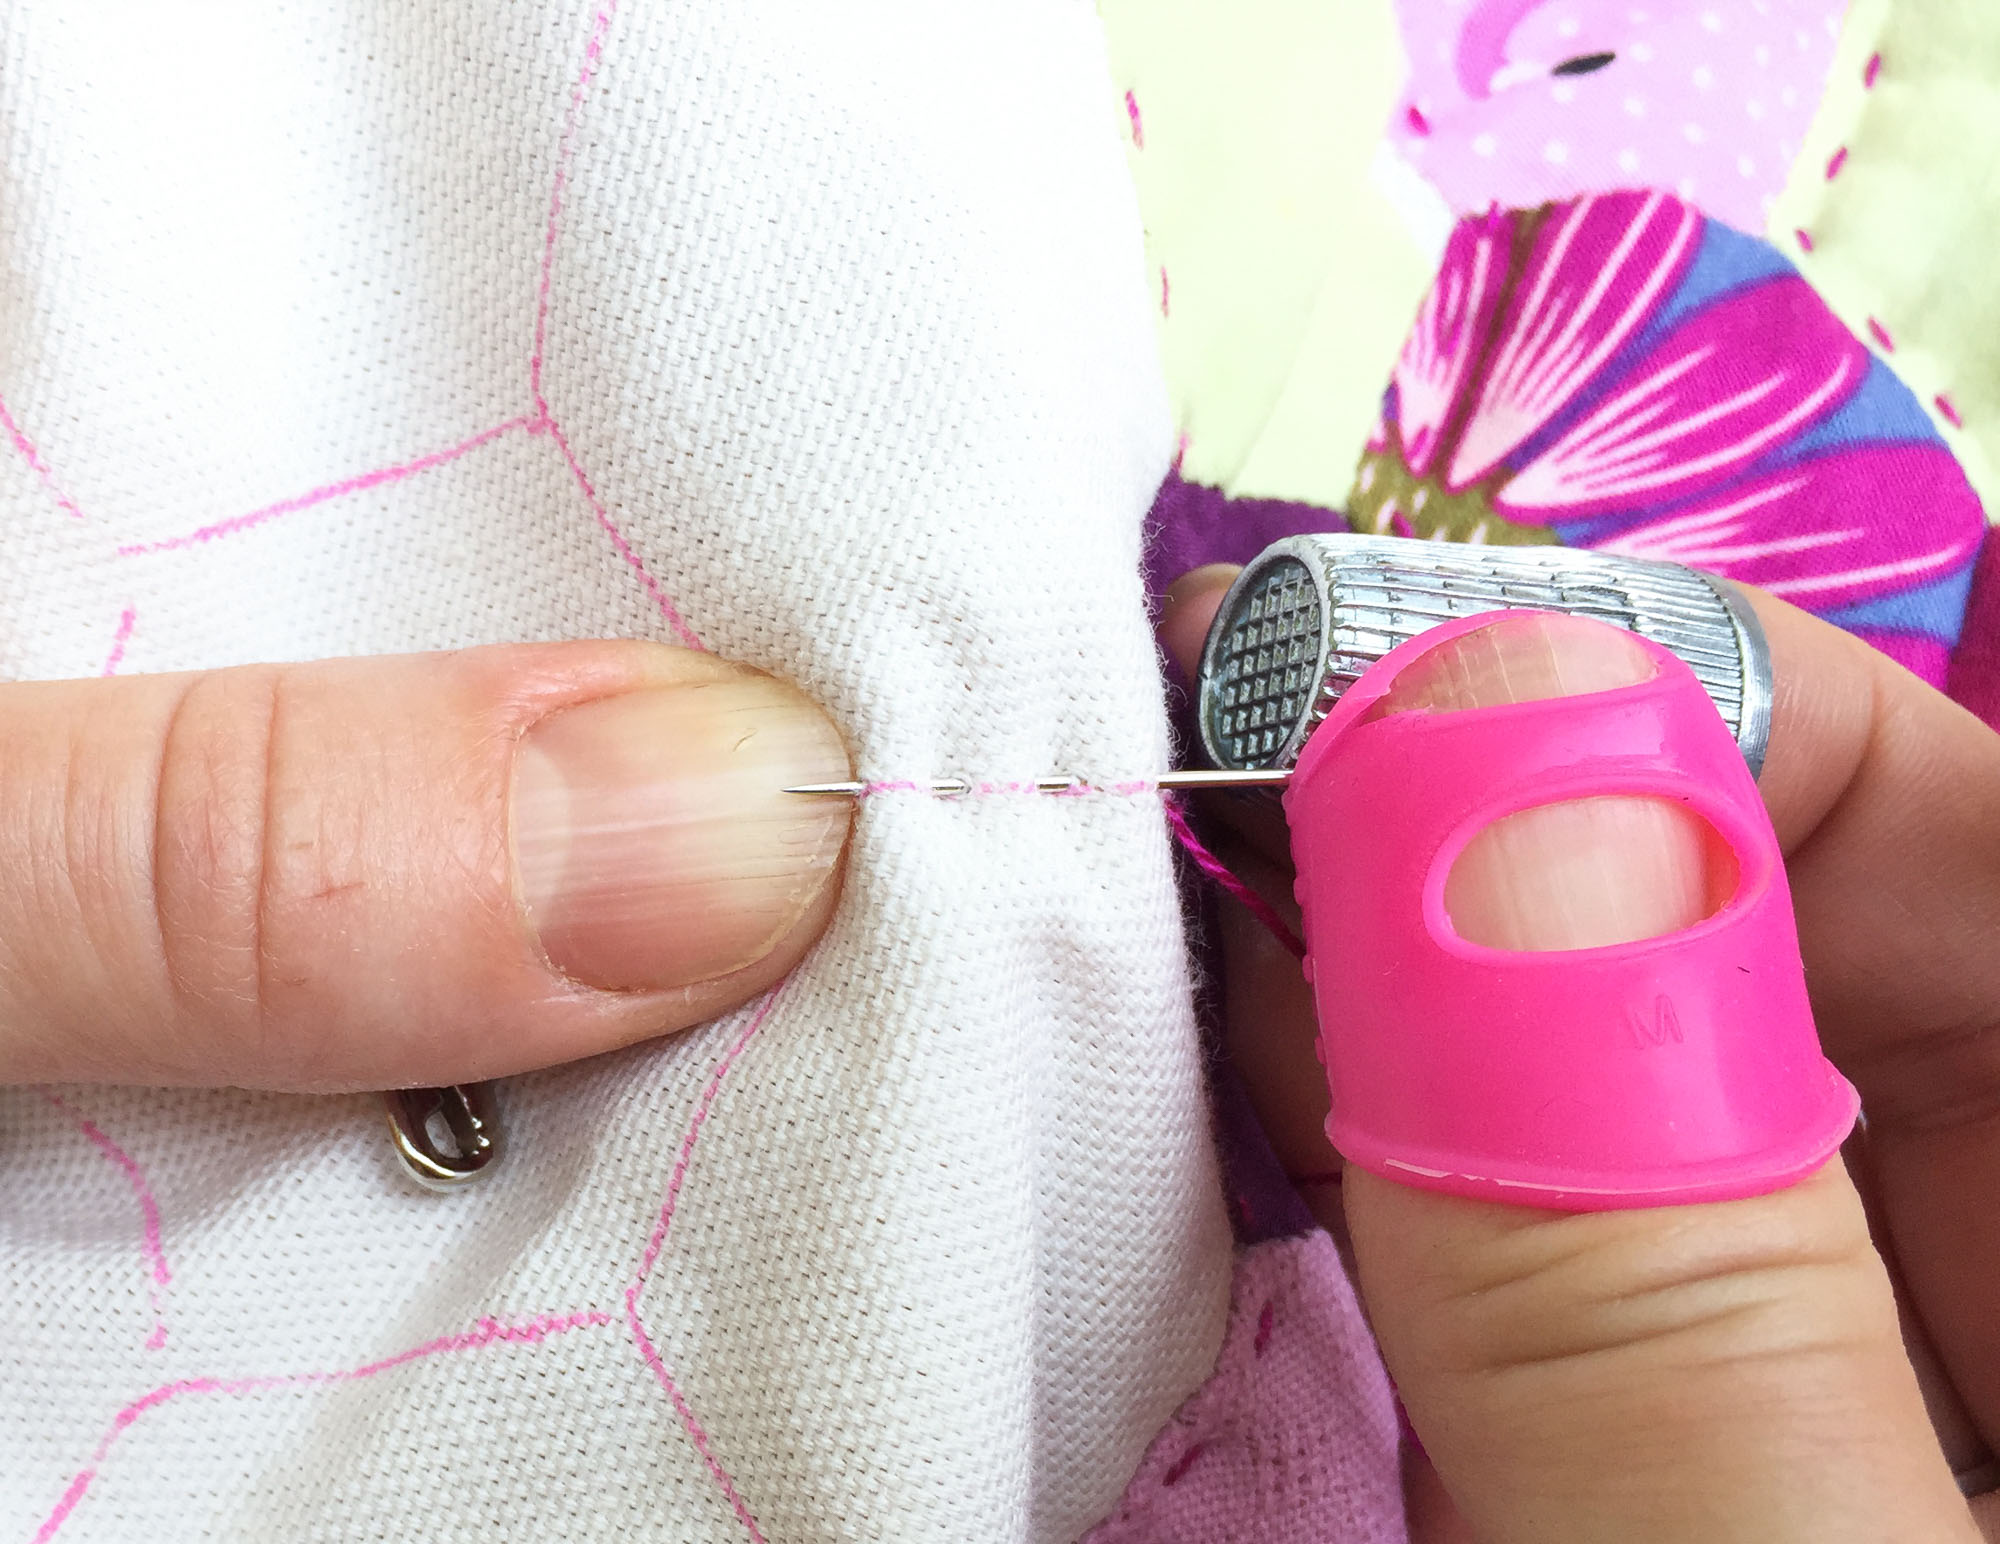
6. Repeat step 5 a few times to “load” your needle with a few stitches.
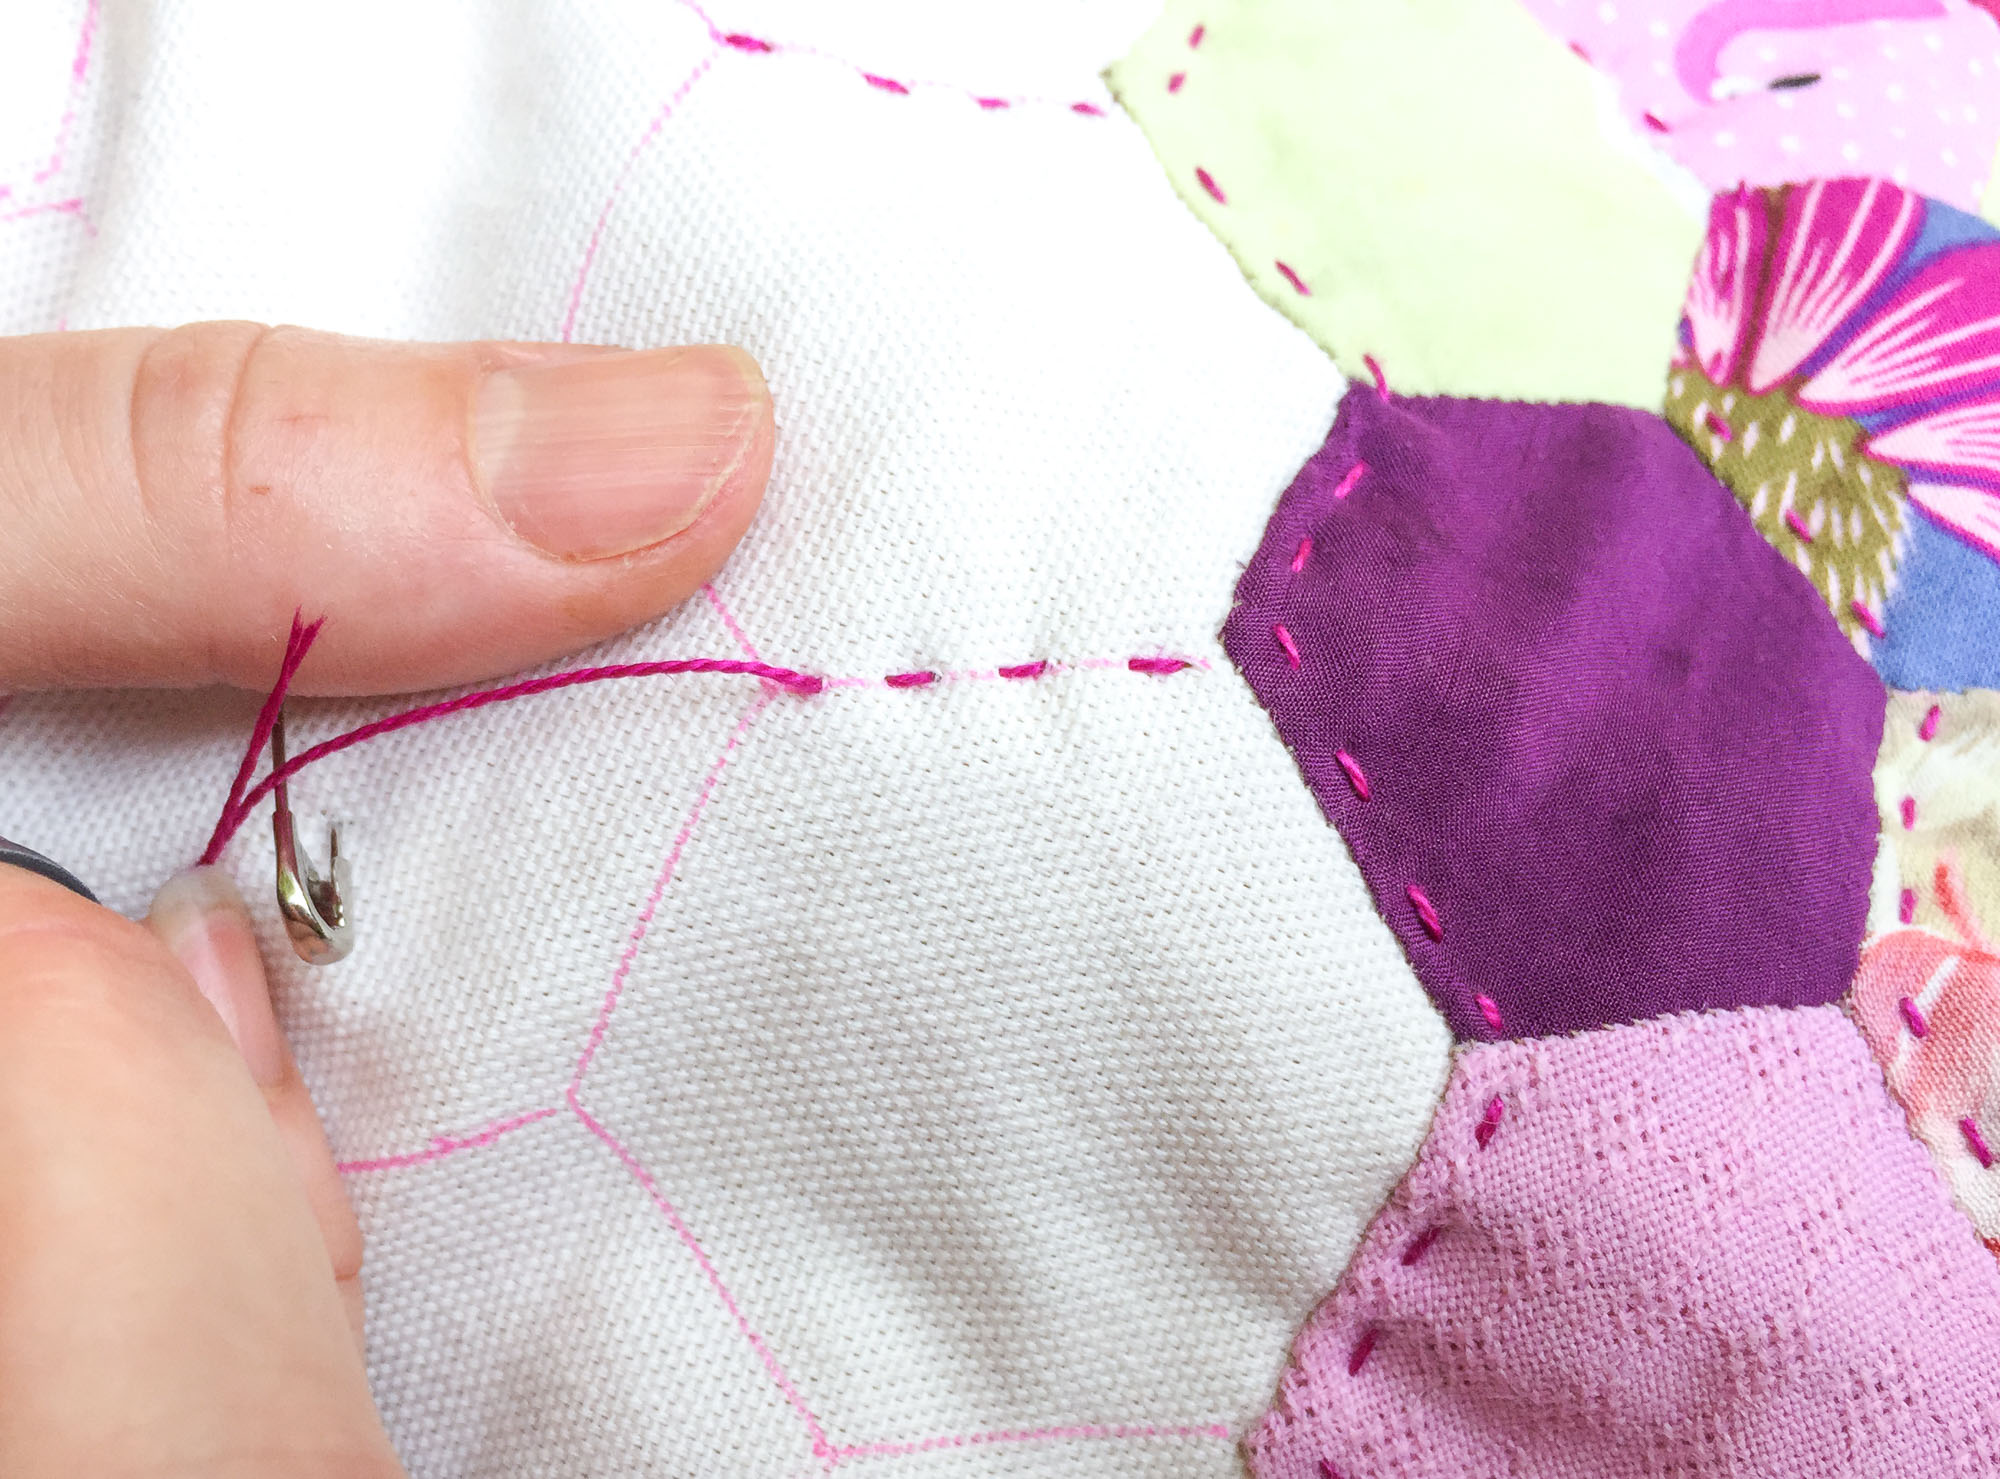
7. Pull your thread through until the stitches are taut but not bunched. Continue stitching in this fashion until you complete your design or reach the end of your thread.
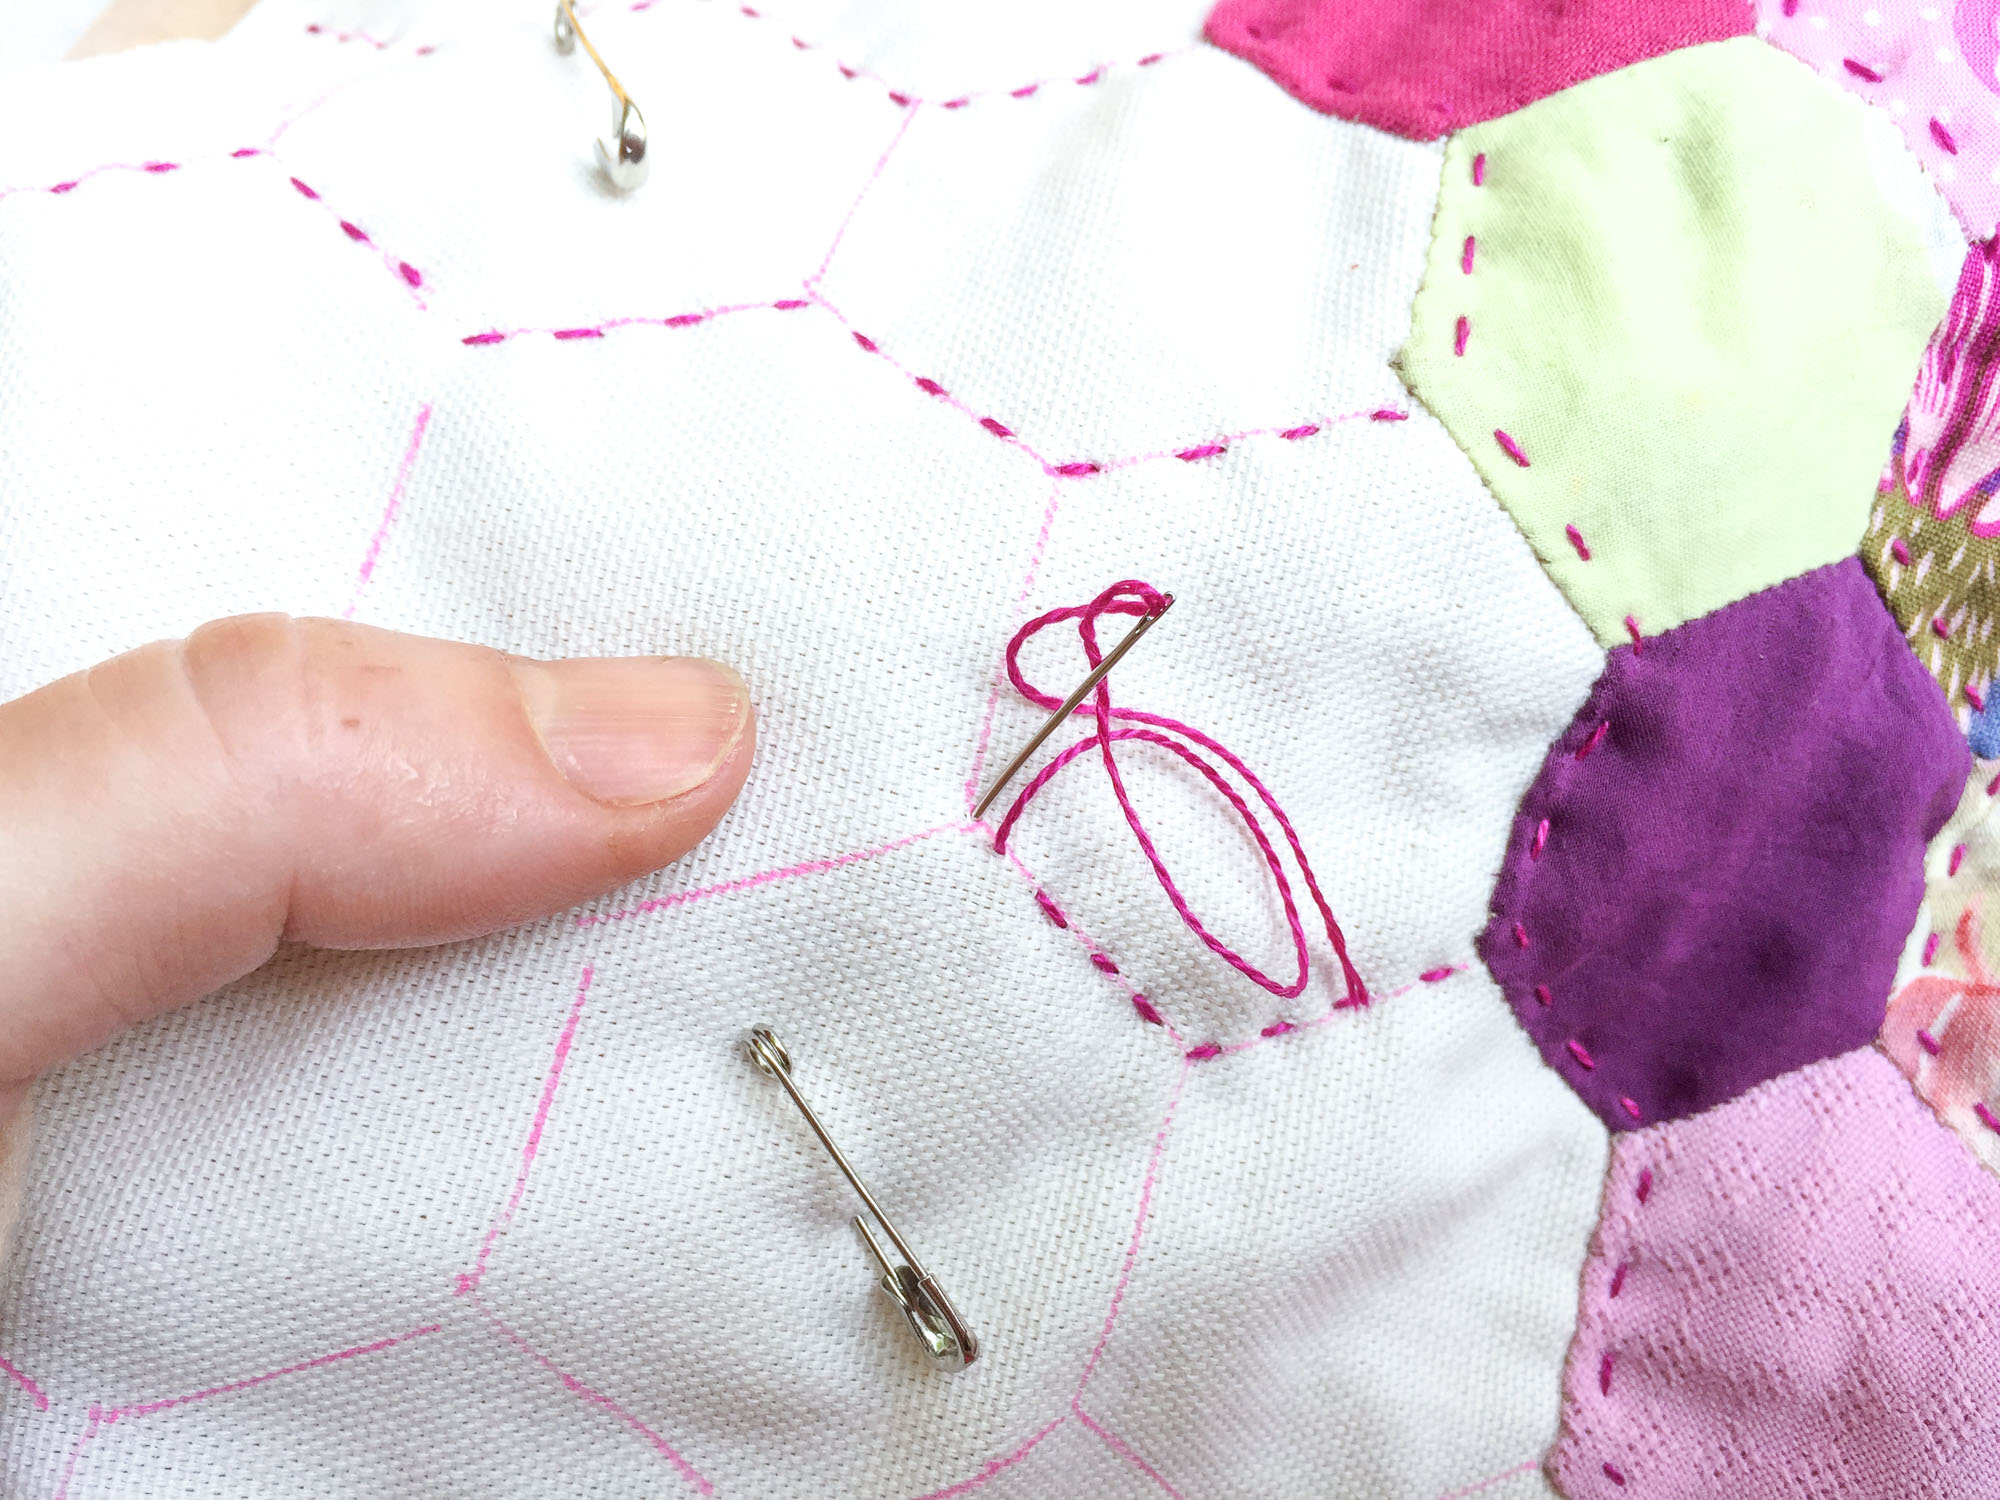
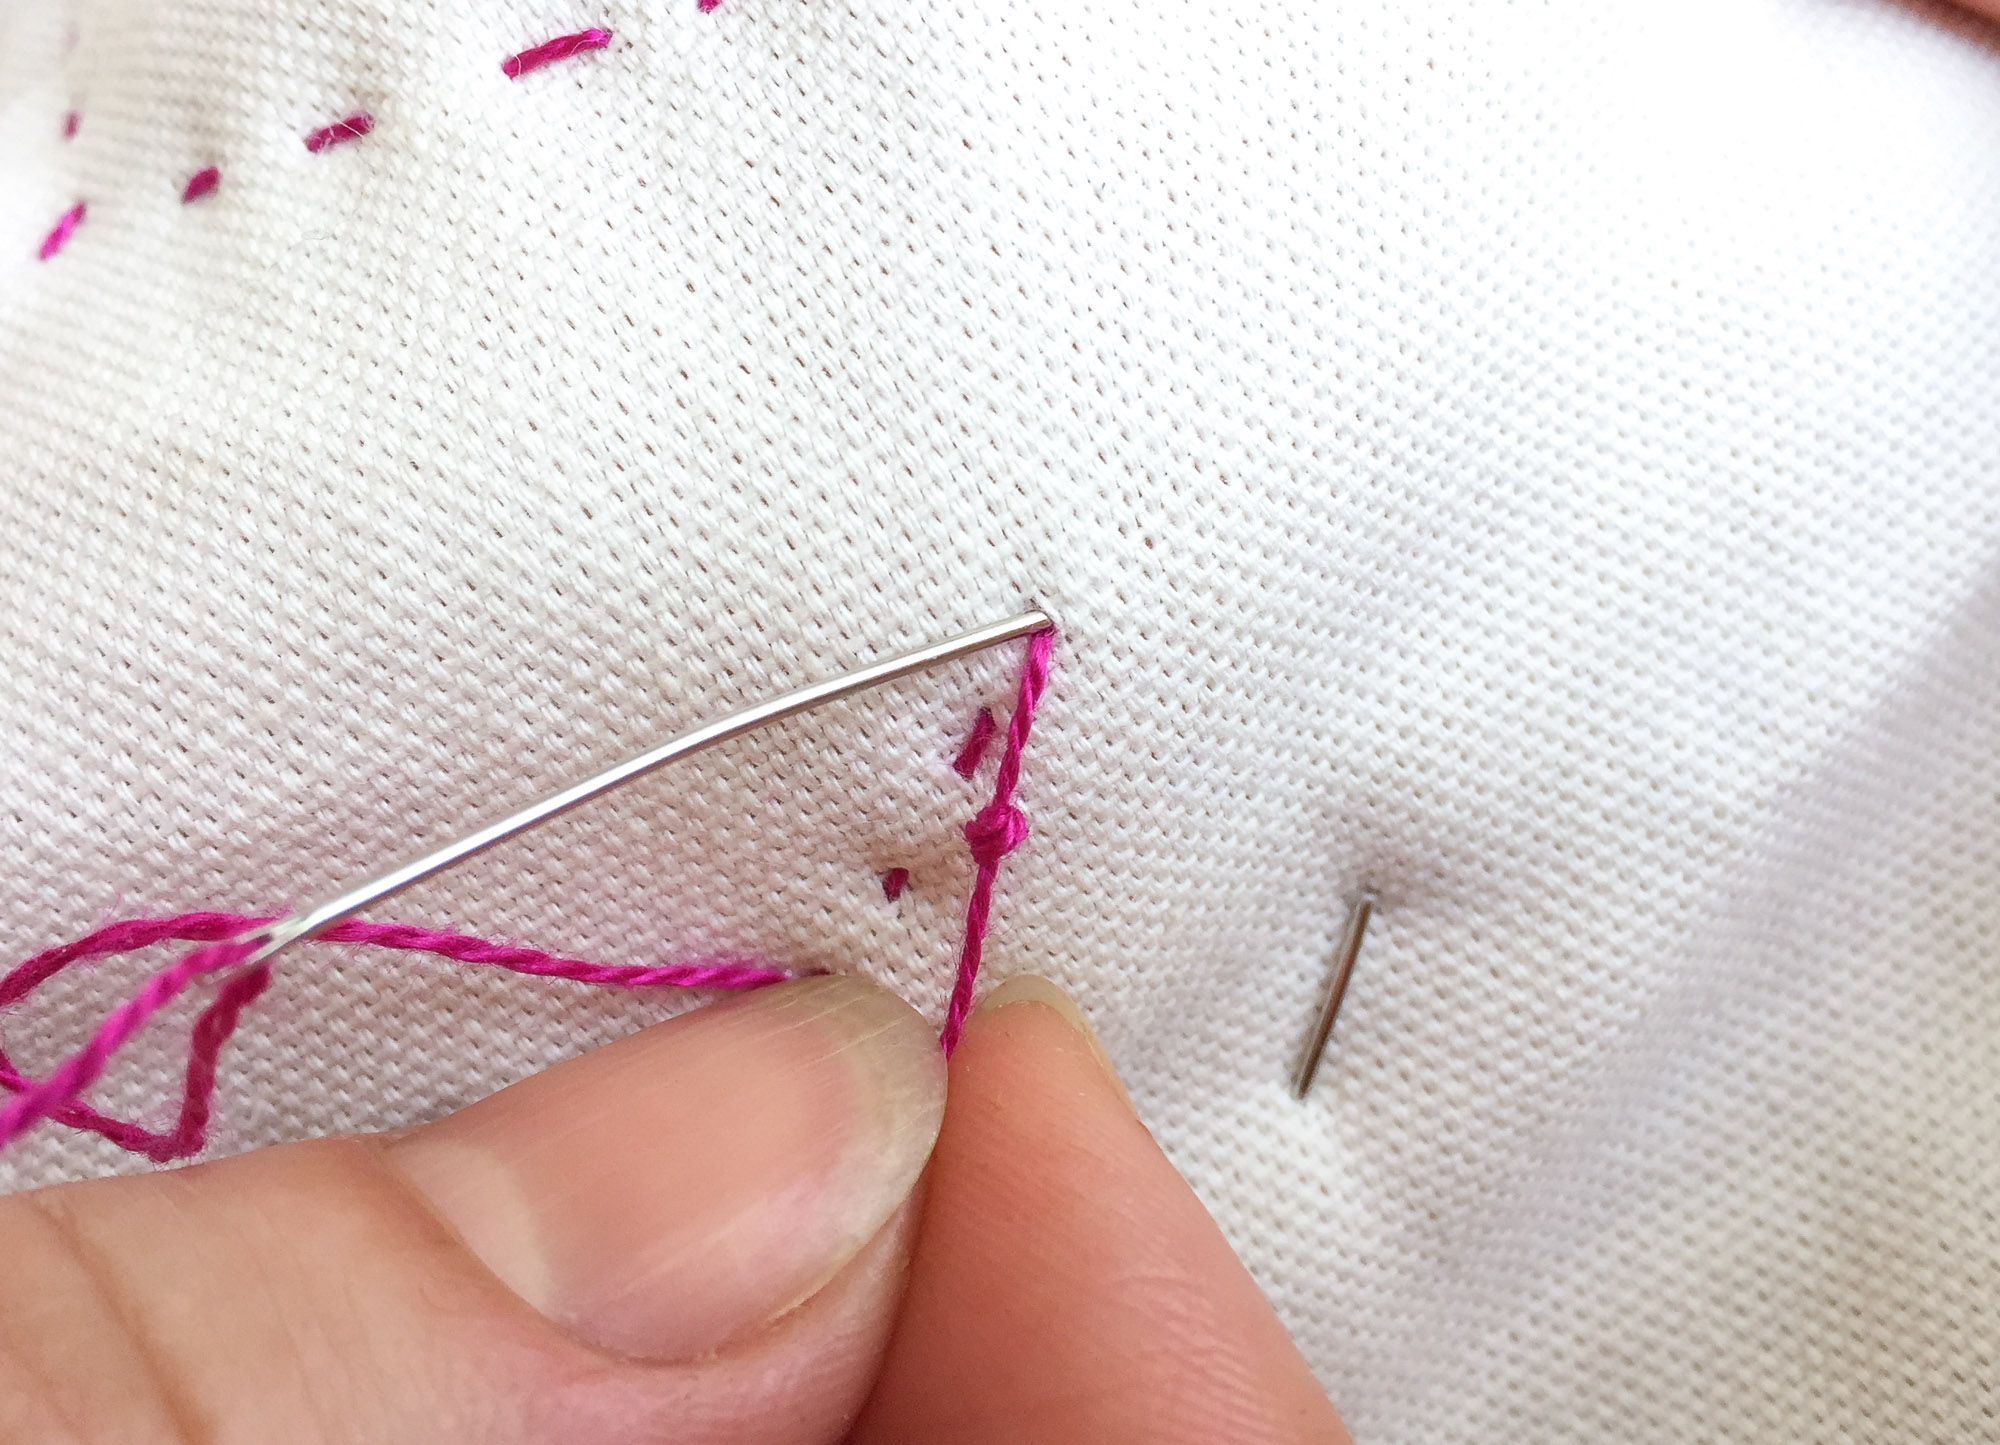
8. To finish a line of quilting, or if you are approaching the end of your thread, make sure you have about 2″-3″of slack left on your thread.
9. Then, take a final stitch from the front of the quilt to the back.
10. Flip your quilt over so you can see where the thread comes out of the backing.
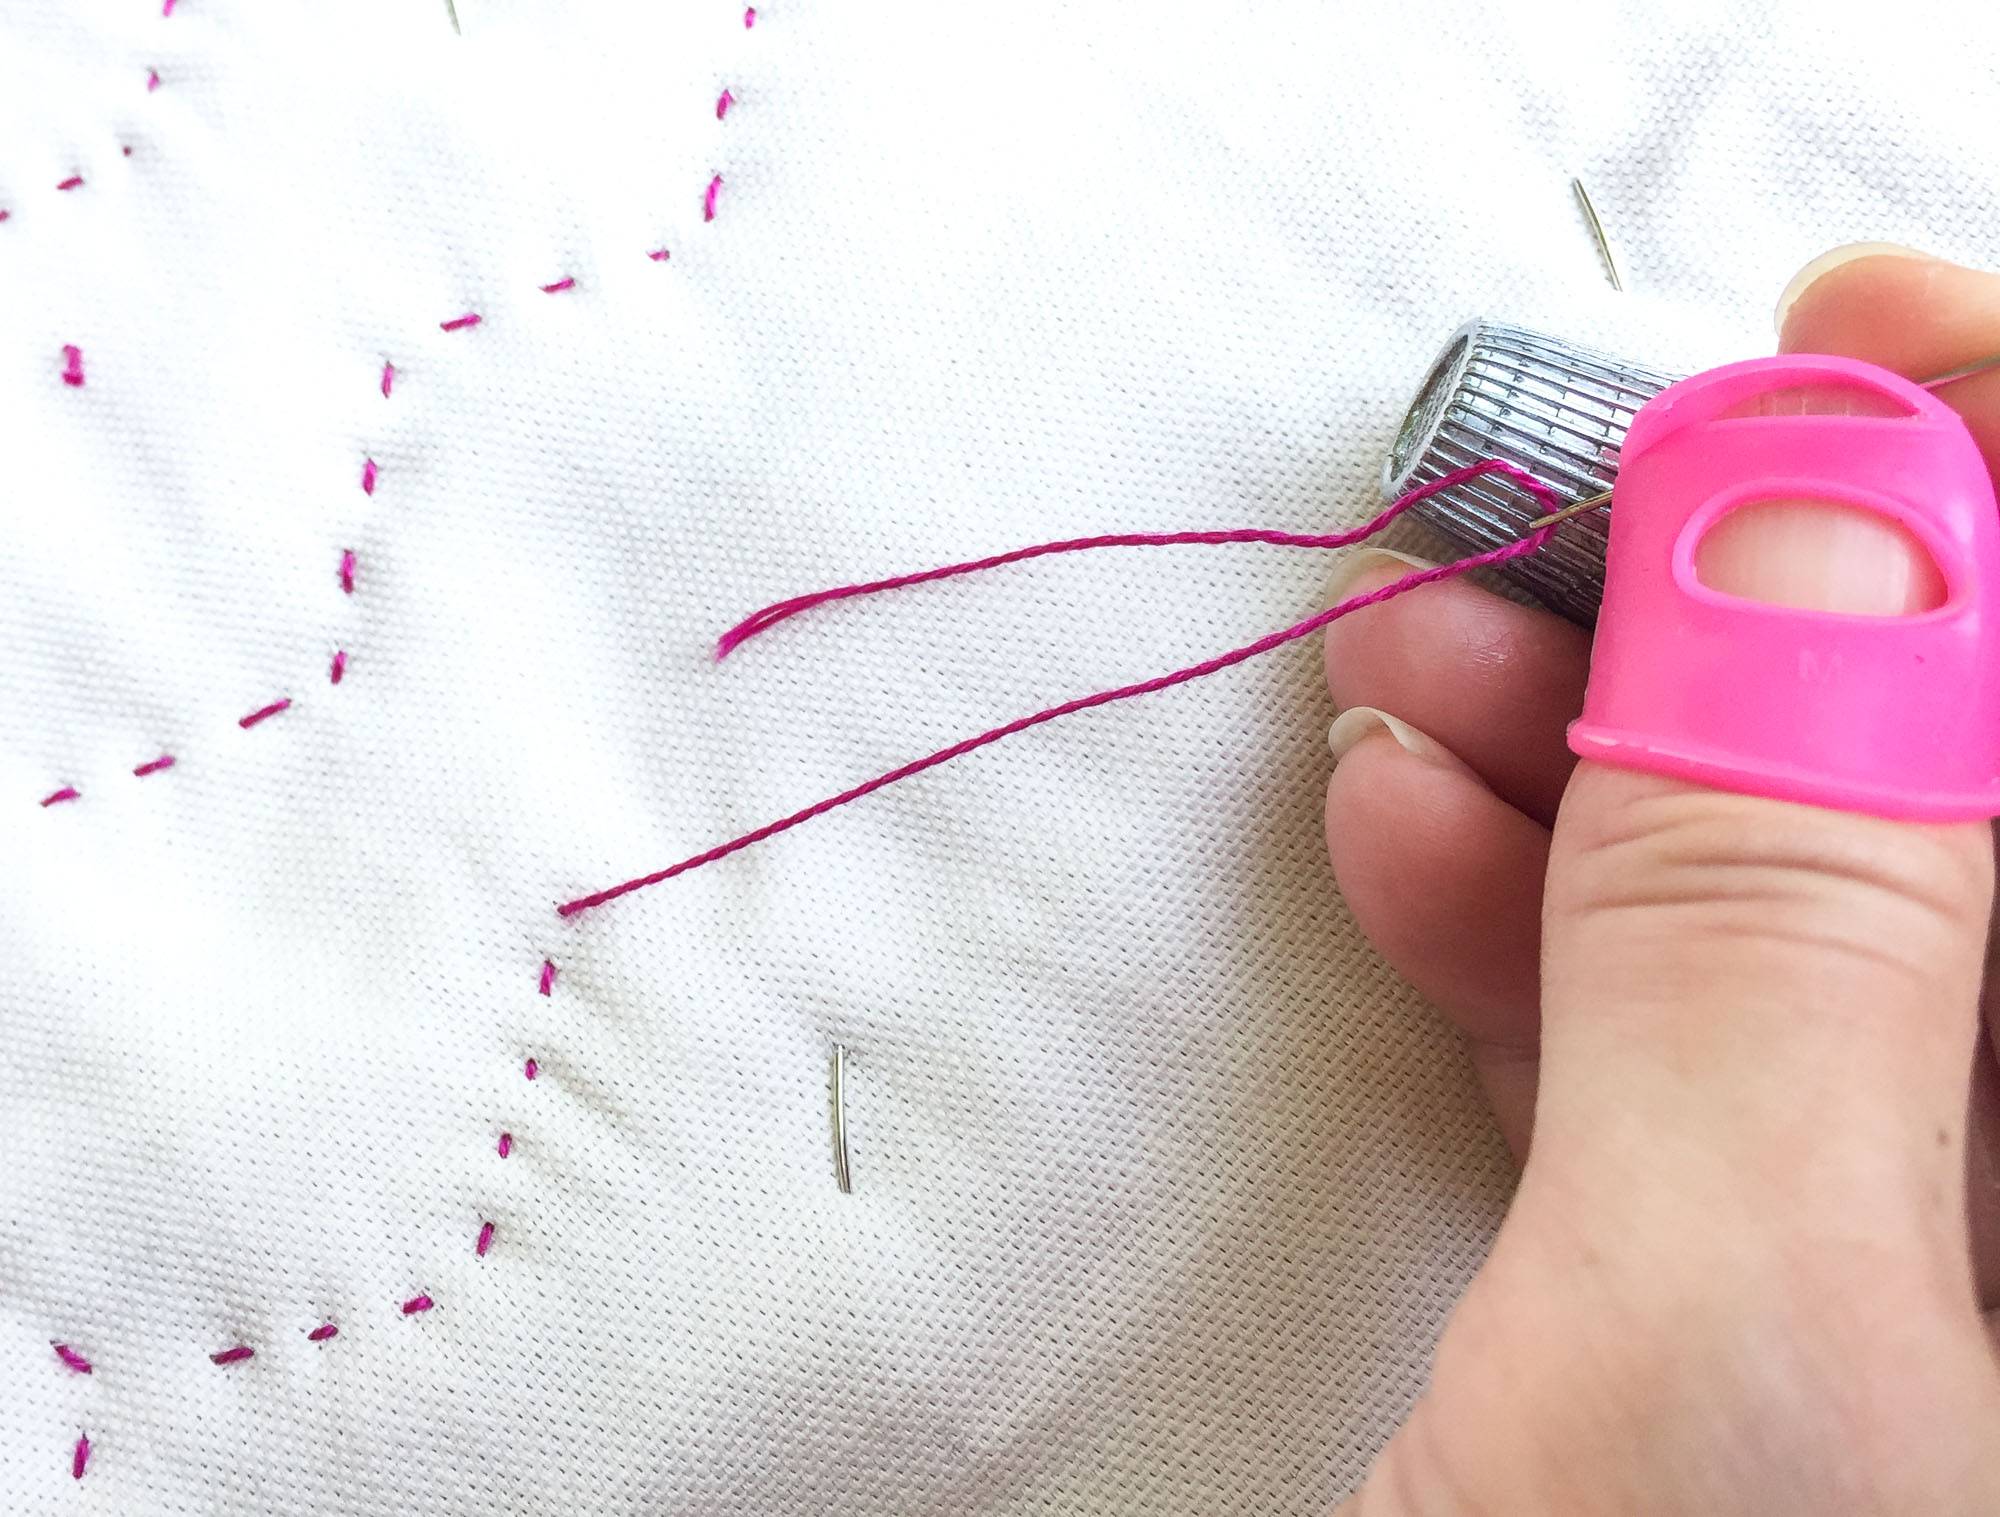
11. Wrap the needle 2-3 times with your thread, creating a coil.
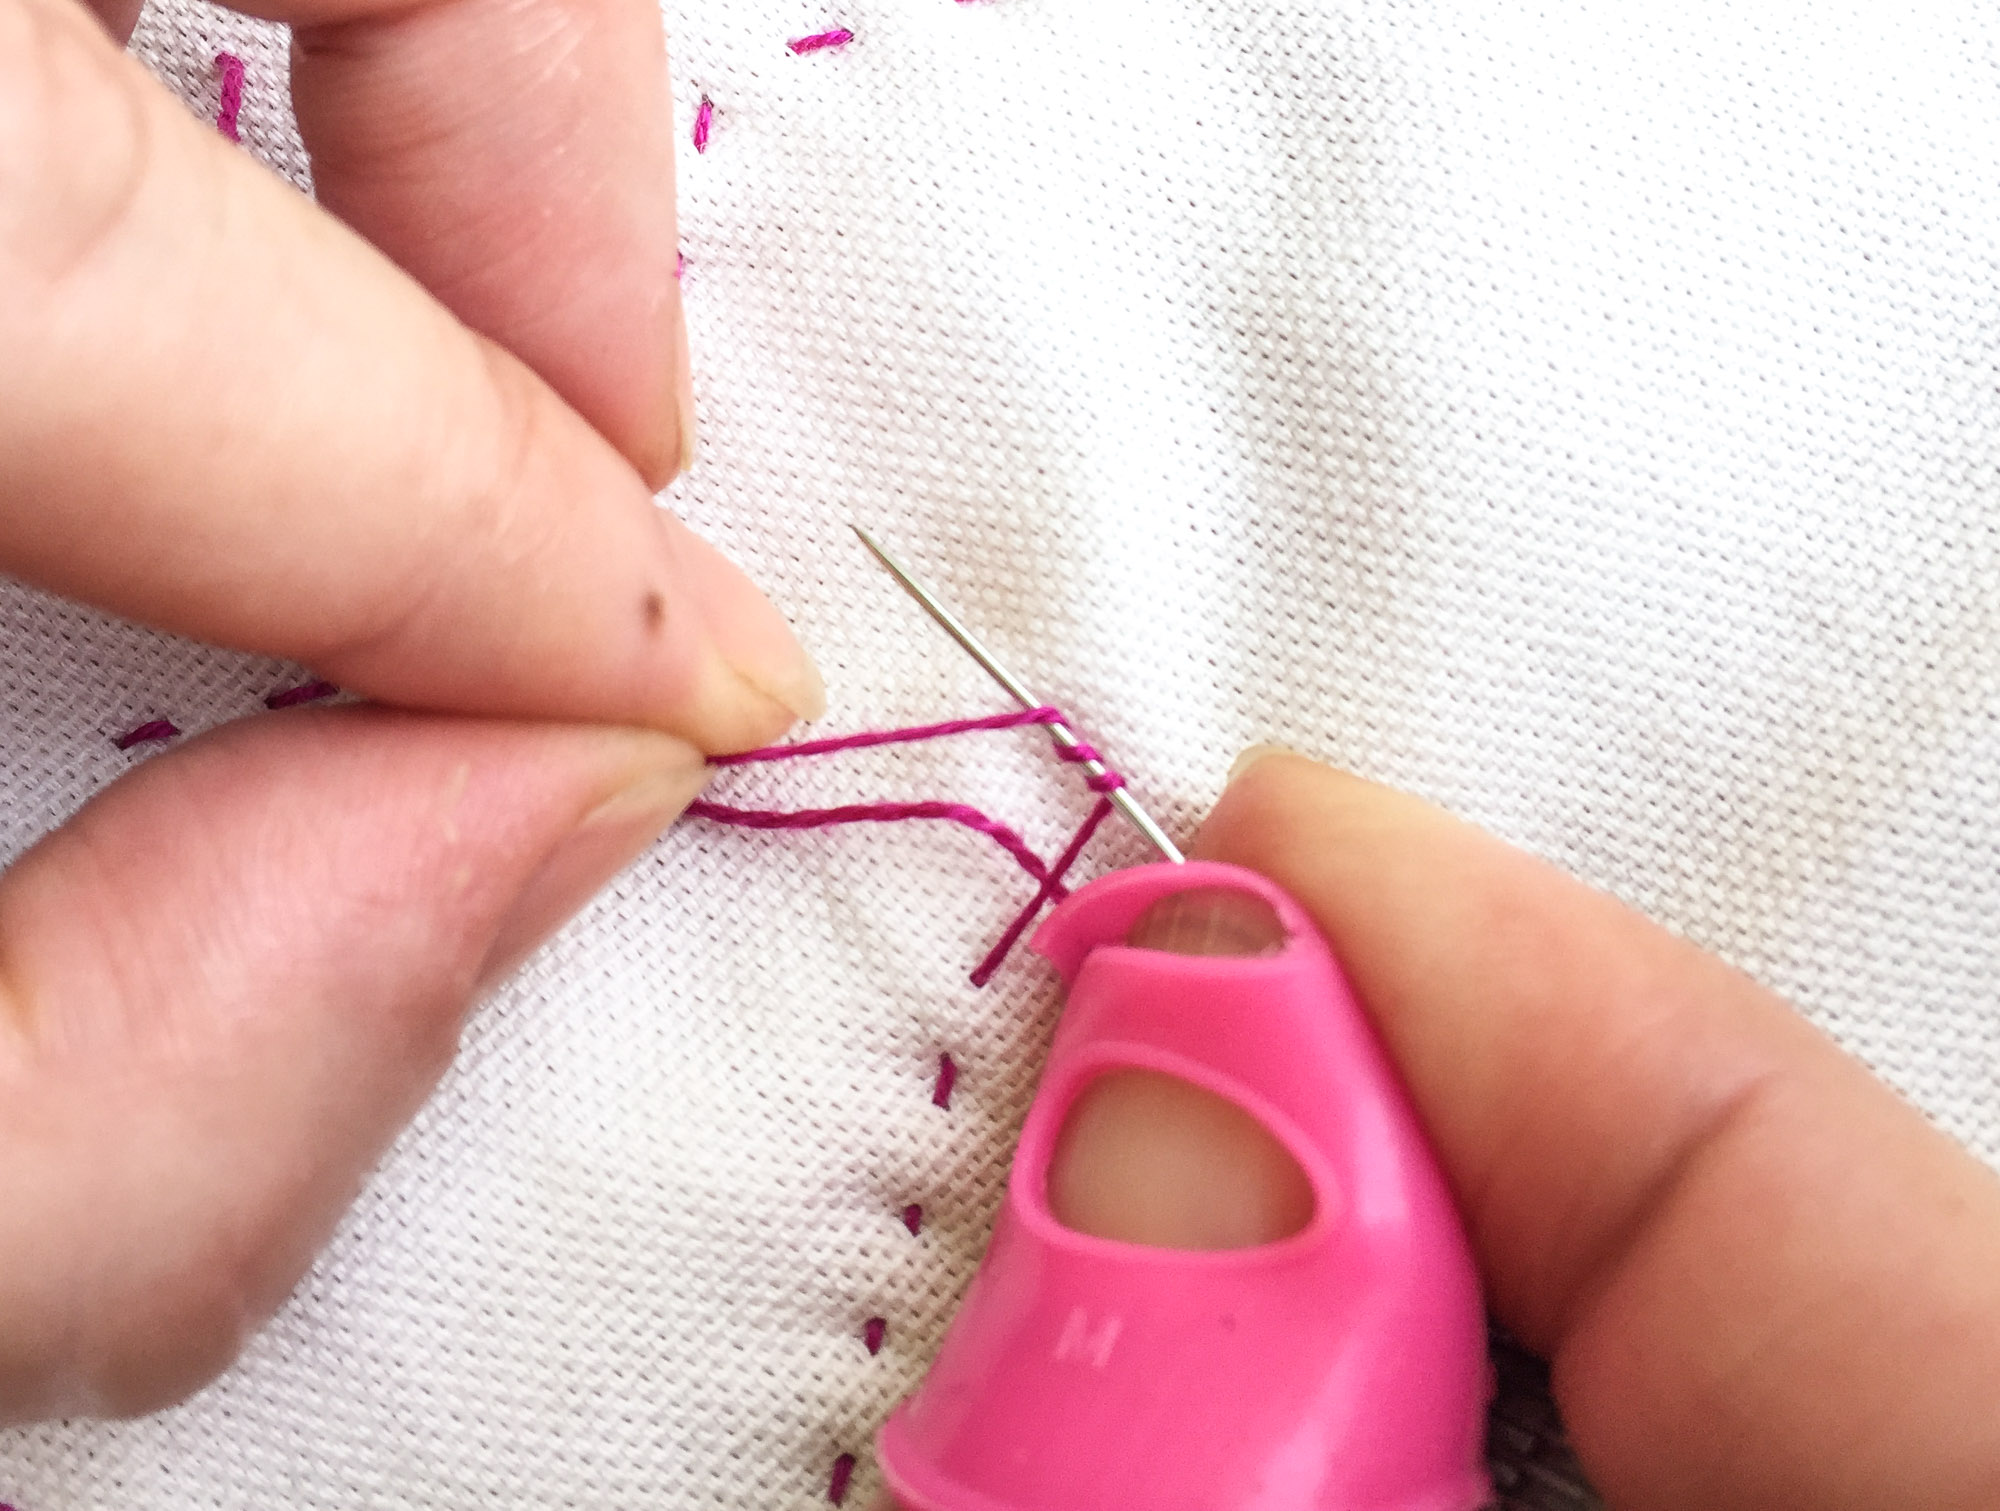
12. Keeping it very close to the back of your quilt, pull the needle through the coiled thread.
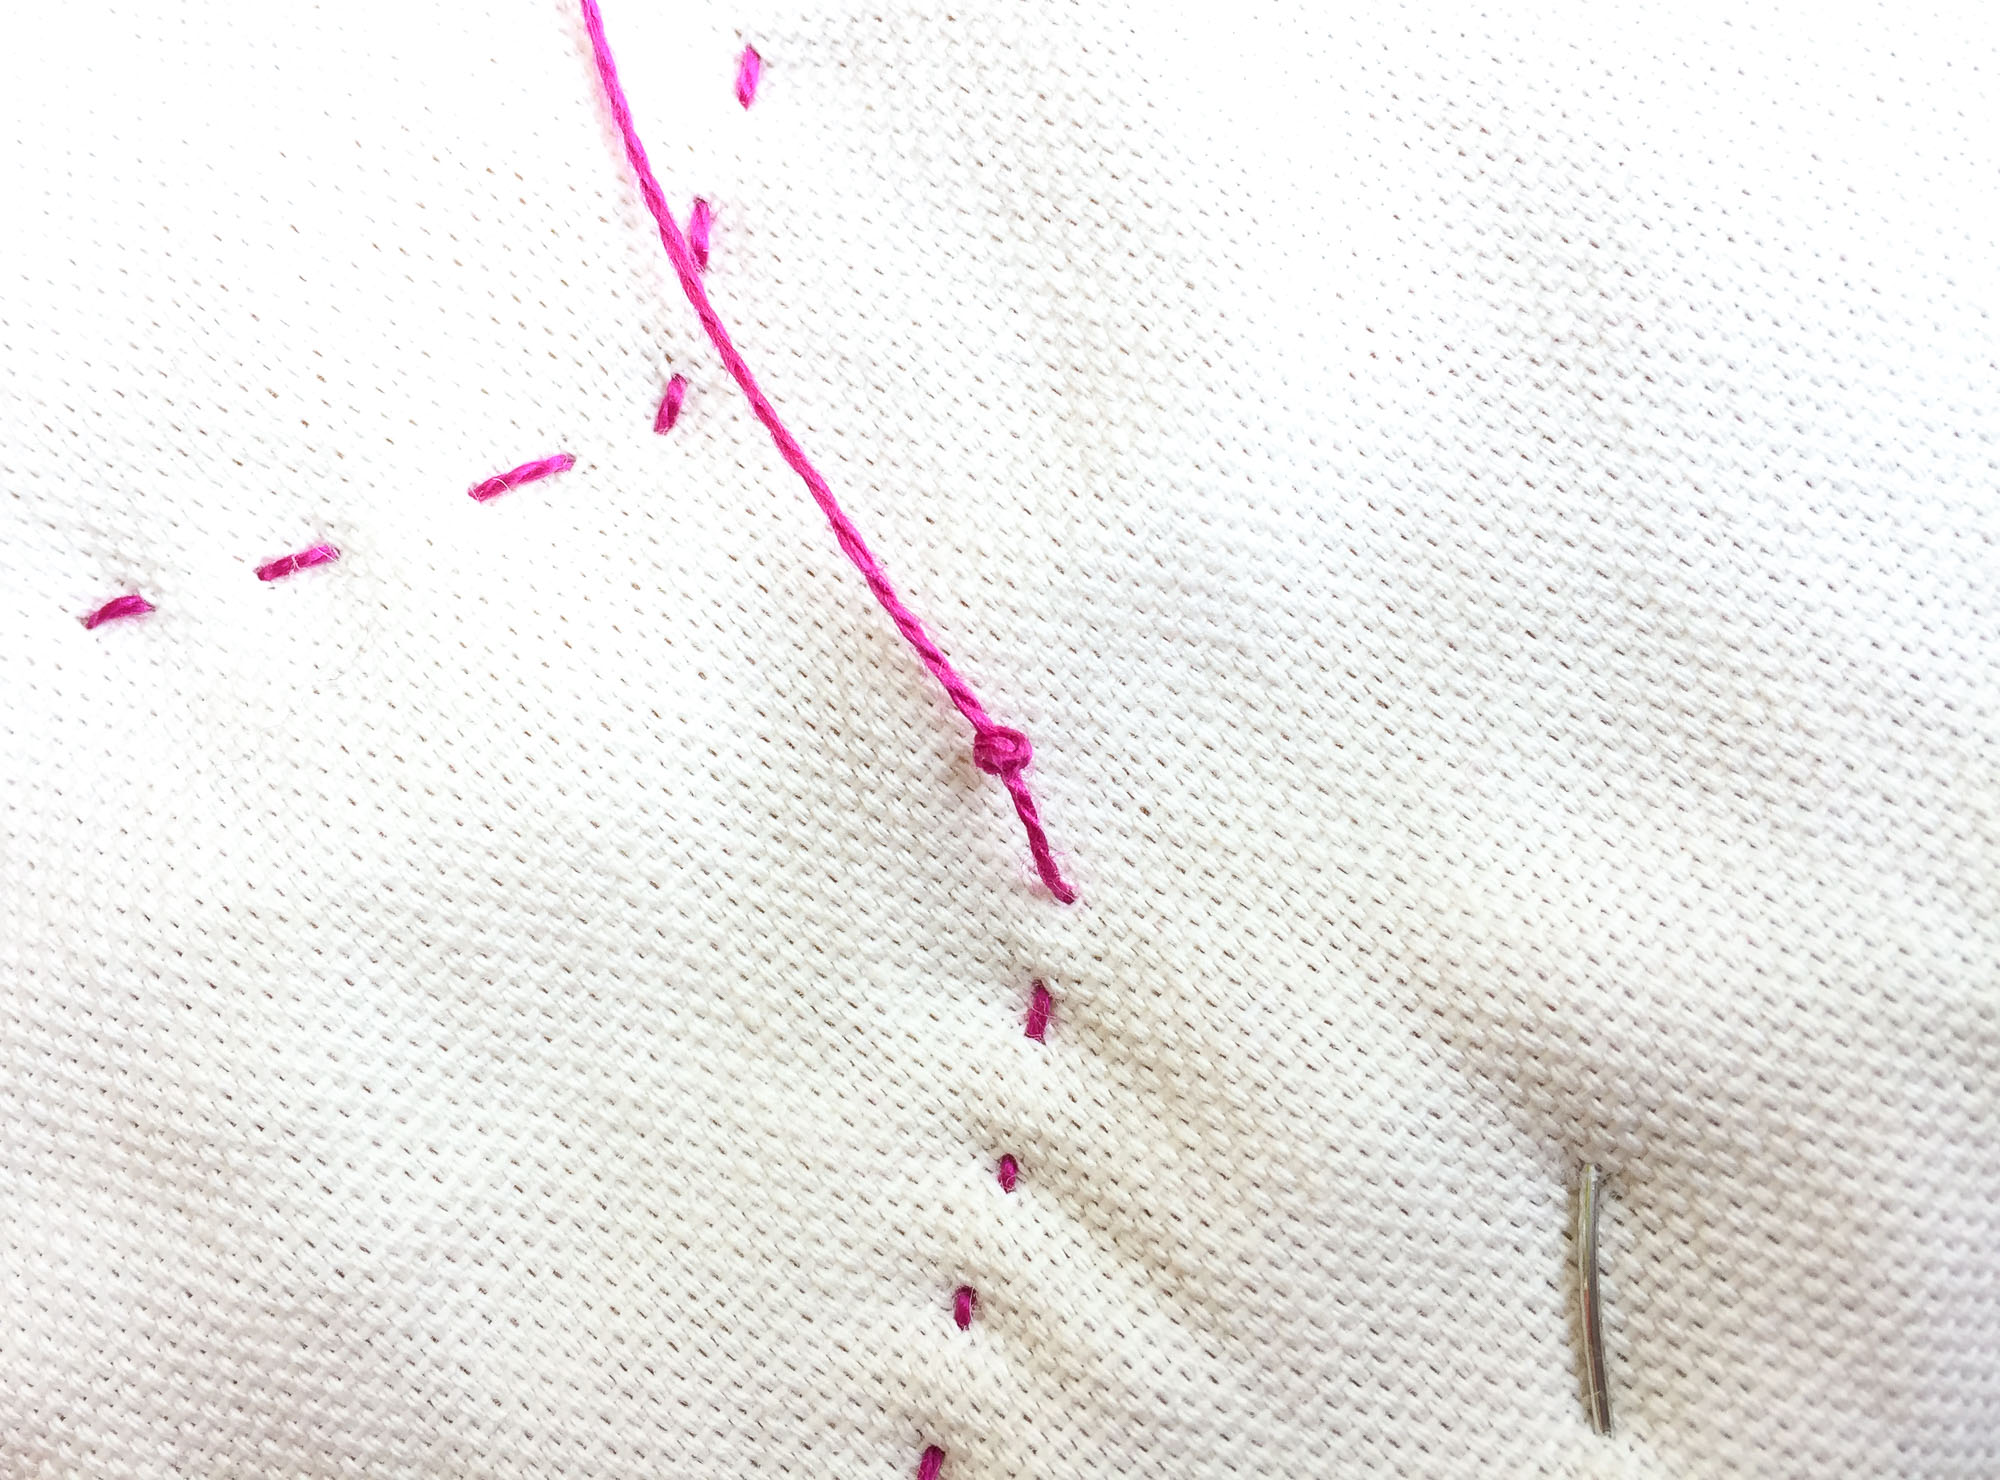
13. You should have a small knot in your thread fairly close the back of the quilt where your thread comes out of the backing.
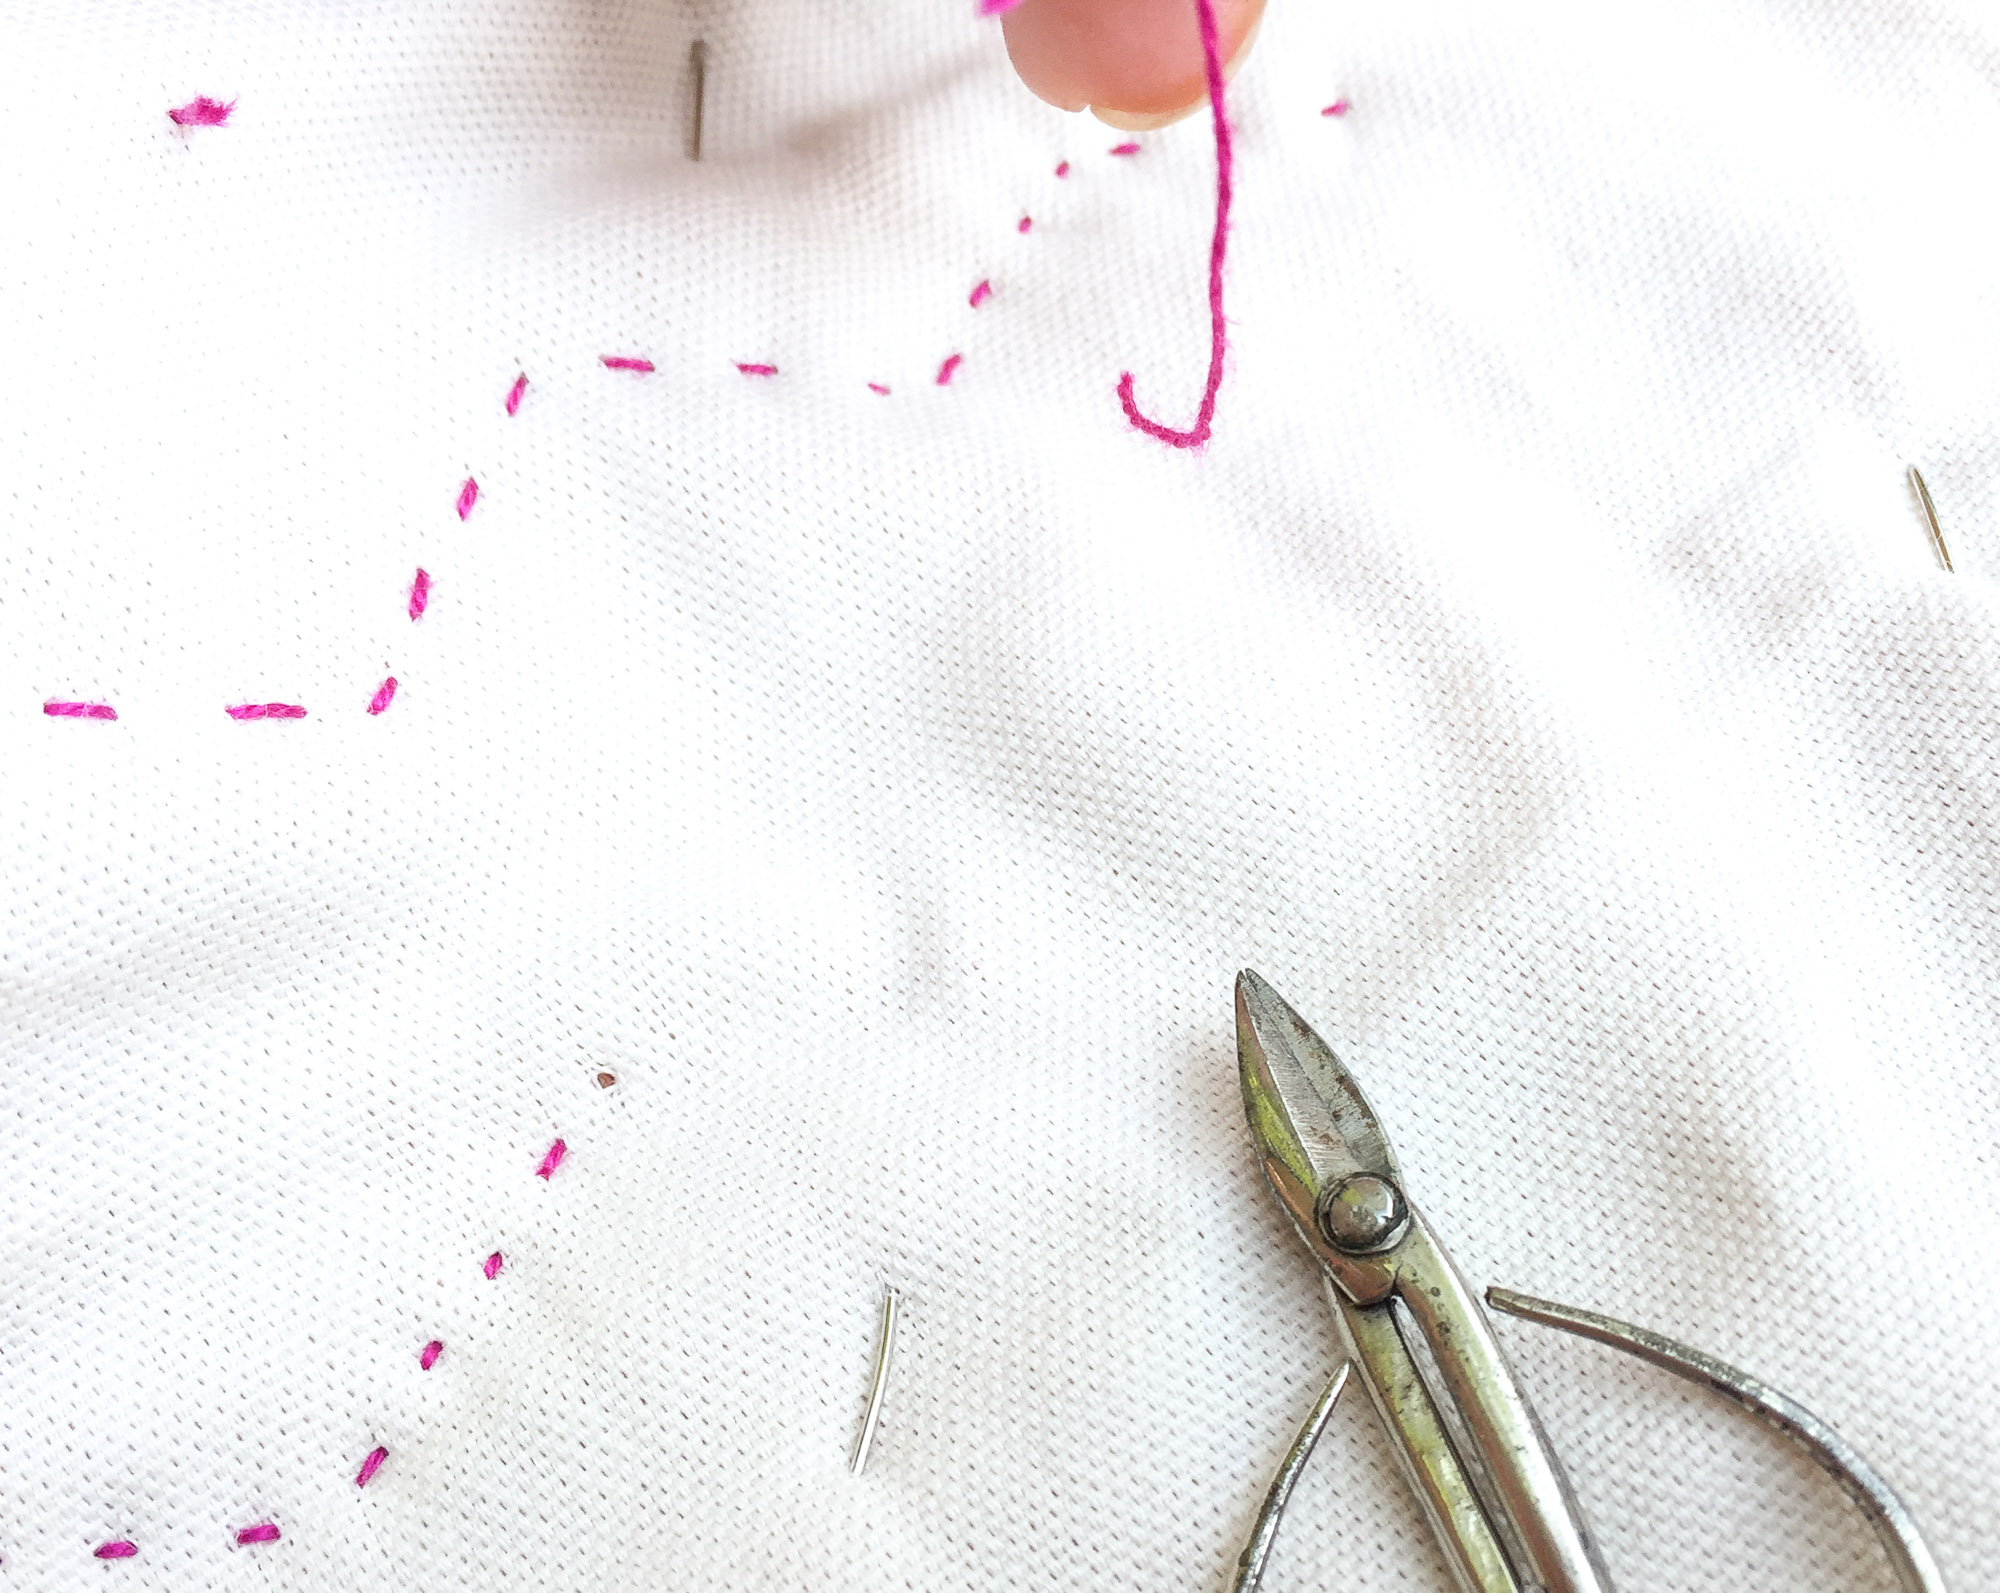
14. Take your needle and insert it back through just the backing layer of your quilt sandwich in the SAME place that your thread is coming out.
15. Bring the needle back out about an inch or so away from that spot and pull the thread through.
16. “Pop” the knot back into the quilt sandwich to hide it.
17. Clip your thread where it is now coming out of the backing fabric making sure the tail of the thread has been hidden inside the quilt sandwich.
You did it! You’re off to a great start on your hand quilting journey!
*How to Make a Quilter's Knot
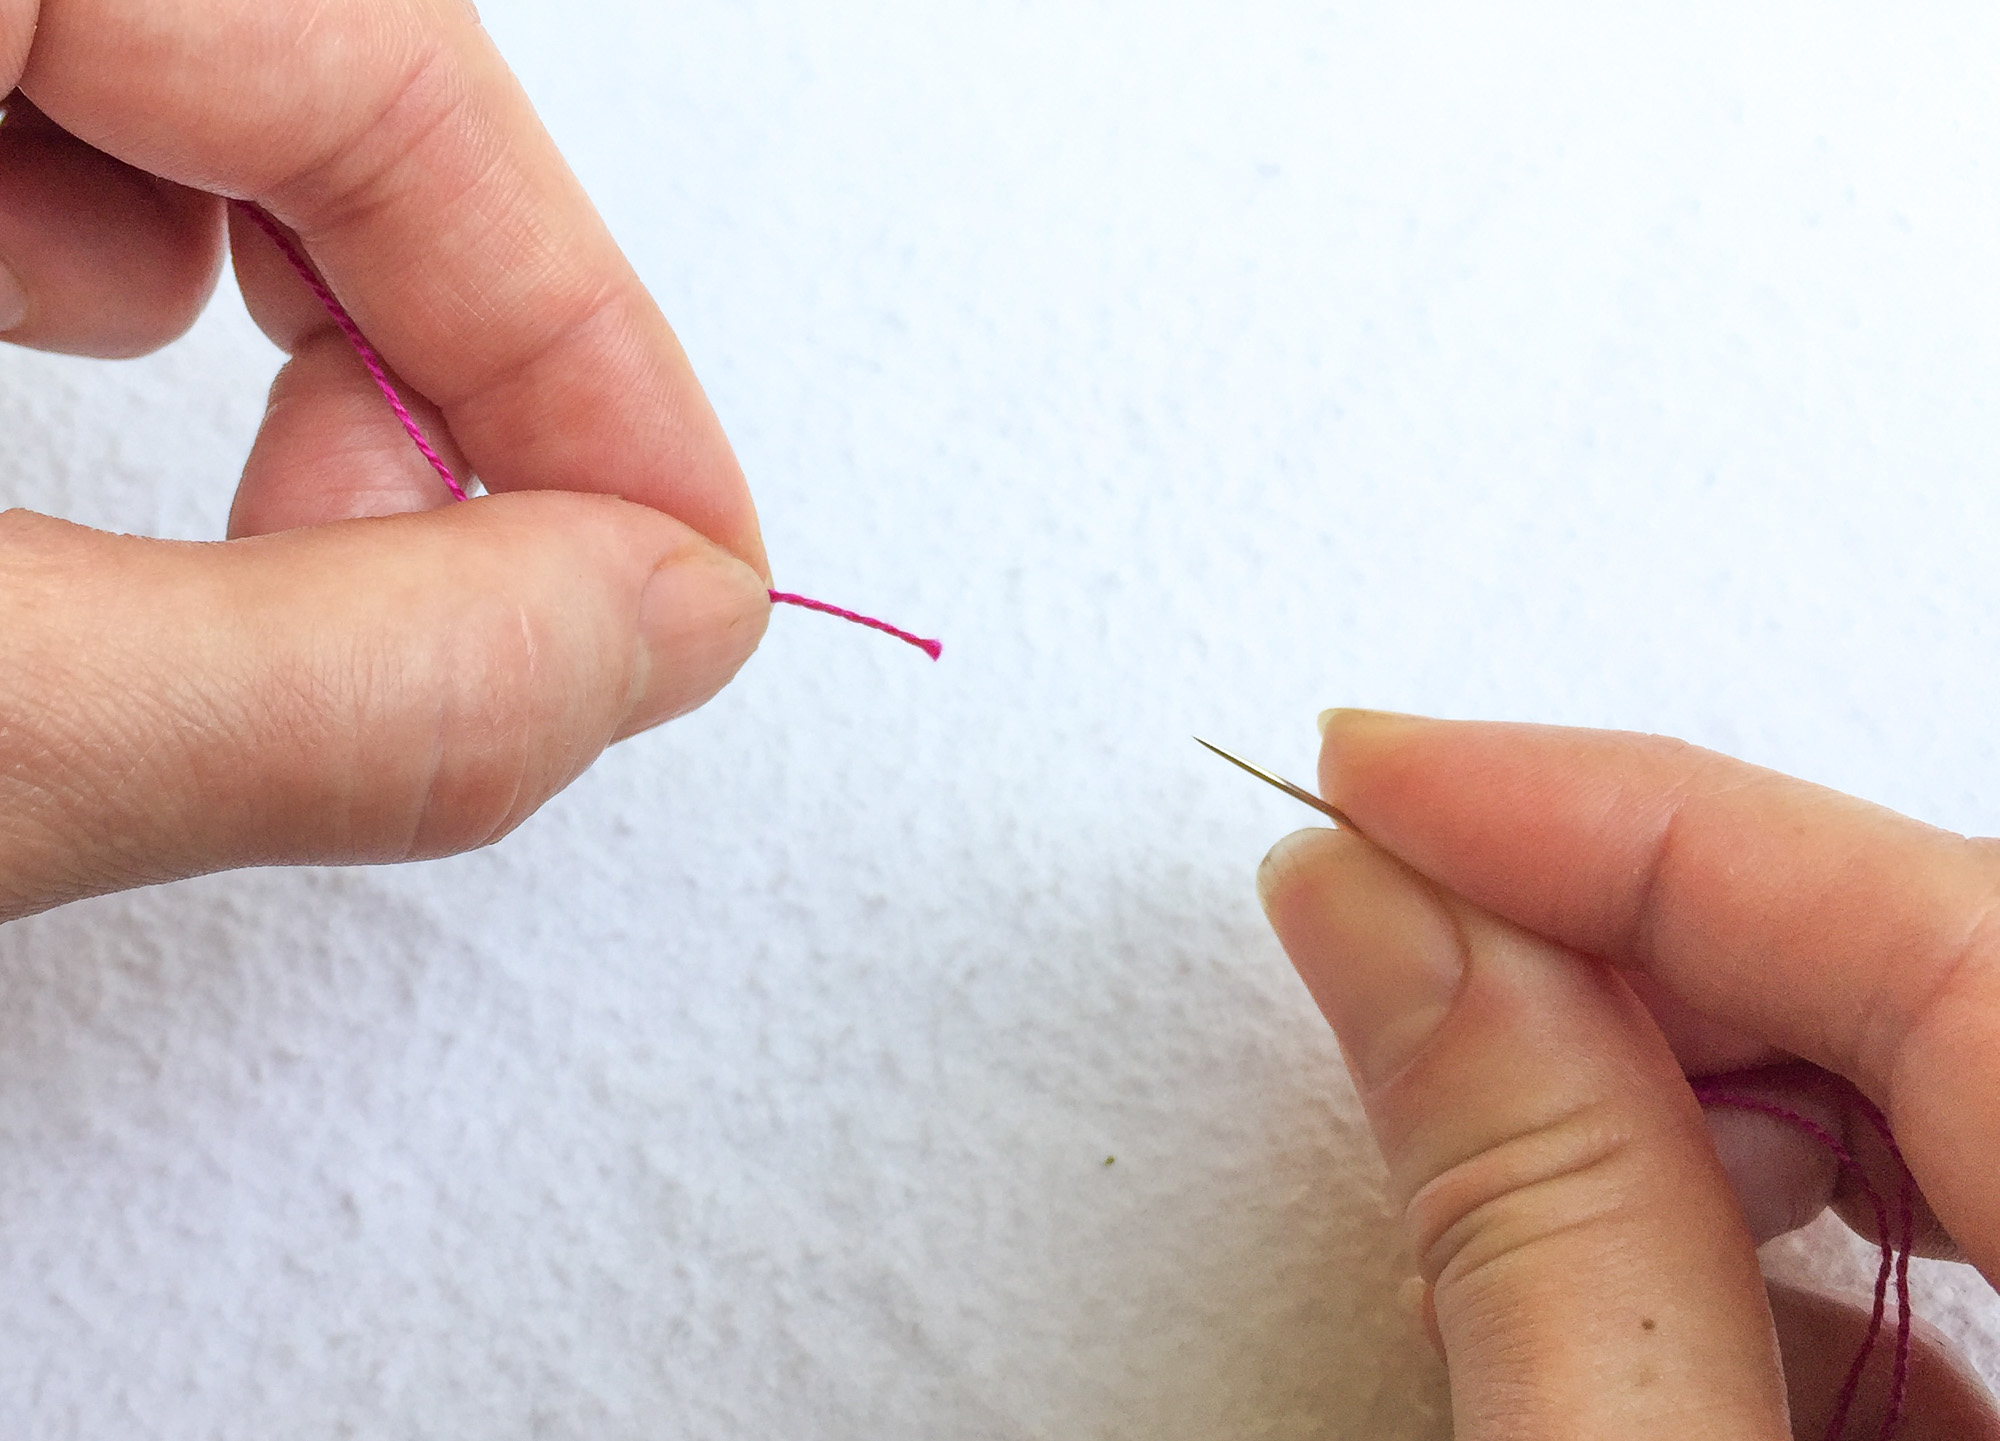
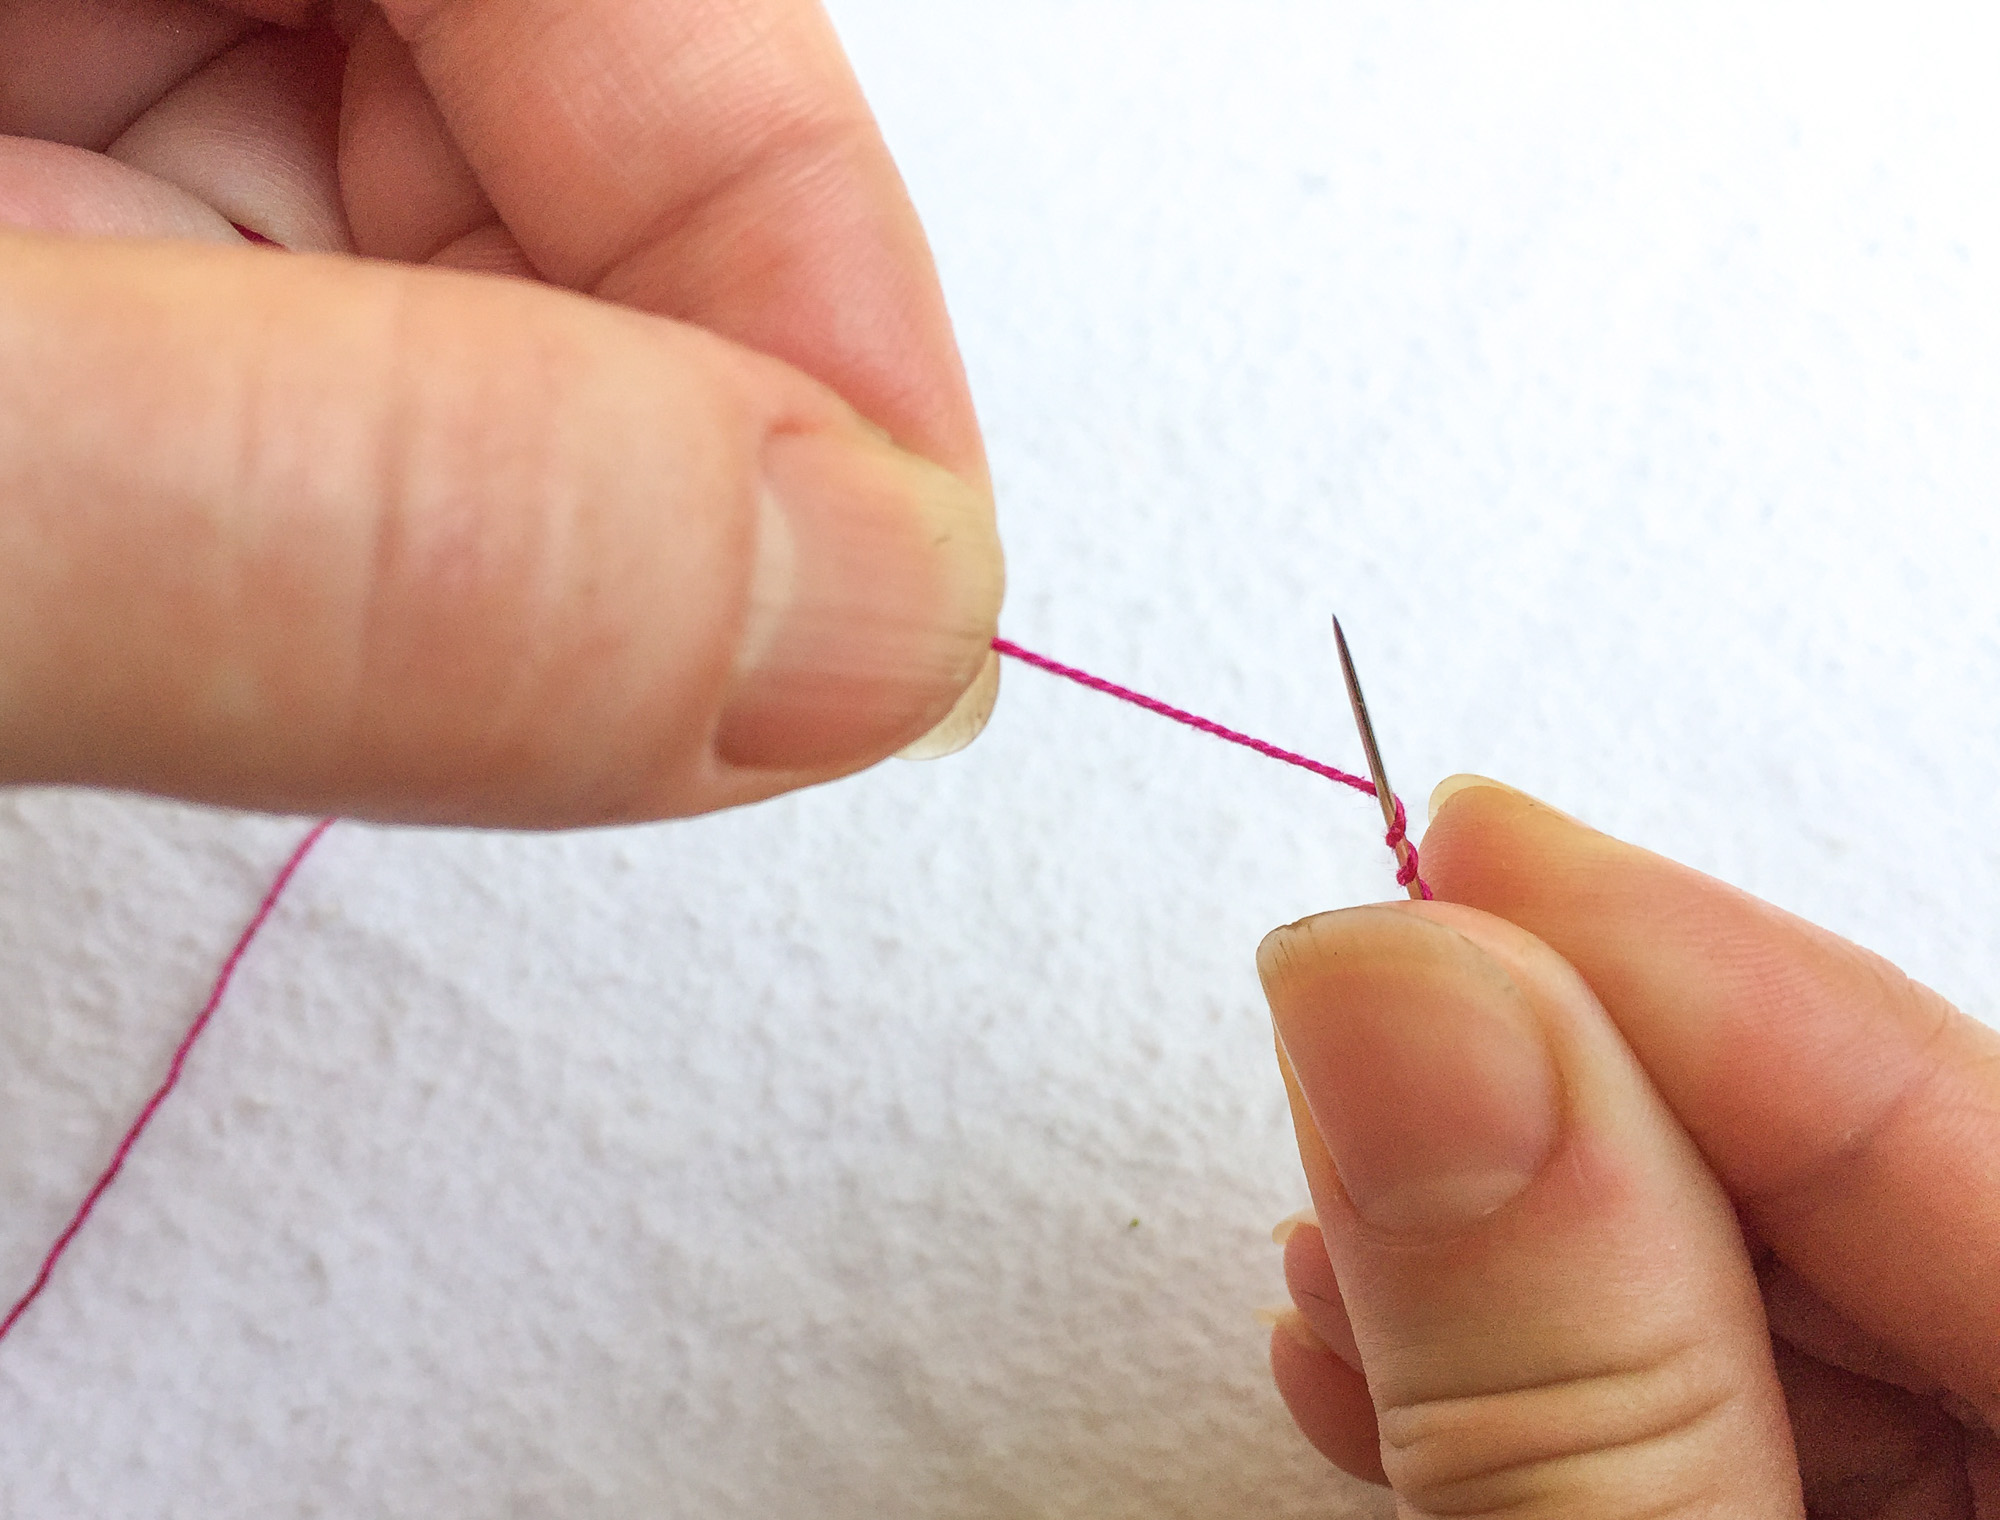
1. Begin by threading your needle.
2. Holding the needle in your dominant hand, grab the end of the thread with your non-dominant hand and position the needle and thread so they are pointing towards each other.
3. Transfer the end of the thread to your dominant hand so you’re holding it securely between your thumb and forefinger.
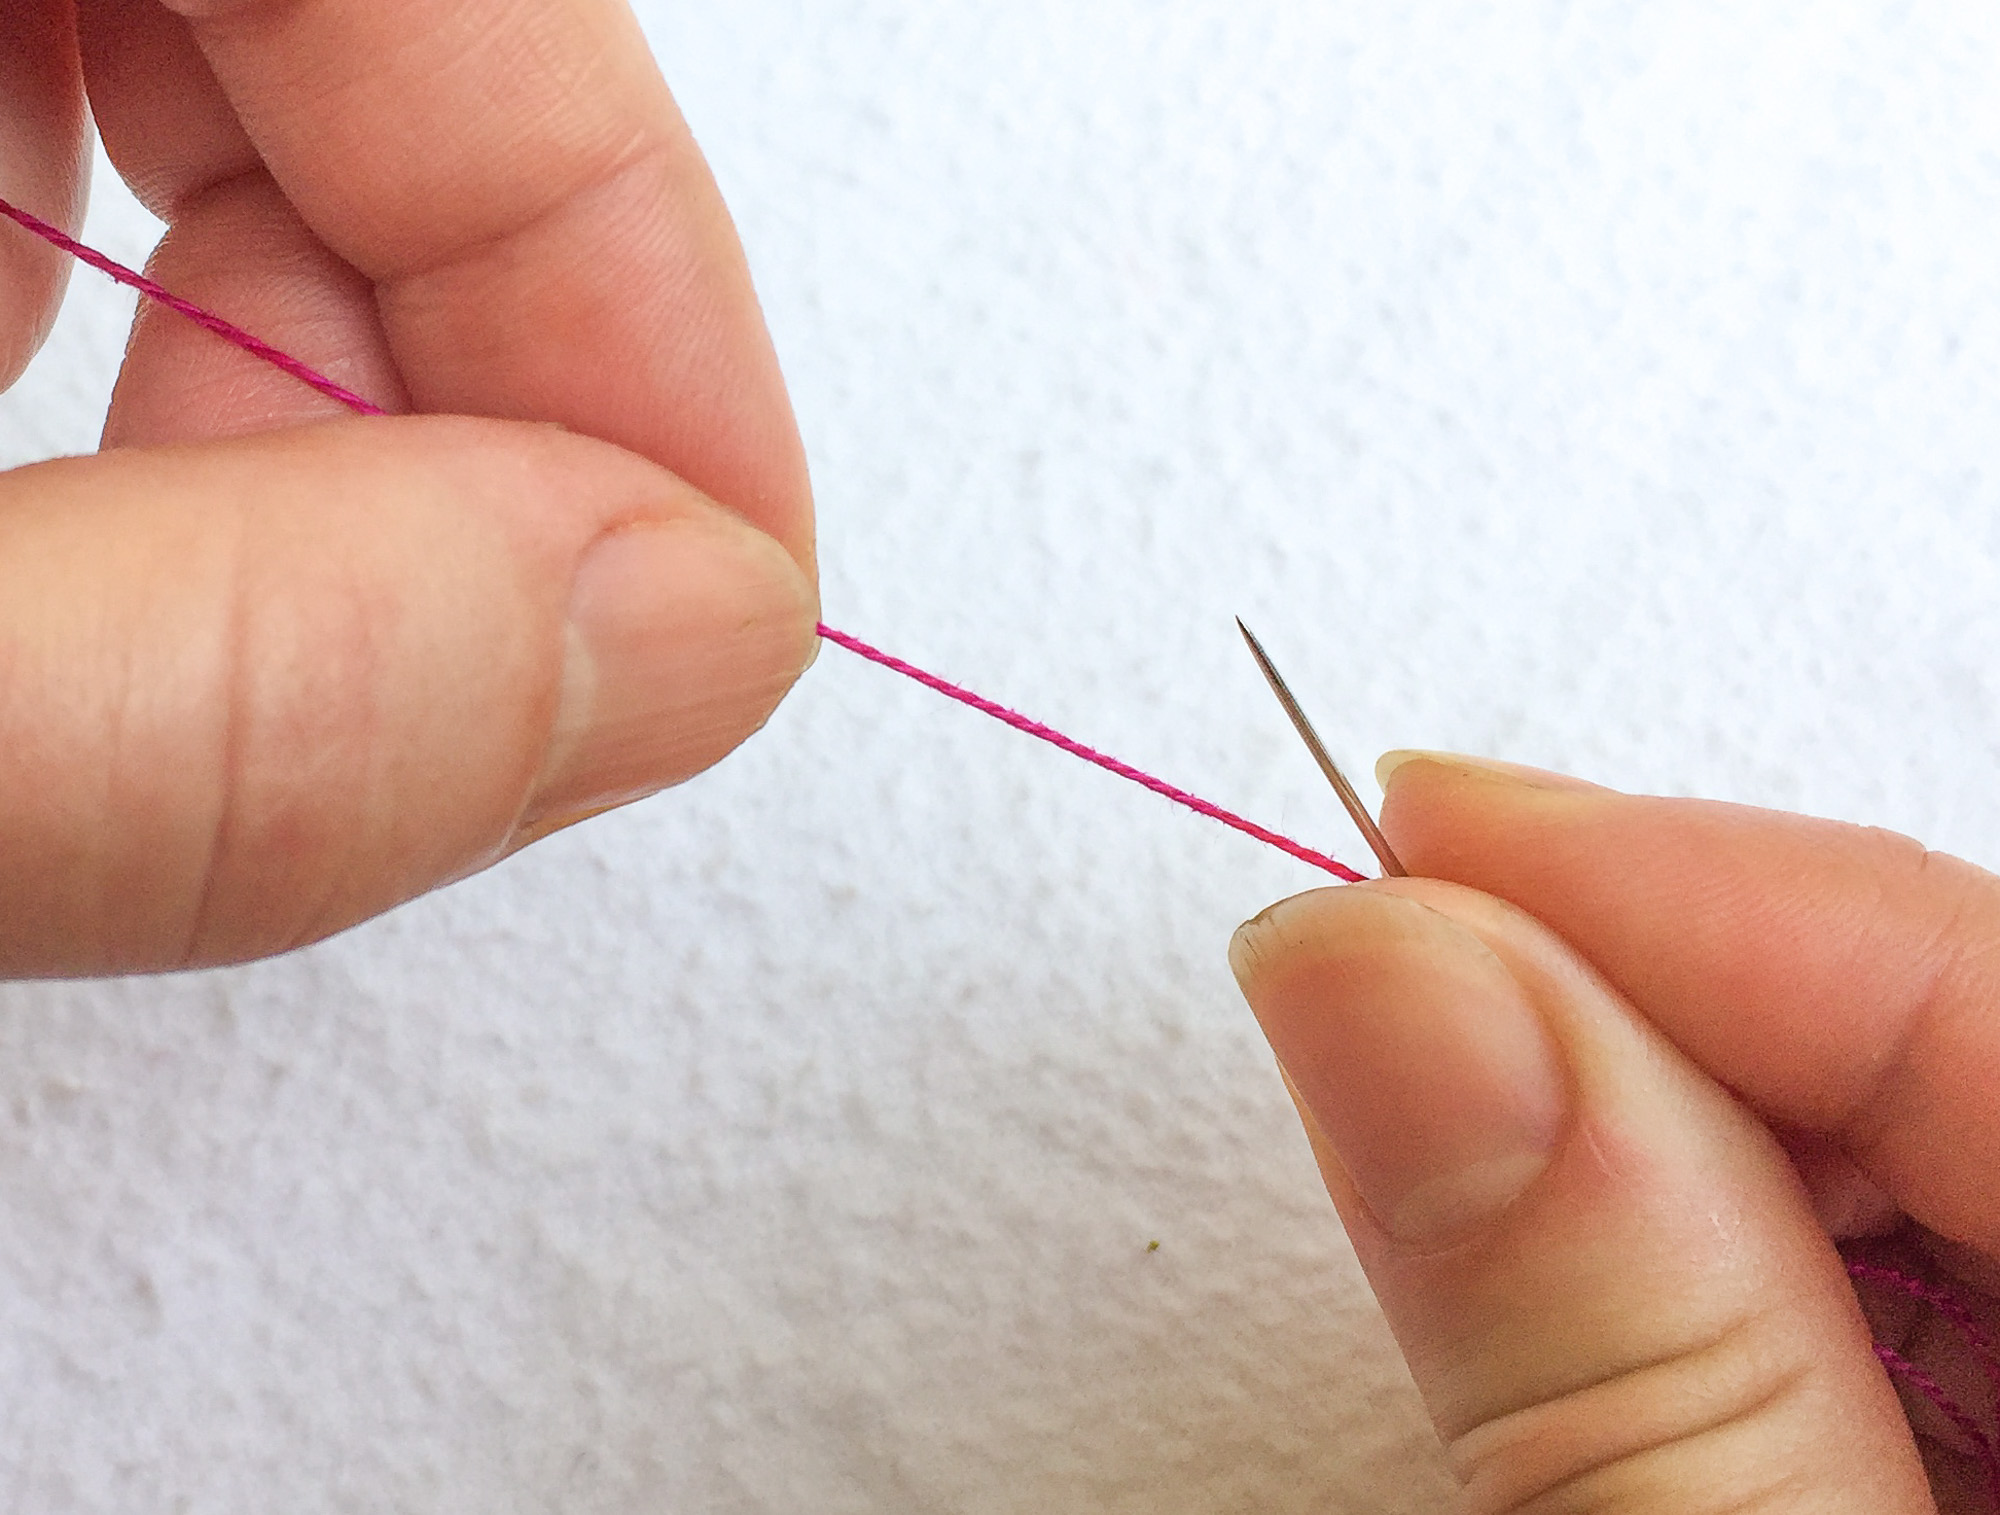
4. With your non-dominant hand, wrap the thread around the shaft of the needle a few times, creating a coil.
5. Using the thumb and forefinger of your dominant hand, carefully slide the coiled thread over the end of the needle.
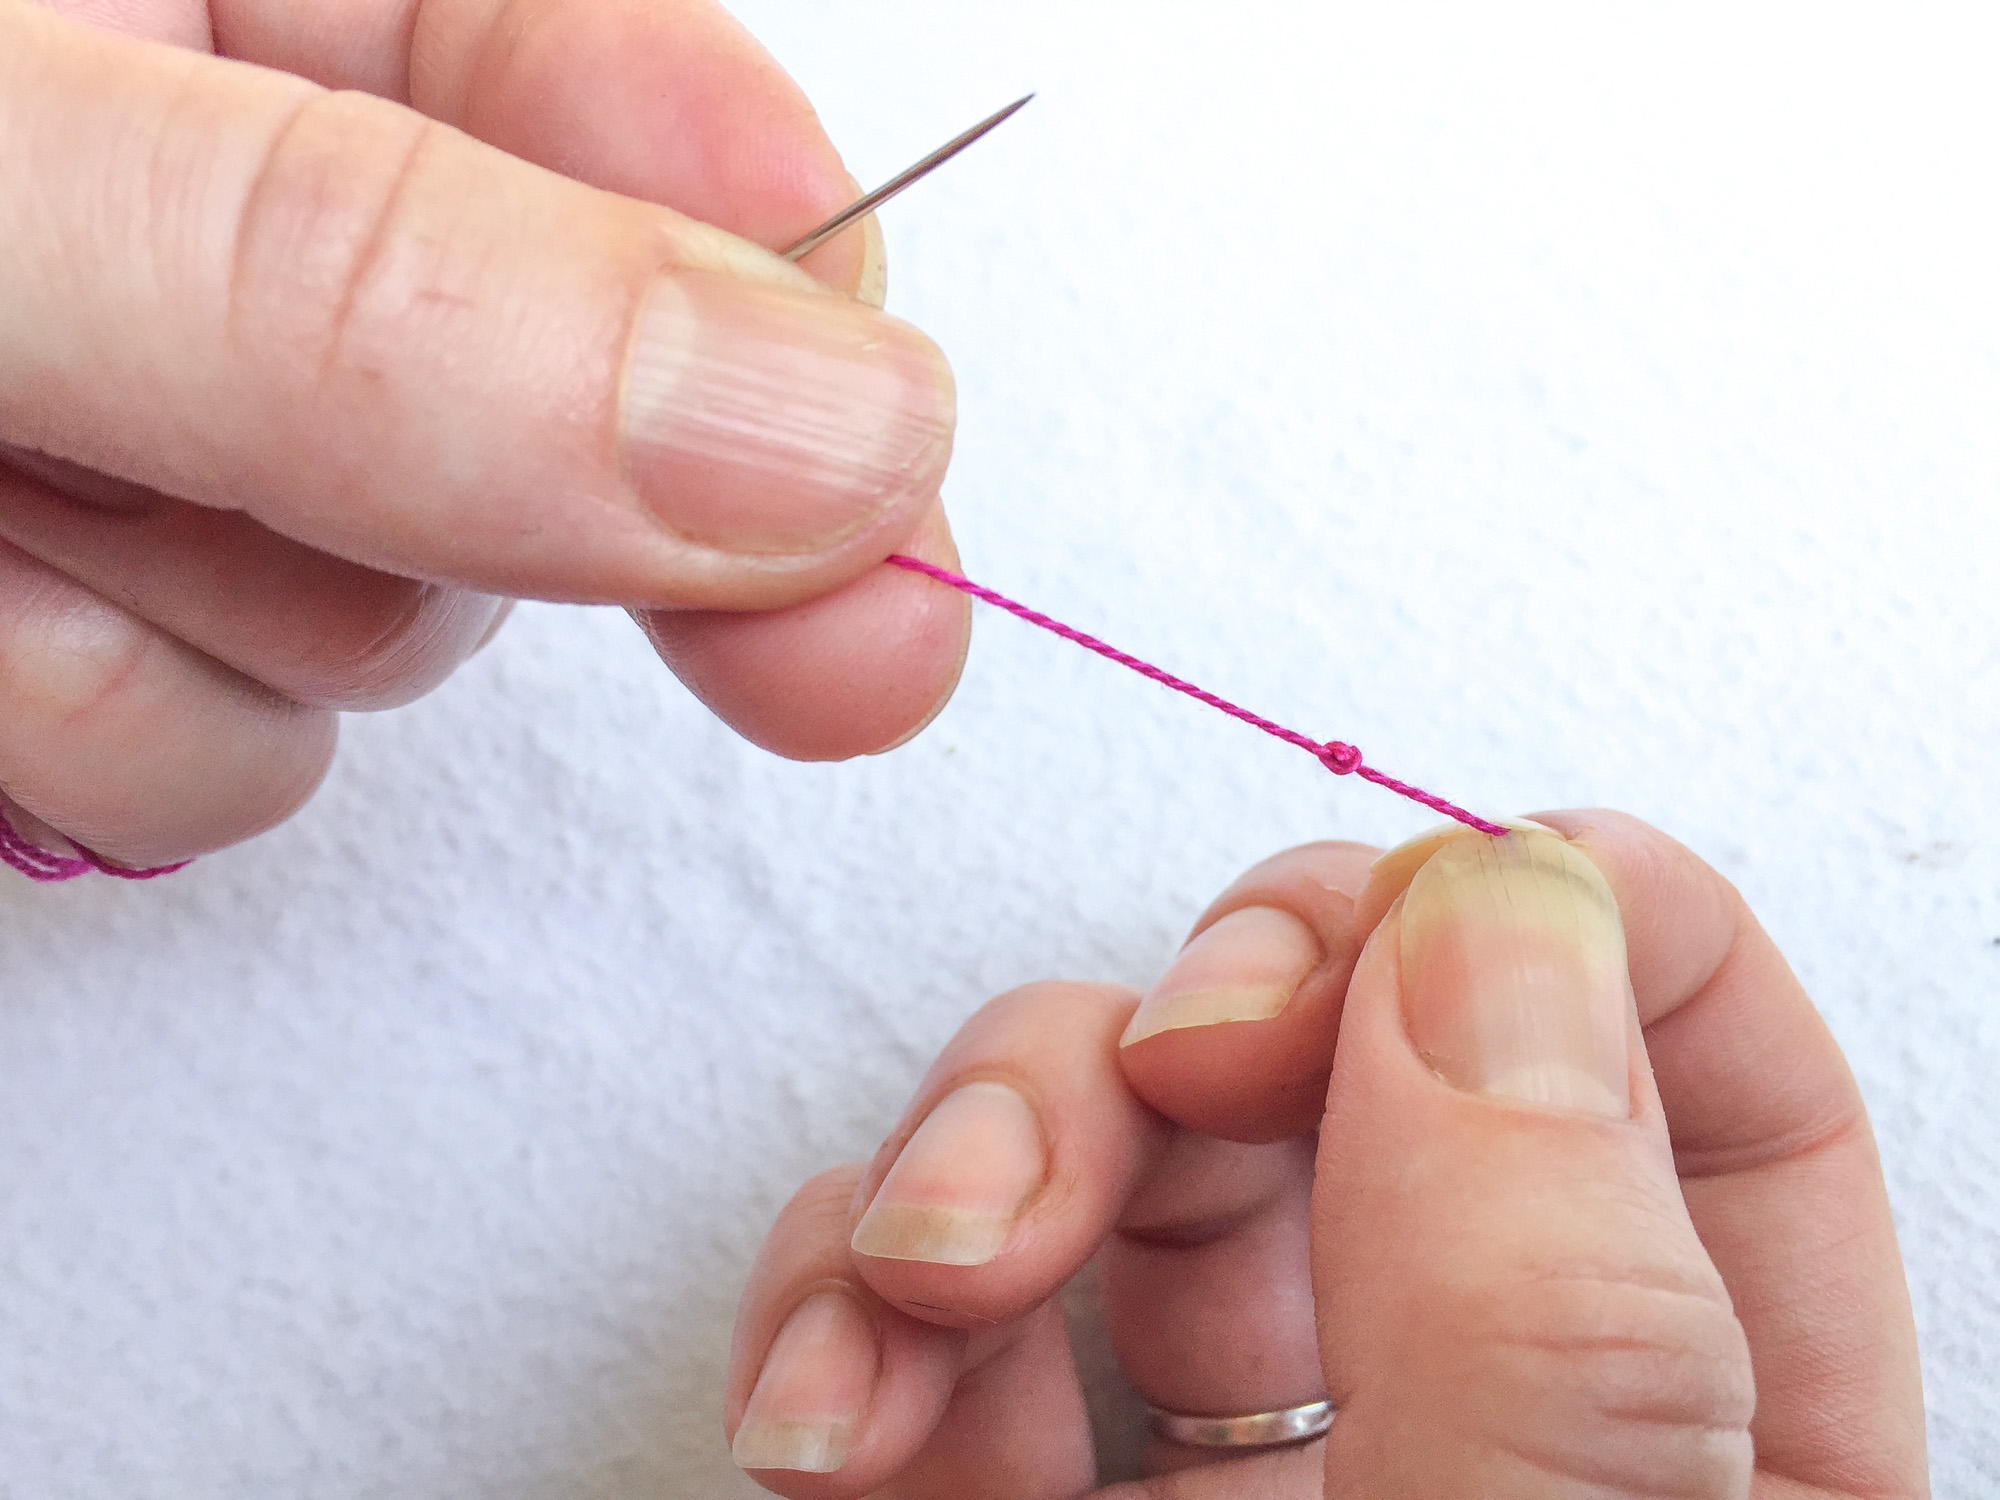
6.Pull the coil along the length of the thread until it forms a knot at the end.
You did it! This takes practice, but it’s a great way to create a nice smooth knot that hides easily within your quilt.
Time to Get Hand Quilting!
Well, we’ve covered a lot in this post as well as throughout the tutorial series! I truly hope that the content here has equipped you with the skills you need to begin or enhance your hand quilting journey. But, as always, I hope that demystifying a few elements gives you a bit more space to cultivate the joy and healing of creativity in yet another way.
If you have any questions, you can comment at the end of this post or find me on Instagram @stitchingthejourney. And, if you give hand quilting a try, I’d love to cheer you on! Feel free to email me at lisa@stitchingthejourney.com or tag me on Instagram so I can see what you’re up to. In the meantime, happy stitching!
Don’t forget, you can always find all of the sections of the Hand Quilting HQ tutorial series here. Or you can use these handy pins for easy access from Pinterest.
This post may contain affiliate links. You can read my affiliate disclosure here.
Great tutorial on hand quilting, thank you!
I have always machine quilted, but will be attempting hand quilting and your tutorial and pics make the process so clear!
When using a hoop for quilting, how do you place the quilt? Do you center the quilt in the middle and start stitching in the middle or do you start on one edge of the quilt and proceed that way.
Yes, I start stitching in the middle of the quilt regardless of whether I use a hoop or not because I feel like it spreads the quilt out evenly that way. Hope that helps!
Thank you so much I am about to start a hand quilting pattern on my patchwork quilt. And your blog here has answered all the questions I wanted to ask. So informative many thanks.
I have stitched little things the ‘Japanese’ way but am thinking how to stitch my lifetime patchwork traditional diamond cabin log bed cover by hand. Maybe using some Arabic geometrical patterns… But I fear it (my life’s work 😉 will become a bit too stiff… Already changing the backing into lighter material… Maybe adding a border with circles and stitching some ‘free’ hand drawn lines…
Thank you for your practical information and inspiration!


8 Responses
Great tutorial on hand quilting, thank you!
I have always machine quilted, but will be attempting hand quilting and your tutorial and pics make the process so clear!
Hi Jennifer! I’m delighted that you found the tutorial helpful, and I wish you all the best with hand quilting. I just adore it! Happy stitching!
Lisa
When using a hoop for quilting, how do you place the quilt? Do you center the quilt in the middle and start stitching in the middle or do you start on one edge of the quilt and proceed that way.
Hi Deb,
Yes, I start stitching in the middle of the quilt regardless of whether I use a hoop or not because I feel like it spreads the quilt out evenly that way. Hope that helps!
Thank you so much I am about to start a hand quilting pattern on my patchwork quilt. And your blog here has answered all the questions I wanted to ask. So informative many thanks.
I’m so glad Linda! Thanks for stopping by!
Lisa
Hello Lisa
Thank you so much for your tutorial!
I have stitched little things the ‘Japanese’ way but am thinking how to stitch my lifetime patchwork traditional diamond cabin log bed cover by hand. Maybe using some Arabic geometrical patterns… But I fear it (my life’s work 😉 will become a bit too stiff… Already changing the backing into lighter material… Maybe adding a border with circles and stitching some ‘free’ hand drawn lines…
Thank you for your practical information and inspiration!
I’m so glad you found it helpful! Thanks for your sweet comment!
xoxo,
Lisa