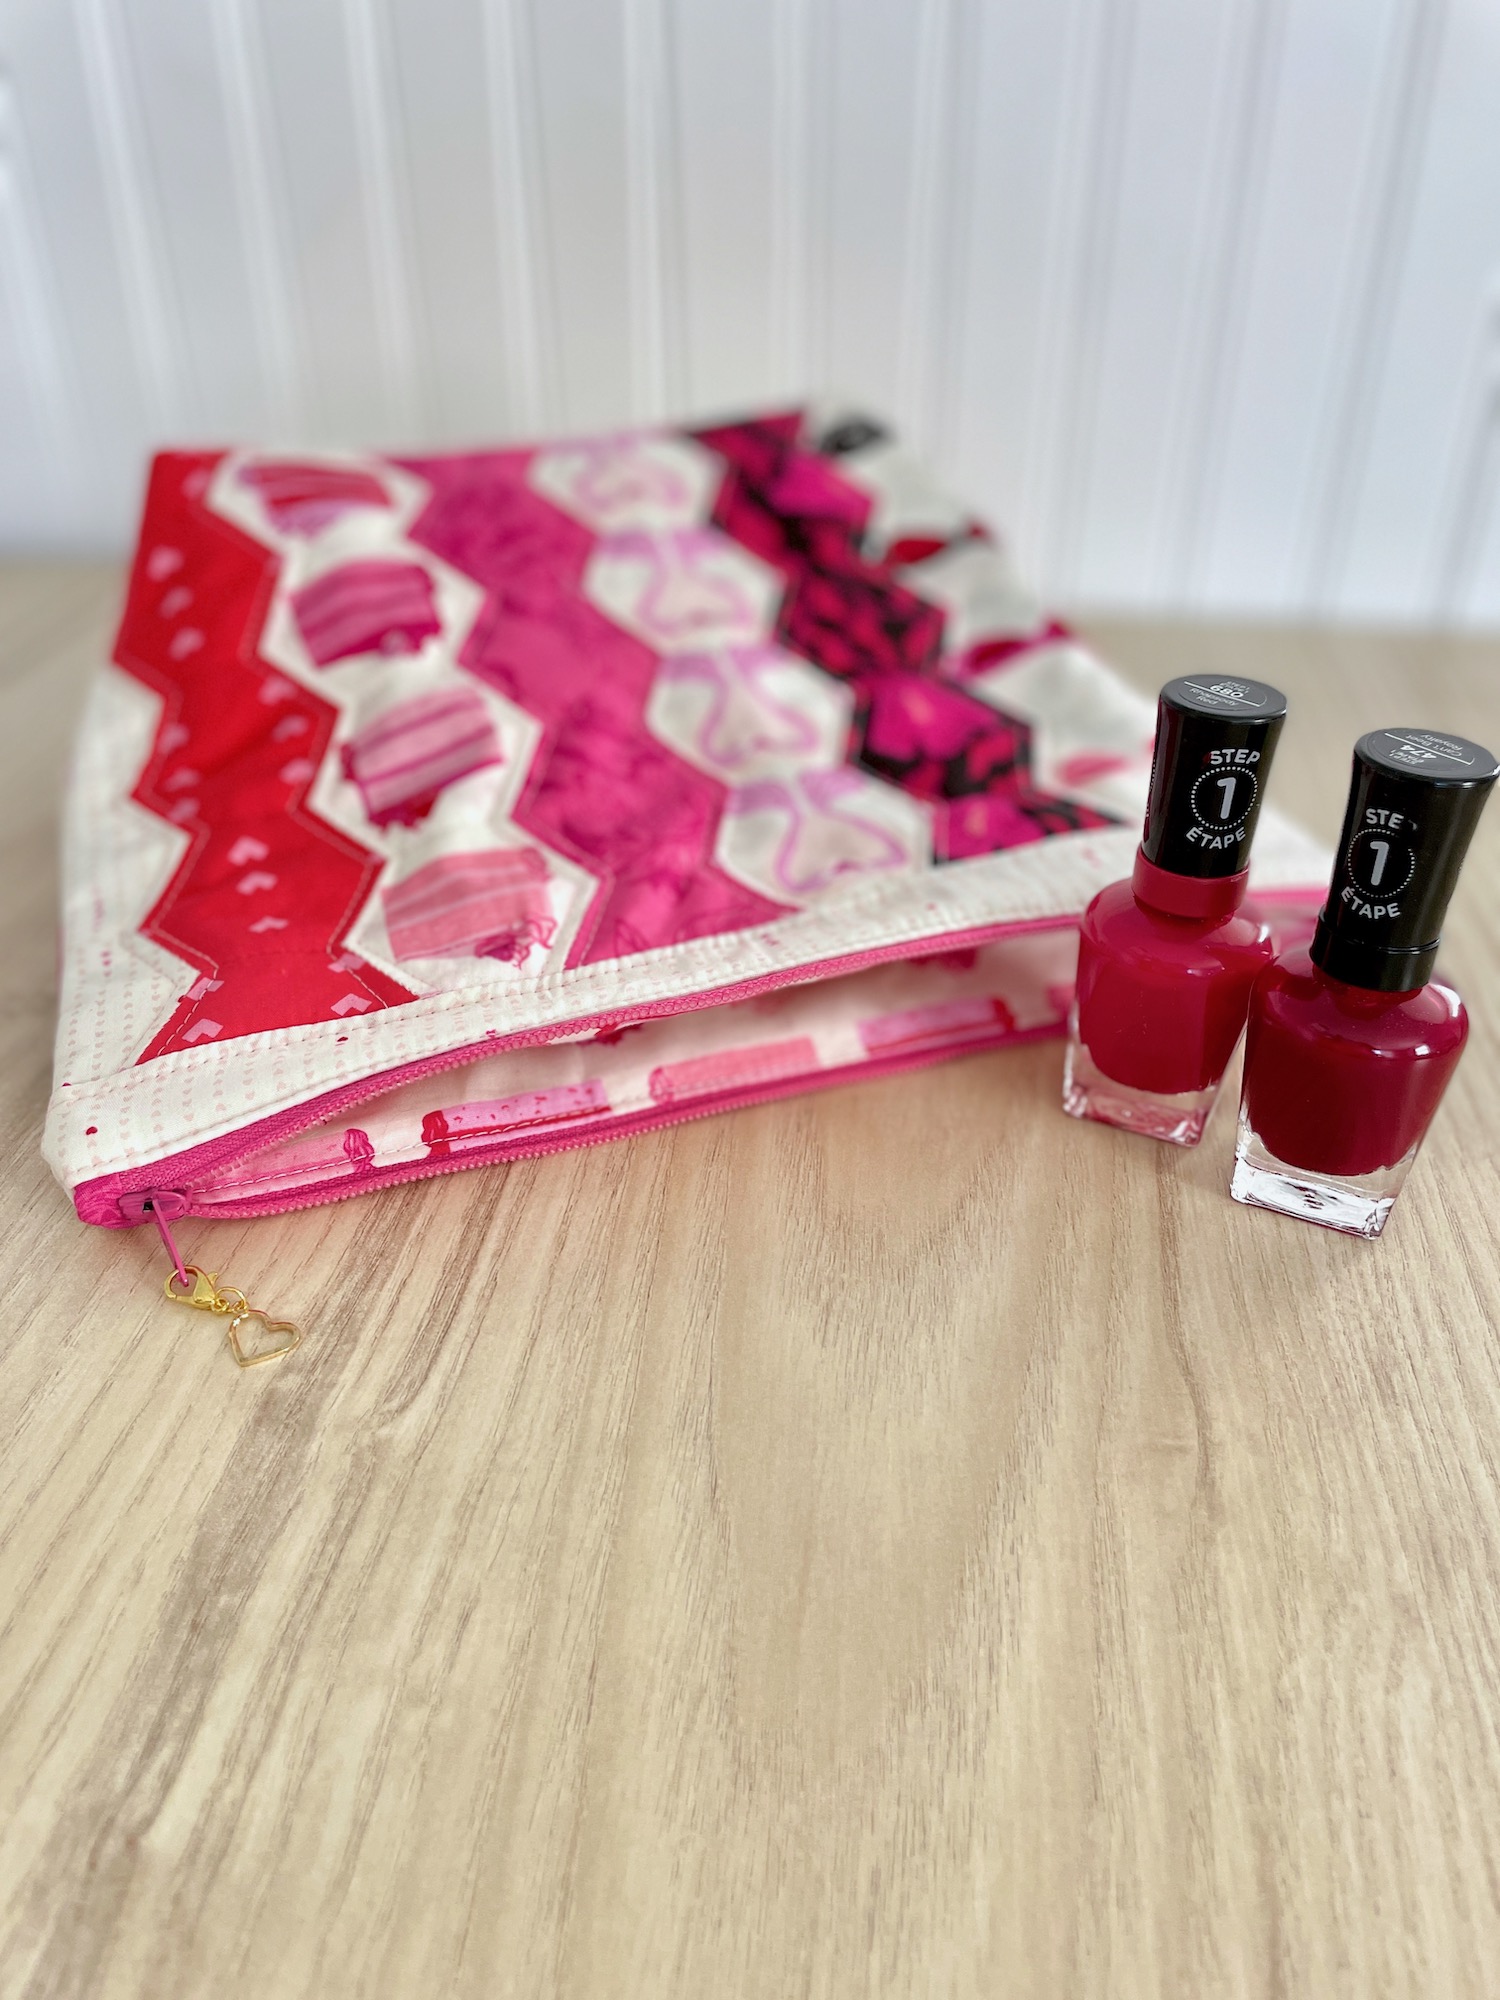
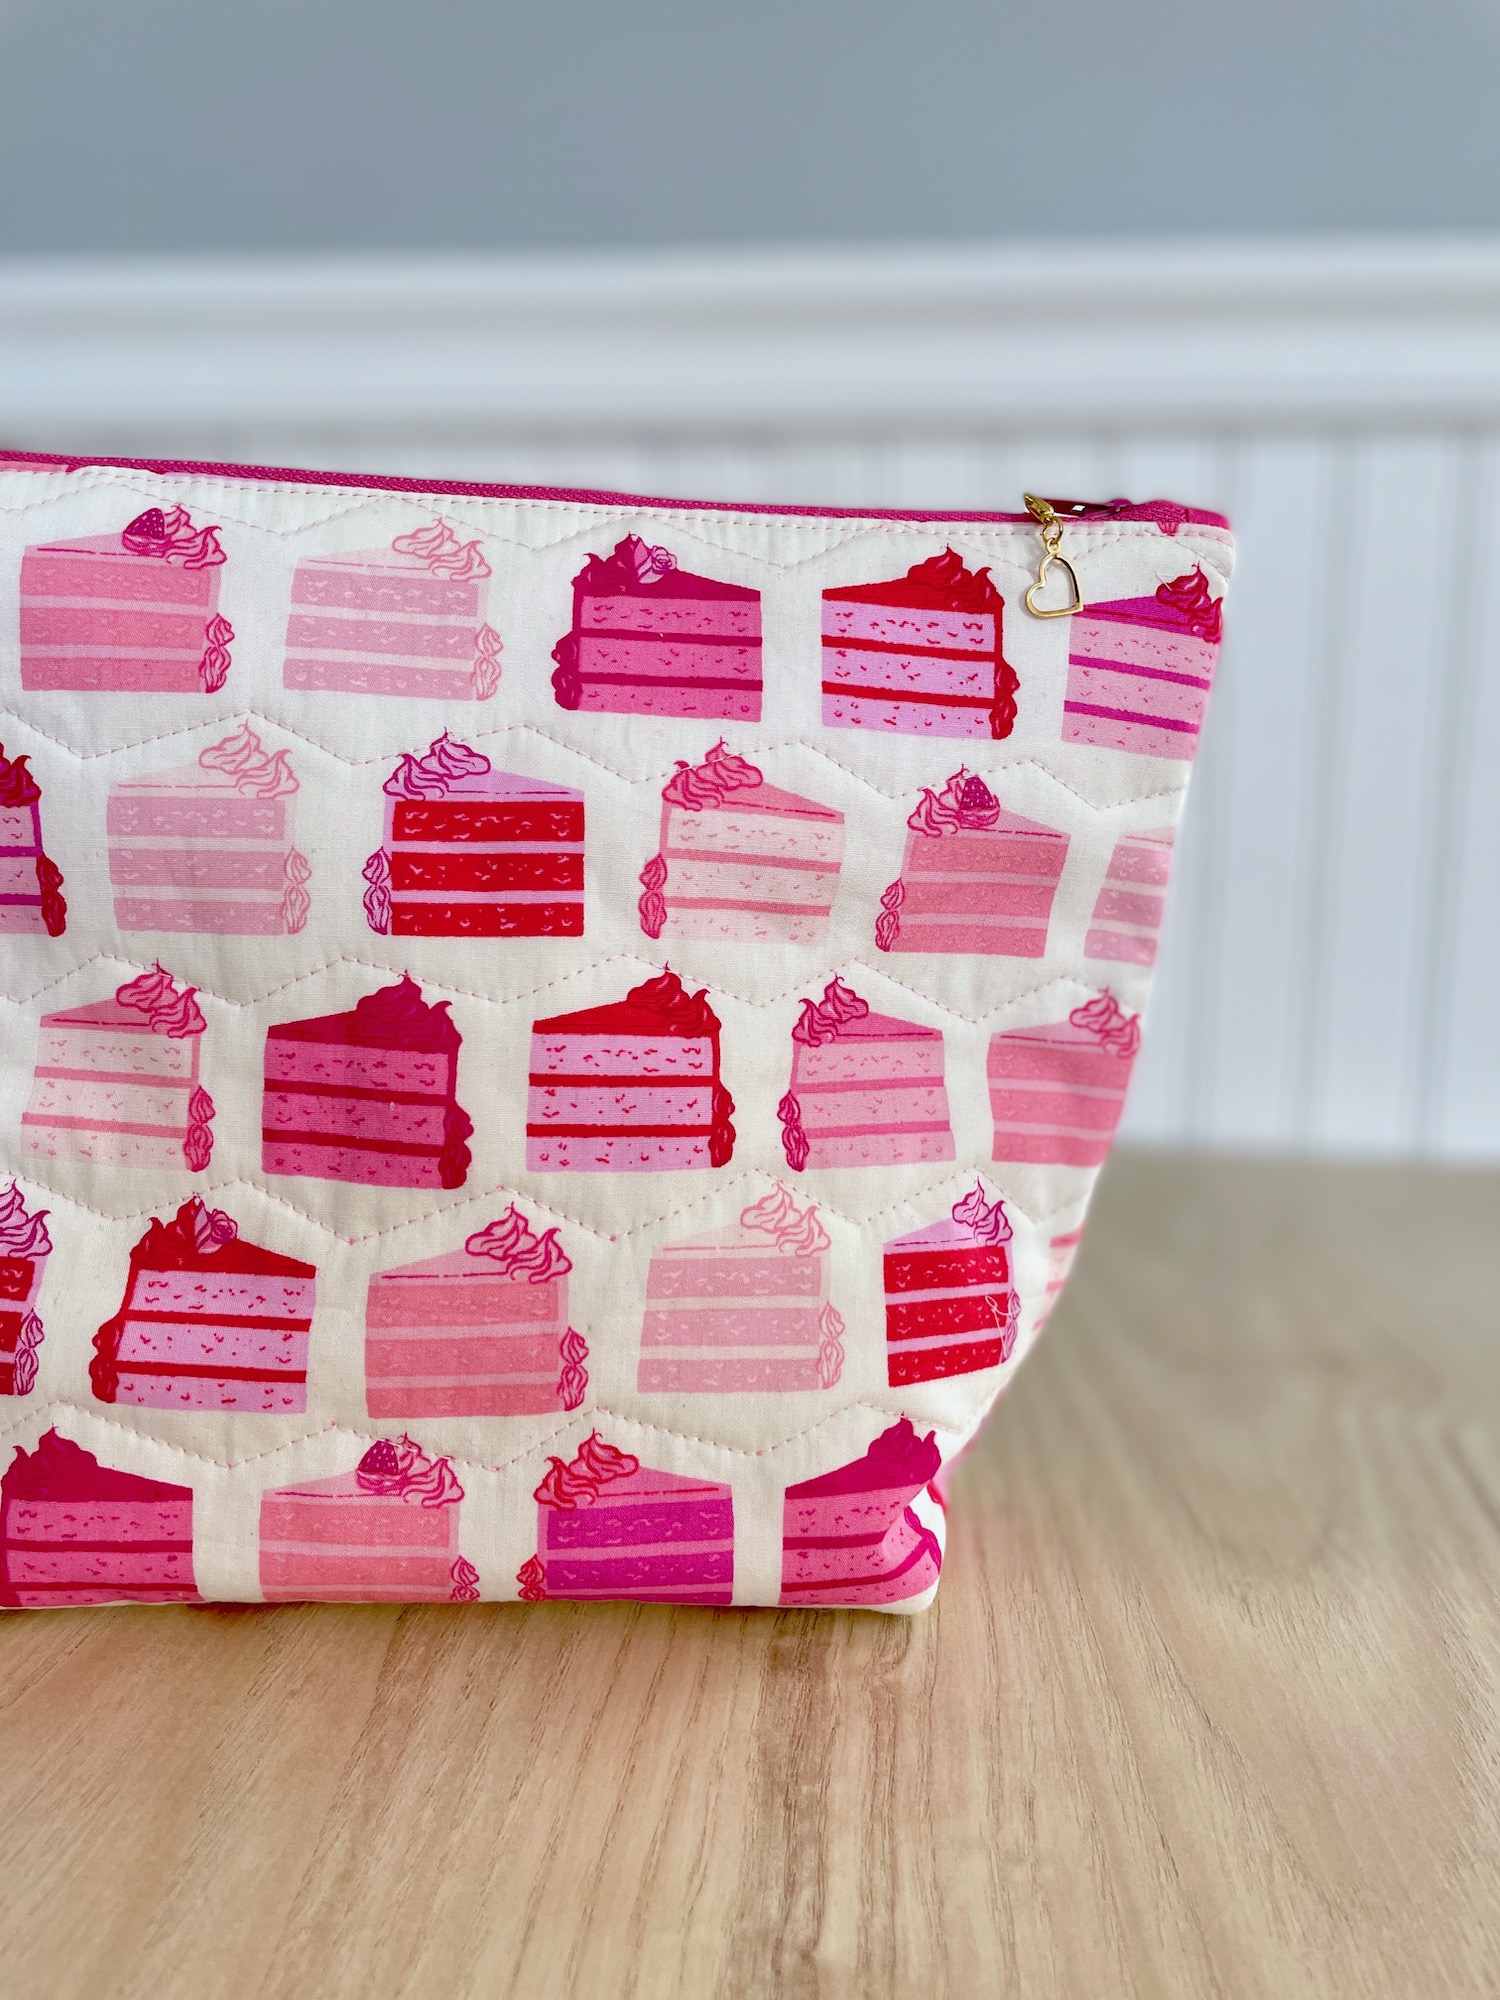
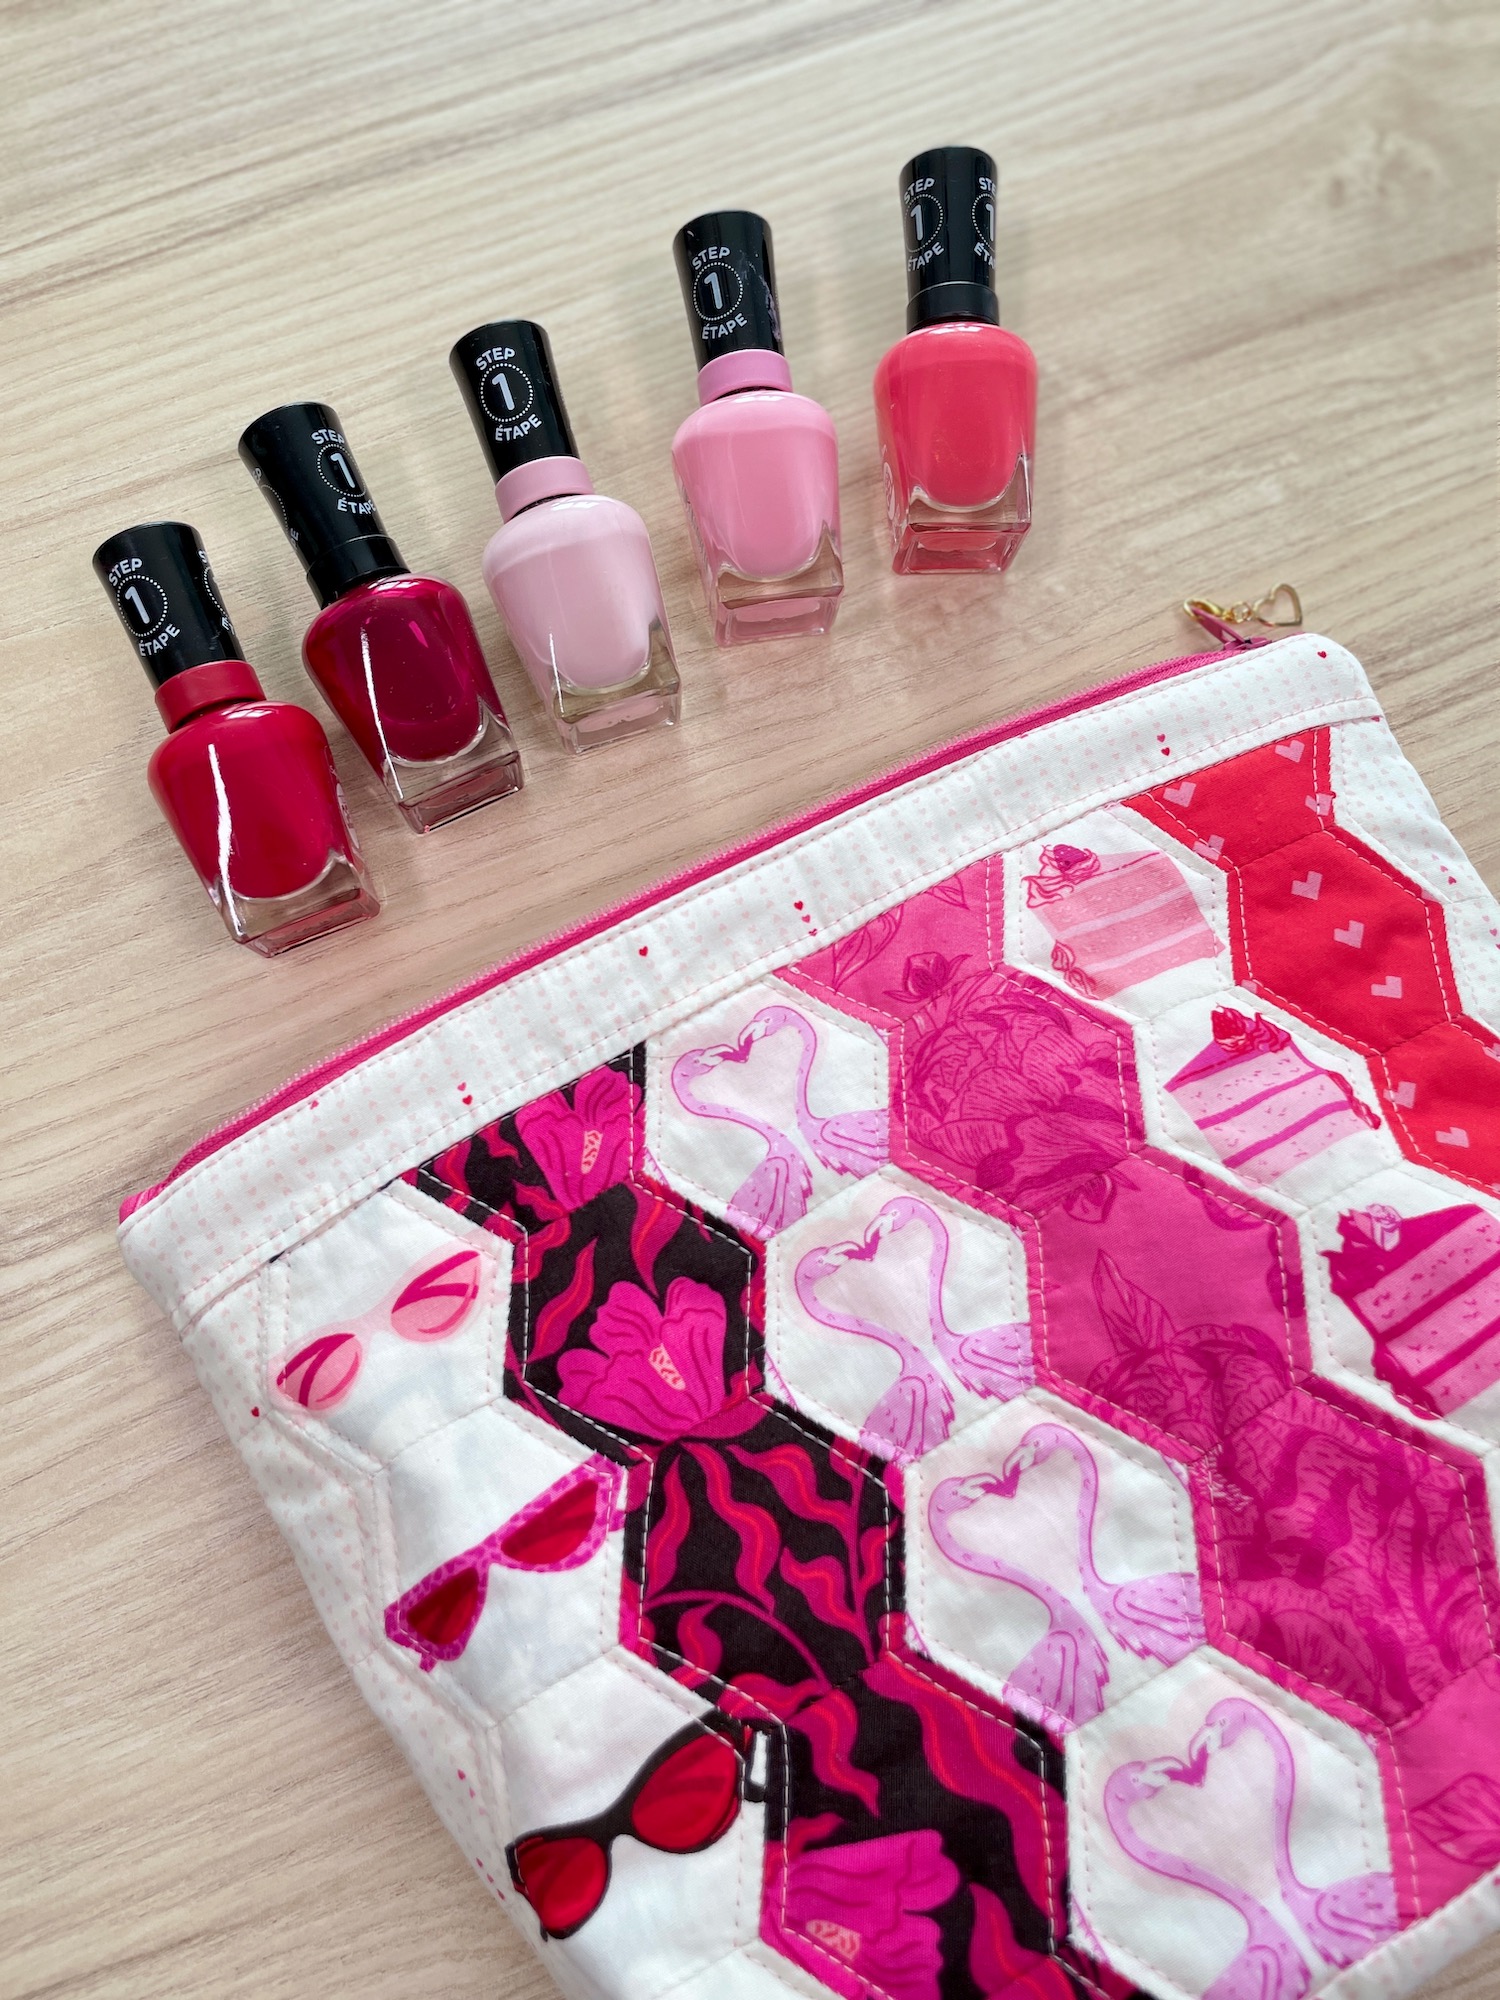
I love making zipper pouches. (In fact this is my second version of this pouch, and my second FREE zipper pouch pattern! Find the first one here.) And, no matter how many I make, it feels like I still never have enough! Not only are they my go-to storage solution for stitching of all kinds, but they come together quickly and are fully customizable in size/shape. They are also great for featuring smaller scale stitching WIPs like embroidery or English Paper Piecing (EPP), and I can pretty much always count on them bolstering my sewjo when I need it.
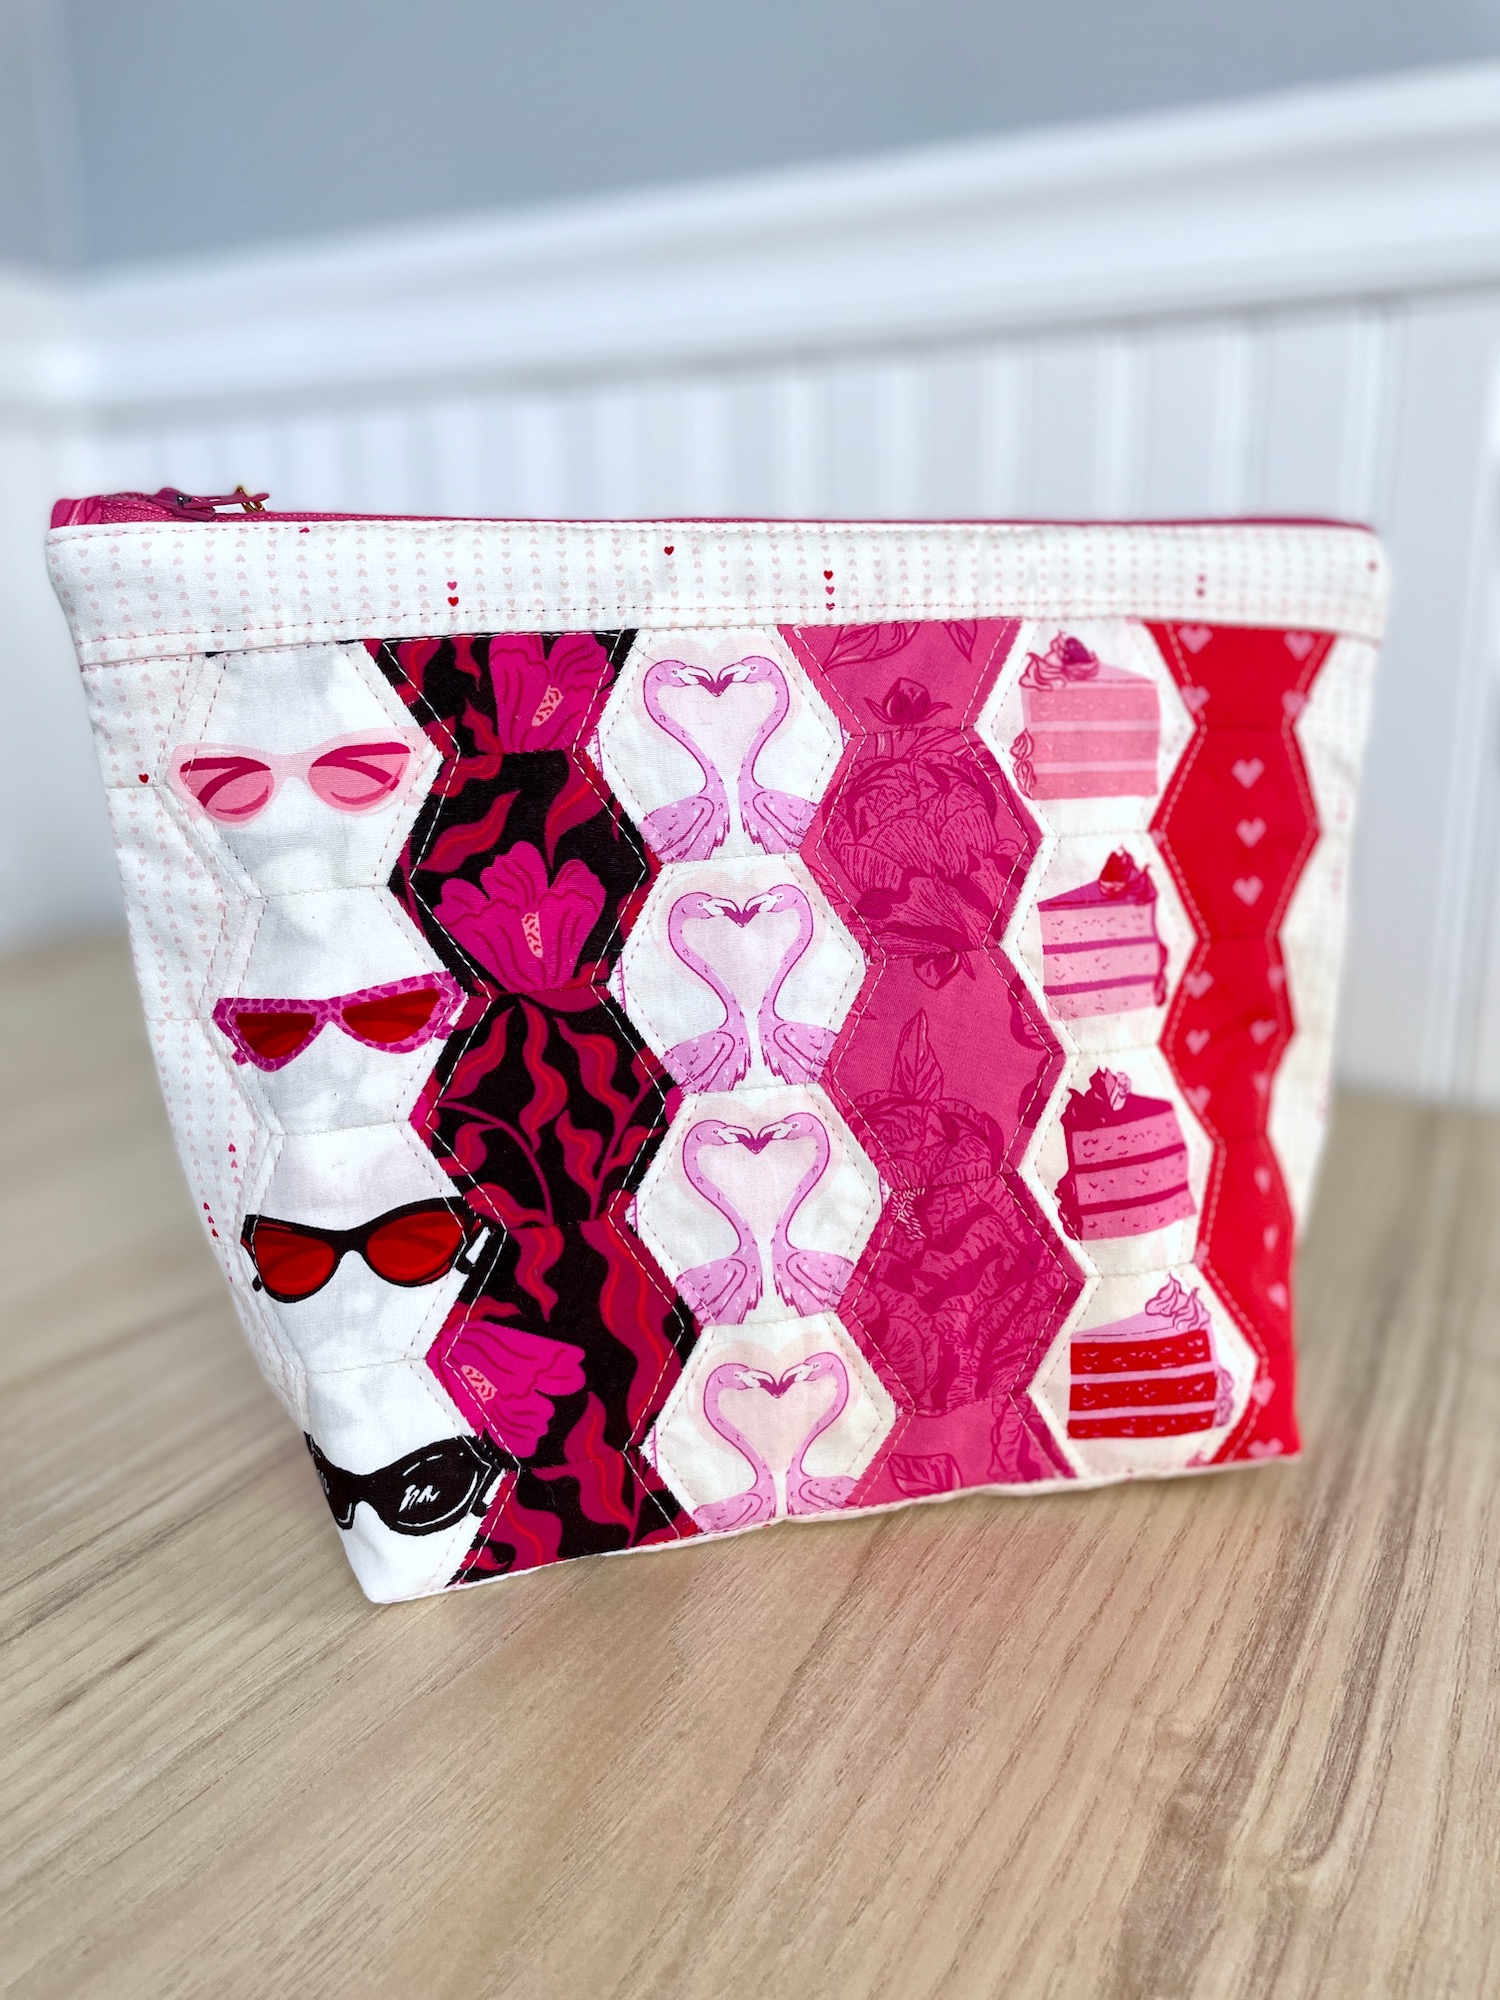
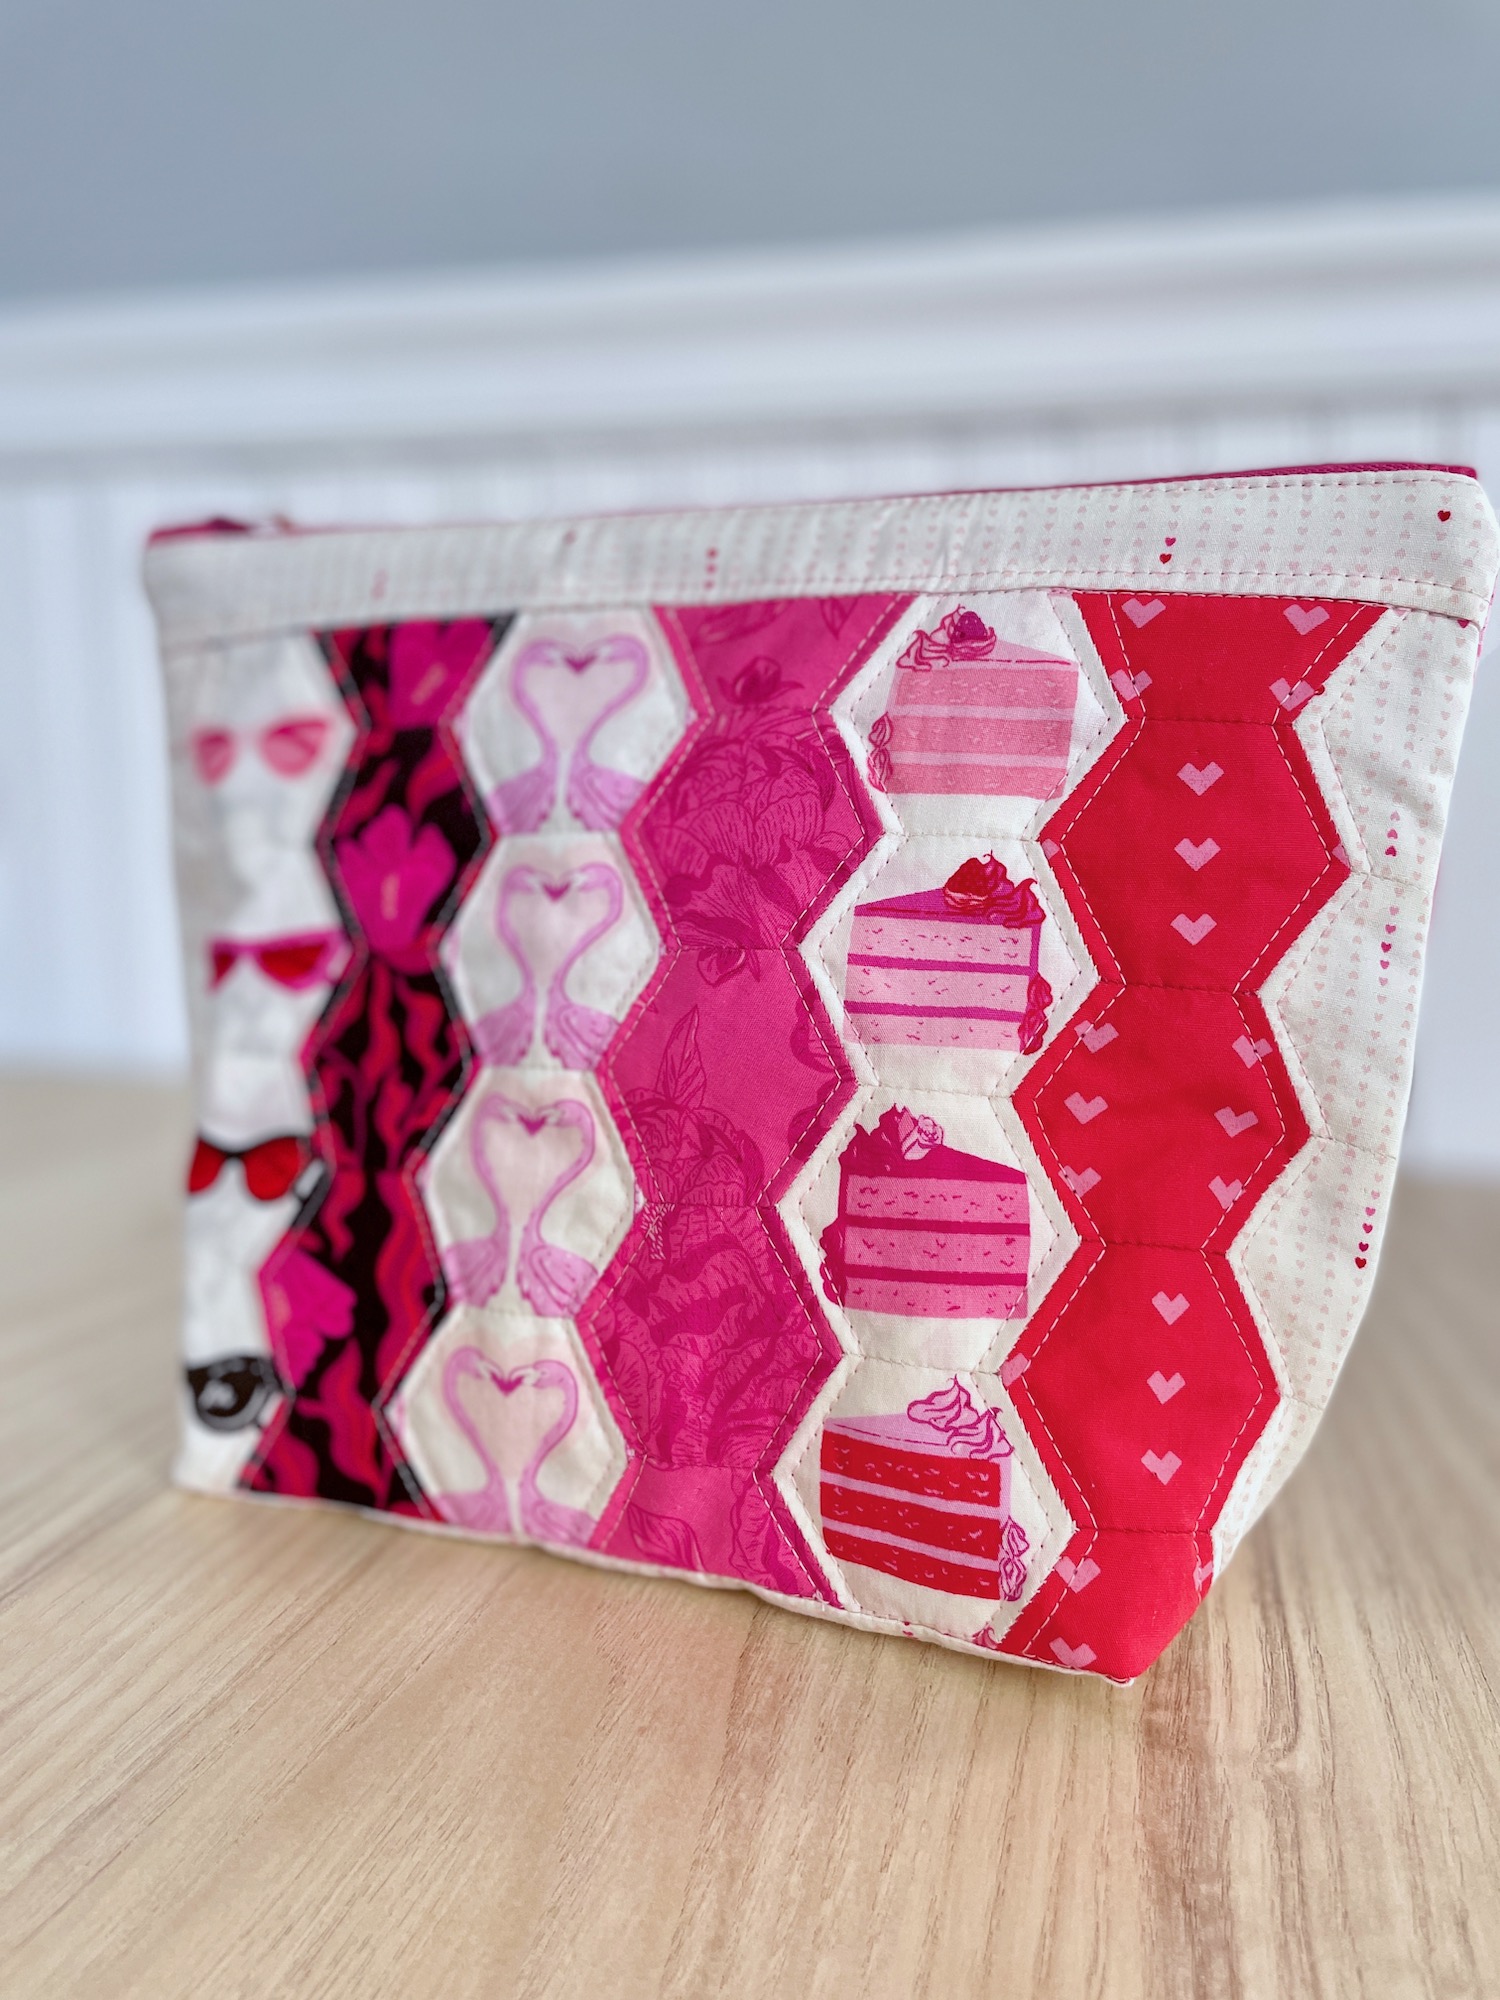
So, I’m delighted to share this adorable pattern that features the perfect amount of EPP hexie goodness, with the versatility of a “boxed bottom” zipper pouch. I especially love these boxed pouches because they stand up on their own and seem to hold even more than the same exact sized pouch that lies flat. (That hurts my physics loving brain just a little bit…)
Because I have already written a tutorial for the flat version of a zipper pouch here, which includes an easy peasy zipper installation, I won’t be going over zipper installation in this tutorial. However, I will be sharing some particulars of making an EPP hexagon panel, as well as how to create the boxed corners for the bottom of the pouch. So let’s get started!
Of note, all fabrics were generously gifted by Art Gallery Fabrics and are from their adorable fabric line “Love Struck.”
Gather the Supplies to Make Your Hexagon Pouch
Paper Pieces (Download Below)
(28) 1” hexagons
(8) 1” half hexagons
Fabric
For EPP Hexagon Panel:
Prints:
(6) 5” charm squares OR (21) 2.5” square scraps AND (6) 1.5″x 2.5″ scraps
Background Fabric:
(1) 2.5” WOF (width of fabric) strip
(1) 1.5” WOF strips
For Back and Inner Lining Panels:
(3) 11” squares
For Back and Inner Lining Panels:
(3) 11” squares
Additional Supplies
(2) 13” squares of batting
12” zipper
Sewing machine (with zipper foot attachment)
Straight pins
Curved basting pins
Coordinating thread
Fabric scissors
Quilt ruler
Rotary cutter
Cutting mat
Cutting Instructions
Front EPP Hexagon Panel:
From Printed Charm Squares:
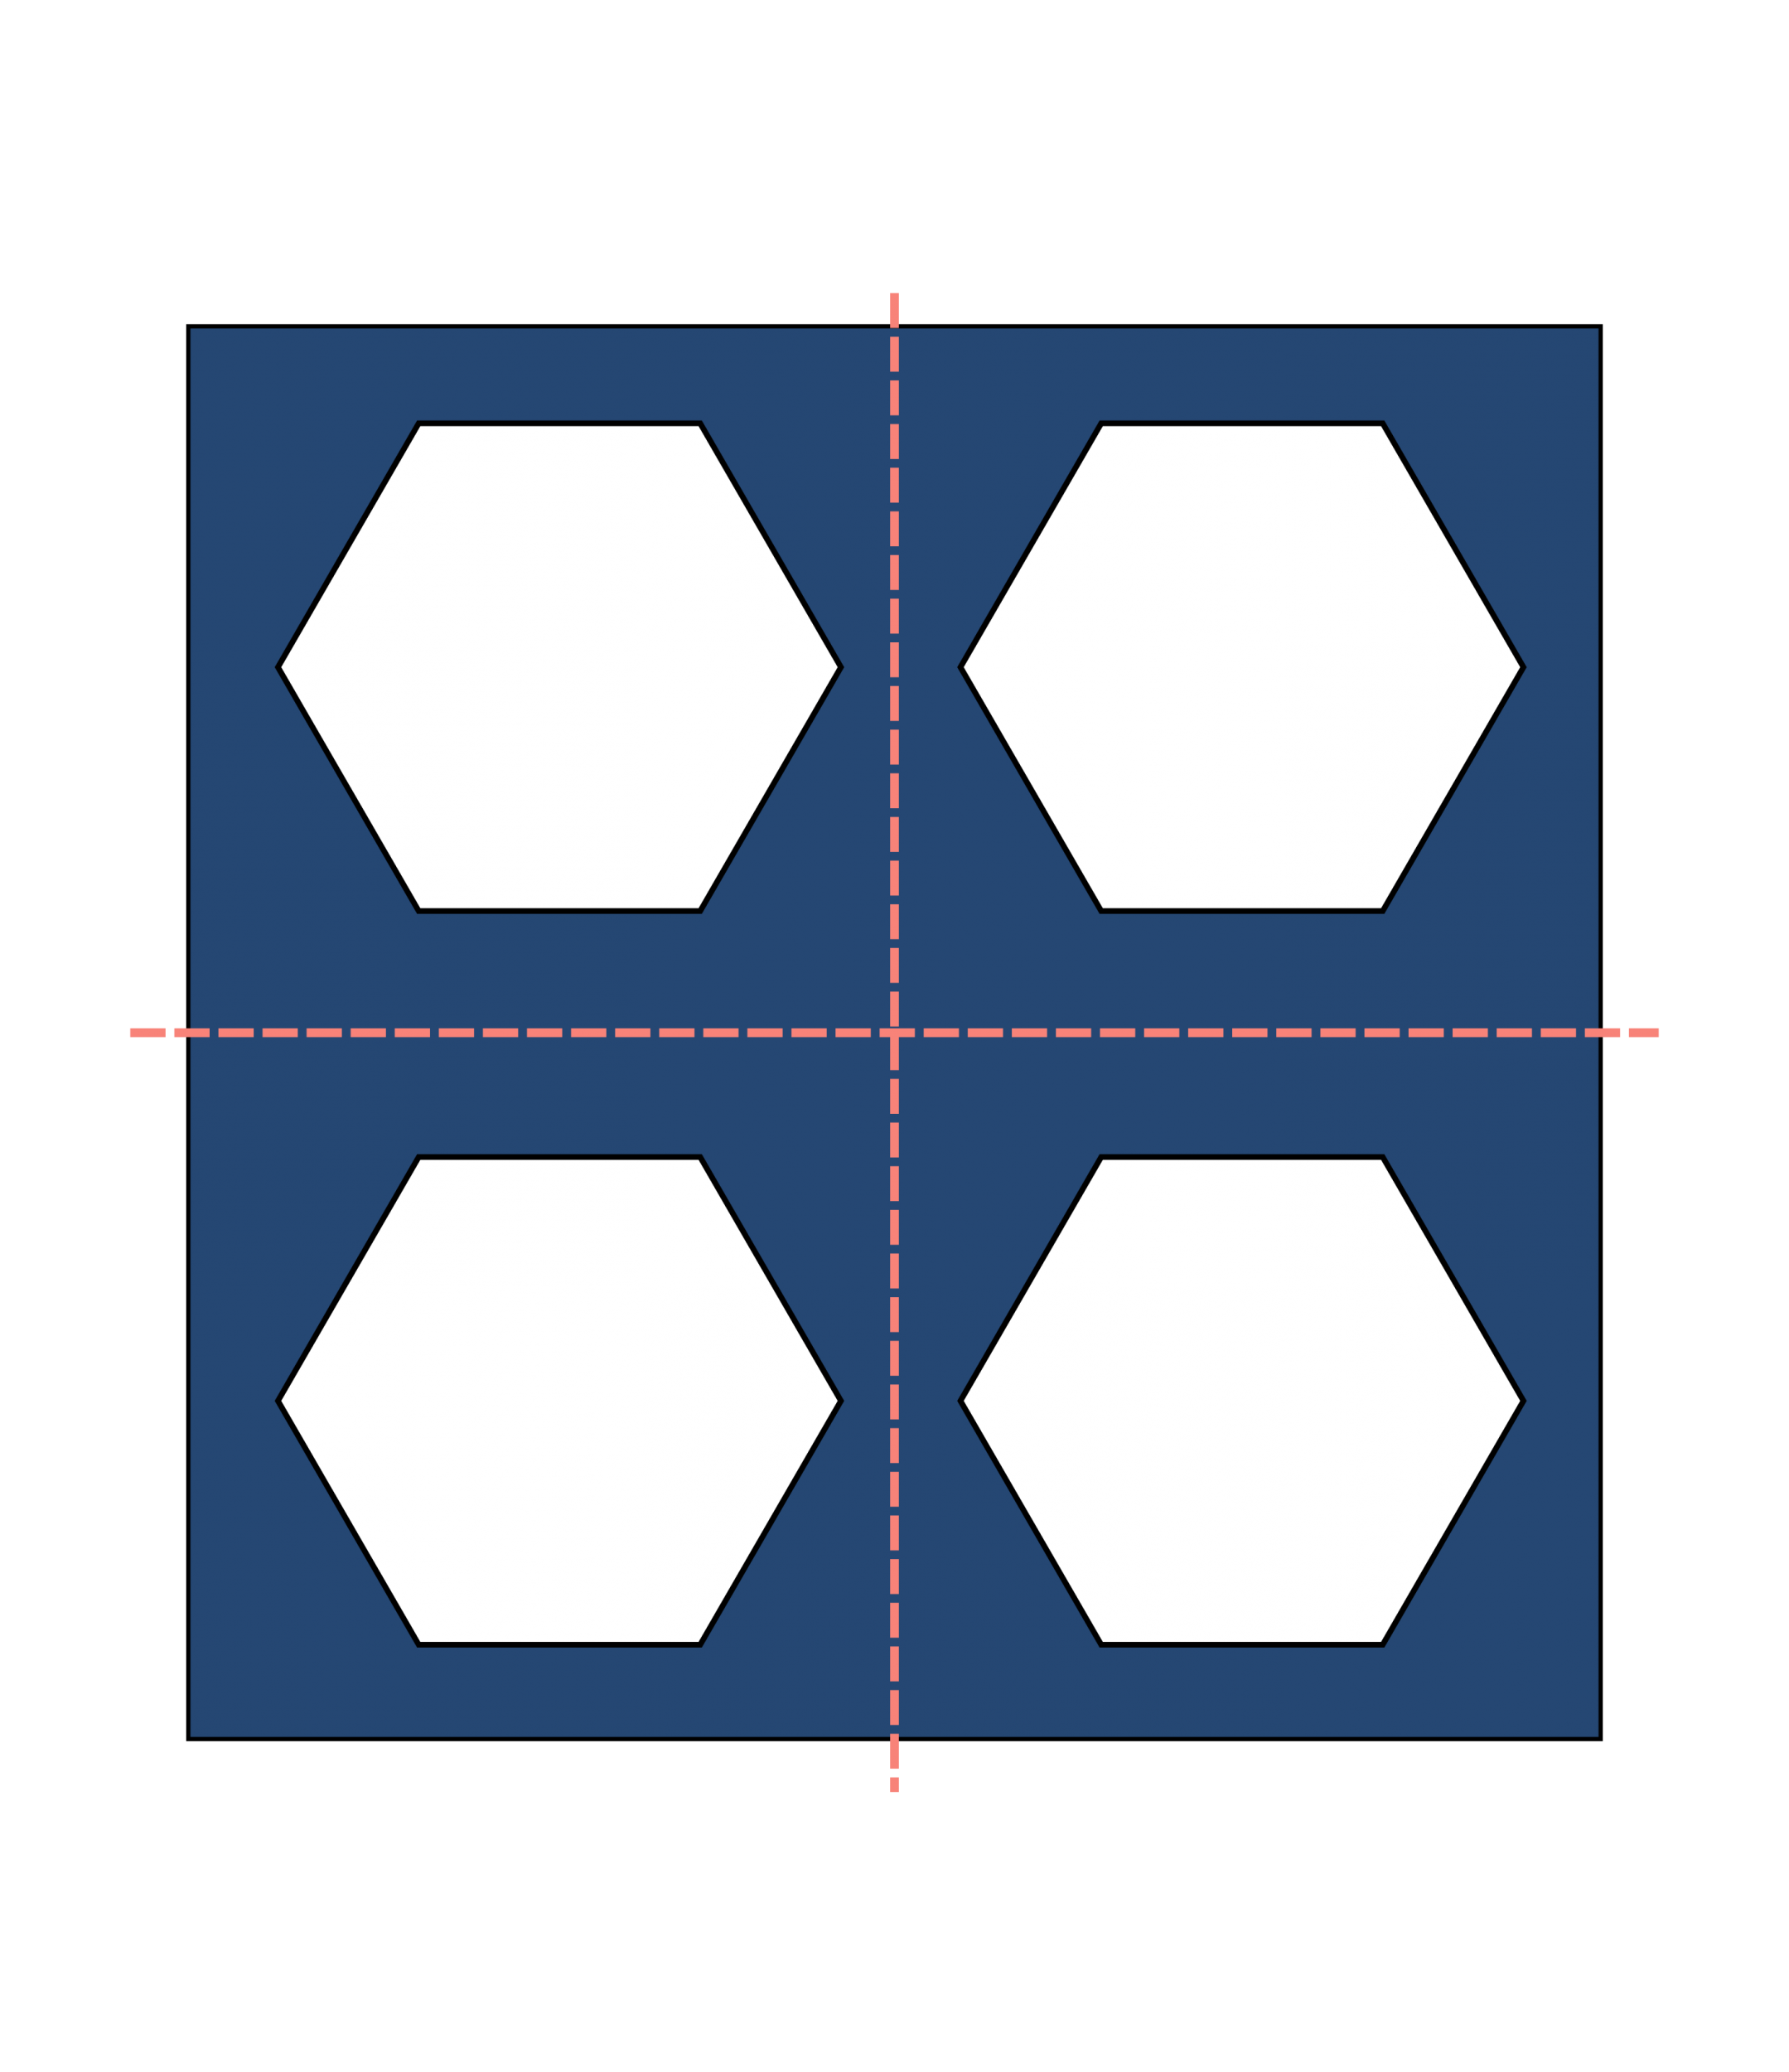
Cut (4) hexagons from each of 3 charm squares as shown in Figure 1 below (12 hexagons)
Cut (3) hexagons and (2) half hexagons from 3 charm squares as shown in Figure 2 below (9 hexagons and 6 half hexagons)
Figure 1
Figure 2
From Background fabric:
Cut (7) 2.5” squares (to baste 7 hexagons), and a 2.5” x 11” rectangle from the 2.5” WOF strip
Cut (2) 1.5” x 2.5” rectangles (to baste 2 half hexagons), a 1.5” x 11” rectangle, and (2) 1.5” squares (tabs for the zipper) from the 1.5” WOF strip
Make the Hexagon Panel
1. Baste all of the printed hexagons and half hexagons.
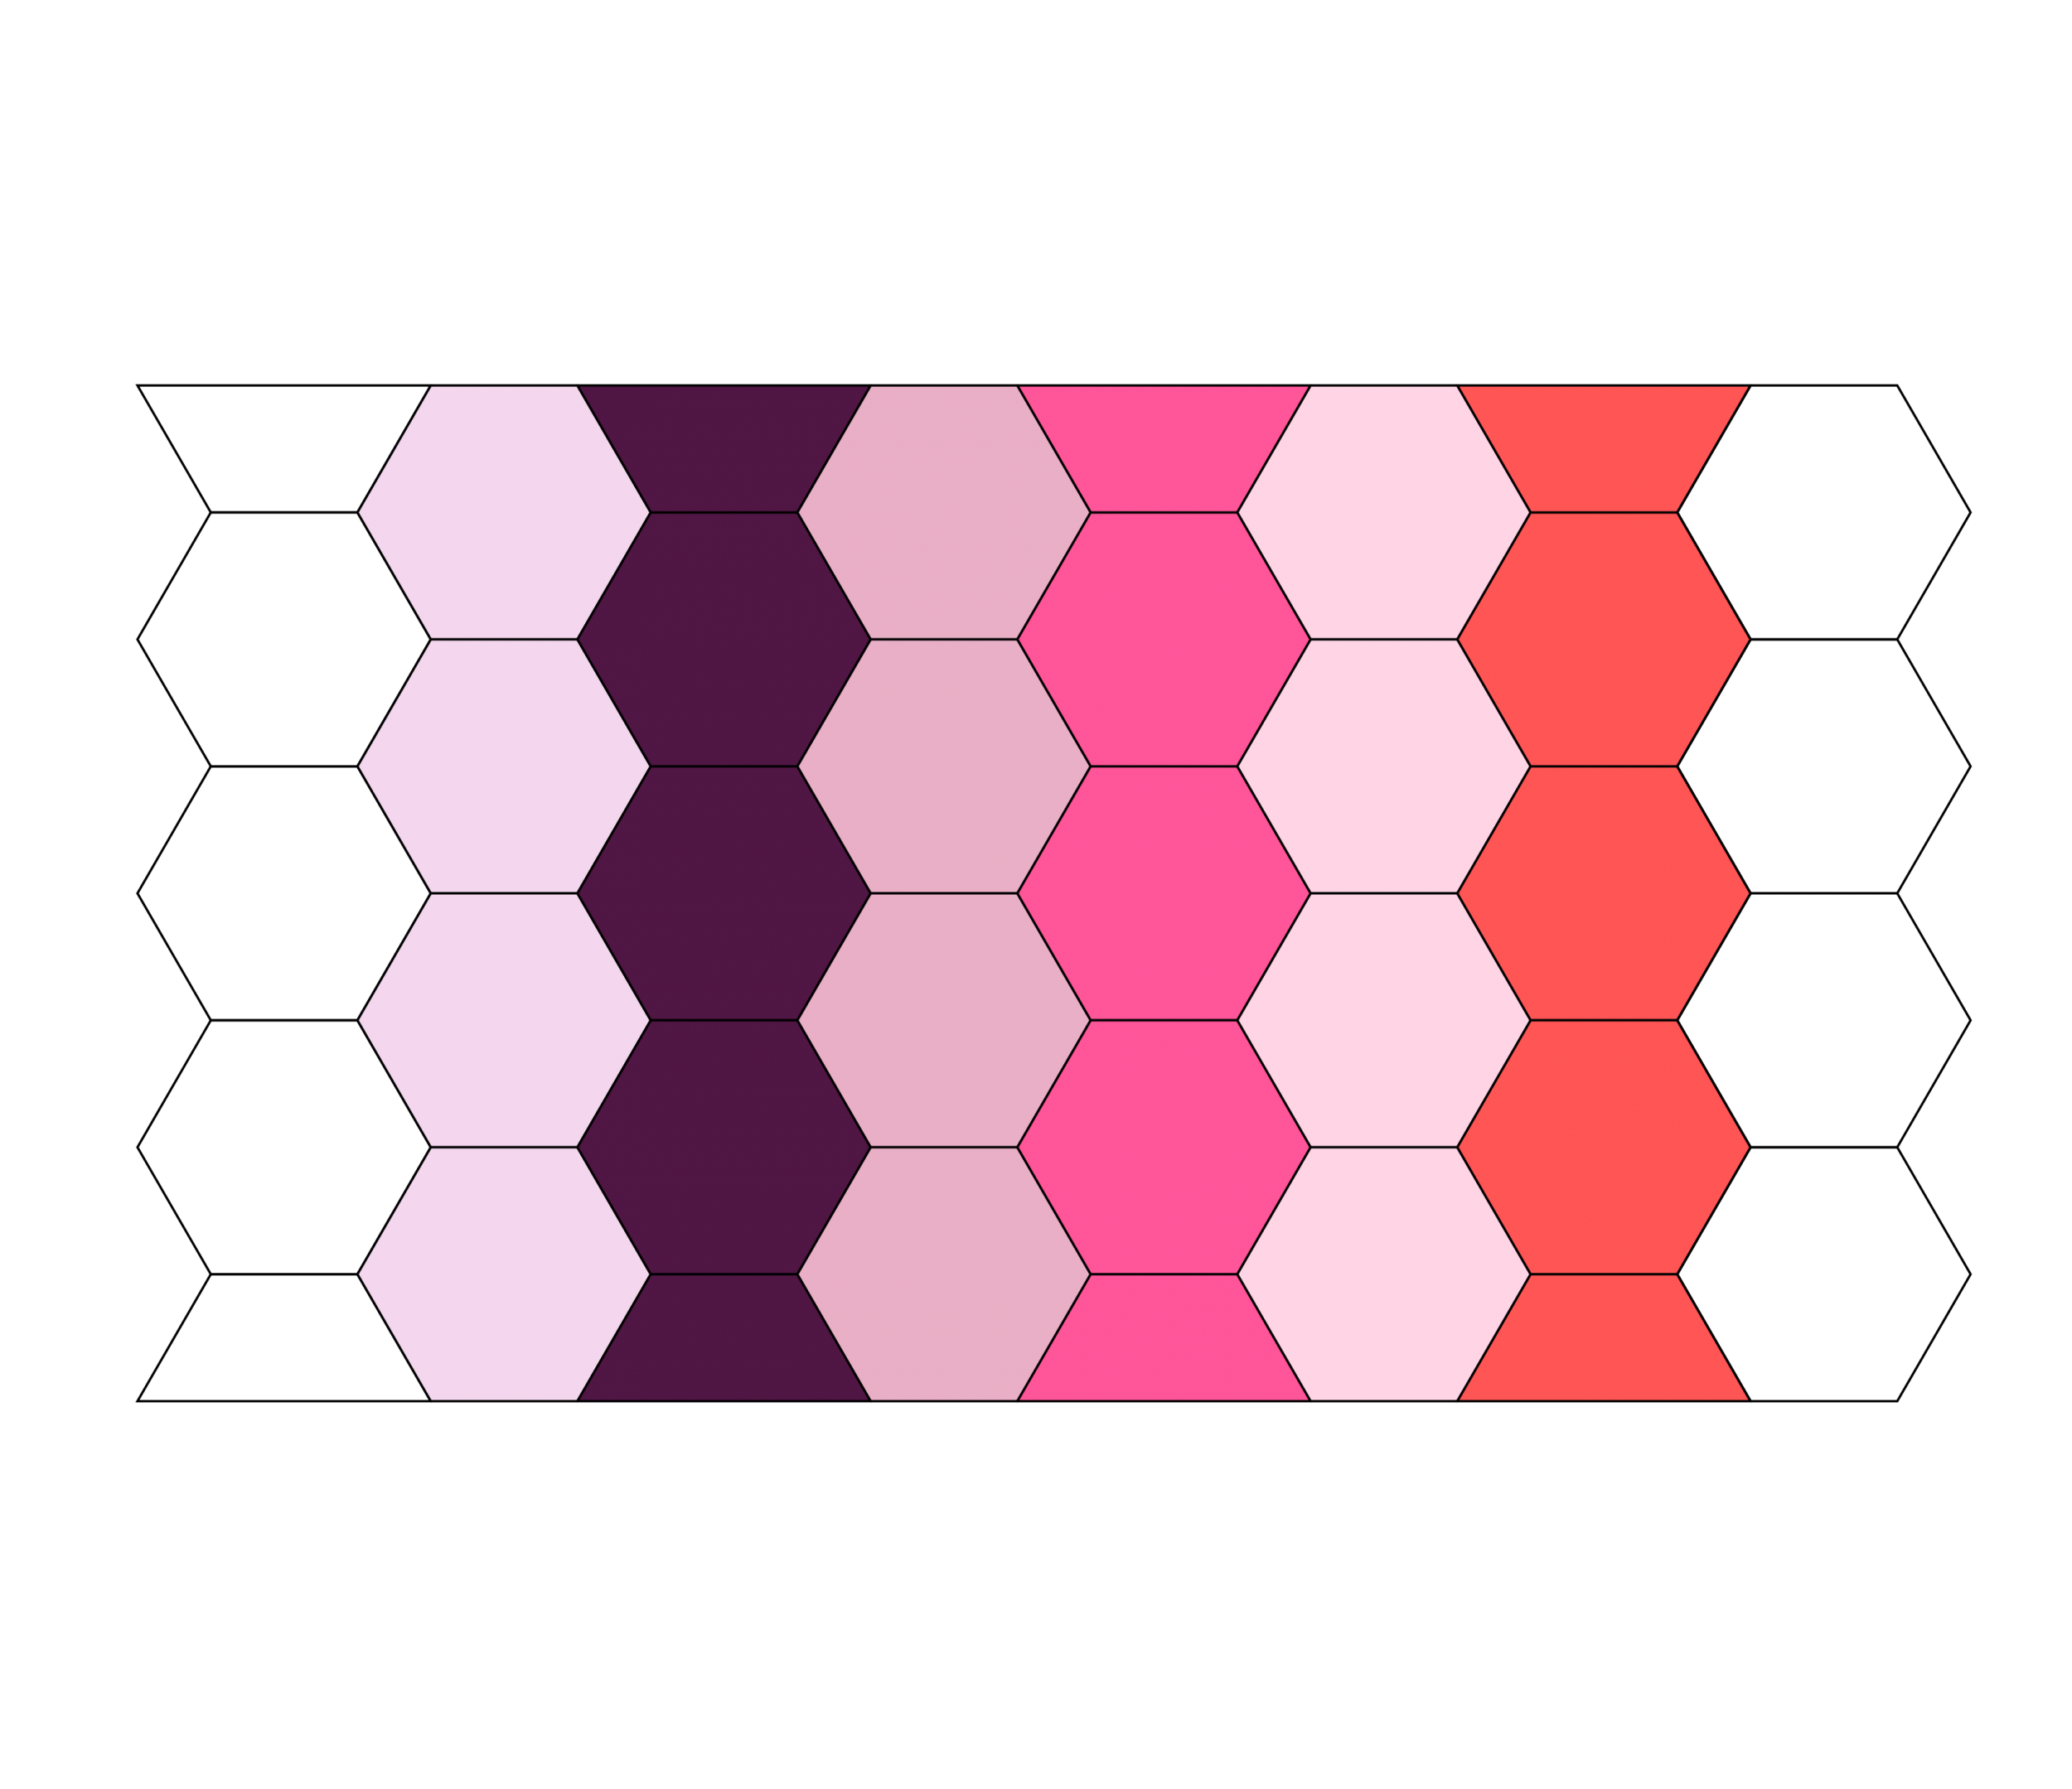
2. This panel is made from two types of rows, Row A and Row B. Row A begins and ends with a half hexagon and has 3 whole hexagons in between. Row B contains 4 whole hexagons.
(See the diagram for reference. Row A is on the left and Row B is on the right.)
Row A & Row B
3. Lay out your hexagons in a pleasing arrangement beginning with Row A made from background fabric and ending with Row B also made from background fabric.
You will have a total of (4) Row A and (4) Row B. (See the diagram for the relative color placement I used for this pouch.)
4. Stitch your rows by adding shapes one at a time. (Find my favorite hack for stitching rows of hexagons here. It’s hack number 4.)
5. Once you have completed stitching your rows, sew the rows together one at a time until you complete the panel.
(You can remove papers as you go once shapes are completely sewn in to make it easier to handle, or you can wait to pull papers at the end.)
6. Press your panel, remove any remaining papers, and press again.
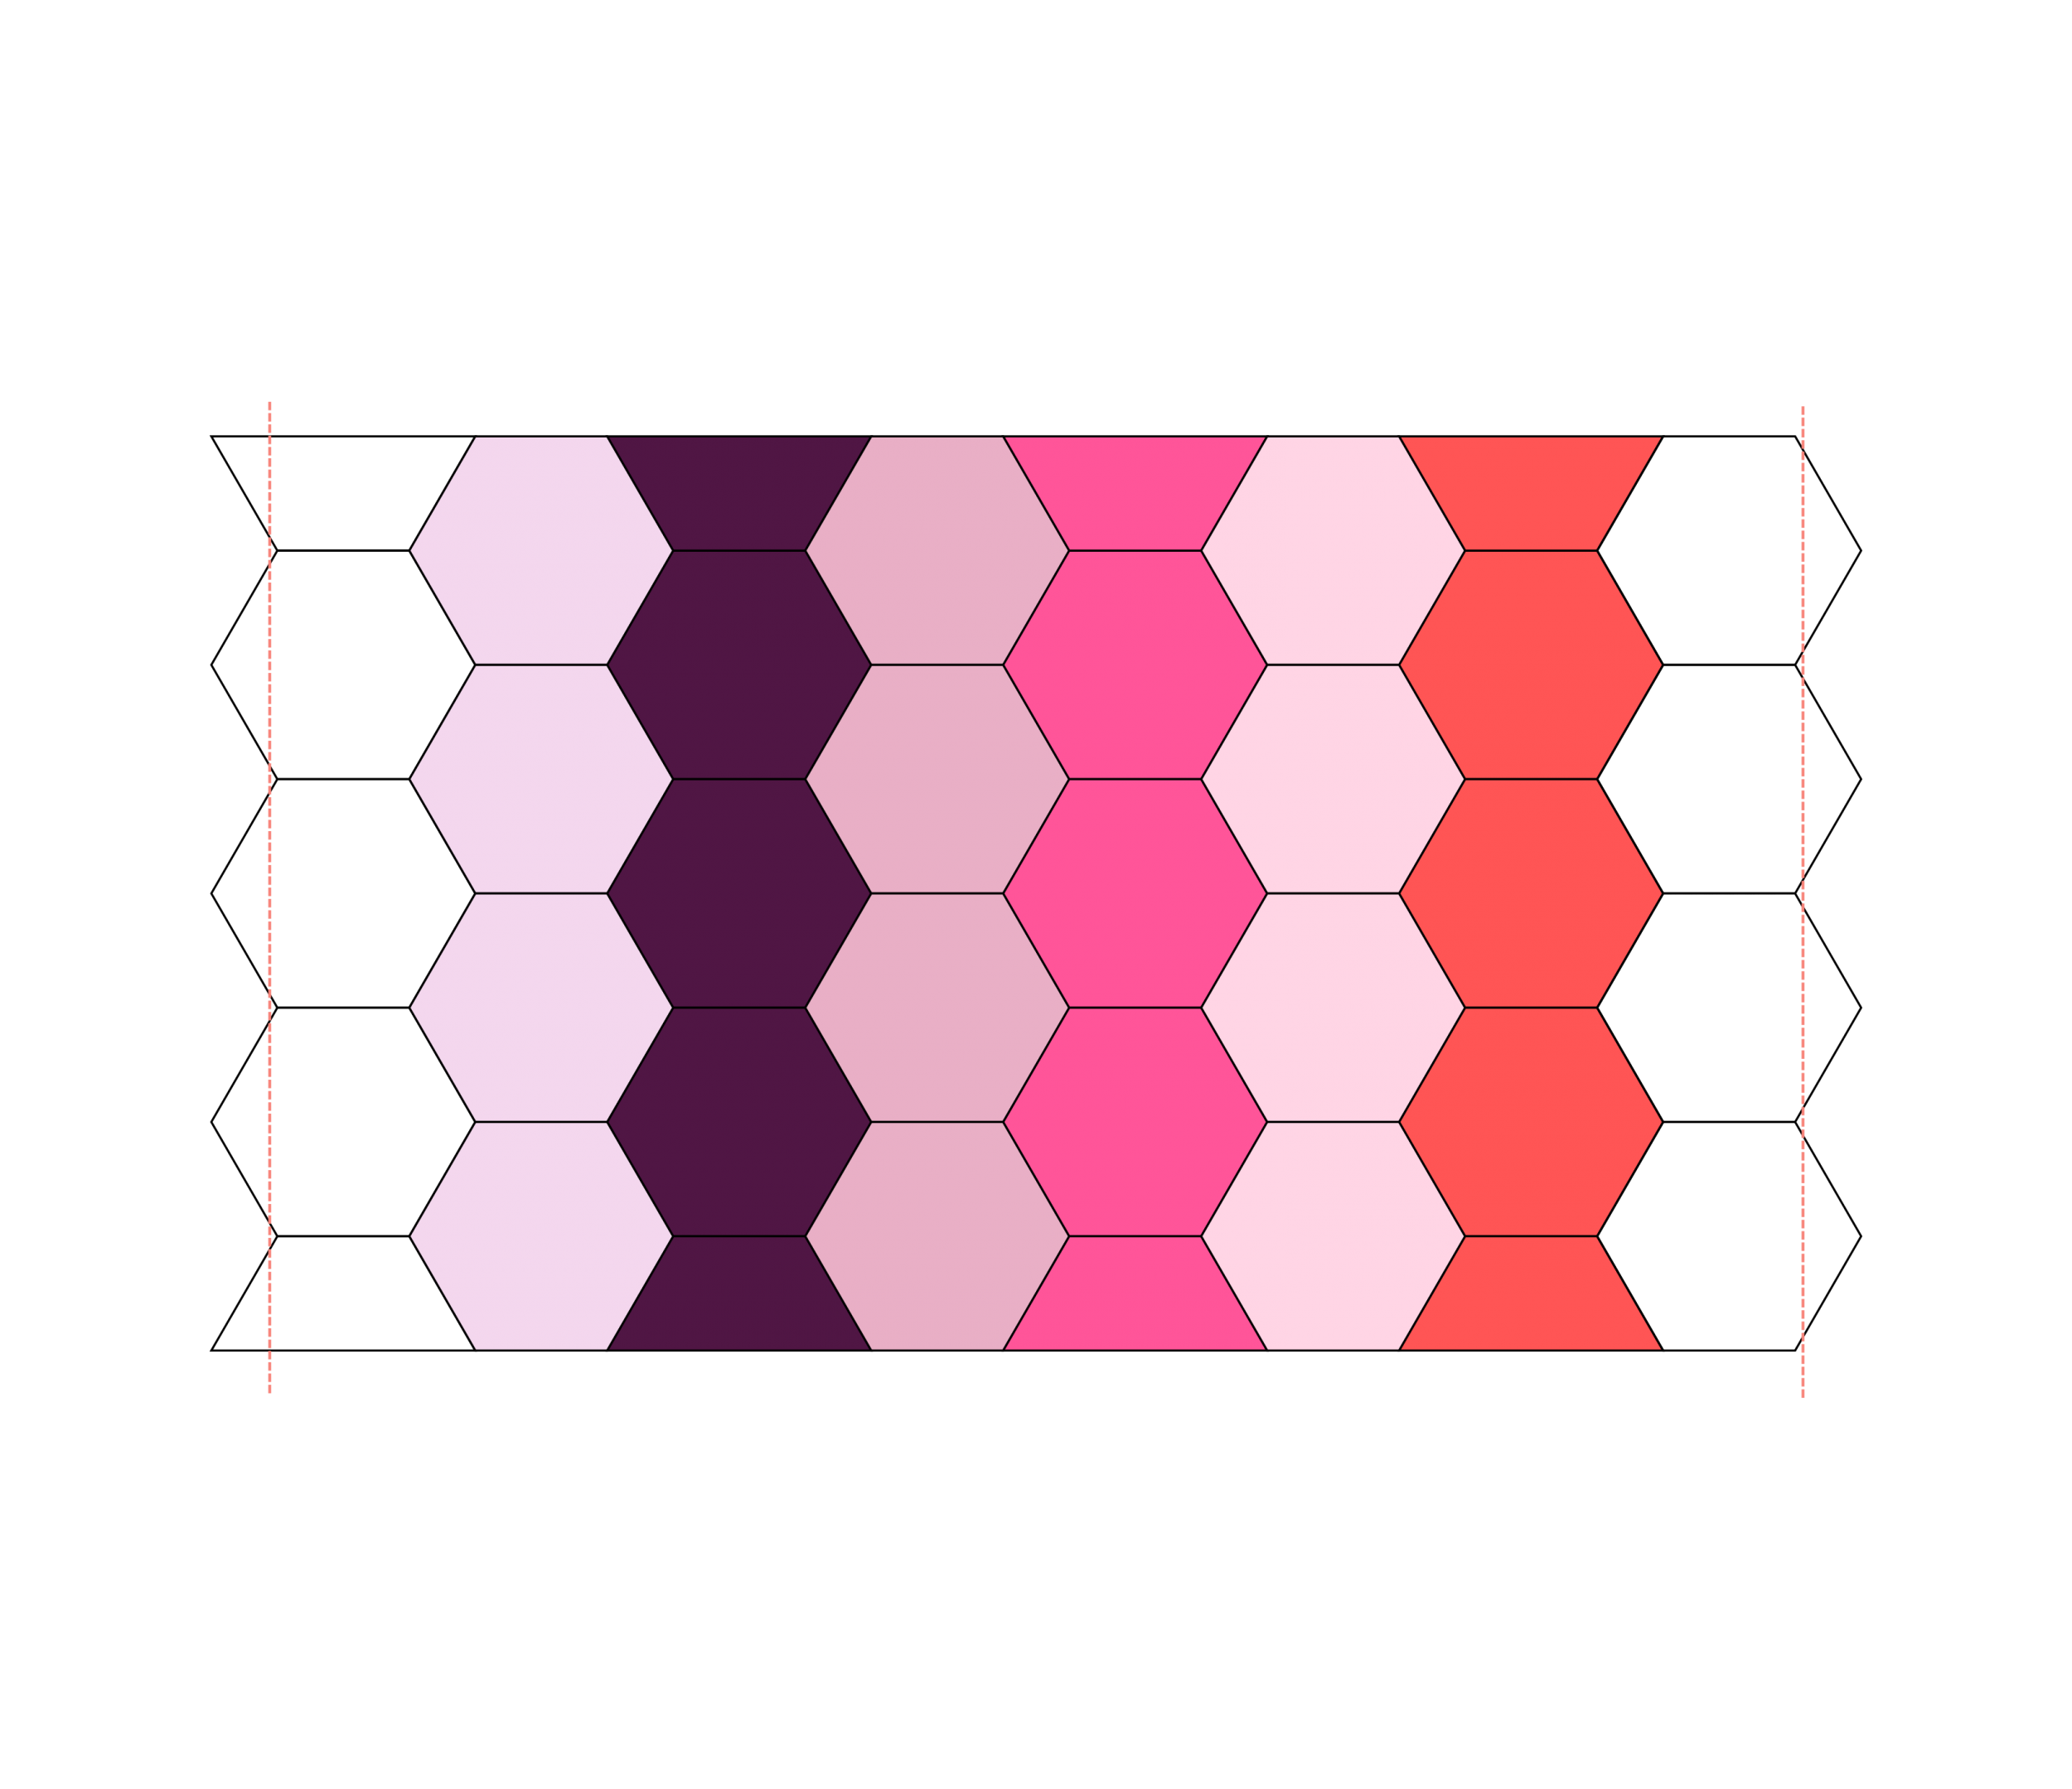
7. Open the seam allowance around the perimeter of the panel out and away from the panel, and press in place.
8. Trim the panel 1/4” away from where the papers have been on the top and bottom of the panel.
9. Trim just outside the horizontal seams on the left and right of the panel, per the diagram.
Add Borders to the Hexagon Panel
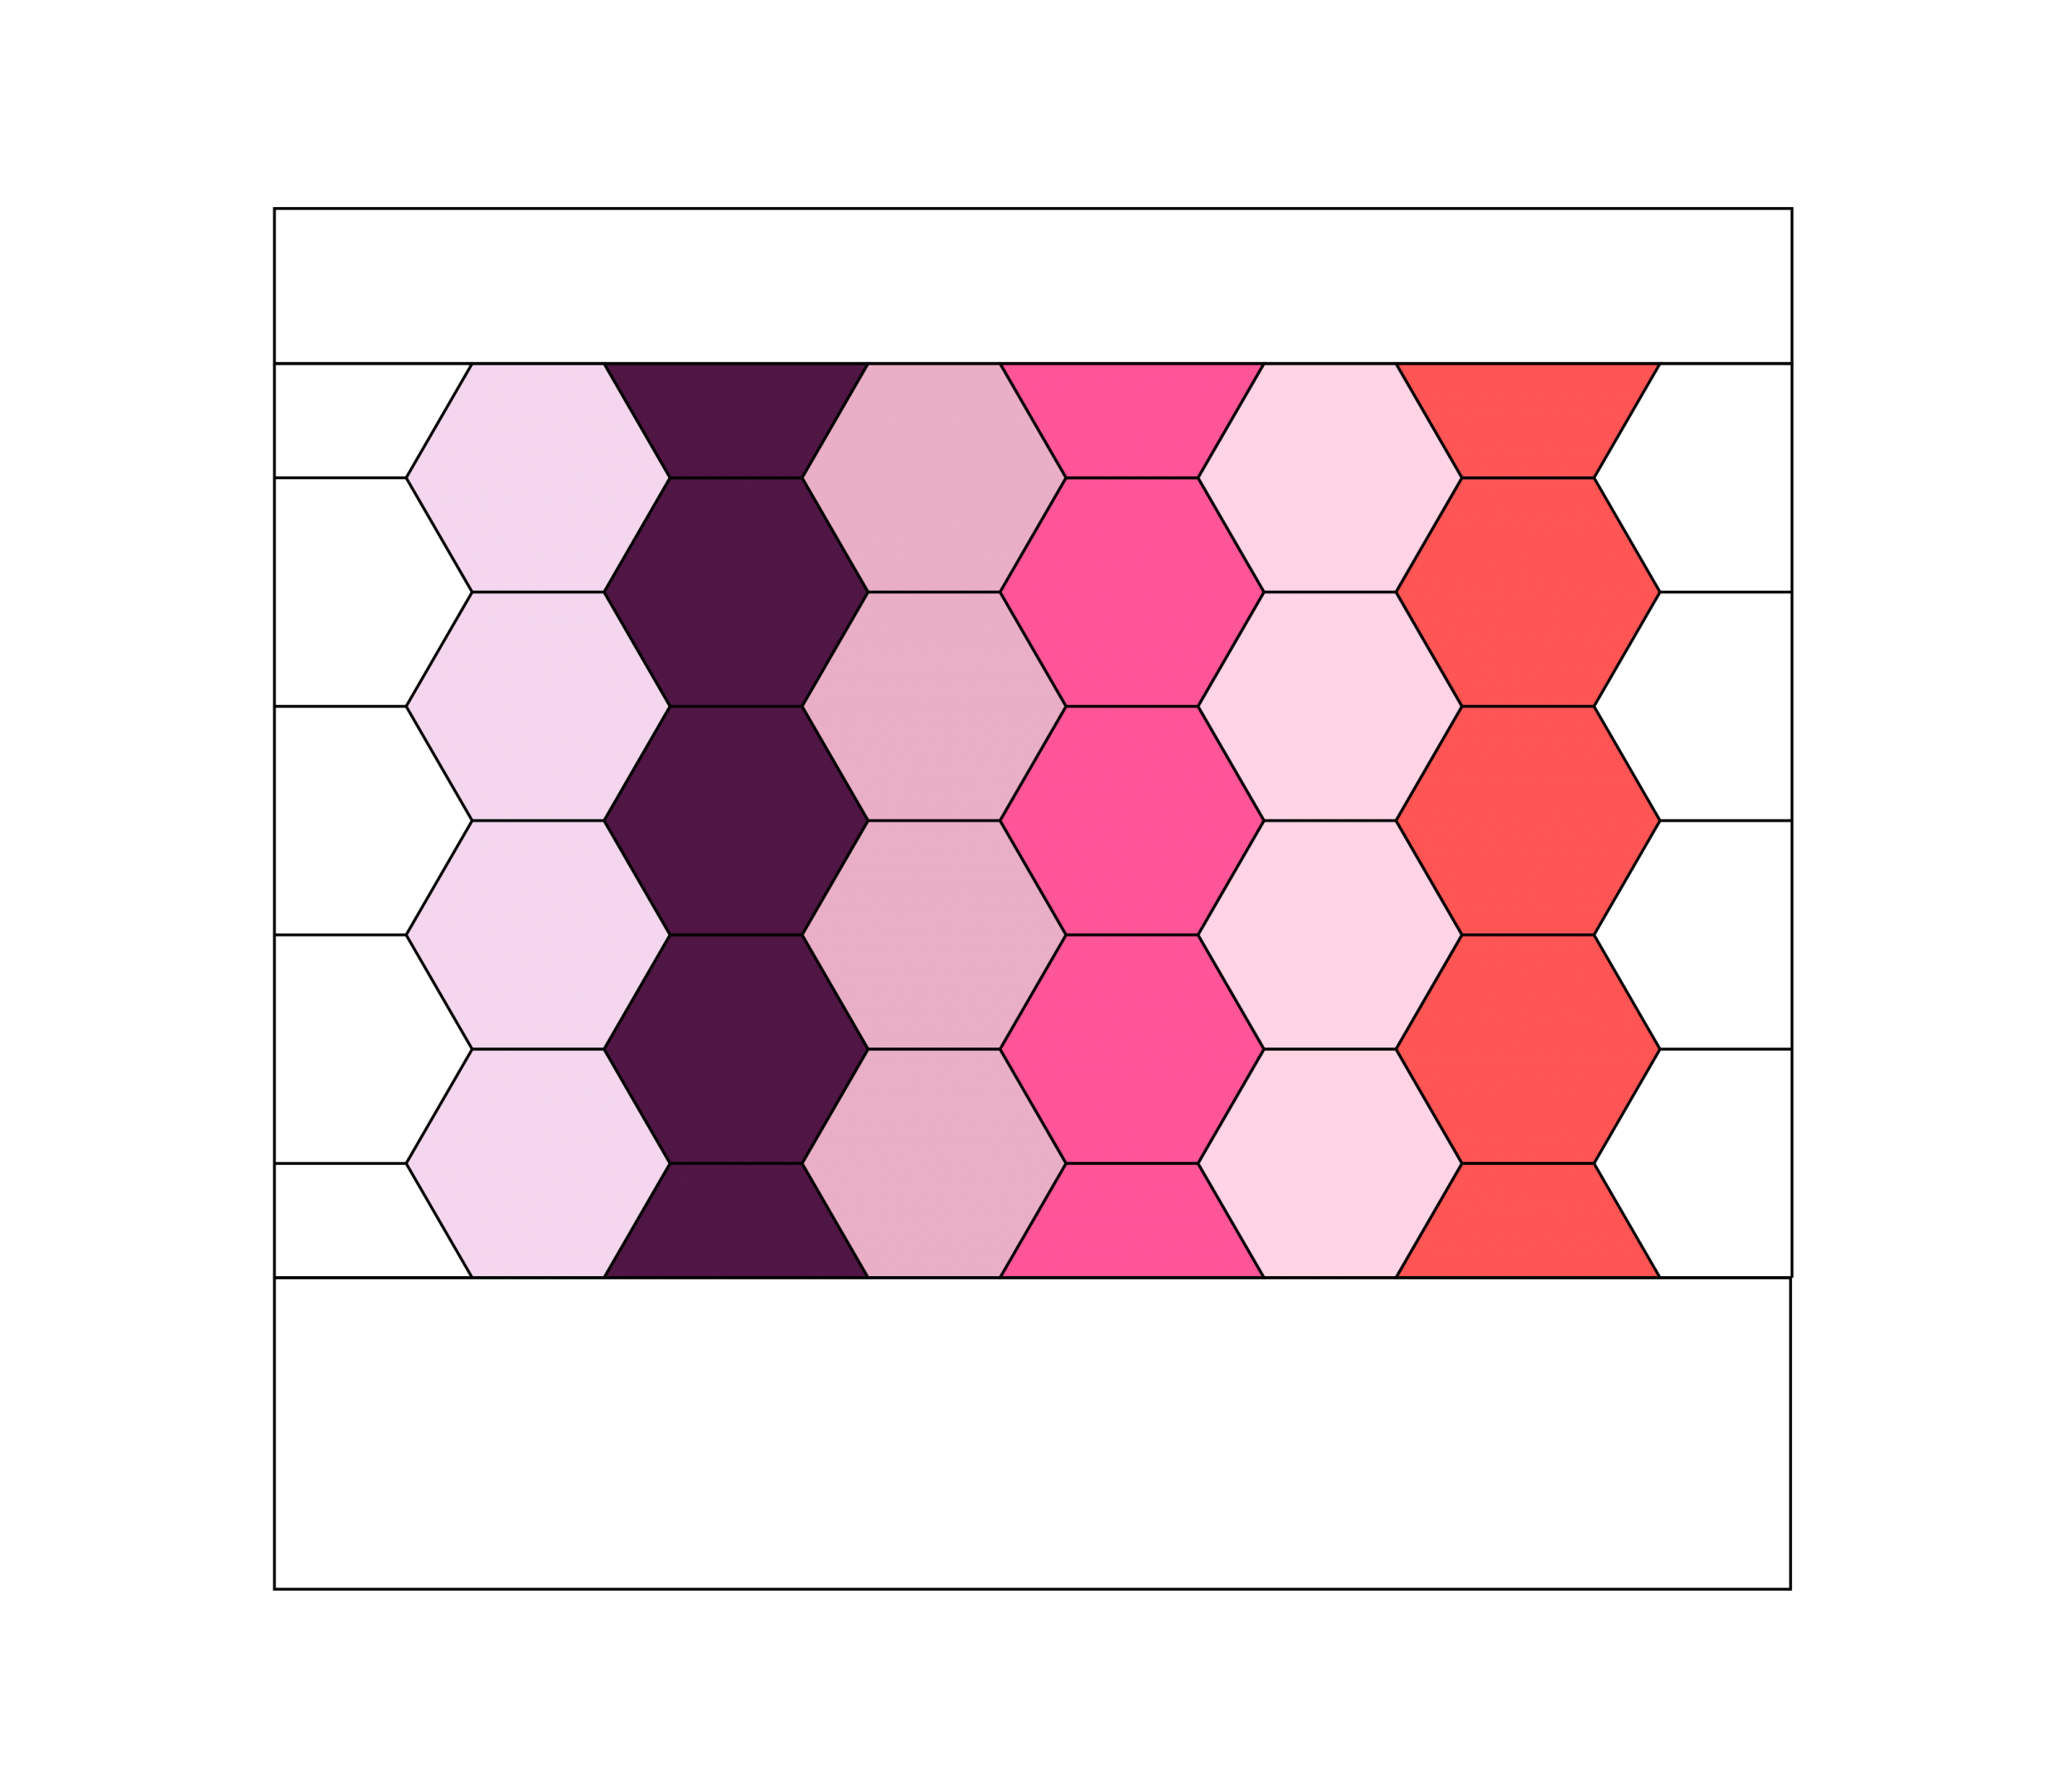
10. Sew the 1.5” x 11” rectangle to the top of the panel by machine. Press seam away from the EPP panel.
11. Sew the 2.5” x 11” rectangle to the bottom of the panel by machine. Press seam away from the EPP panel.
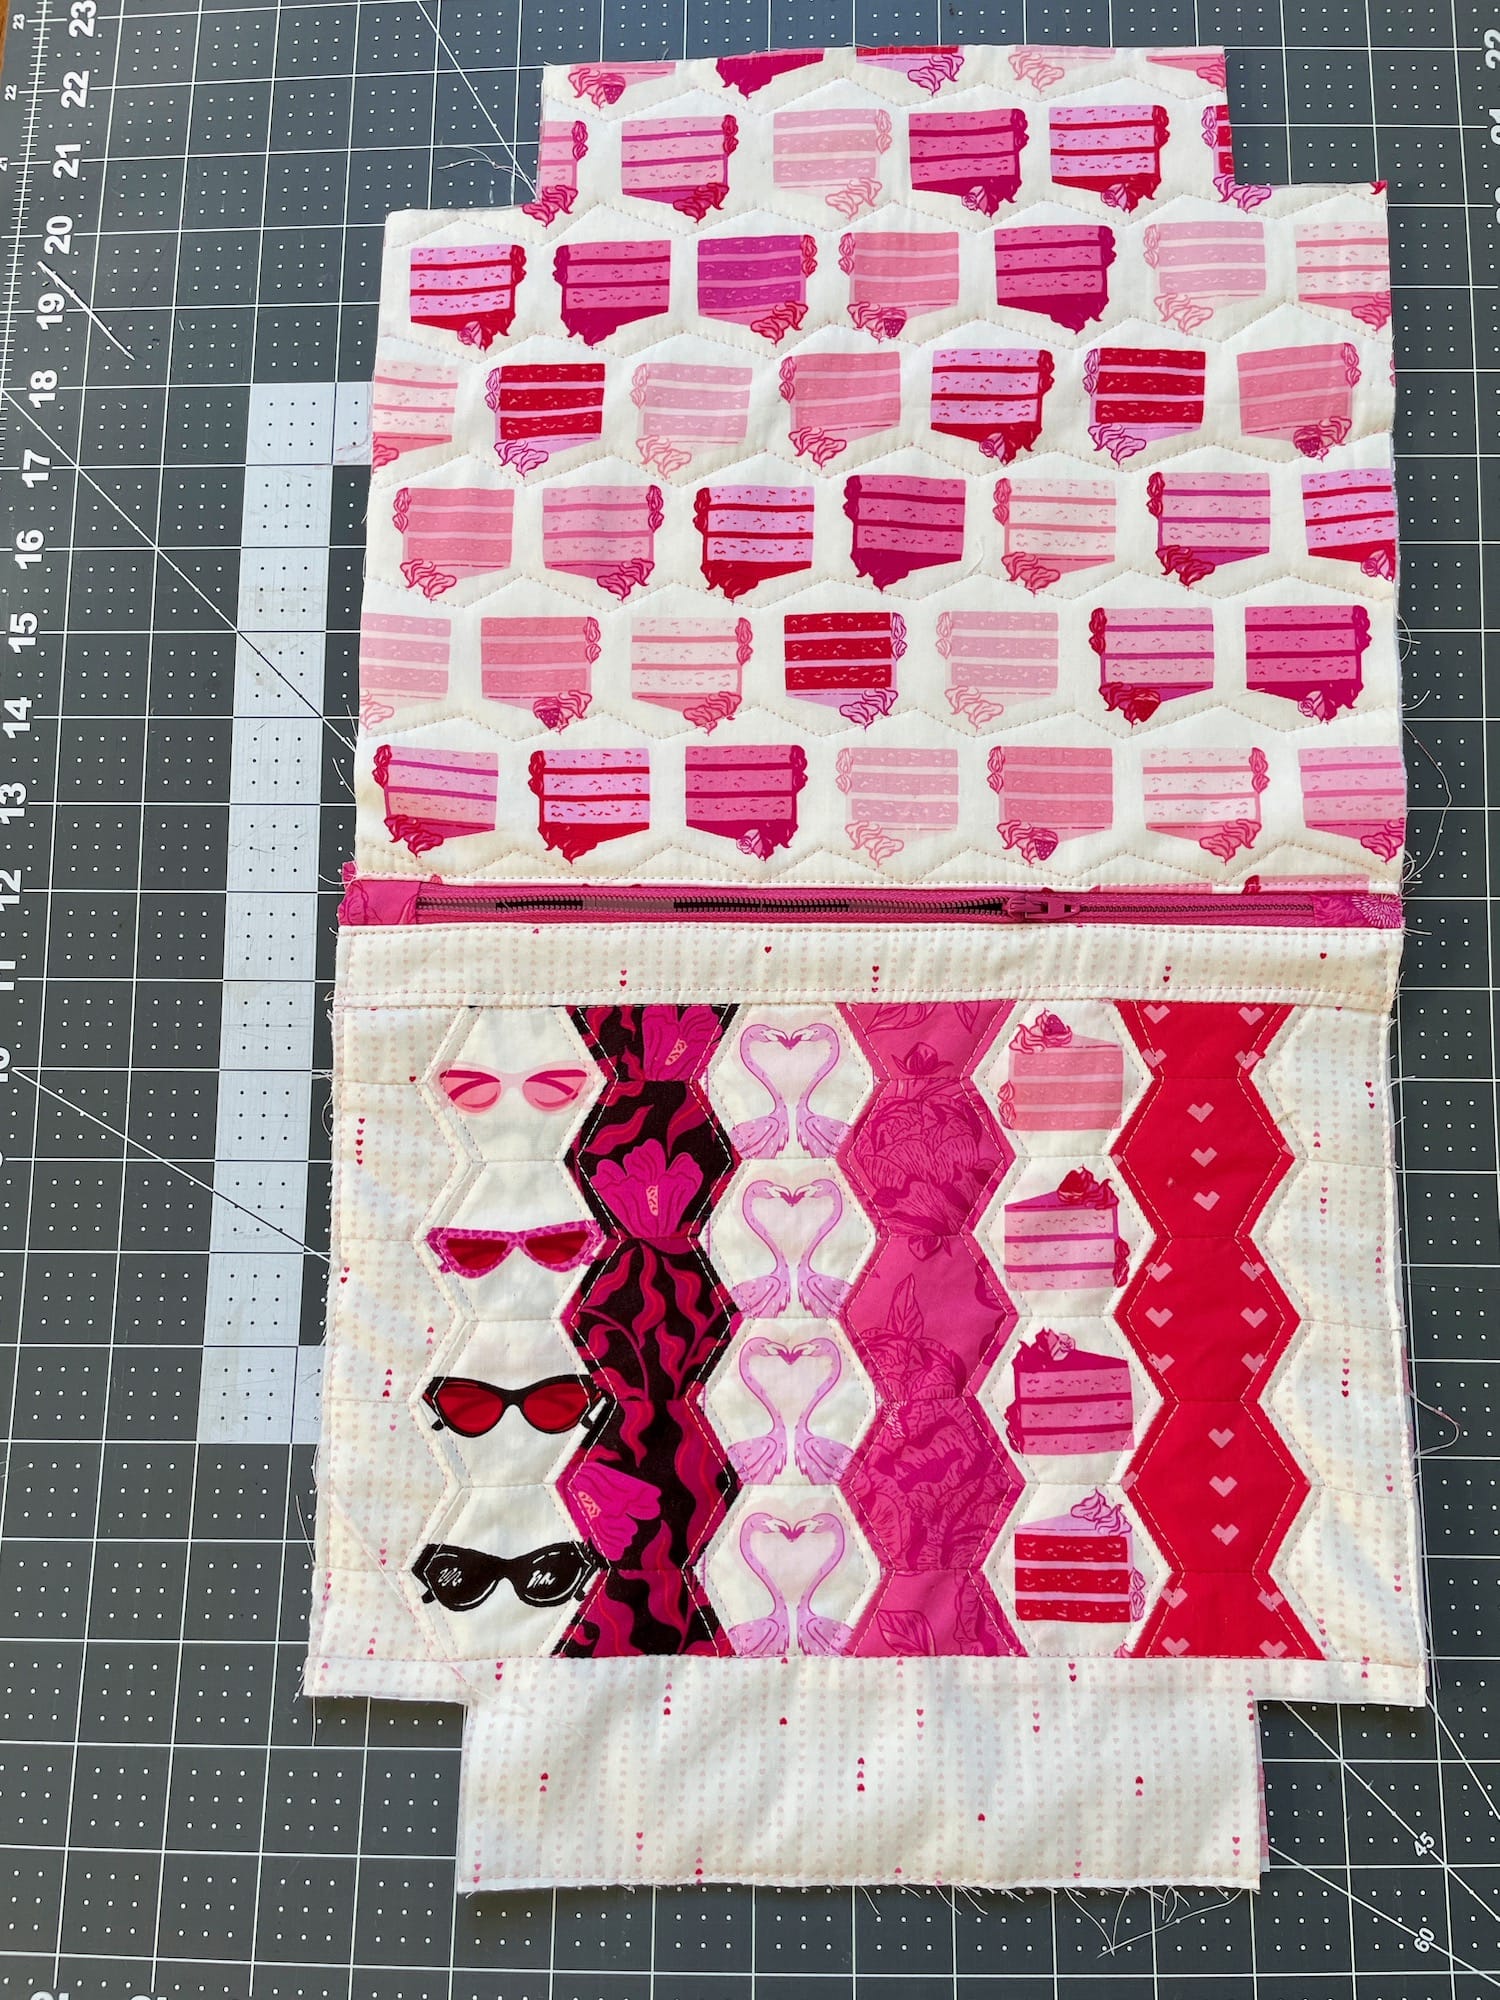
12. Baste and quilt as desired. I machine quilted straight lines on my panel using the outline of the hexagons as a guide, approximately 1/8”-1/4” one either side of the vertical seams.
13. Baste and quilt the back panel as desired.
14. Trim both panels to 11” square.
Sew the Hexagon Pouch Together
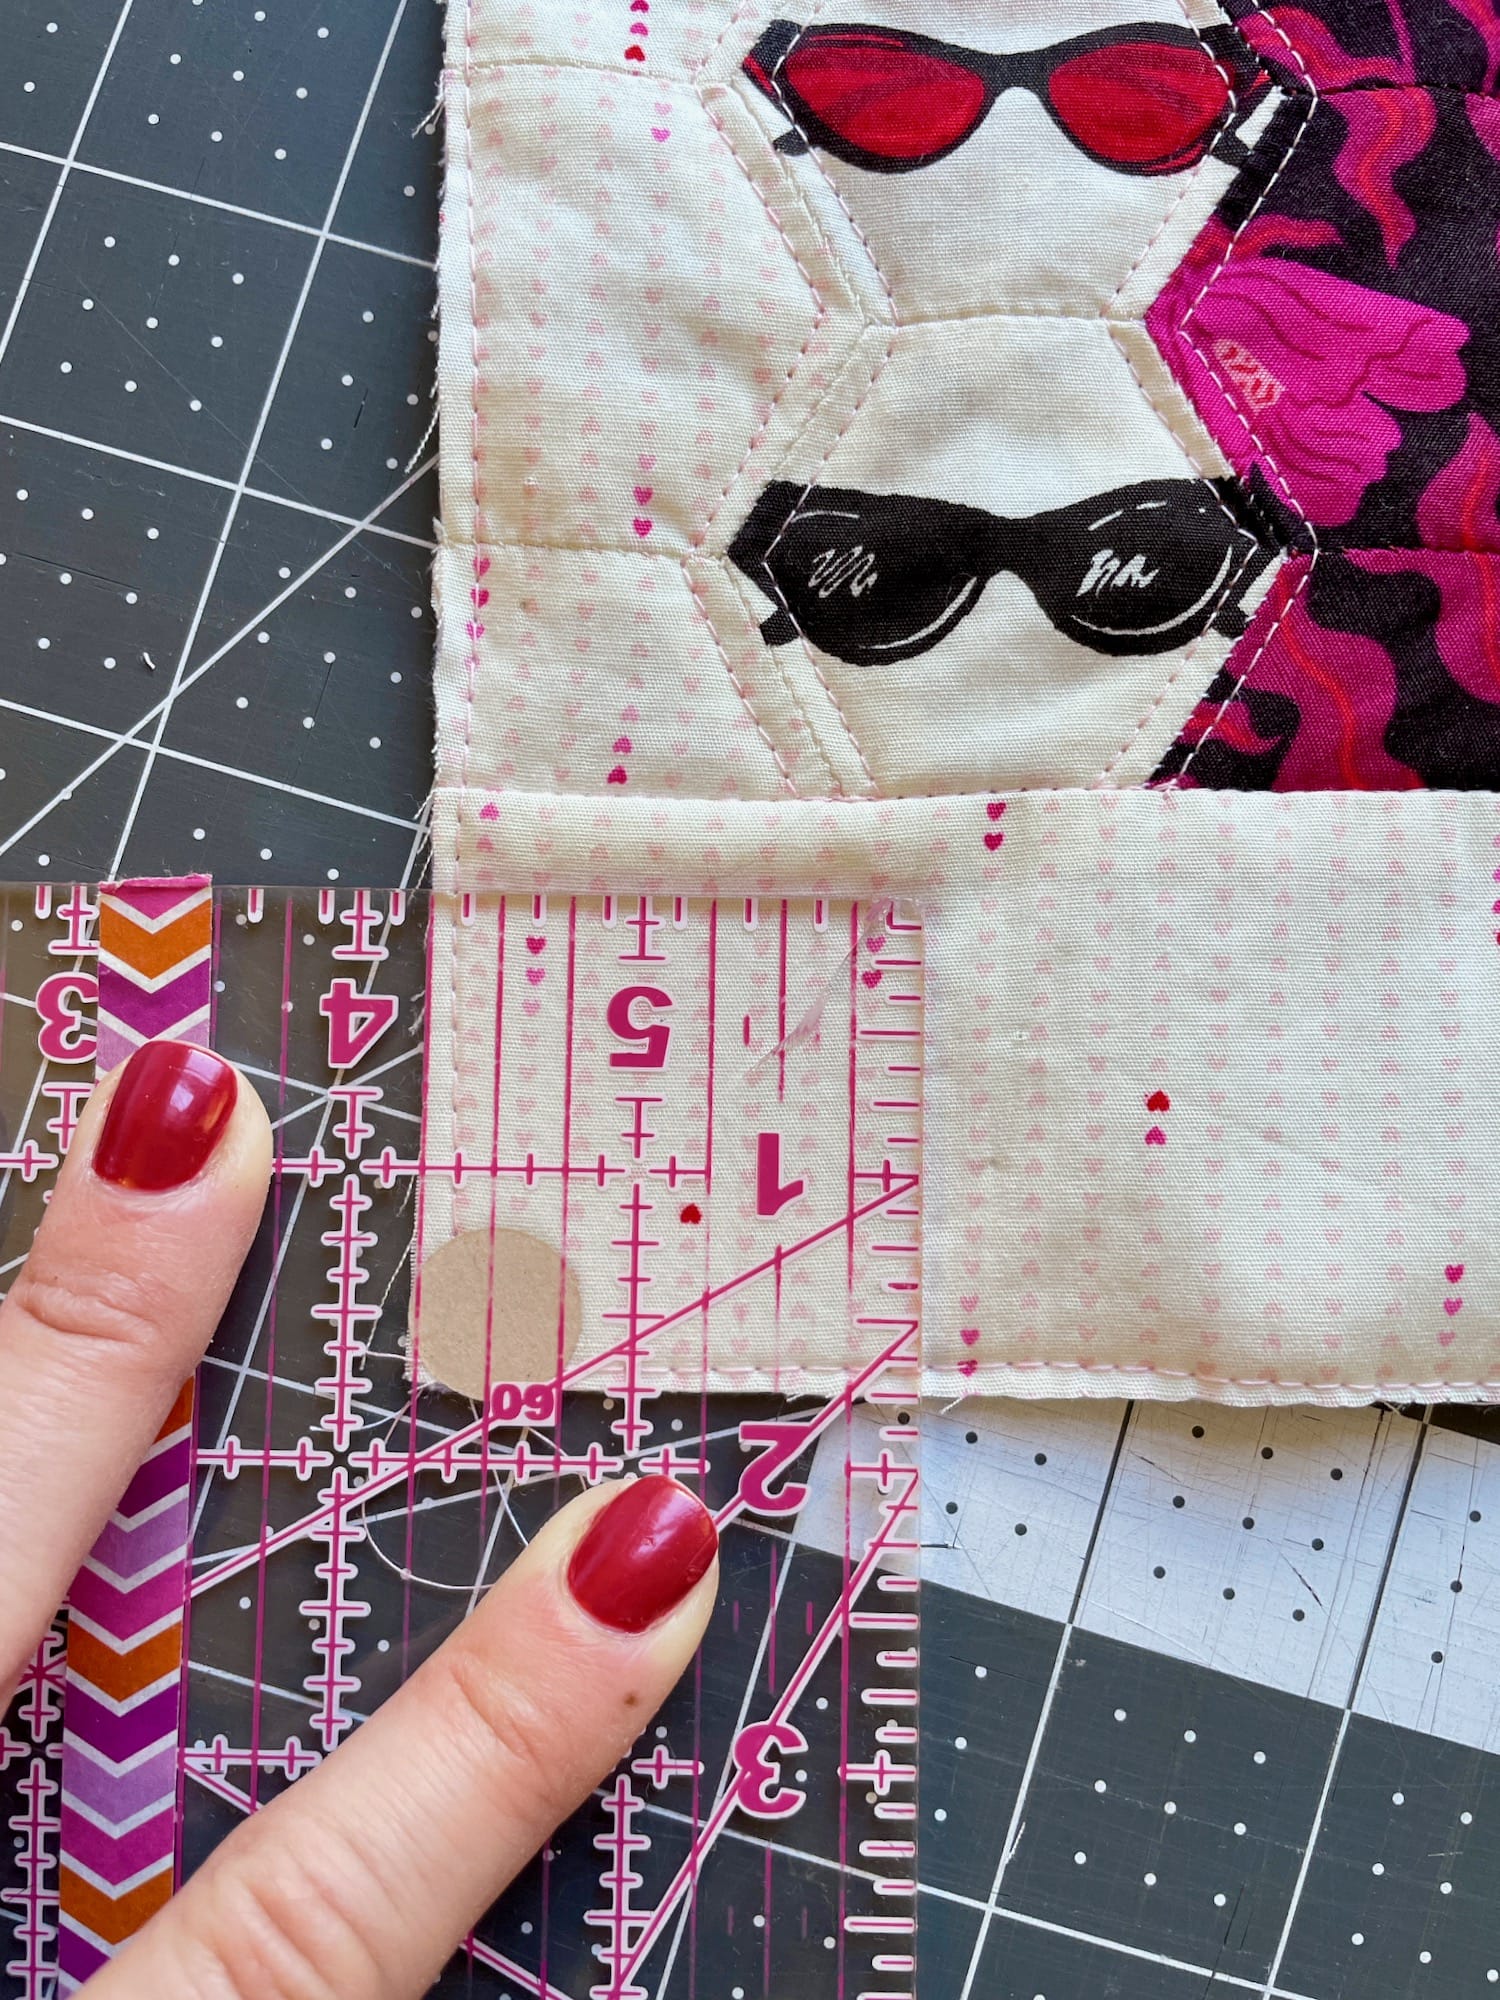
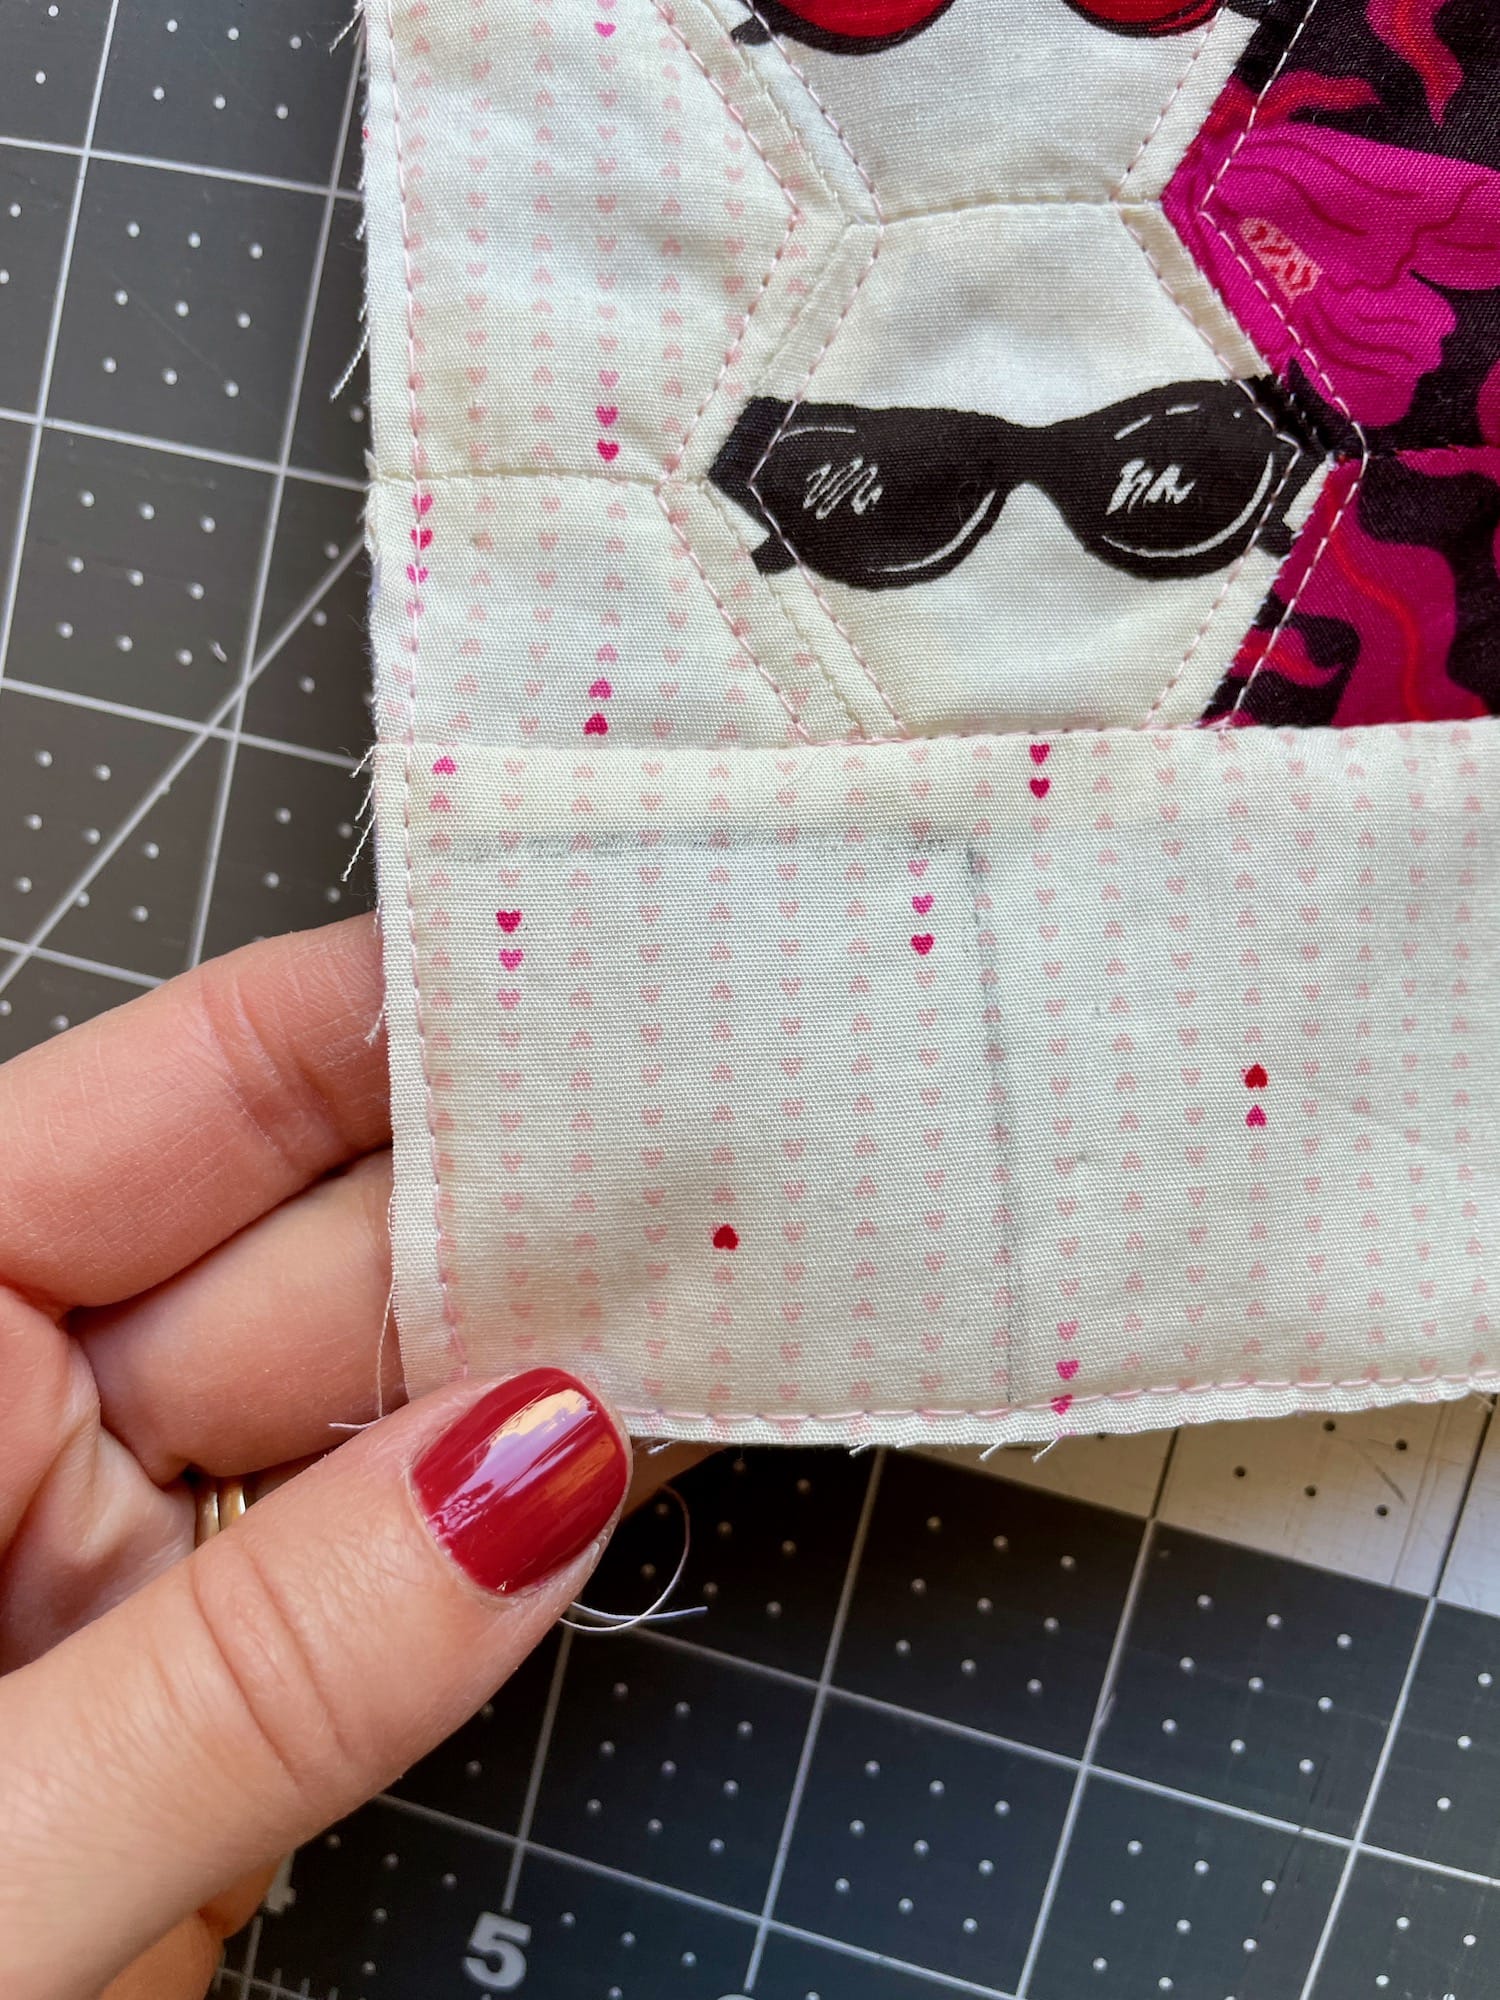
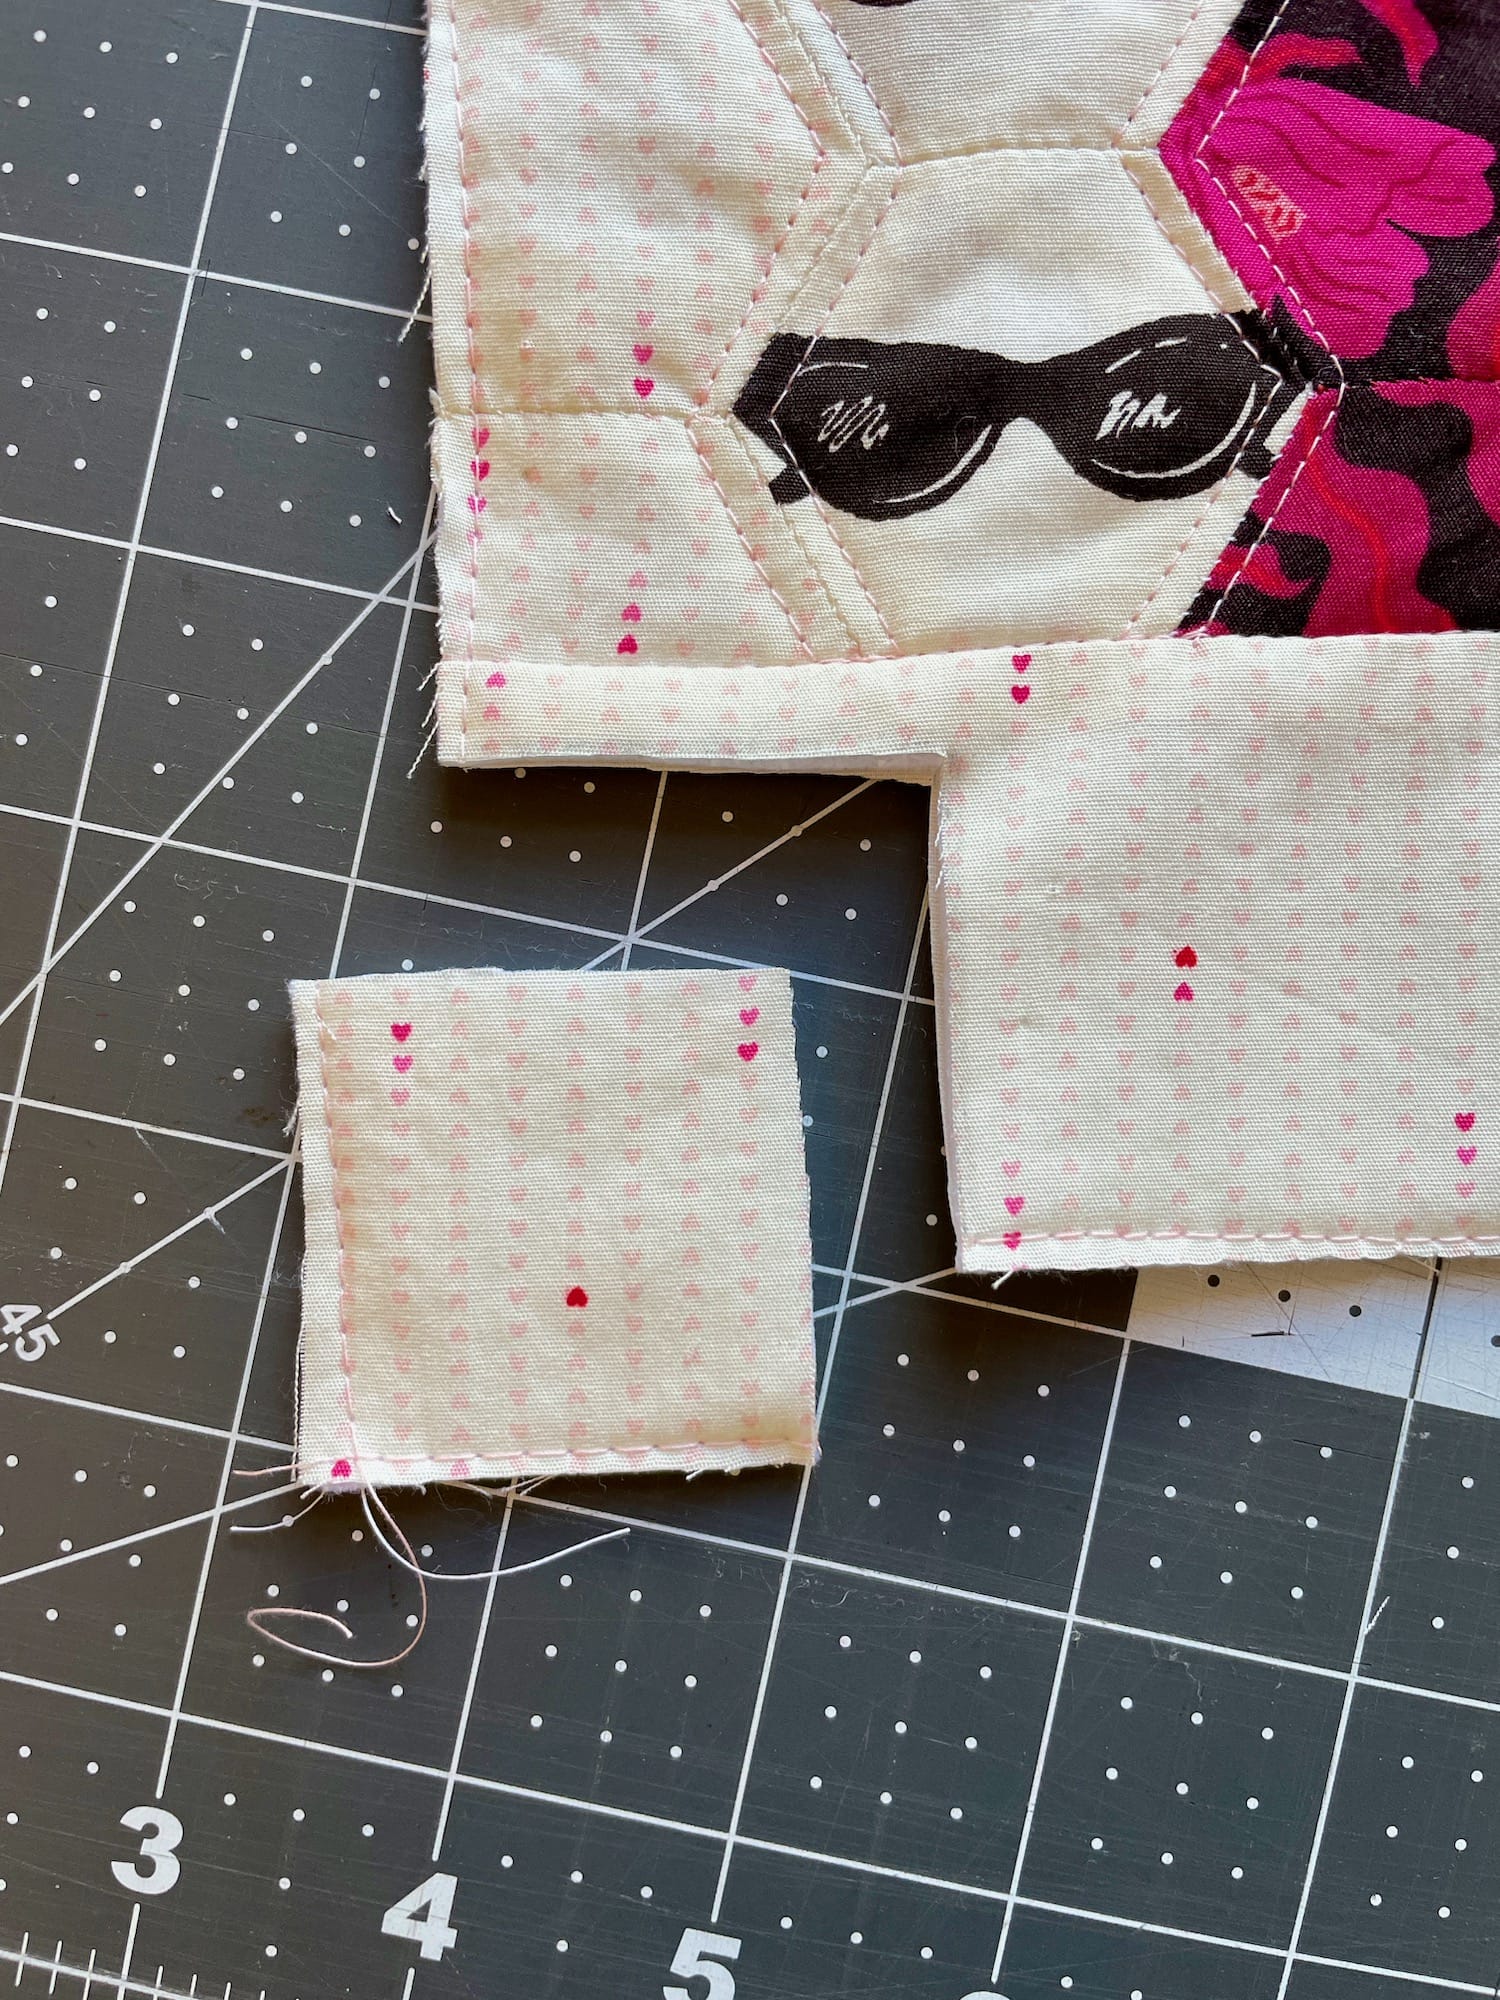
15. Using a quilt ruler, trace a 1.5” square at the bottom corner of each panel. (Don’t forget the lining panels!)
16. Cut the square out of the bottom corner of each panel with very sharp scissors.
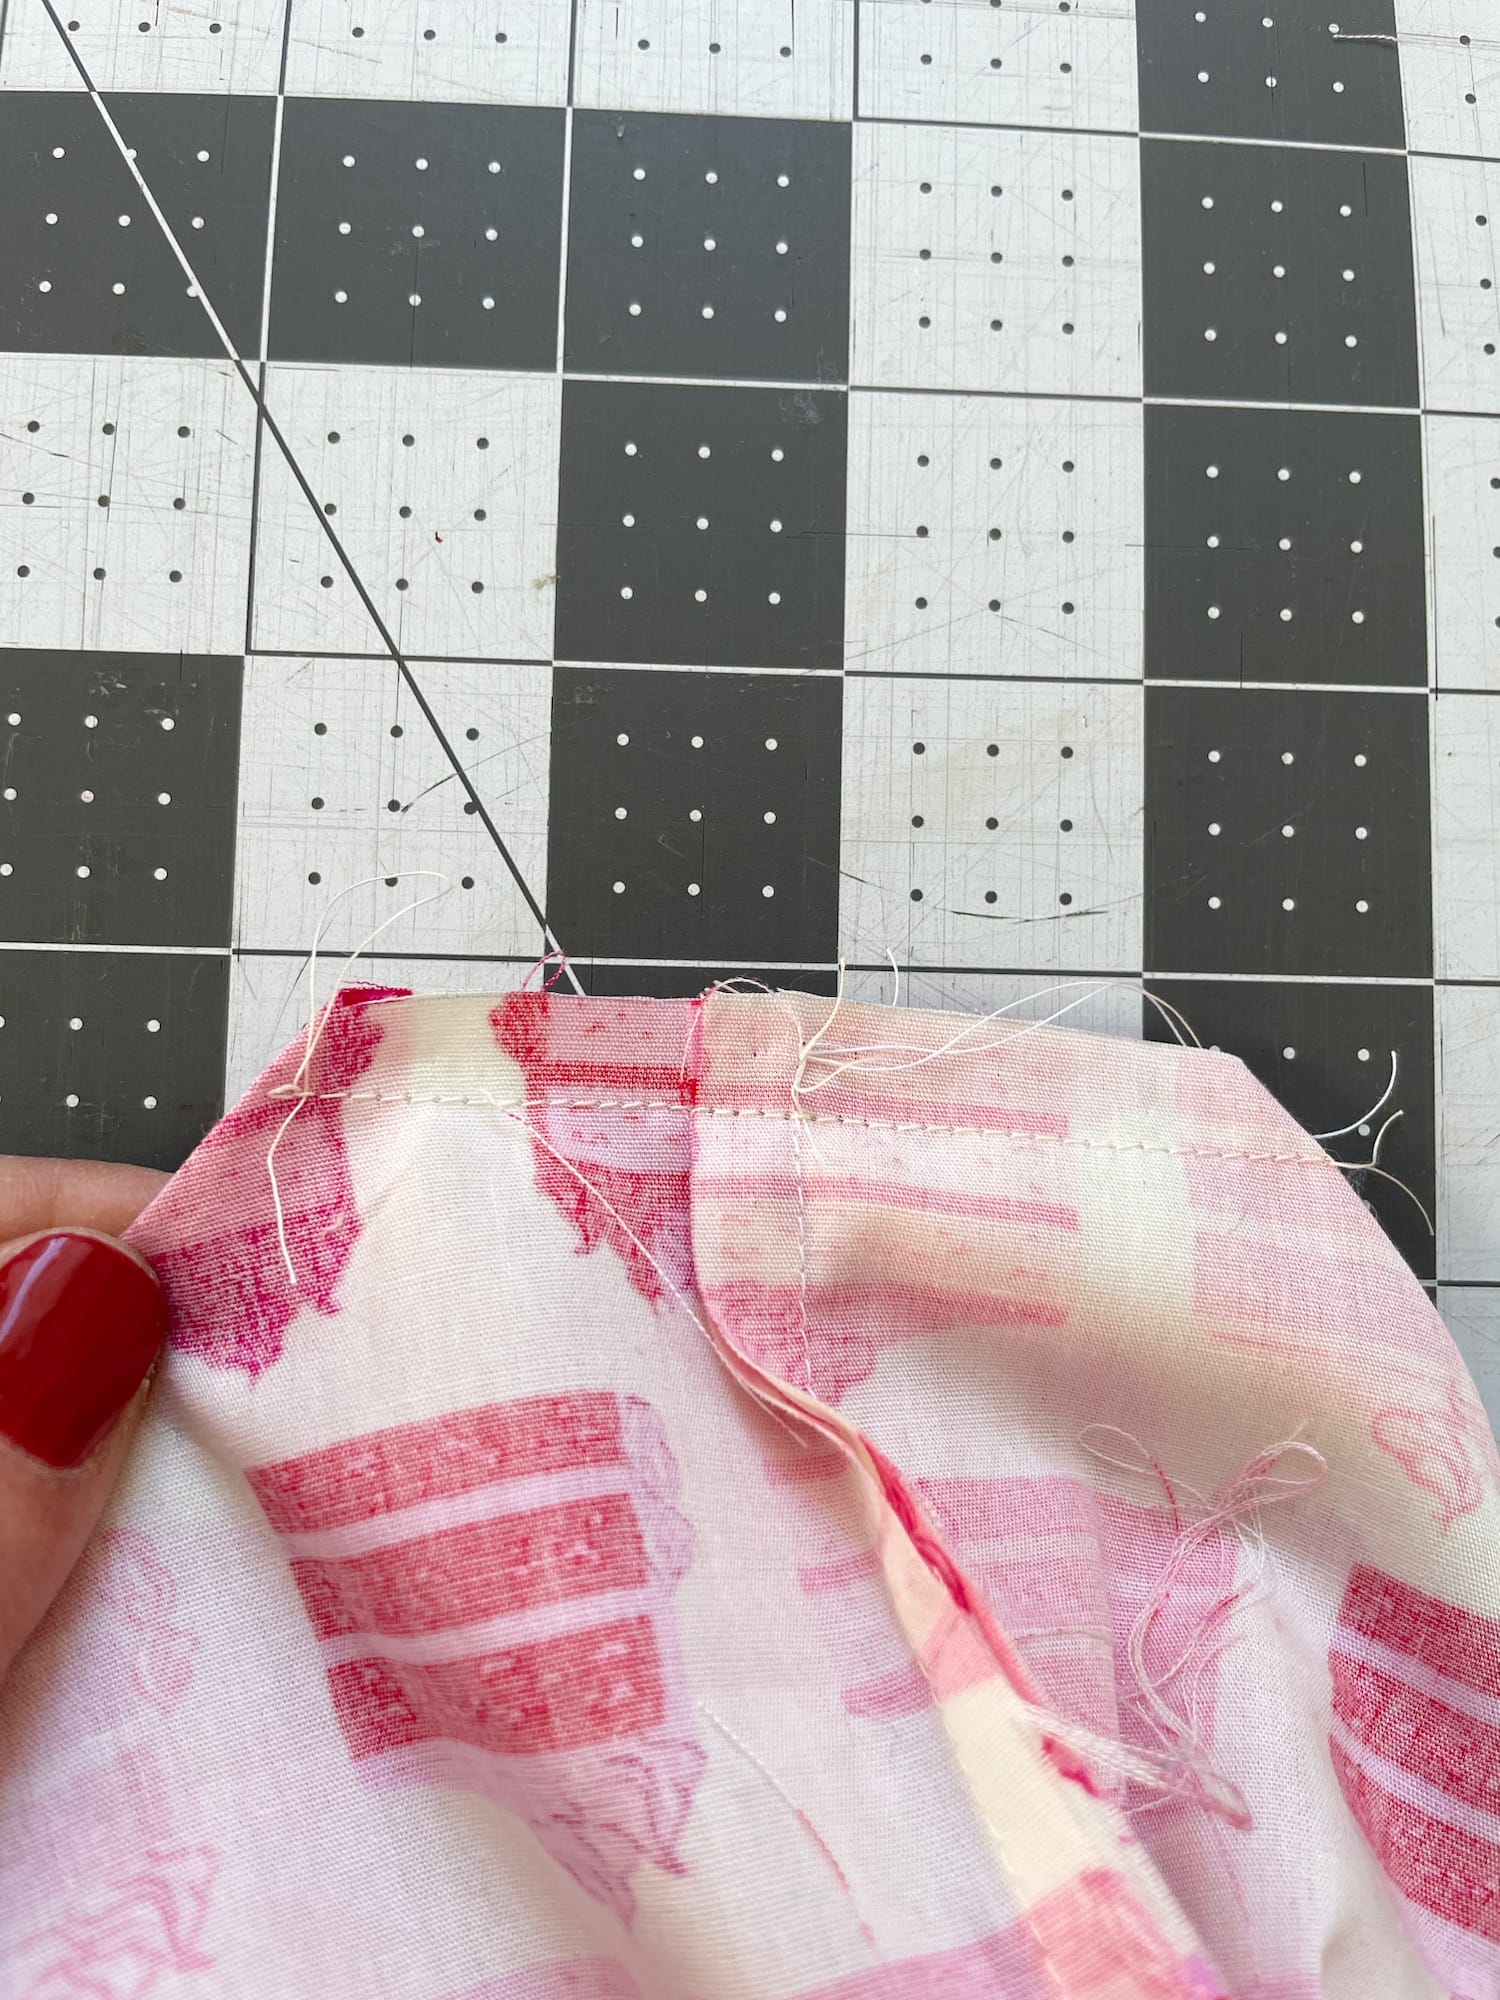
17. Install the zipper with your preferred method or use this tutorial. (After step 23, come back here to complete the pouch.)
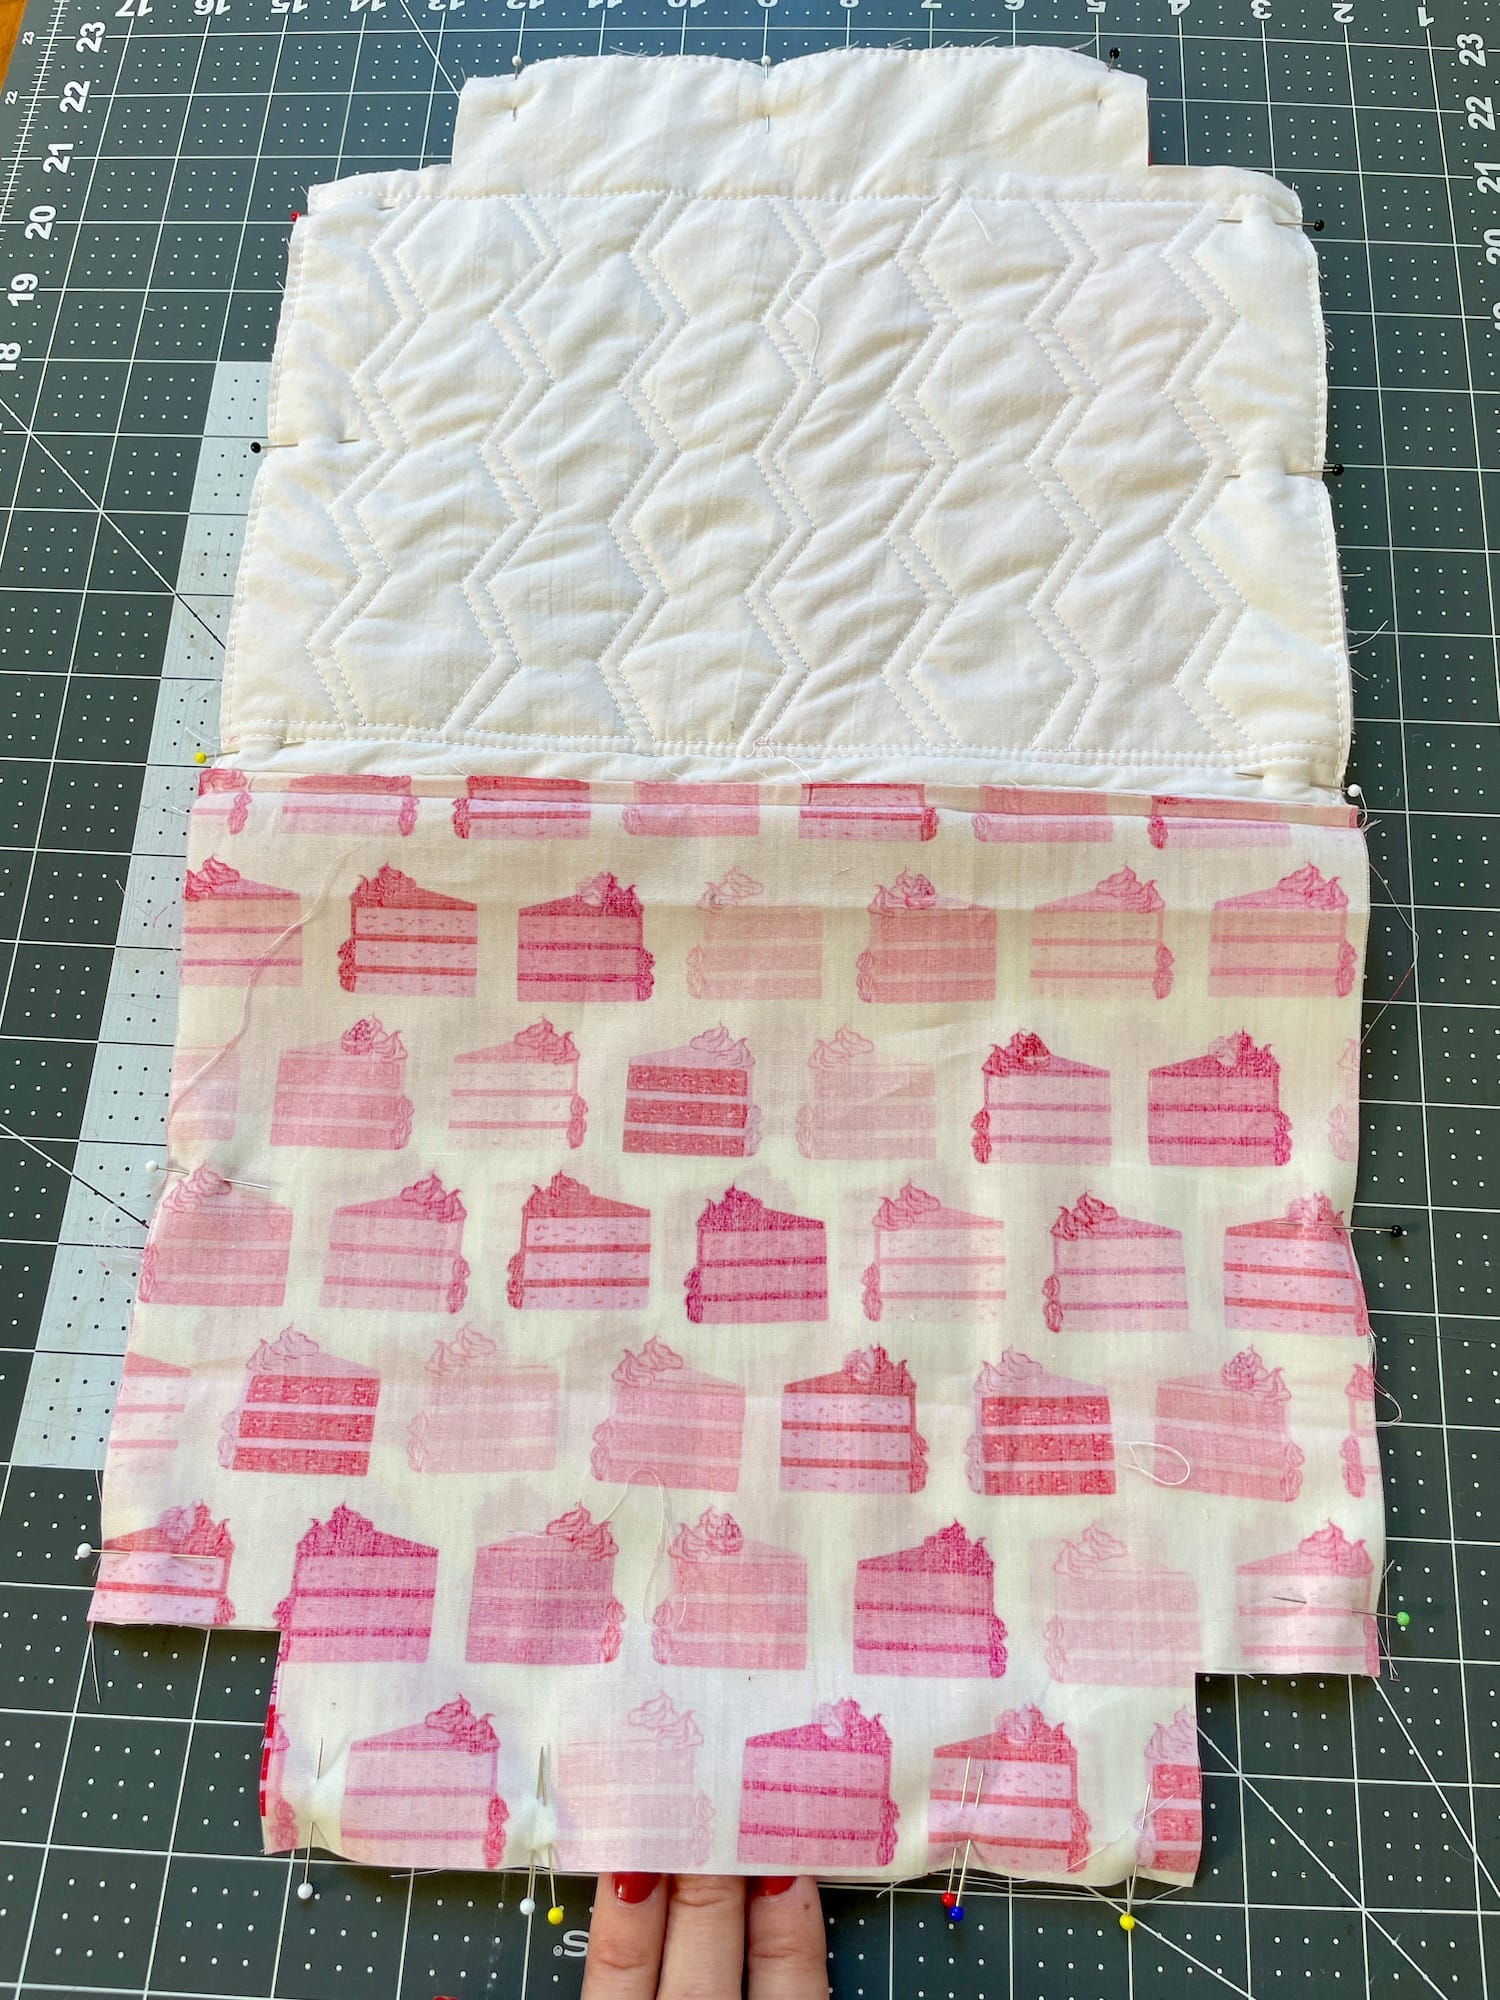
18. Make sure the zipper is UNZIPPED. Then, pin the outer panels to each other, and the lining panels to each other. Leave an opening in the bottom of the lining to turn.
19. Sew around the perimeter of the pouch, skipping the open squares.
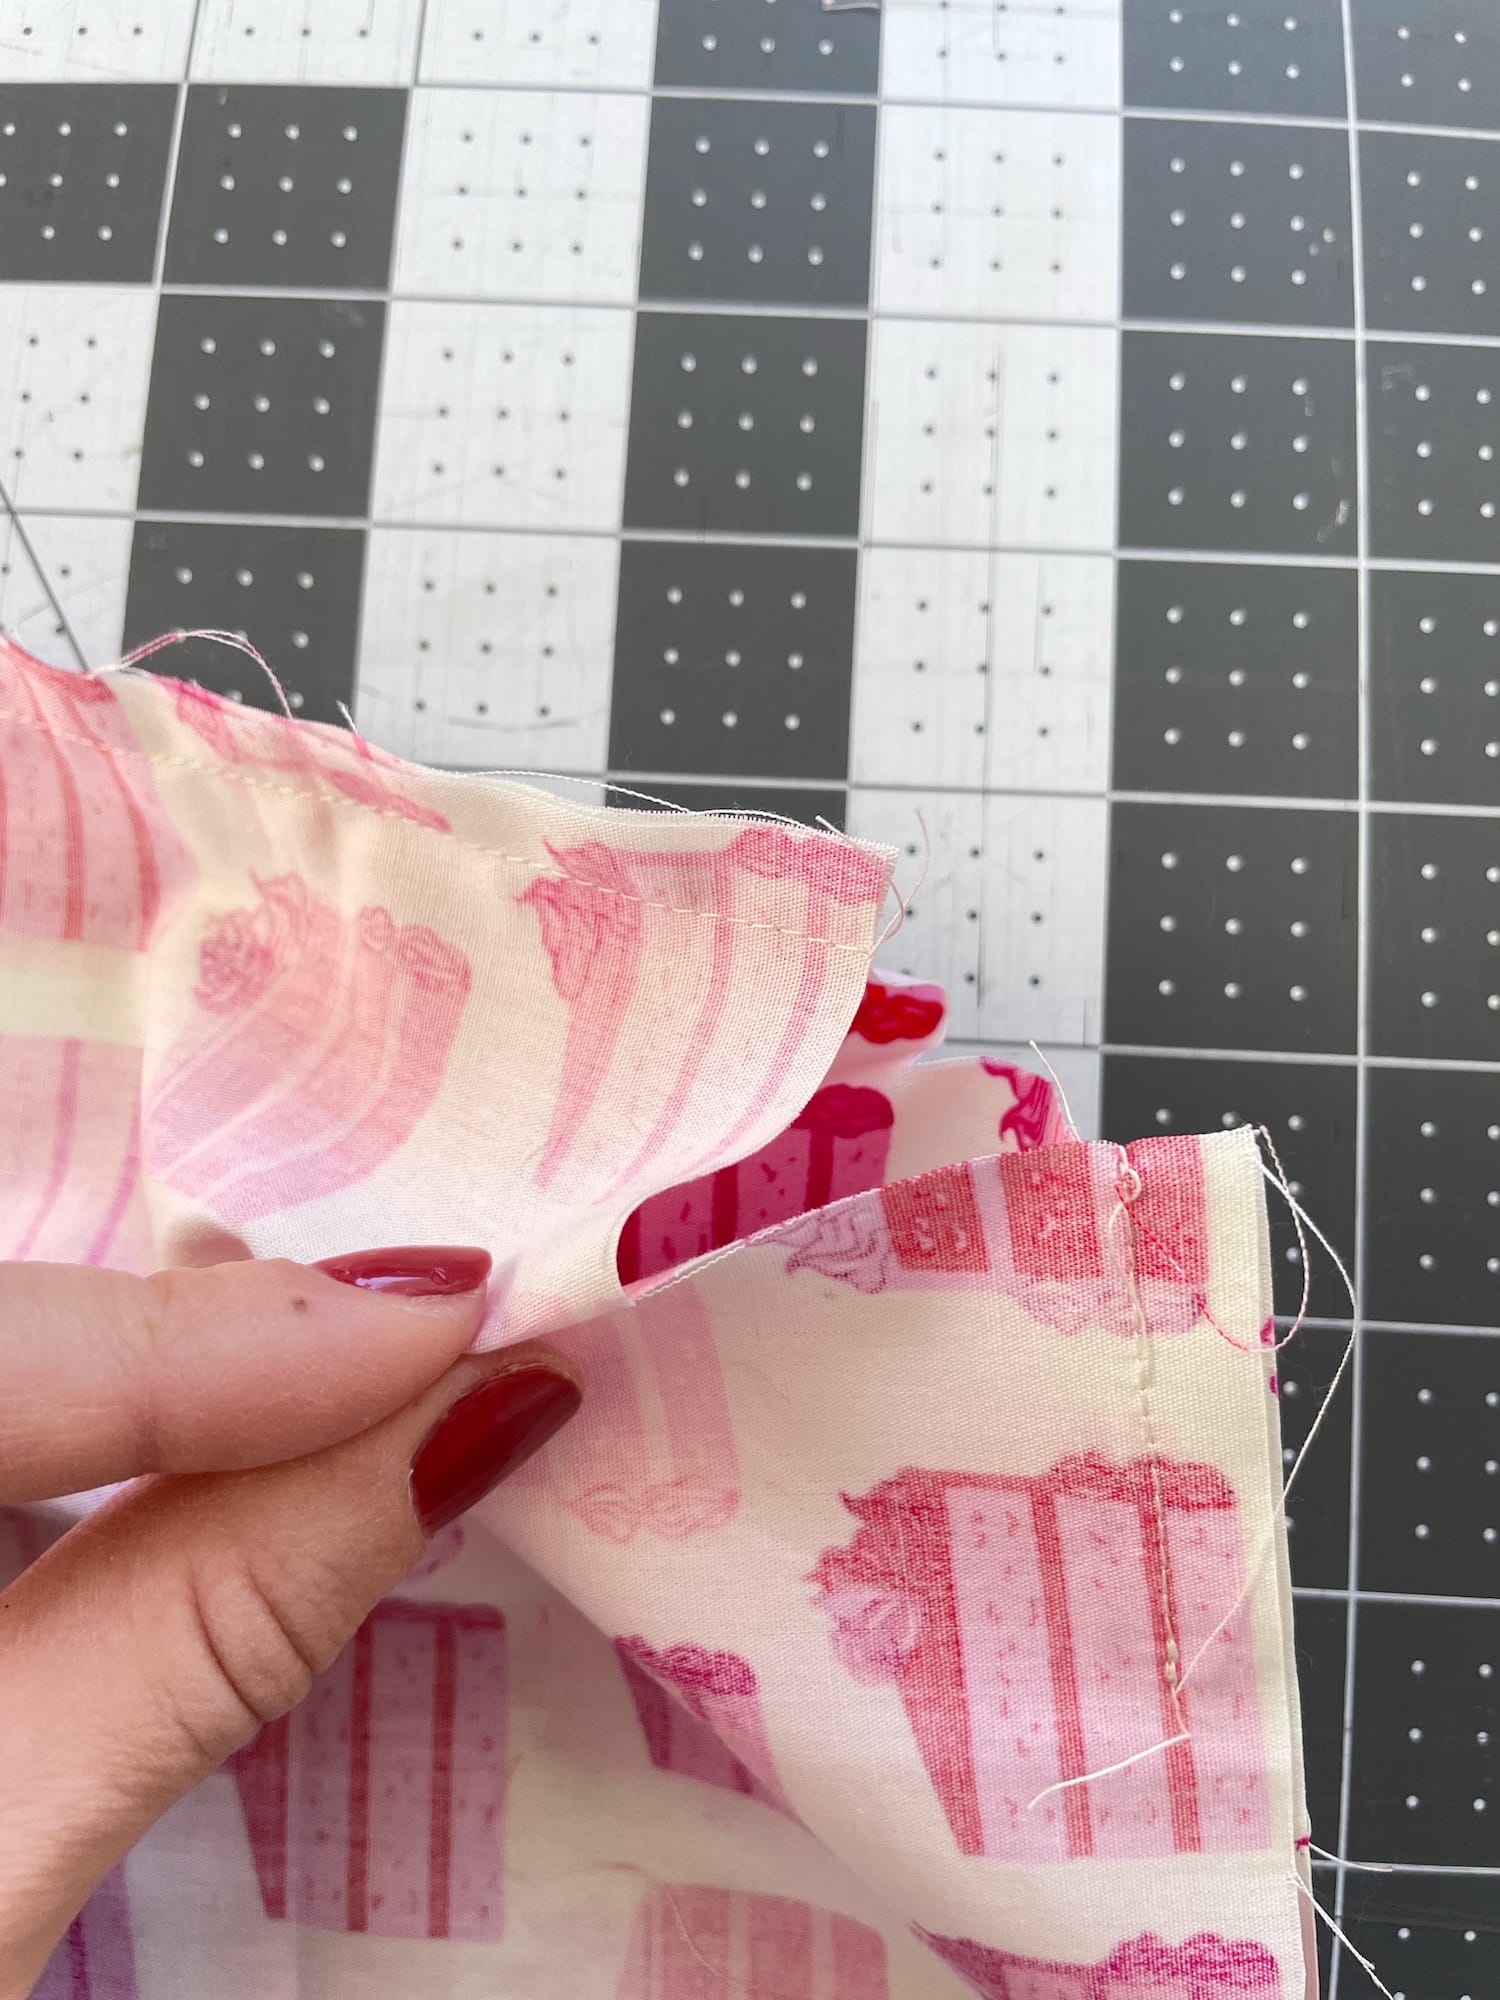
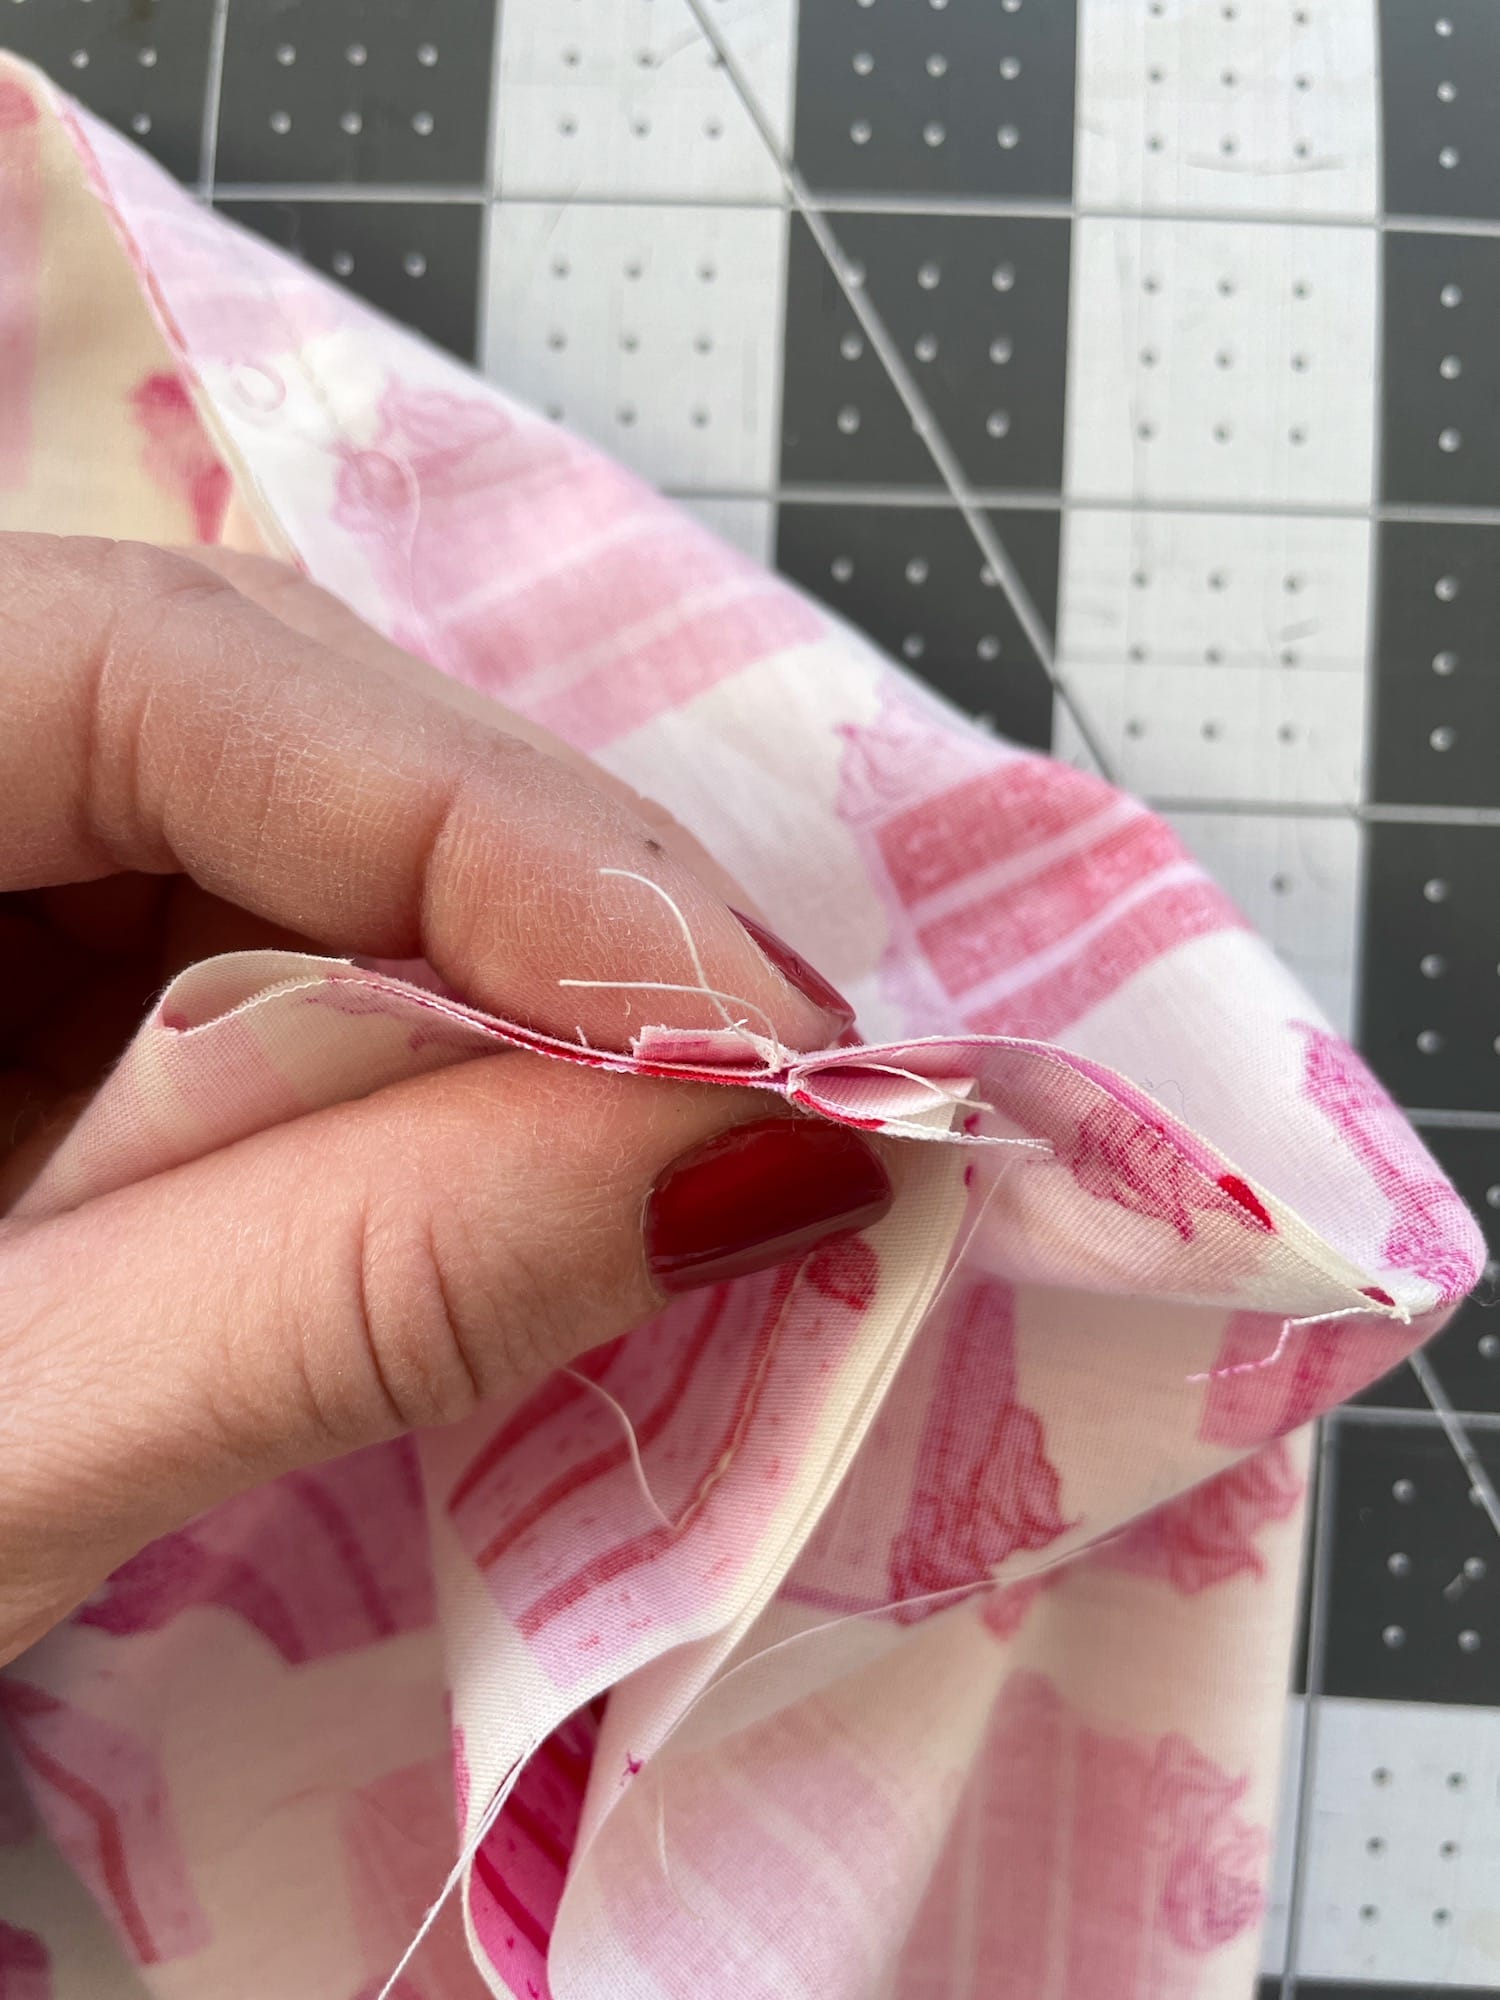
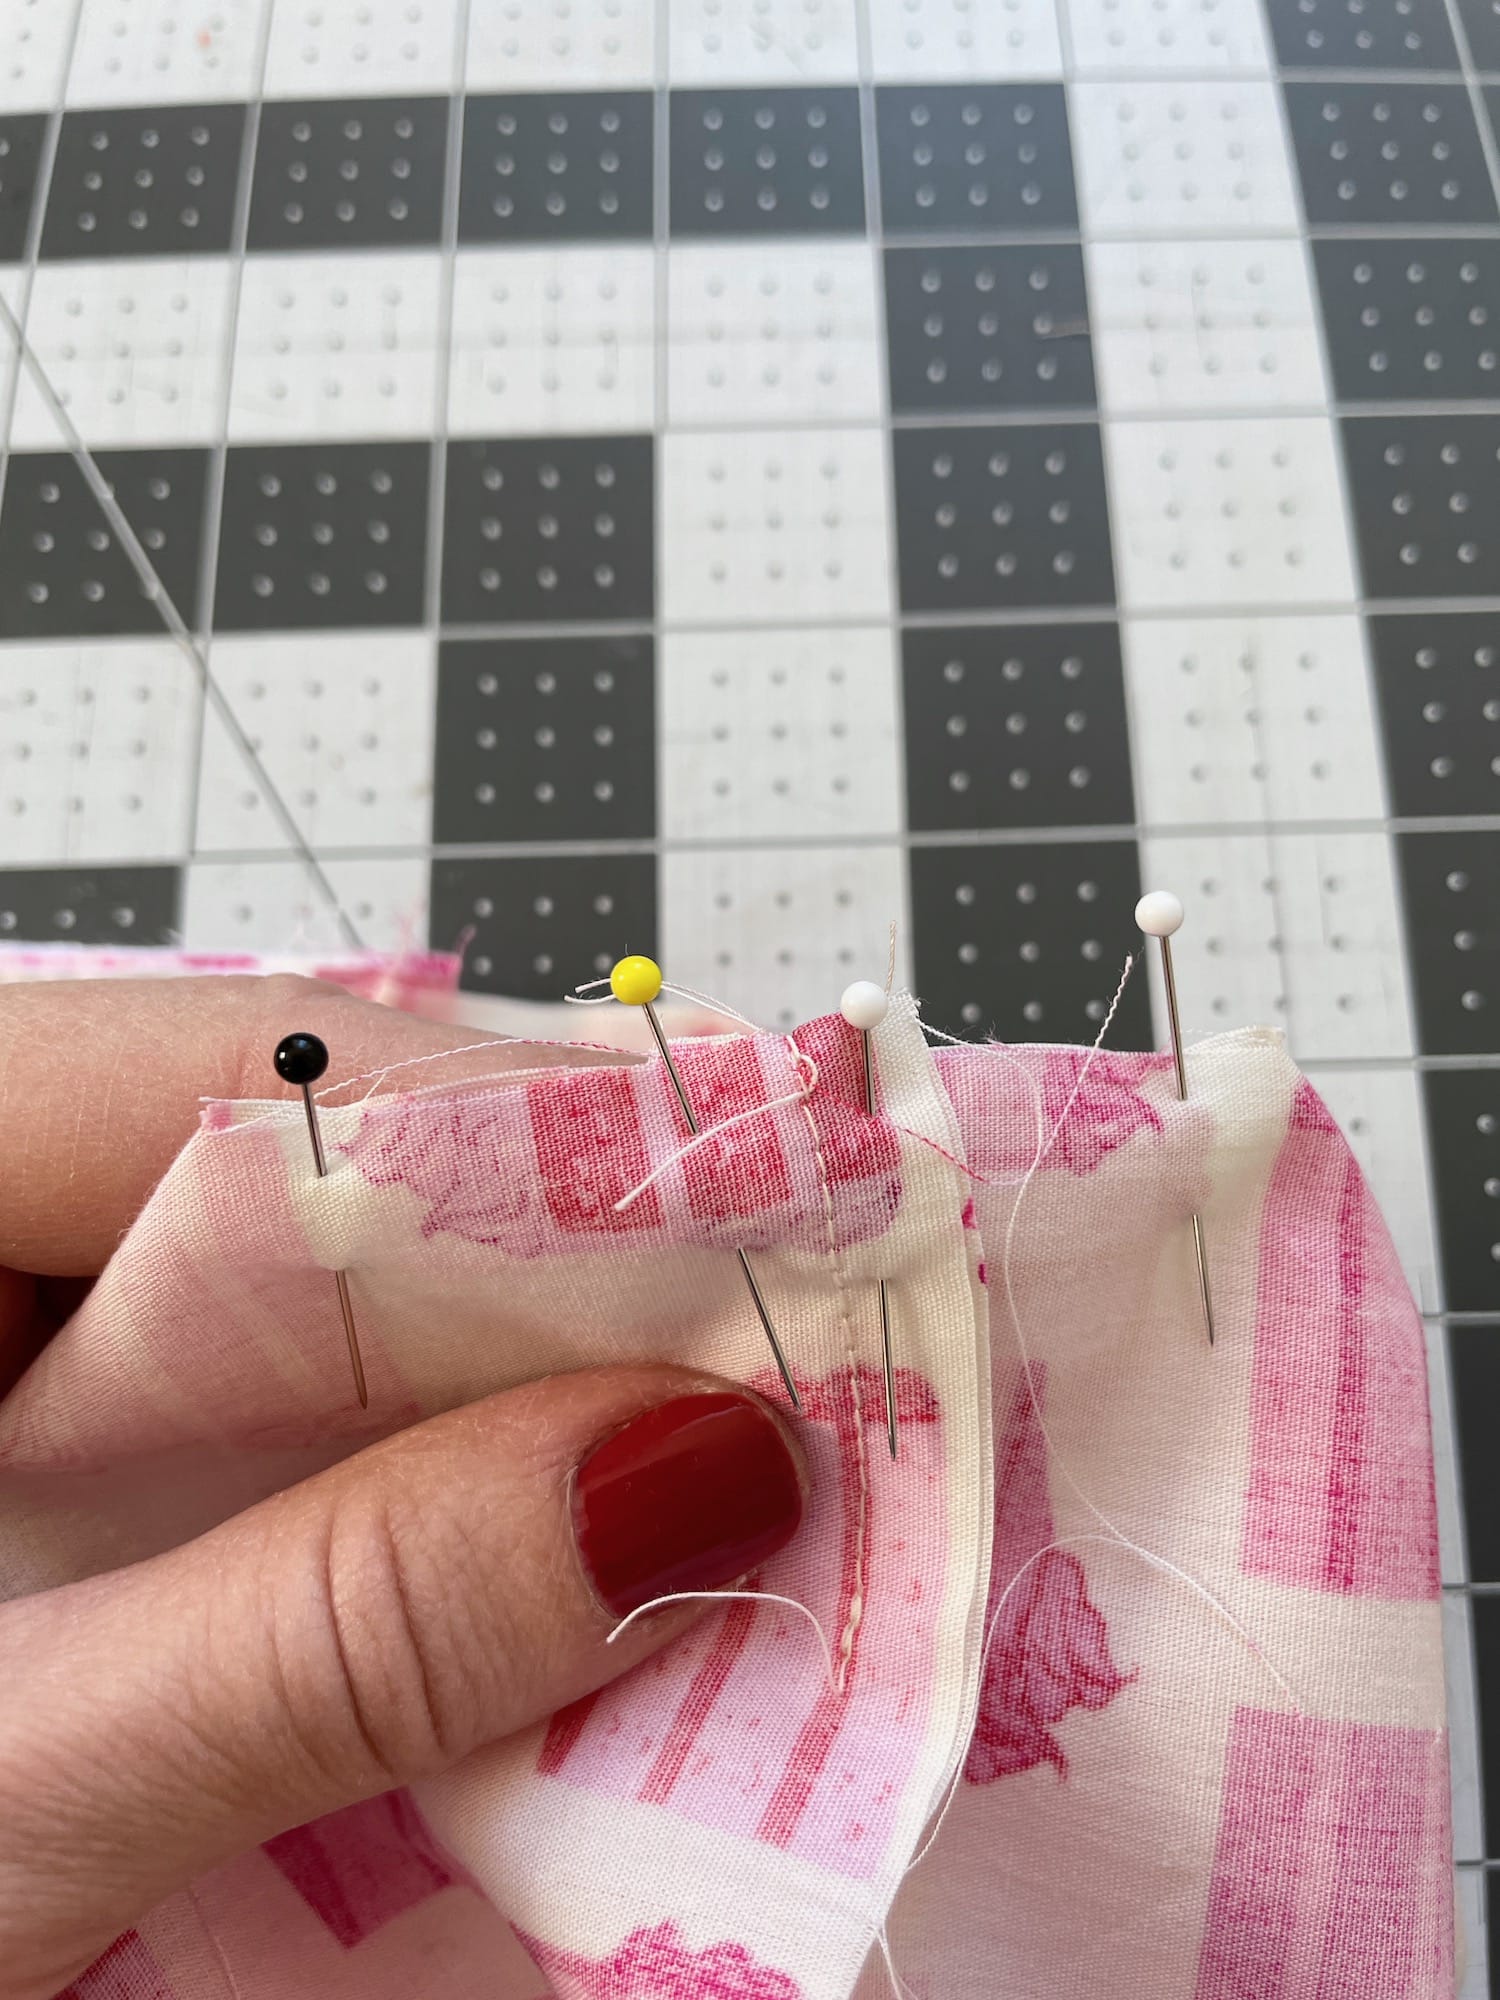
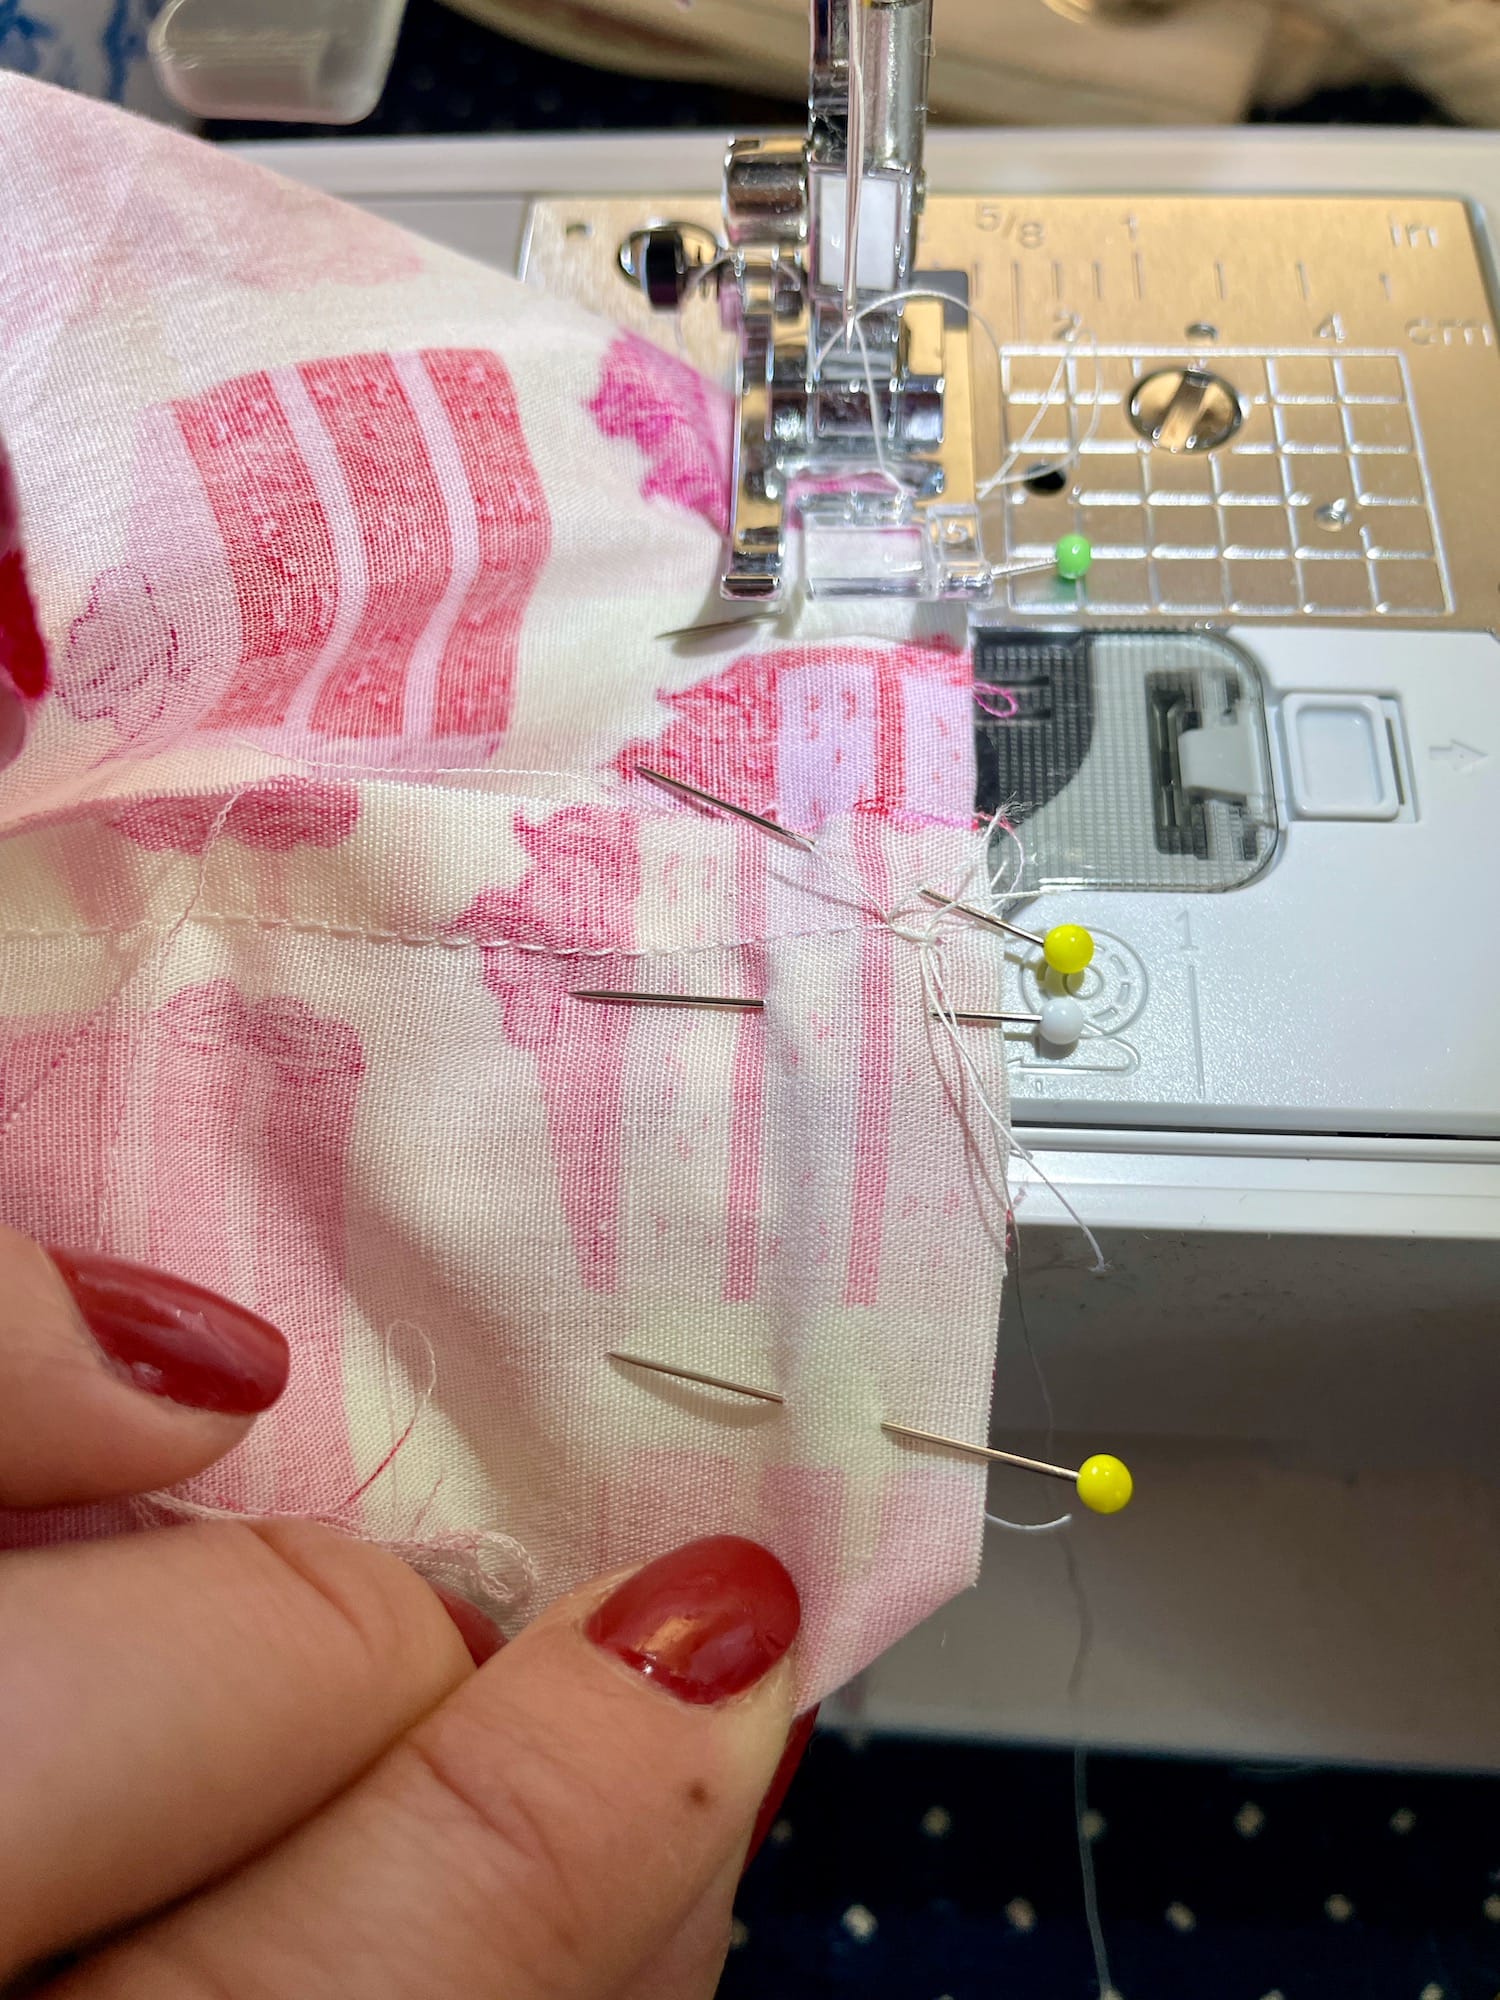
20. Box the corners by pinching the openings where the squares are, and nesting the two seams.
21. Pin in place.
22. Sew the seam closed. Repeat for the remaining corners.
23. Turn the pouch right side out through the opening in the lining.
24. Push corners out, and press to create crisp seams.
25. Sew the lining closed by hand or machine. (If you need any help with steps 23-25, you can see a more detailed explanation in this post under the “Complete the Zipper Pouch” section beginning at step 10.)
26. Turn the lining inside the pouch and you’re done!
Ready to make your own hexagon pouch?
Isn’t this the perfect little pouch? It makes me want to paint my nails red and go out on the town! (Or, maybe just stay home and stitch with pretty nails just for me…)
But, if you’re ready to make your own hexagon pouch, I’ll gladly drop a printable PDF with 4 different sized hexagon templates straight into your inbox! Click the button below to grab your free templates!