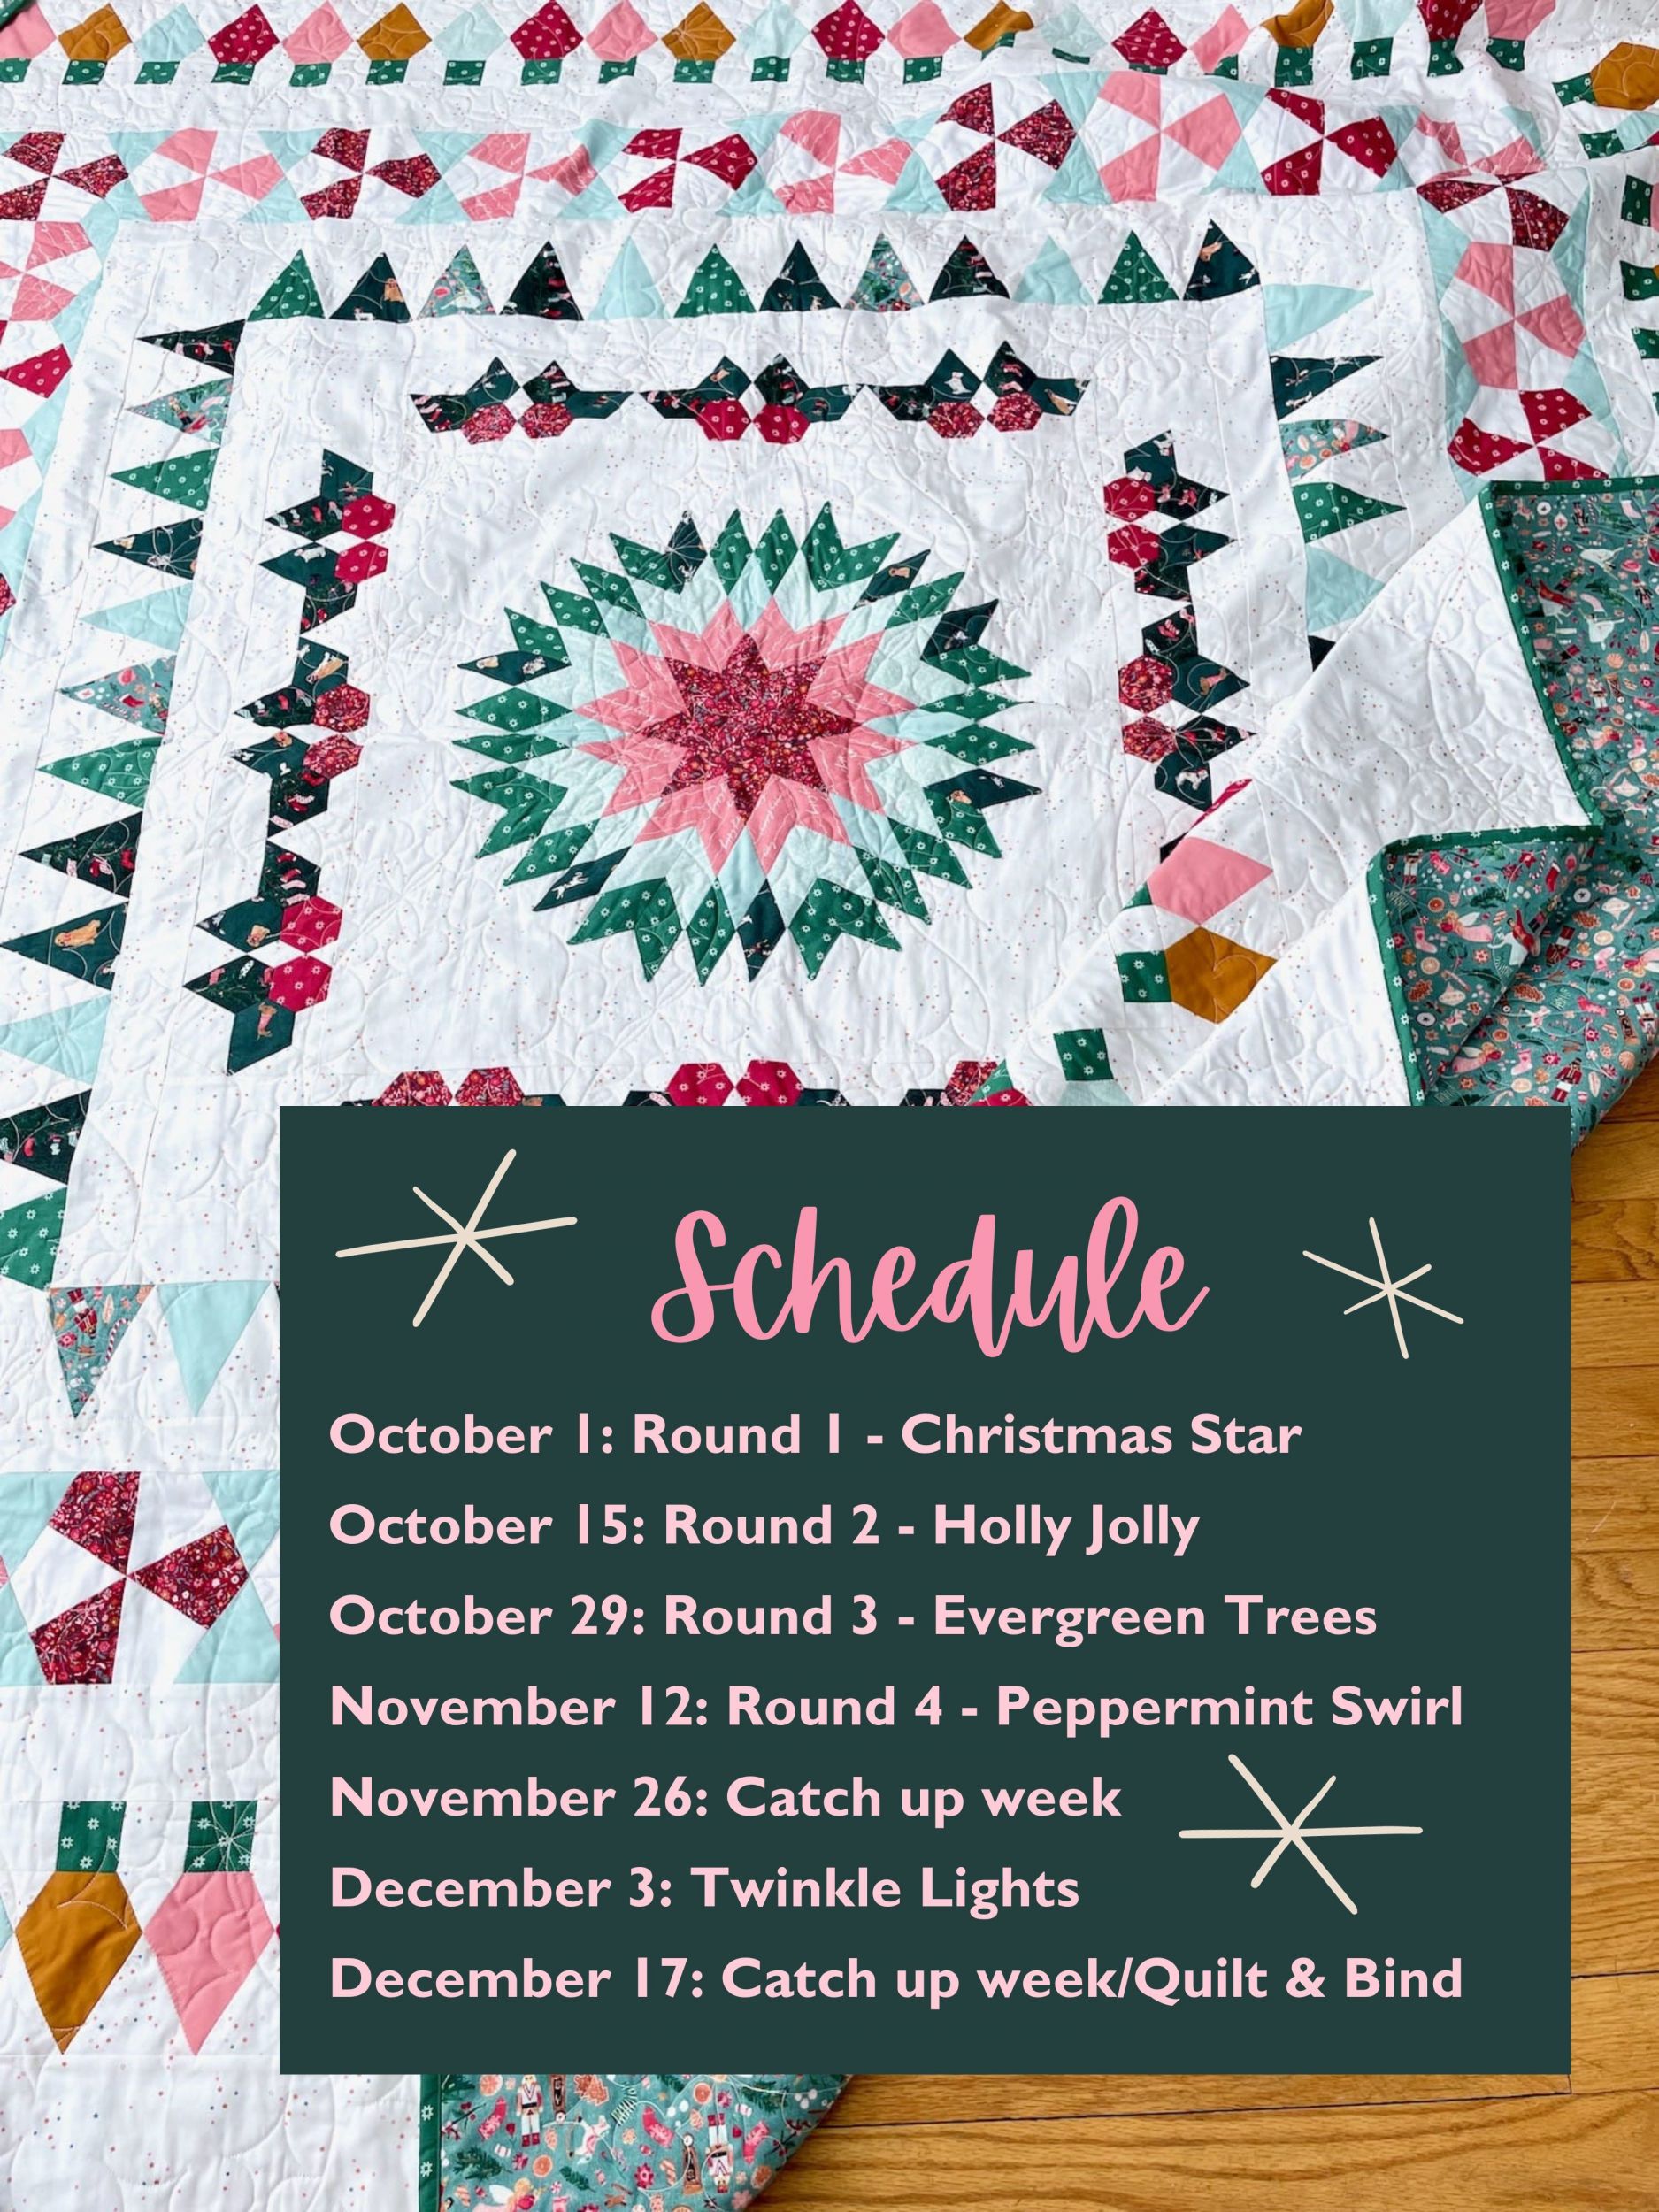
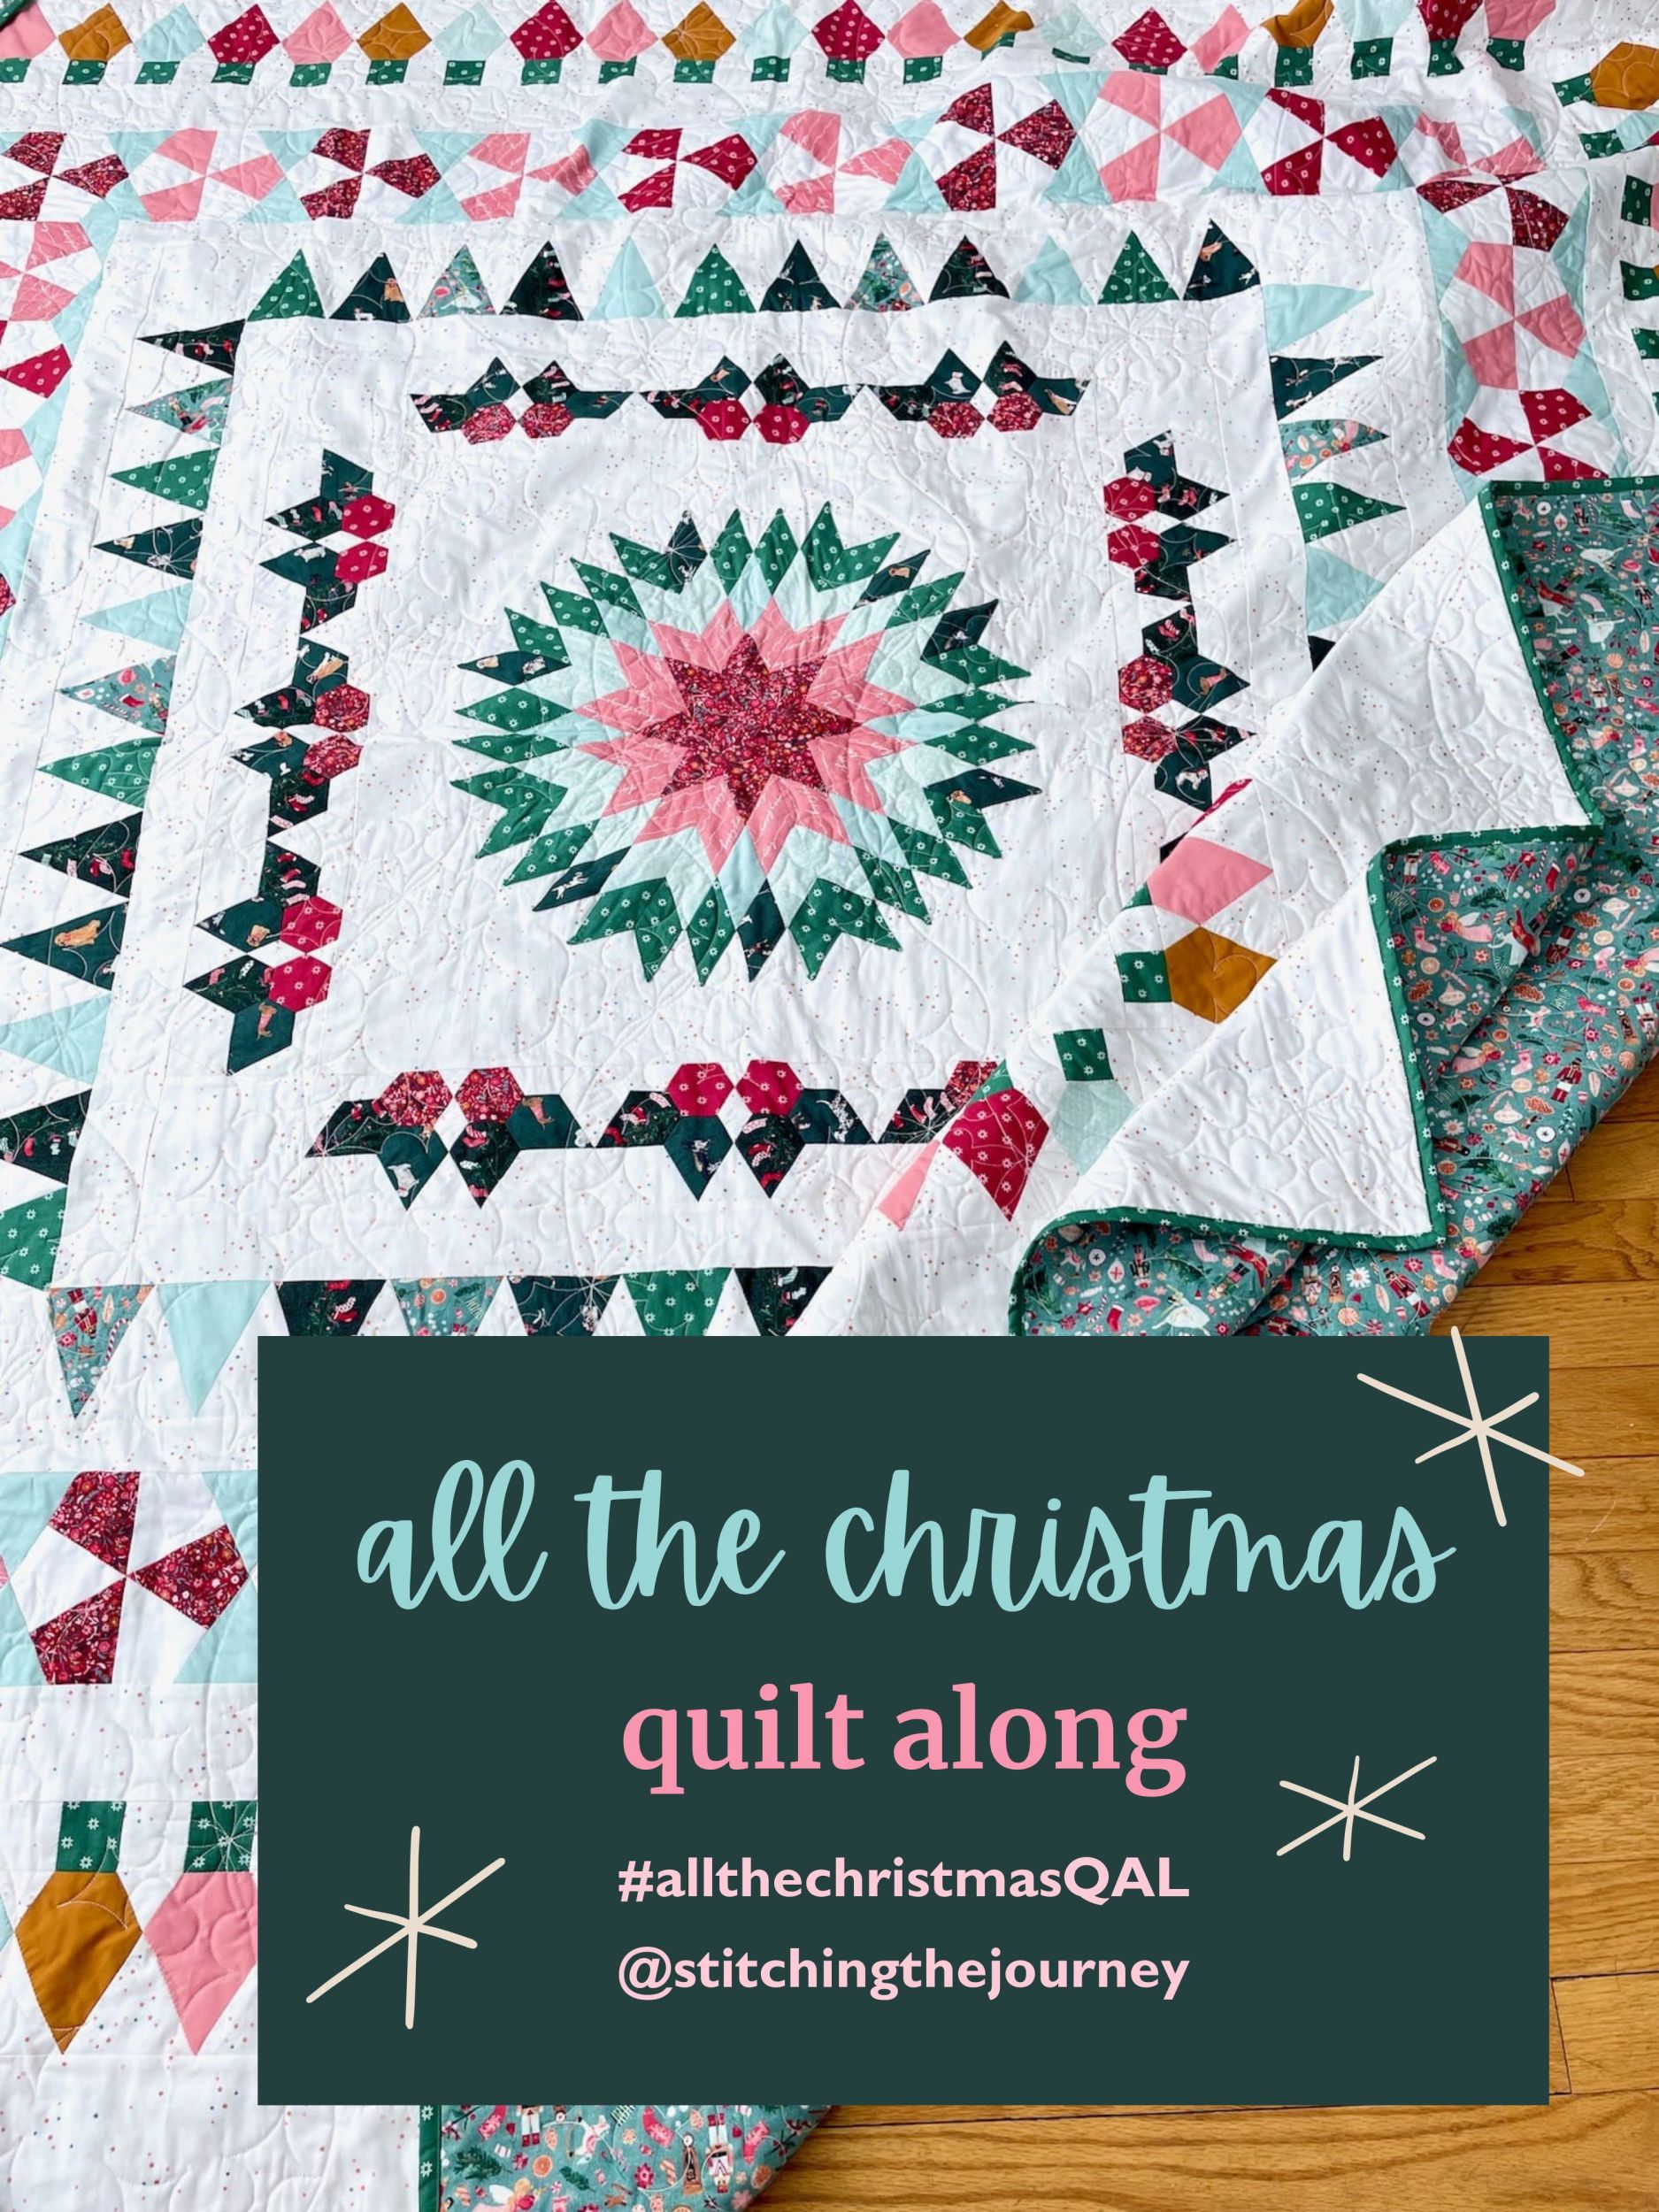
All the Christmas Quilt Along: Round 2, Holly Jolly
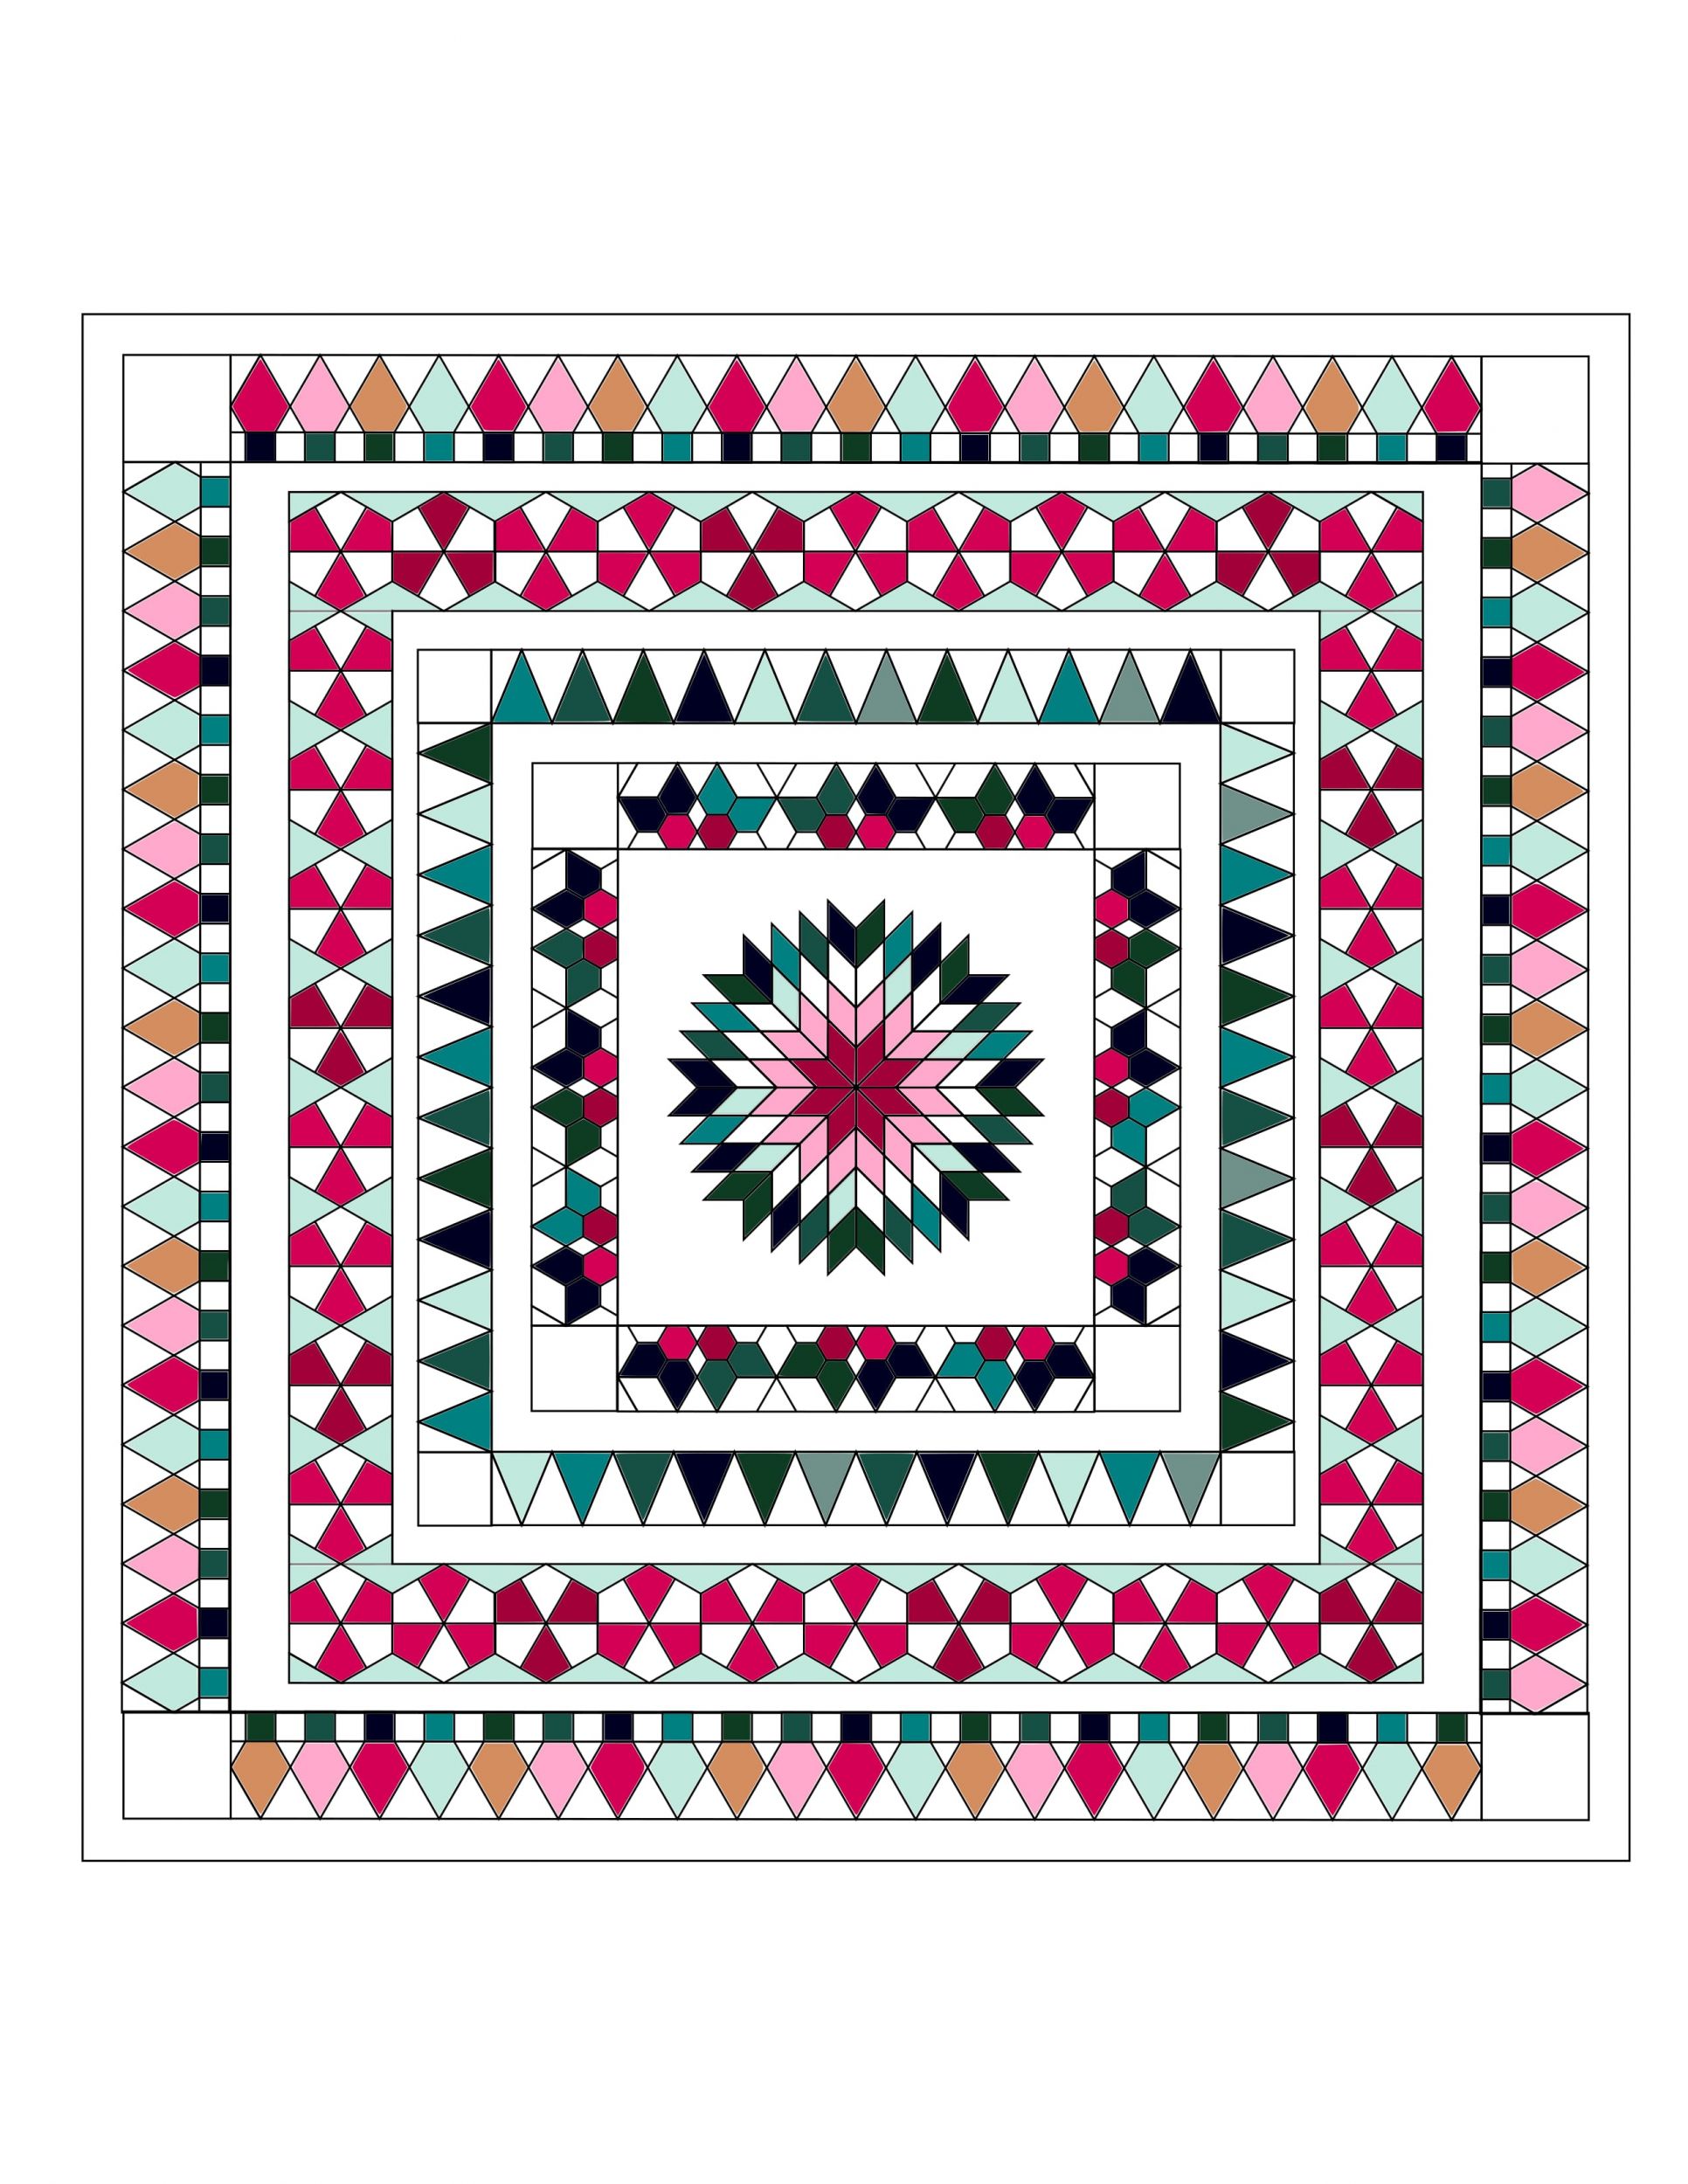
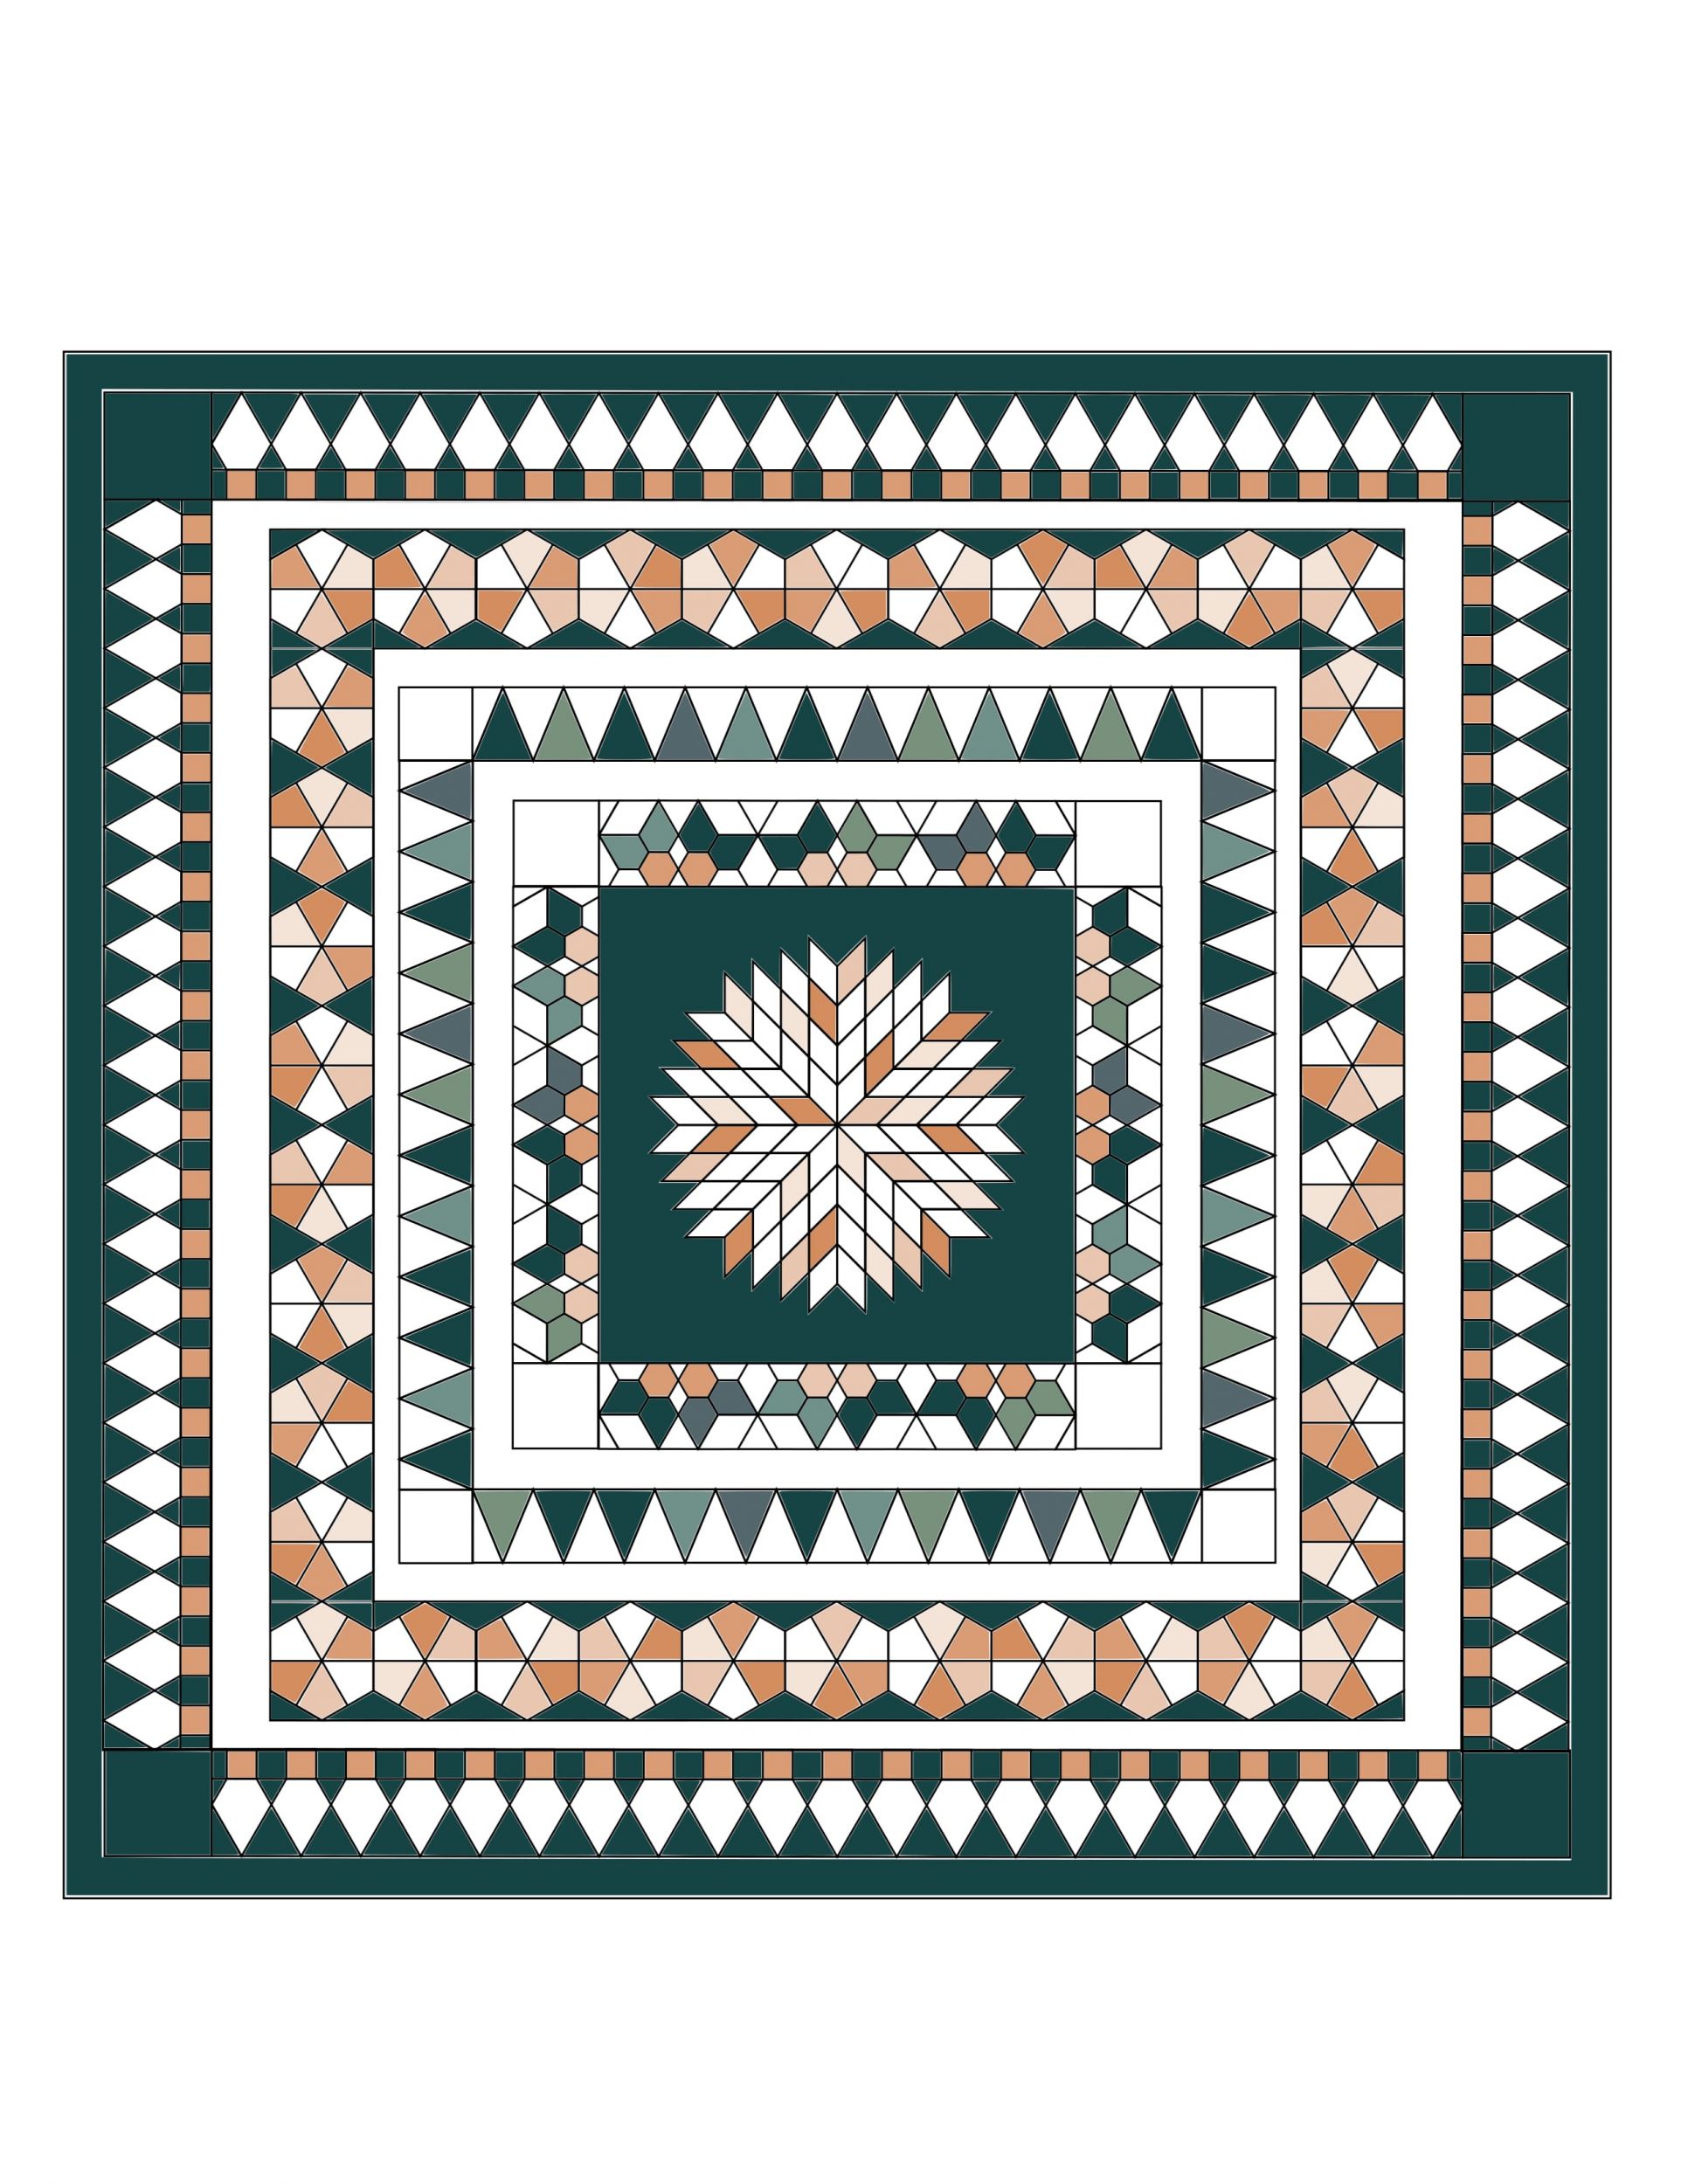
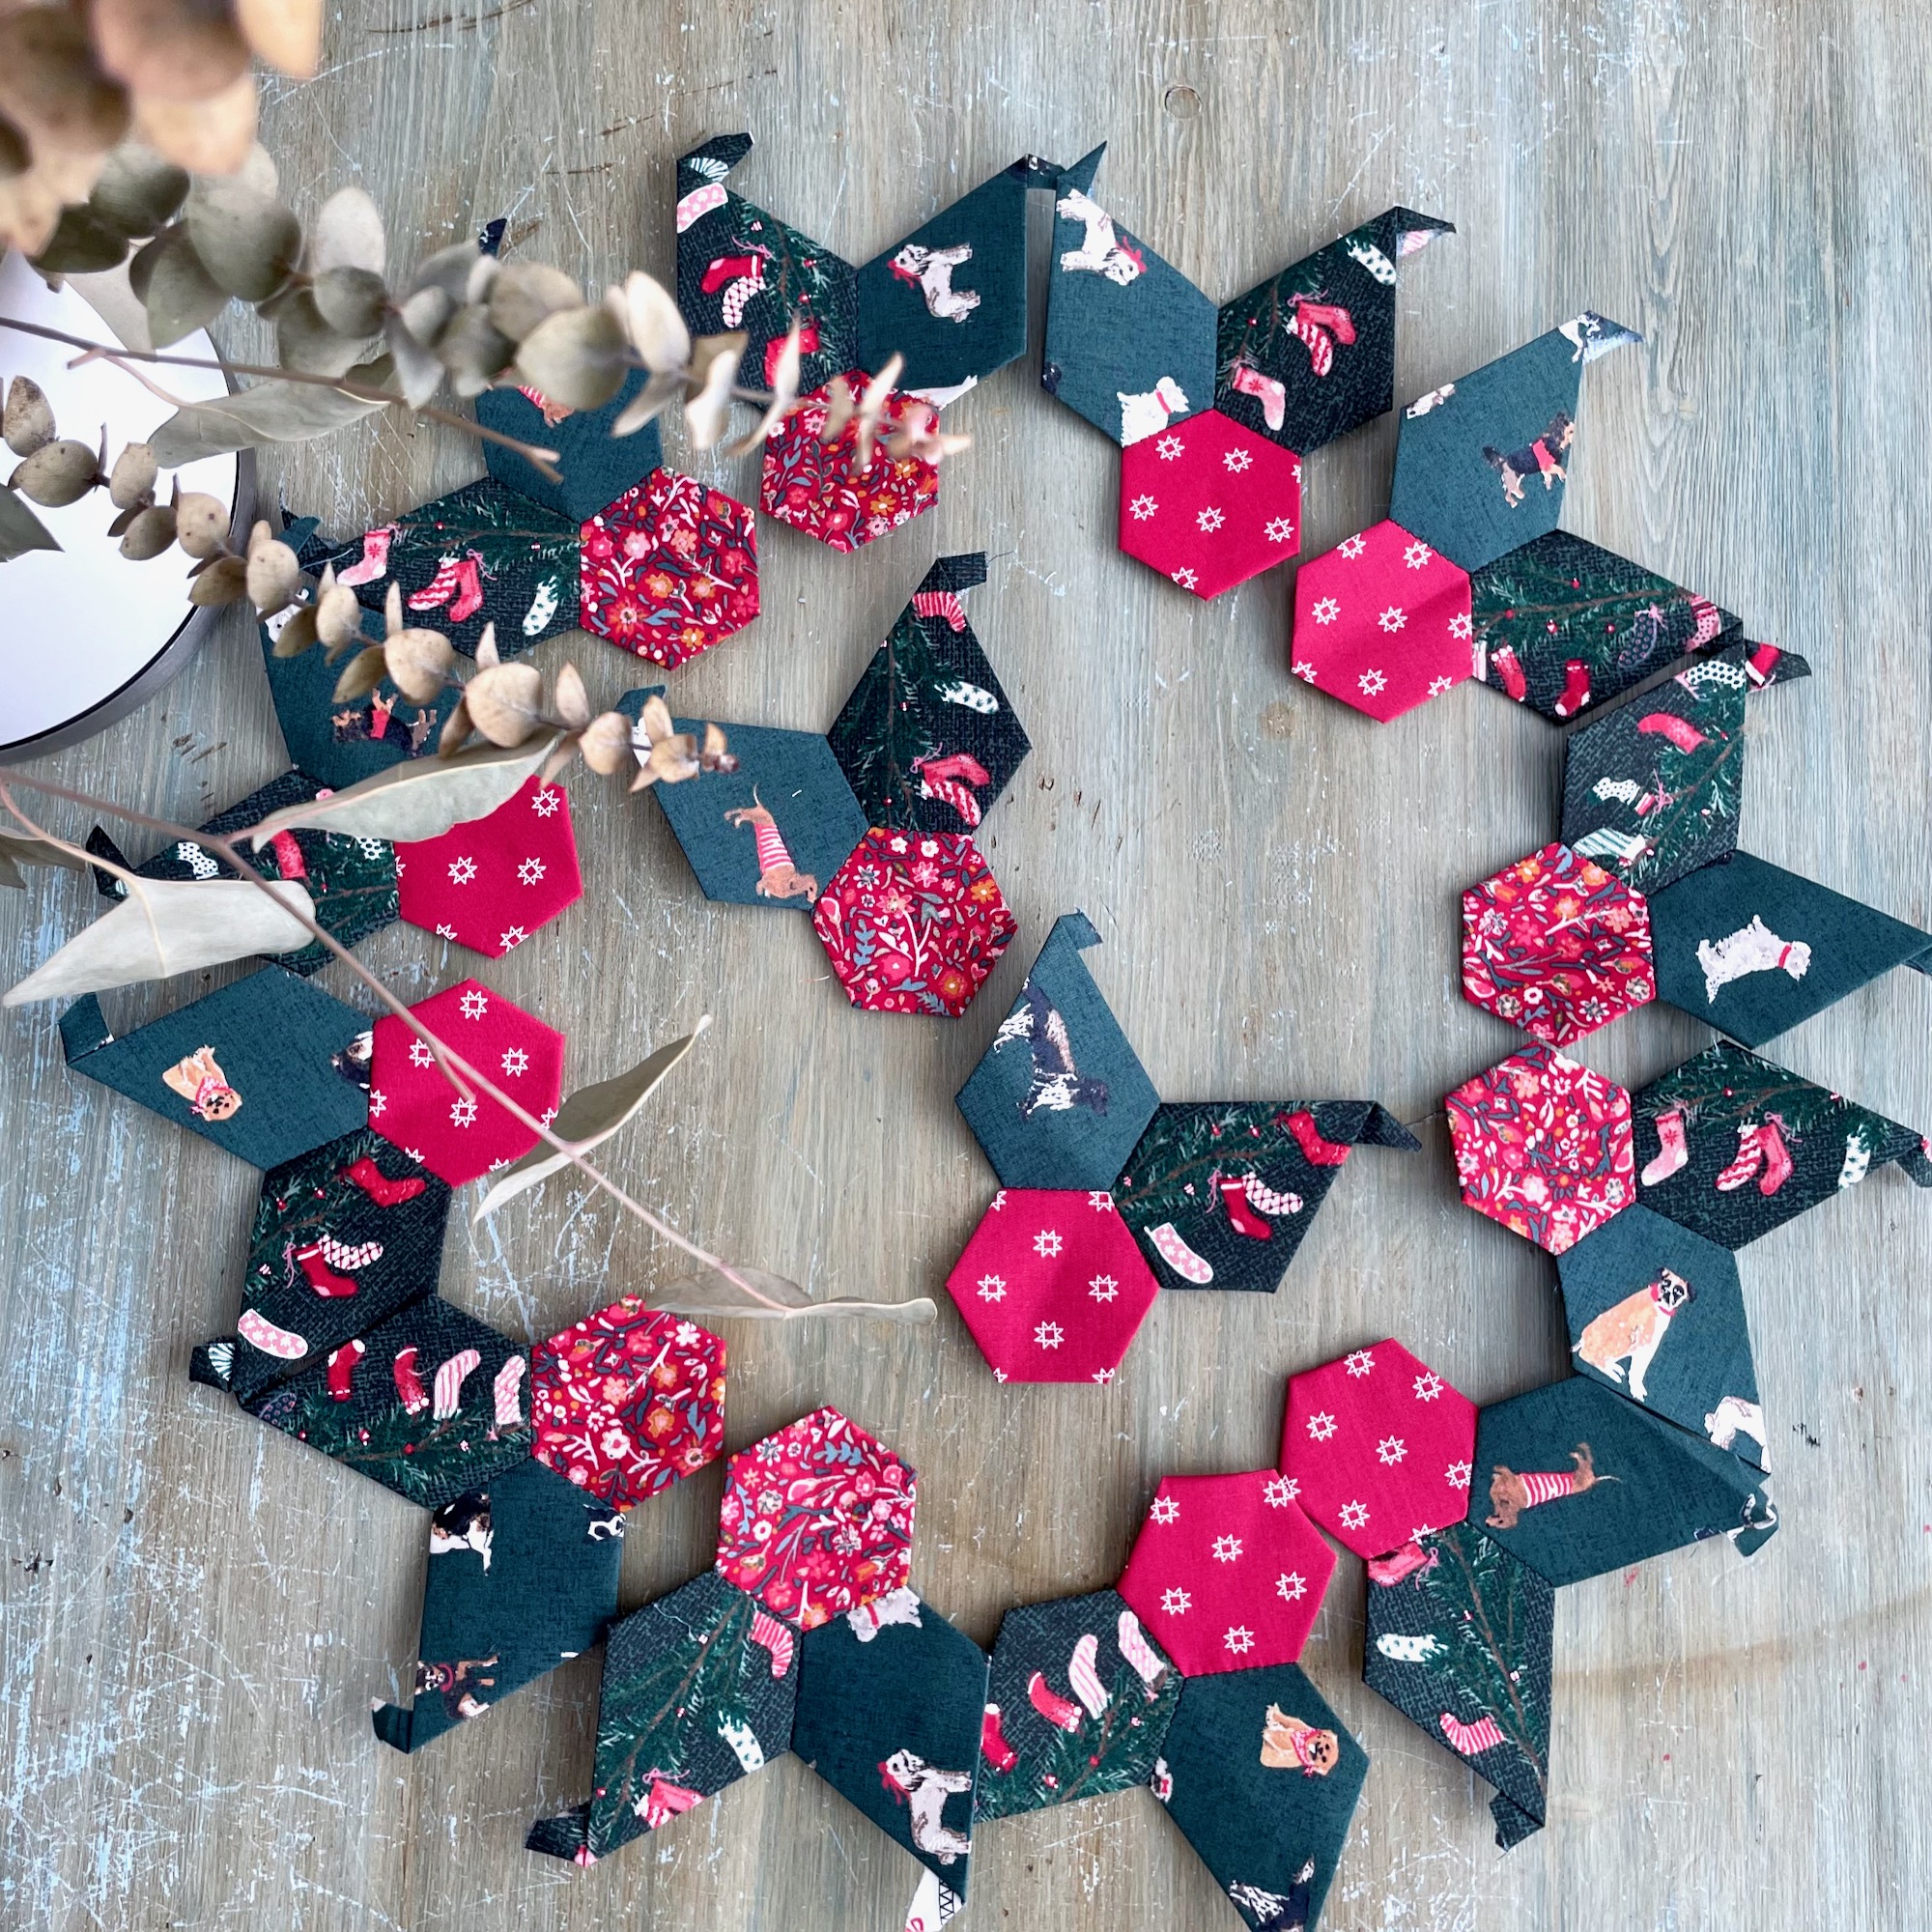
It’s the next segment of the All the Christmas quilt along (QAL), and can I just say how much I love this little round? It’s short and sweet and plays with so many classic English paper piecing (EPP) shapes. It has hexagons, jewels, diamonds, and triangles. But, when they come together to make these adorable little holly sprigs, they feel fresh and special in a new way to me.
However, before I dive in to sharing more about this cute little round, I want to let you know that the loveliest customer brought it to my attention that there is an error in the shape count for this round. There should be (12) 1” equilateral triangles not (6) as previously stated. So, if you have purchased the pattern before October 18, 2023, please adjust accordingly. Rather than continue to send out pattern updates, I have created an “errata” page here for future reference. I apologize for any inconvenience!
A Few Quilt Along Notes Before You Start Round 2
Now that we’ve finished some housekeeping, let’s dive in! As, I mentioned, this is such a fun little round. It’s a nice change of pace after the Christmas Star since the blocks come together quickly, and the pieces are fairly small.
Pro Tip:
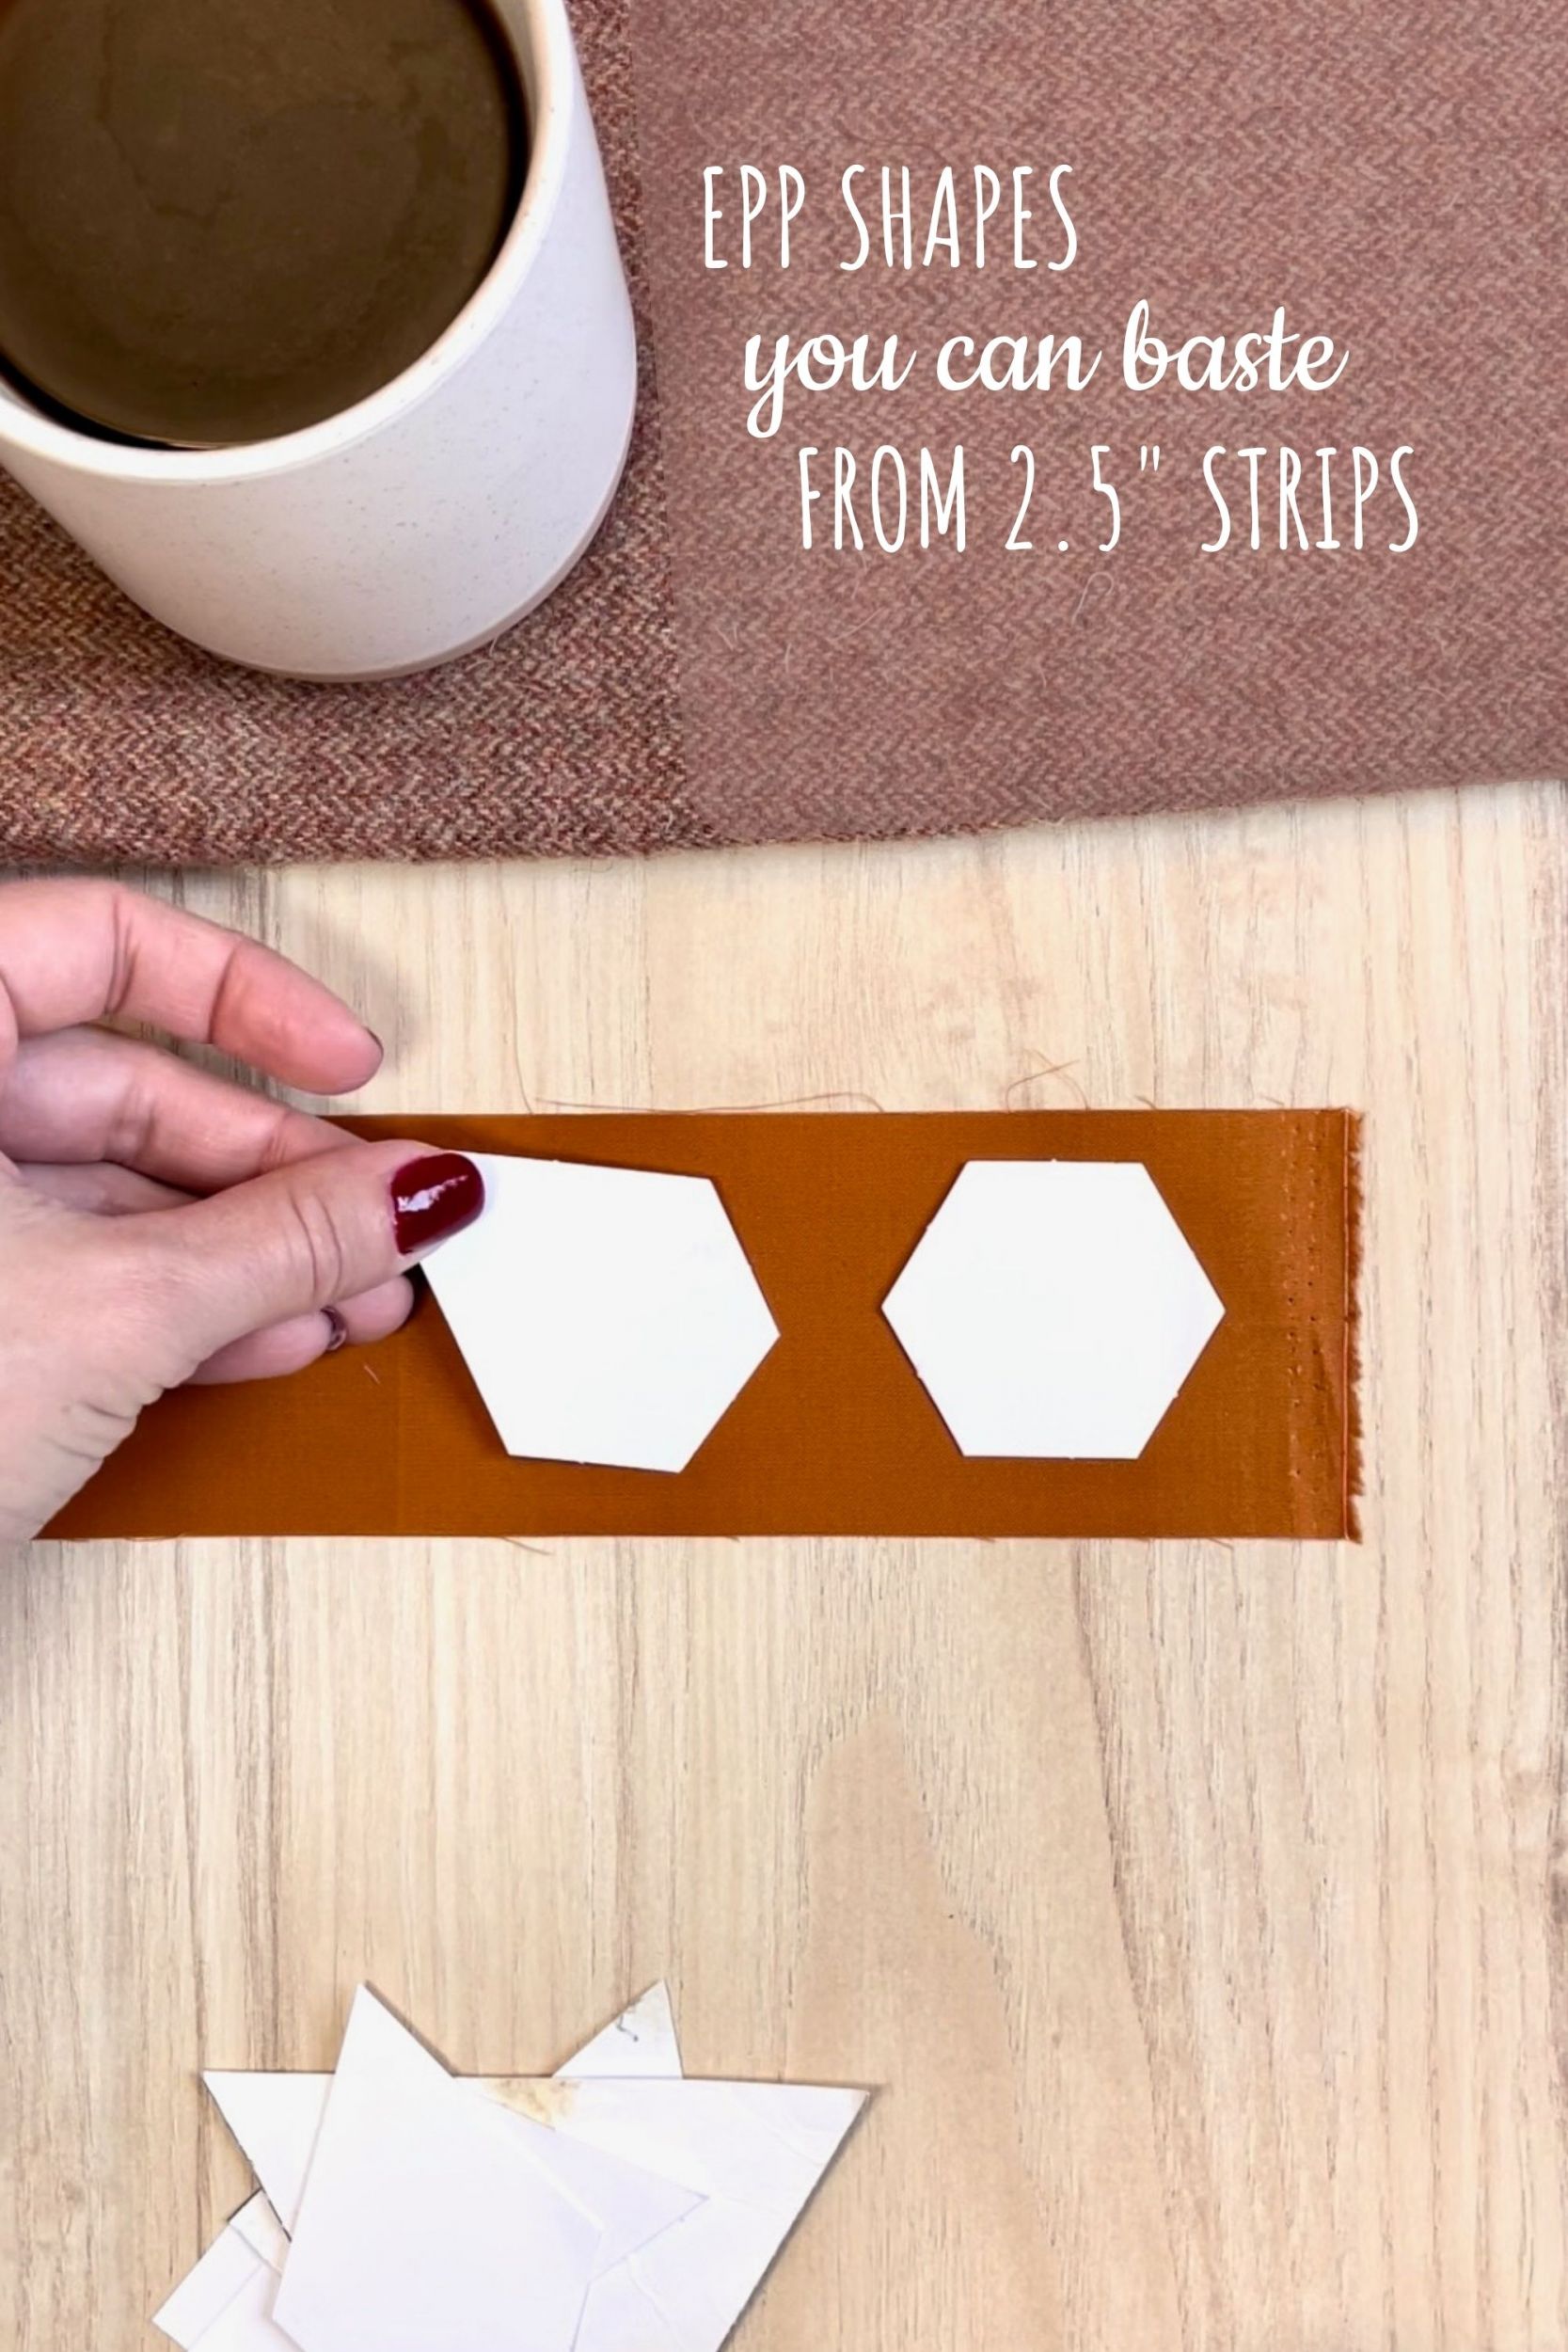
If you cut your fabric into strips, keep in mind that lots of shapes fit on 2.5” strips as you can see in this video. So, before you cut additional strips for each round, double check to see if you can use any leftovers from the previous round.
A Note About Round 1:
***If you are using the same background fabric for Round 1 and Round 2 as I did in the cover quilt version below, you can disregard this note.***
However, if you choose to do a different color, as I am in my Juniper version, you might want to consider cutting a smaller background square for your Christmas star appliqué, and adding borders in the same background color that you’ll be using for Round 2 to give the Holly Jolly blocks a little bit of space.
To modify Round 1 in that fashion follow the steps below.
Cut a 23” background square, and appliqué the Christmas star per the pattern instructions.
Trim the background square to 22.5” square, ensuring that you trim it evenly on all sides.
Sew a 1.5” strip from the background fabric for Round 2 to the top and bottom of the center background square. Trim the strips flush with the square.
Repeat step 3 for the left and right of the quilt top. Your quilt top should measure 24.5” square.
Proceed with the pattern as written.
Finding Time To Sew
This round requires lots of little steps to make the blocks, stitch them together, and create edge units. I highly recommend constructing each step in assembly line fashion. In fact, I wrote a post all about how I do that, in addition to how I like to manage my time for EPP, in the post below.
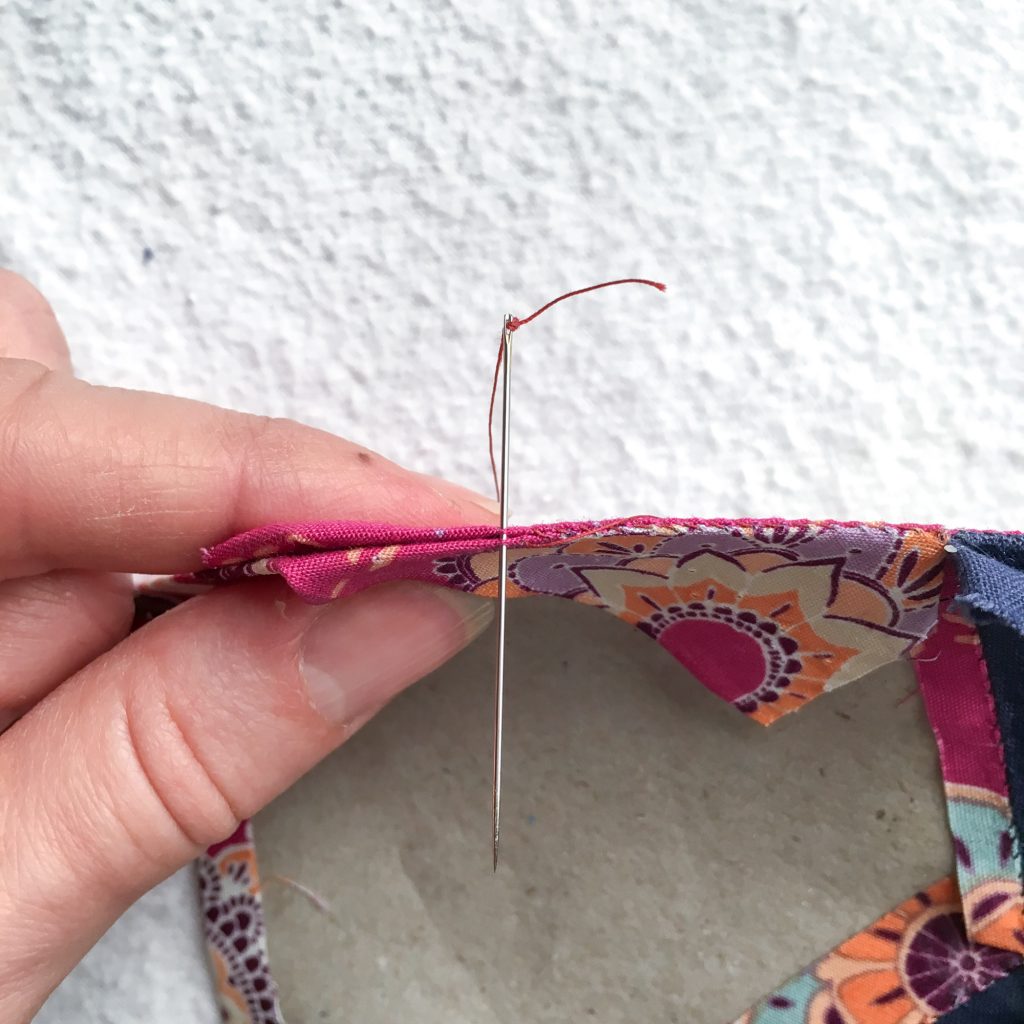
If you’re new to English paper piecing (EPP) or looking to take your EPP to the next level as you navigate this quilt along, I have some helpful tutorials you might enjoy. In the previous segment of the QAL, I shared my bulk basting tutorial. This time I have a stitching tutorial. It contains my best tips and tricks for choosing thread, taking neat, nearly invisible stitches, and more.
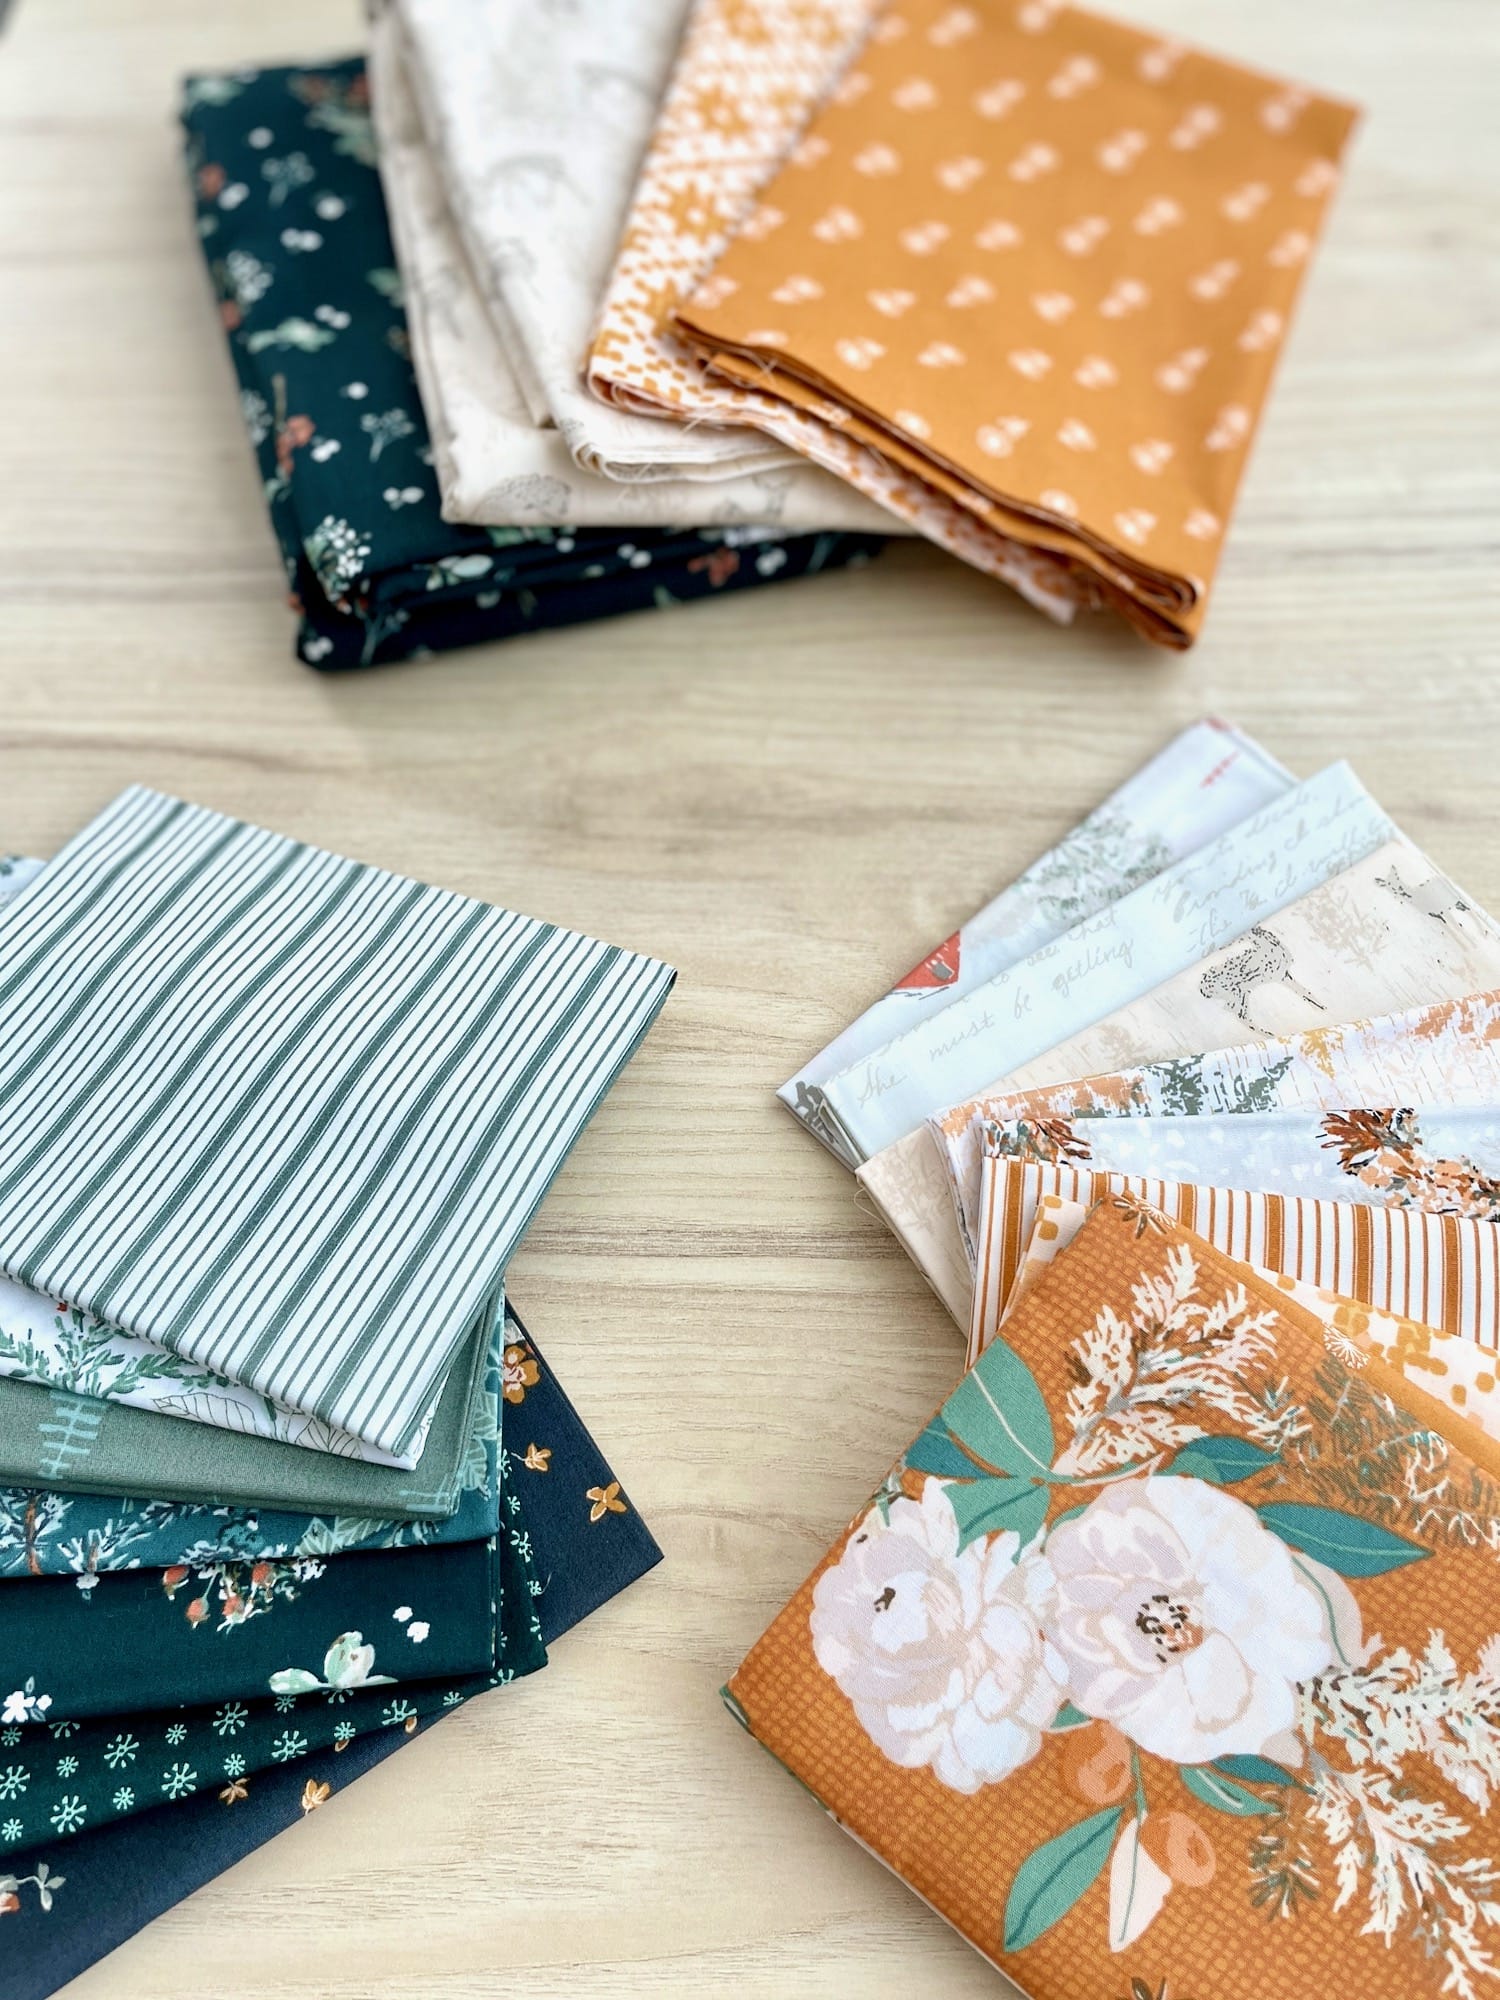
I know we’re still pretty early in the quilt along, and it’s not even November yet. So, I don’t expect you to necessarily have started yet. If that’s you, then I want to remind you that Heather from Pearls and Clovers still has a few fabric kits left! Be sure to check out her shop if you’d like someone to alleviate the decision making for you.
This one features “Wintertale” by Katarina Roccella for Art Gallery Fabrics, like my cover quilt.
Have you grabbed an EPP kit for the quilt along yet?
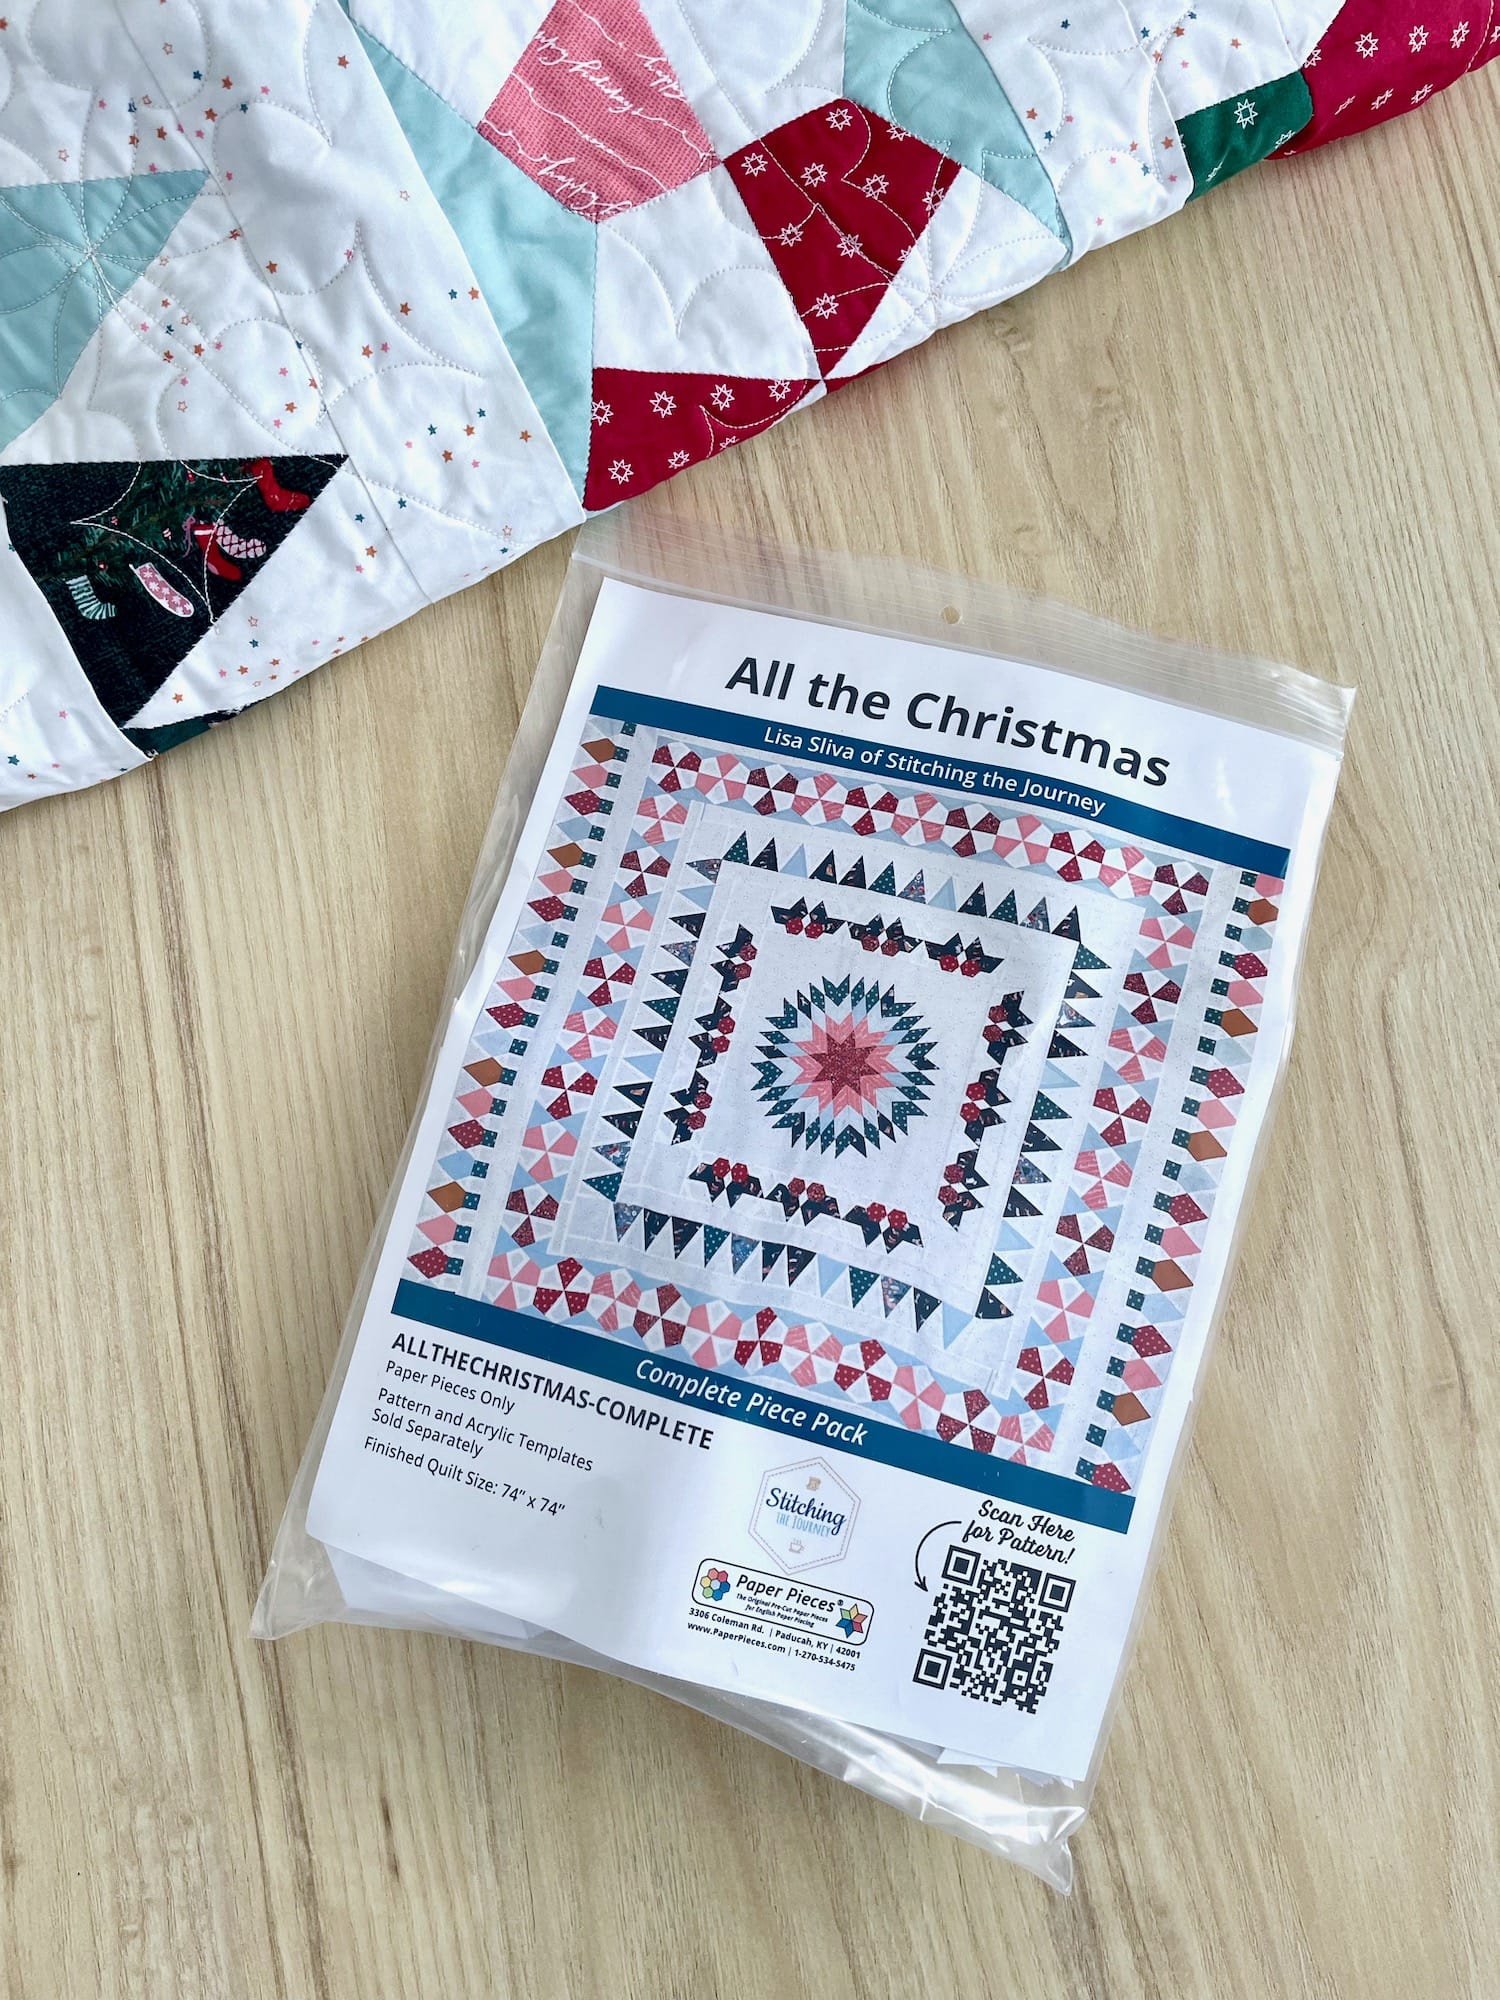
I still have EPP kits in the shop for those of you who don’t want to cut 1000+ papers to make your quilt! You can now shop them in my legacy shop or in my new Etsy storefront if that’s where you prefer to shop. Click either link below to grab yours!
That’s it for now! I’ll be back soon with updates for the next round, but in the meantime don’t forget to share your progress on Instagram using the #allthechristmasQAL and tag me @stitchingthejourney so I can see. Happy stitching!
This post may contain affiliate links. You can read my affiliate disclosure here.