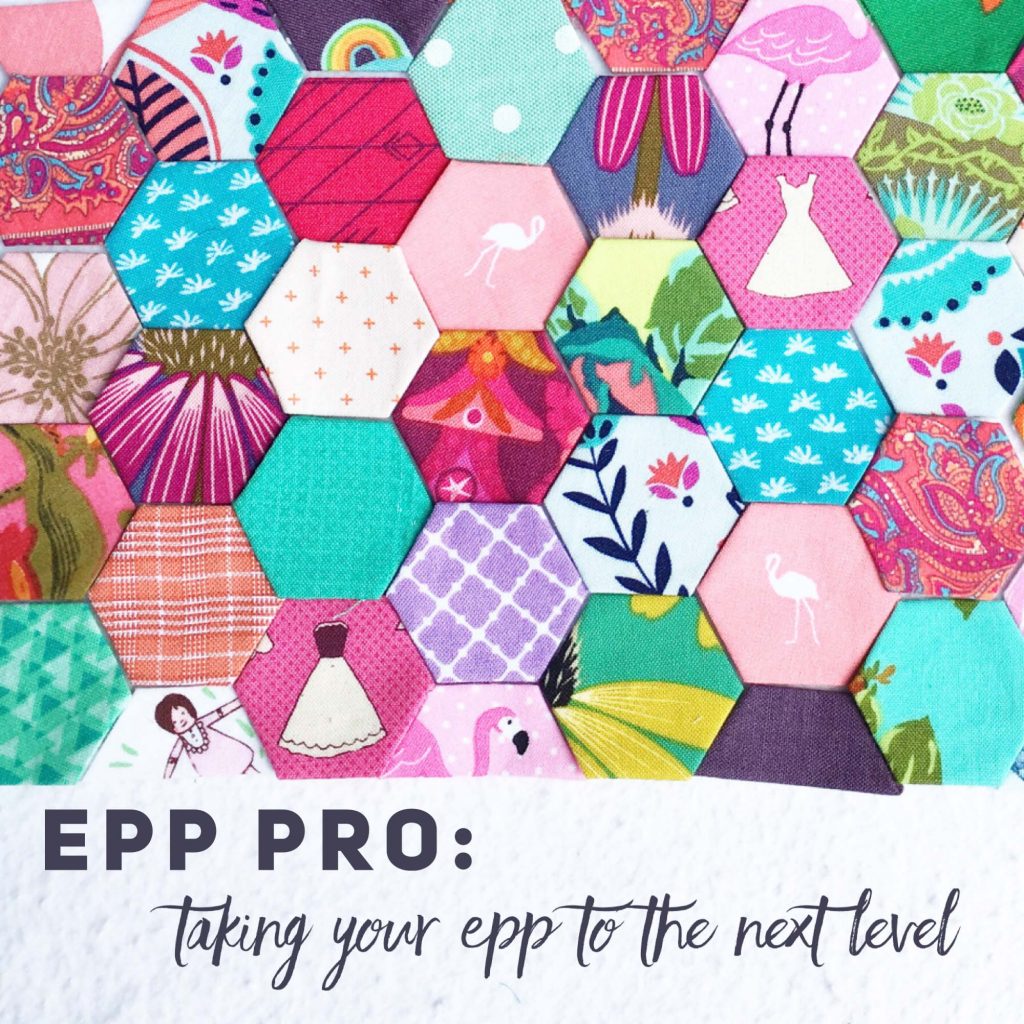
This post is part of the EPP Pro tutorial series. For the most fluid experience, I recommend starting at the beginning since the posts build upon each other. If you missed any of the previous posts, you can find them here.
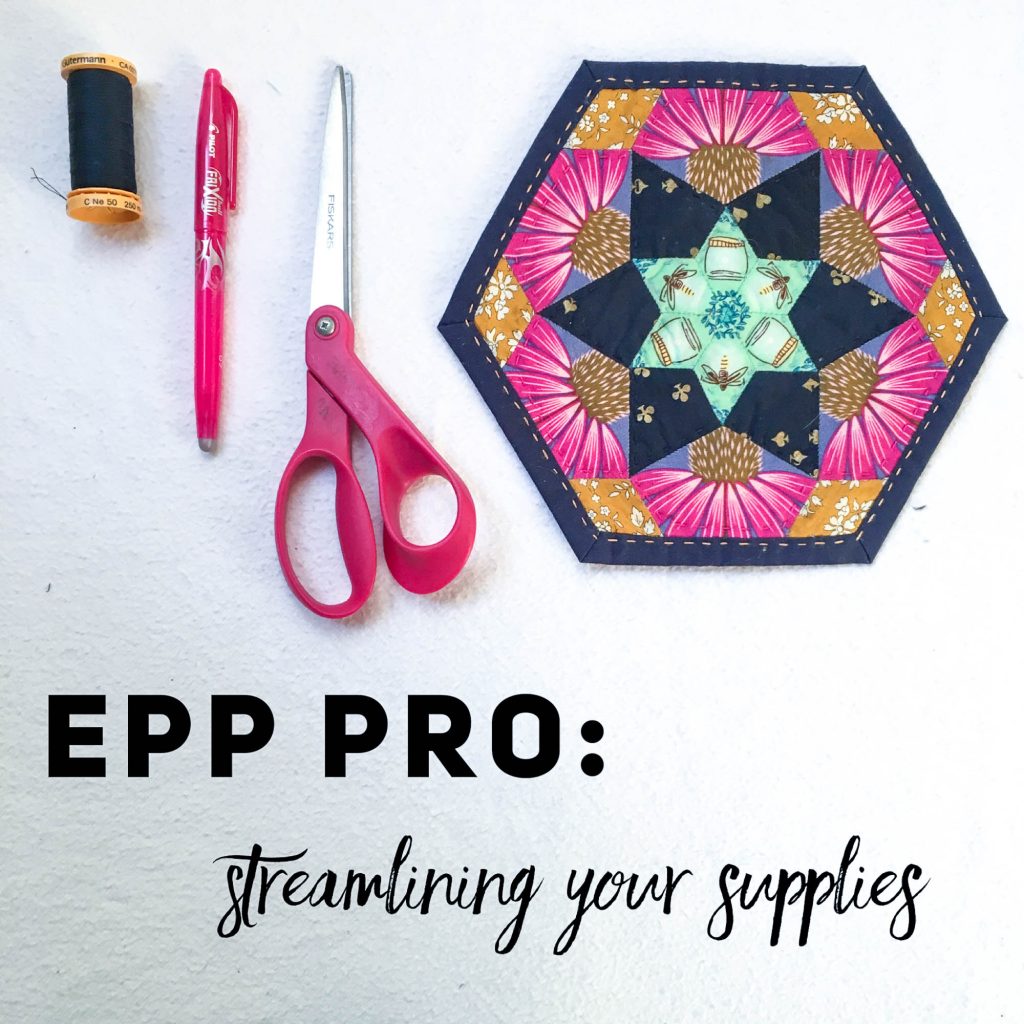
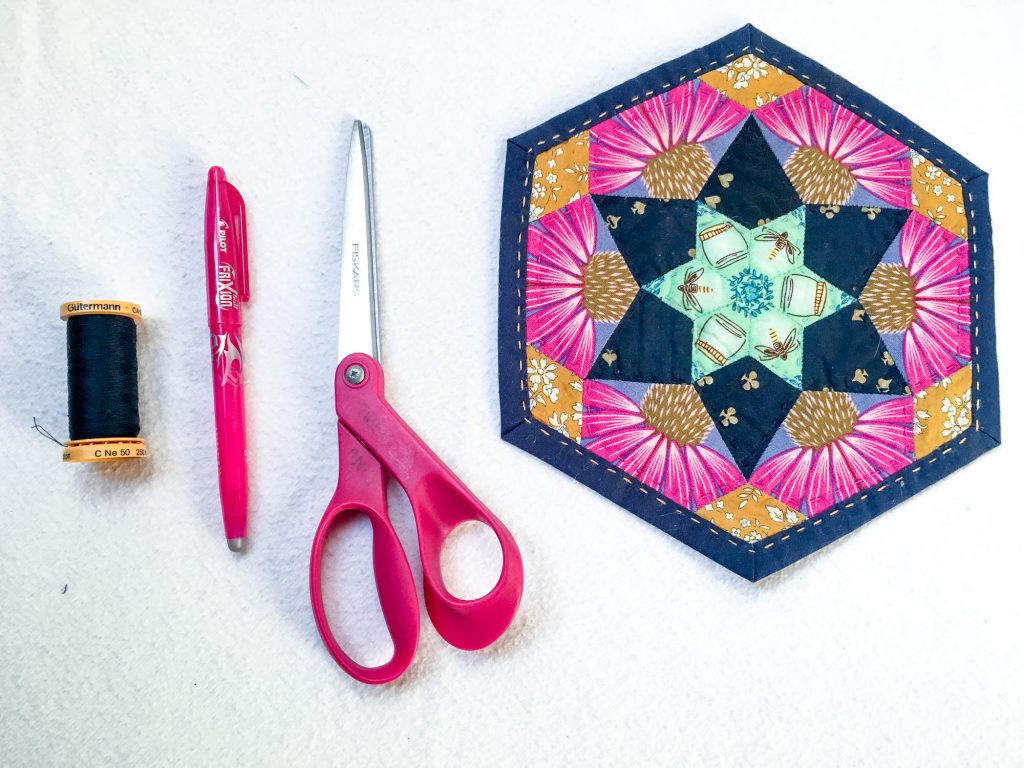
One of the best parts about EPP is that you can begin with relatively few supplies. If you have paper, fabric, a needle, and thread you can begin. However, there are several additional supplies that can make the process more efficient. This post is devoted to those EPP supplies.
If you are new to EPP, I highly recommend reading through the EPP Primer: Starter Supplies post for a list of my favorite starter supplies before proceeding, since this post will assume you are familiar with those already.
This post is a bit lengthy, but it is meant to be a reference post for you to easily refer back to in future. As such, I have divided these supplies based on the step they generally apply to in order to facilitate use with future EPP Pro posts. So without further ado, here is a little peek into the tools I have added to my EPP Pro toolbox.
Basting Supplies
I cover my favorite “pro” basting tips and tricks in this post, so some of these will make more sense once you read that post. However, it feels appropriate to have all of the supplies located in one place, so here they are.
Slotted Ruler
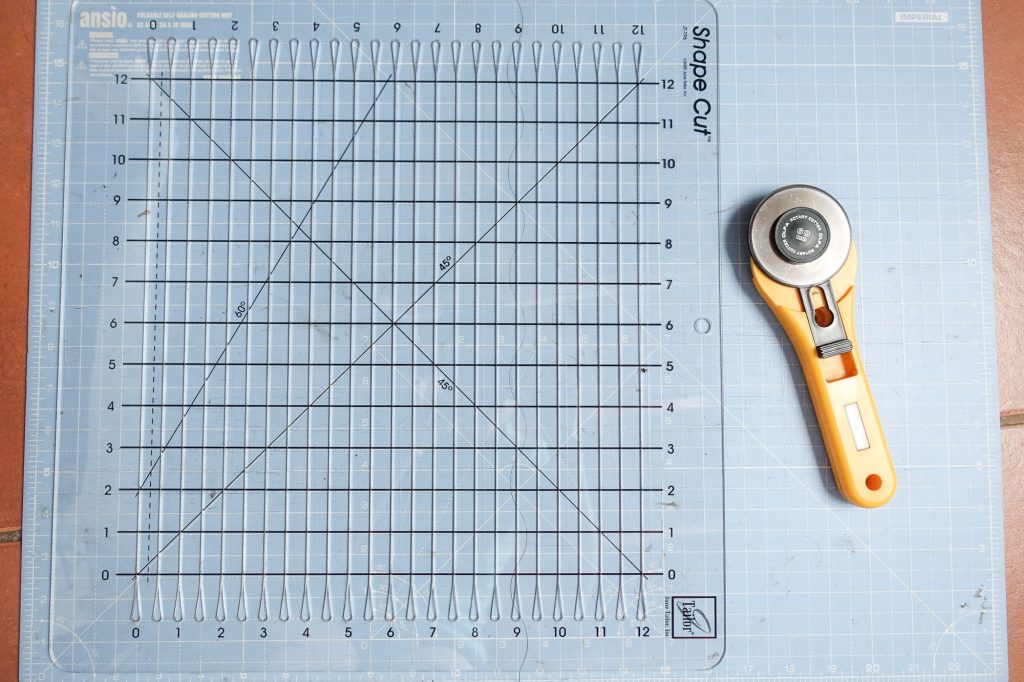
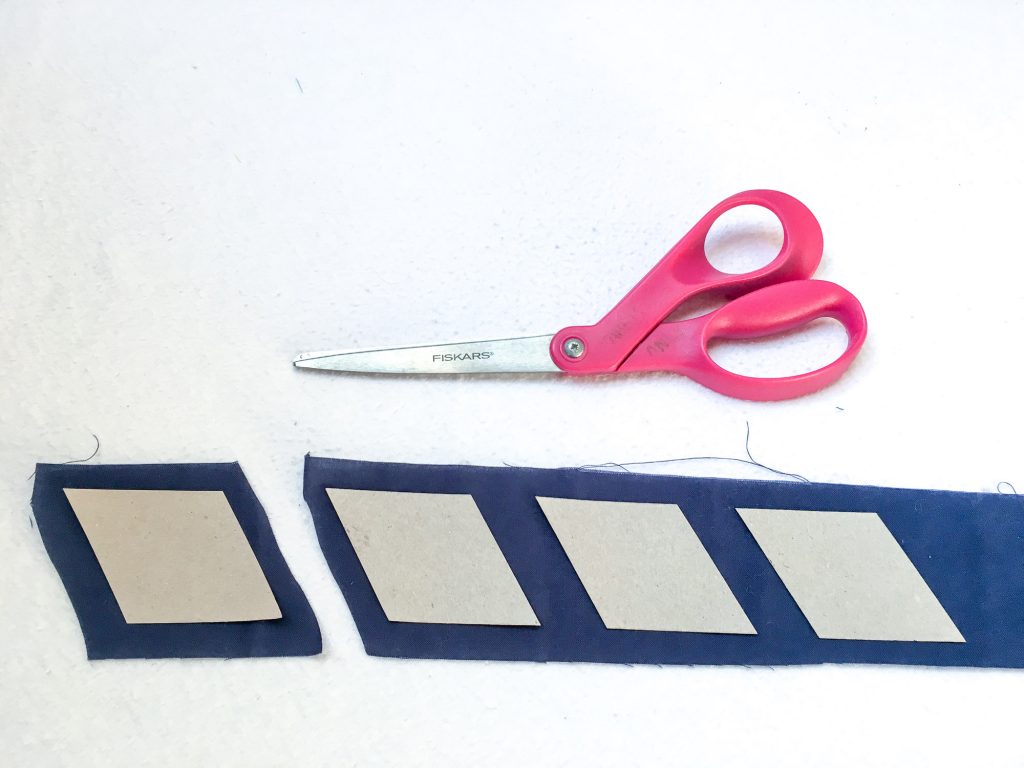
I had never heard of a slotted ruler until just last year. It is incredibly convenient for cutting multiple strips of fabric at once. (If you are a machine quilter, think jelly rolls and binding.) I discovered it shortly after I learned from Jodi Godfrey’s Tales of Cloth Hexie Handbook that you can cut strips of fabric based on the size of your pieces to speed up the basting process in EPP.
Then the EPP stars aligned, and I realized that I could combine the slotted ruler tool with the practice of cutting multiple strips of fabric at once. Thus came the advent of bulk basting into my EPP repertoire.
As I mentioned at the beginning of this section, I will cover this in depth in the basting post, but you can find the trade favorite Stripology ruler here. It requires a rotary cutter and cutting mat for use. Of note, this strategy of bulk basting may not be conducive to fussy cutting, if that is your preferred EPP style. So let’s cover my favorite supplies for that next.
Fussy Cutting Templates
My first EPP quilts contained a LOT of fussy cutting. I have shared before that I have had to come to terms with my recovering perfectionism in my quilting life. While I still love a good fussy cut when the inspiration strikes, I have recently found myself embracing the speed and imperfection that bulk basting affords. However, there are a few versions of one particular tool that I like to have around when the fussy cutting fairy sprinkles her magic fairy dust on a project.
Enter the fussy cutting template. These can be commercial or DIY, and they are ideal for determining the exact piece of fabric you want to feature. They generally denote the outline of the EPP paper piece you will be using, and then add the seam allowance so you know just where to cut in order to capture the desired design from the fabric.
I will admit that I generally don’t use the commercial acrylic versions. Typically, I work on a lot of different EPP projects during the course of a year, which would require several different templates. And, I live in a location where mail takes so long that even if I wanted to purchase one, it likely would not arrive before the inspiration faded. However, there are plenty of benefits to using them.
Benefits of Acrylic Templates
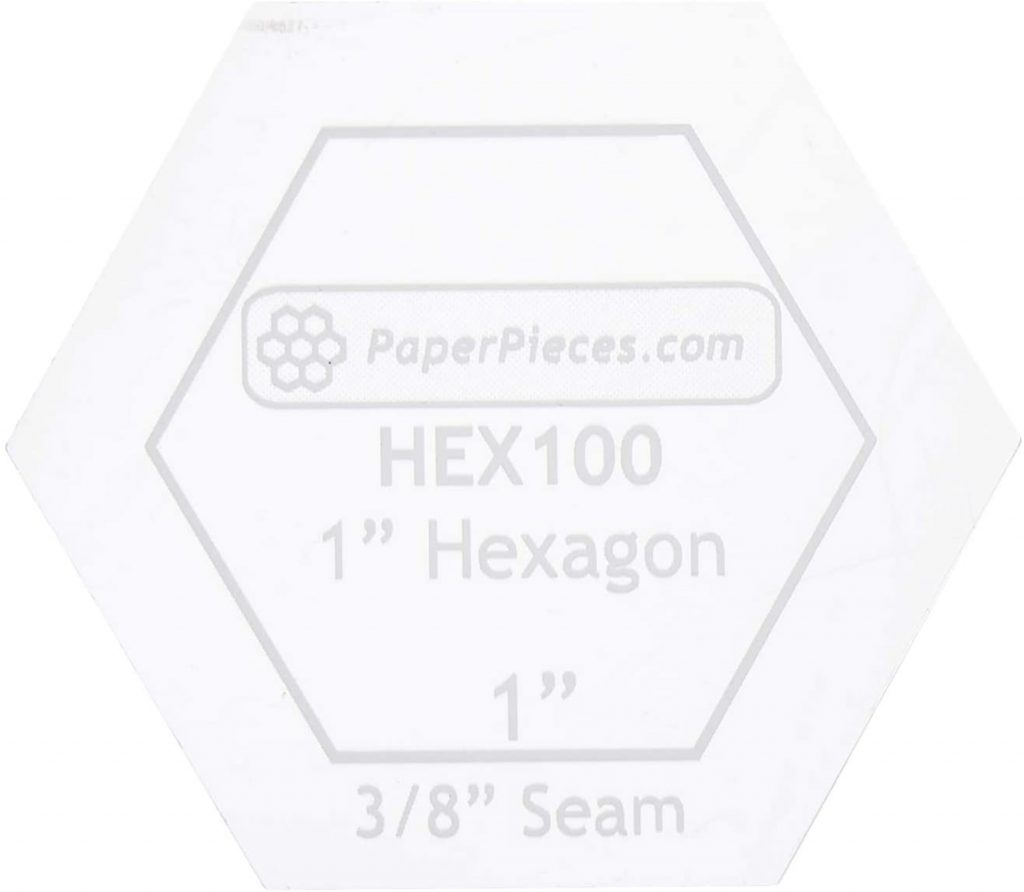
- very accurate seam allowances
- genrally work well with a rotary cutter and cutting mat
- durable with repeated use
While I appreciate these benefits to acrylic template use, my preferred method is making DIY templates. I cover the actual process for creating one in the aforementioned EPP Pro: Basting with Brilliance post, but here are a few of the benefits of making your own EPP templates.
Benefits of DIY Templates
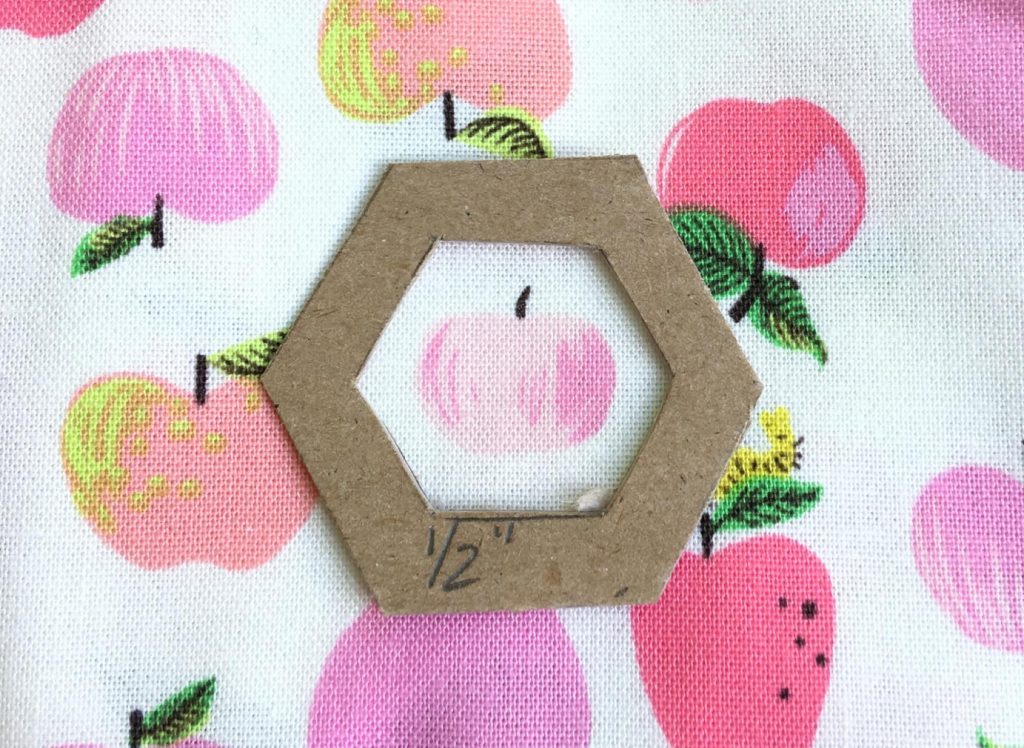
- customizable for any EPP shape or size if you already have your papers
- very affordable if made with basic supplies you already have in your home
- ready for use within minutes
One caveat to DIY templates is that using a rotary cutter and cutting mat is difficult. Because the material used for creating them is not very strong, tracing your DIY templates works best with repeated template use. I prefer using removable marking pens for this step, which also work with acrylic templates, as well. I’ll cover my favorite marking tools next.
Various Marking Pens
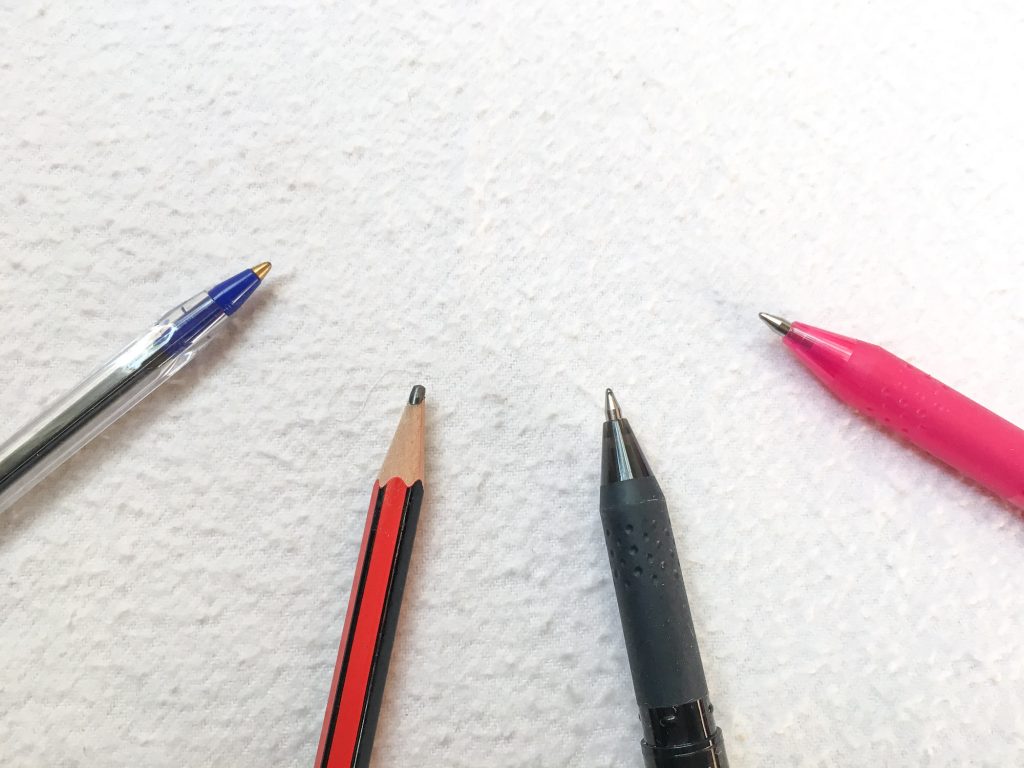
I have tried several removable marking pens/pencils, as well as traditional indelible pens and pencils, over the years. I have discovered that there are mixed ideas about which tools work best. So, as I will say repeatedly throughout this series, try a few different ones and decide which works best for you. I will share the ones I’ve used and my reasons here, but feel free to share your experience or favorites in the comments, as well.
Traditional Pens/Pencils
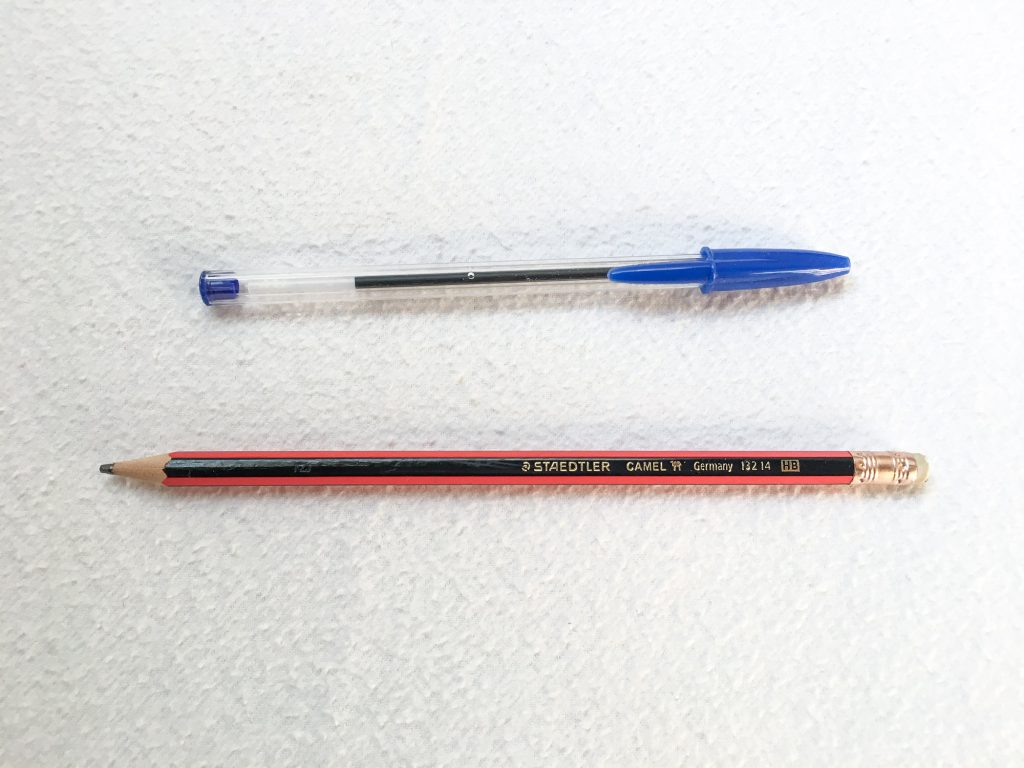
I started out using traditional pens or pencils for fussy cutting. These certainly do the job for fussy cutting if you only trace the outline of the fussy cutting template, or if you write with it on the wrong side of the fabric. However, I have found that I prefer to trace not only the outline of the template, but the inner outline of the actual paper piece to achieve greater accuracy with basting. Once I realized this, I discovered that I could use a removable marker to get the same effect, but without the permanence.
Water and Air Soluble Markers
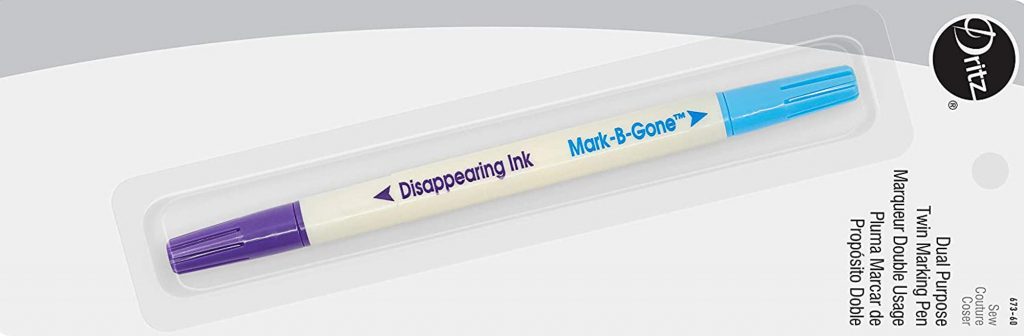
I have tried a few different water soluble markers. However, to my dismay, I had mixed results with how truly removable they were. Sometimes the marks would reappear after the water dried. So, I tried an air soluble marker. These are are lovely if you work efficiently since they tend to disappear within 24 hours. (As you might have guessed, I am not one of those efficient EPP people.)
Chalk Pencils

I actually like chalk pencils for extremely saturated colors in the deep navy to charcoal/black spectrum. However, they do buff out fairly easily with repeated handling, much like chalk on a chalkboard. So, they require a bit more efficiency between marking and basting. They come in a variety of pastel colors, but I have found they prove insufficient for lighter fabrics.
Heat Erasable “Frixion” Pens
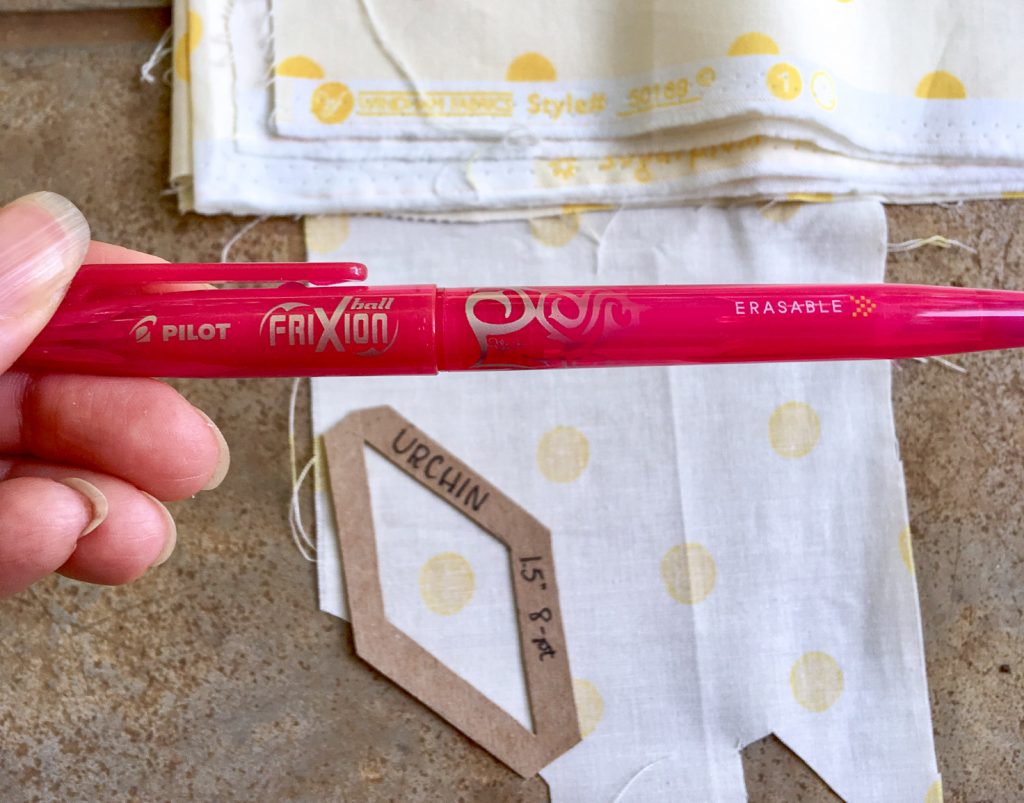
These magical pens are designed to be erasable on paper, simply by applying “friction” to your work. However, some wonderfully brilliant person (sadly I don’t remember who!) pointed out that friction is simply heat in action. Thus, apply an iron to this ink, and it will disappear in the same way!
Once I tried these pens, I have never looked back. They come in a plethora of colors, which make them ideal for use on a variety of fabrics and shades. With the exception of the deeper fabrics I mentioned in the previous section, I have found these extremely versatile.
A Disclaimer
However, a little disclaimer is due before pronouncing these delightful pens as the “gold standard” for removable pens. I have heard a few stories of folks using these pens for projects entered into quilt shows, with mixed results.
It seems that if this ink is not washed out AFTER it has been “erased” by the iron, it has the potential to reappear in very cold temperatures. While many of us will make most of our quilts for general use, and thus will wash them at some point, this tidbit of information could be useful in some instances. If you don’t plan to wash your quilt after ironing OR you plan on entering your EPP quilt into a quilt show where the transit or storage temperatures may not be regulated, use with caution.
As an addendum to the previous disclaimer regarding cold temperatures, I have also heard of one quilter who left her WIP in a hot car on a summer’s day. Sadly, she returned to discover that her hard work had been “erased” by the heat of the car. I can’t remember if she tried to put it in the freezer to help it reappear, but in the end she had to redo her work.
My Conclusion to the Pen Issue
Clearly, there are definitely advantages and disadvantages to each of these tools. In my experience, I have been very happy with Frixion pens. While I do trace my EPP templates on the wrong side of the fabric “just in case,” I can confidently share that I have used these pens not only for tracing EPP shapes but also for creating quilting lines for hand quilting.
I used them on my most prized quilt, and it has been washed and dried multiple times without ever showing signs of reappearance. Sadly, this was not consistently the case even when using “washable” marking pens. So, I will again encourage you to try a few different types and decide what works best for you.
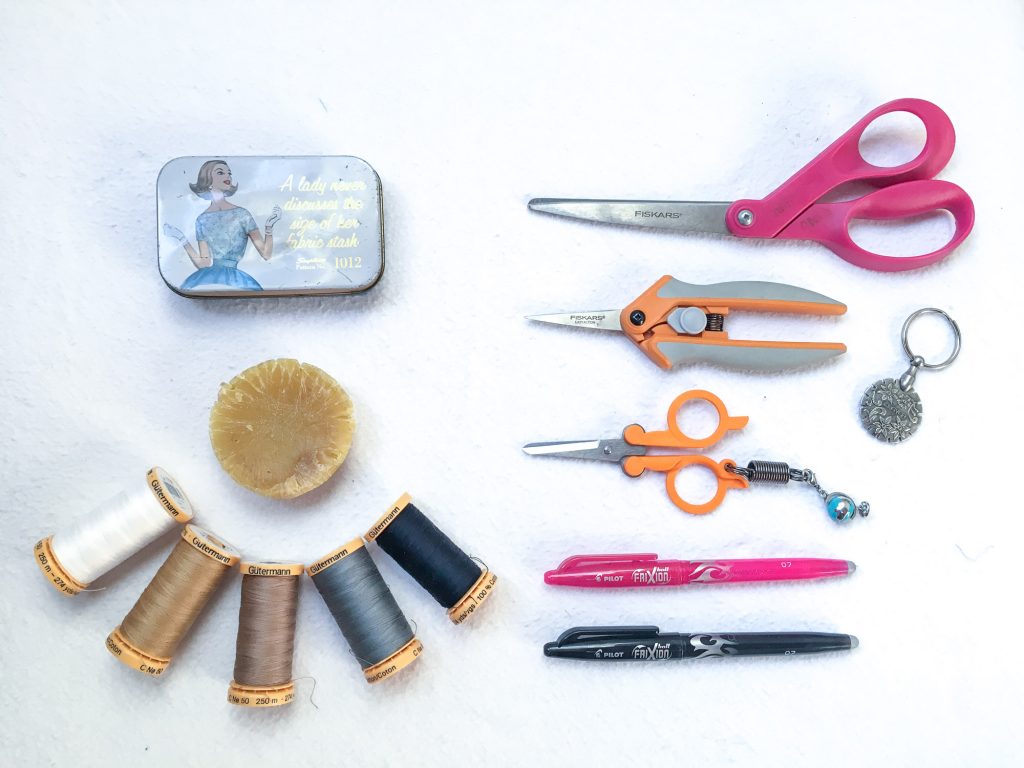
Scissors
This next statement might go without saying, but I don’t take it for granted since I didn’t know it at first. You should have dedicated scissors for sewing. To some, this might sound like a luxury, and maybe it is. But, let me tell you how lovely it is to use sharp scissors. Well, it’s lovely. Even if you only own two total pairs of scissors in your home, one for sewing and one for everything else, it’s fine. Just have dedicated sewing scissors.
Unfortunately, nearly everything else we use scissors for dulls them more than fabric does. As a result, if we use a pair of scissors for paper and they work perfectly, but then try to use them for fabric, you might discover in dismay that they don’t work as well on fabric any longer. If you’re anything like me, having tools that don’t do what they’re supposed to do leads to frustration. And, frustration is the fastest way to deflate my balloon of inspiration. As such, I try to avoid it as much as I can. Having sharp scissors helps me do that.
A Friendly PSA for Your People
But, if you’re also like me, you live with at least one other human who knows nothing about dedicated sewing scissors. So it can help to have a system in place for identifying your sewing scissors not only for you, but for the people you live with.
I read a story once about a stitcher who taught her children to only use red handled scissors for paper. All other scissors were off limits. Another stitcher actually padlocked her sewing scissors! I don’t have any children, so I simply label my scissors “fabric only” and my highly intelligent husband respects those instructions.
Whatever your system, stick to it and gently remind the people around you to honor it, as well. (Otherwise you might come home to someone cutting wrapping paper with your new sewing scissors exclaiming, “these scissors cut like butter!” Ask me how I know.)
Ok, now I’ll get off my soap box and dive into the different kinds of scissors I actually use.
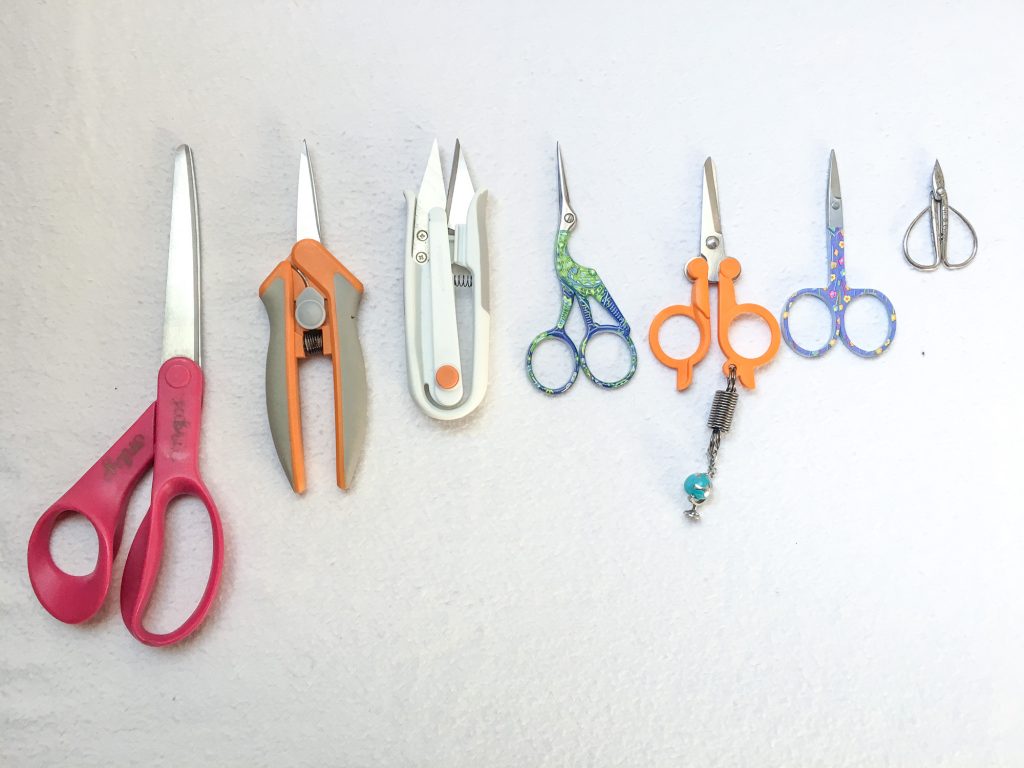
Large Handled Scissors/Shears
I like having a large pair of sewing scissors, often called shears, particularly for basting. As I mentioned before, I like to cut long strips of fabric and then “pre-baste” my pieces in a row along the strip. Then I cut them into individual pieces with my large sewing shears. I like to take these cuts in one snip, if I can. Having a large pair of scissors makes this a breeze.
There are lots of different kinds of sewing shears, but I tend to be a fan of Fiskars. They are sharp, not too heavy, and readily available at affordable prices from a variety of suppliers. Another trade favorite is Gingher, which I adore, but since they are heavy and I travel a lot, I tend to stick to my large Fiskars. Plus, mine are pink.
Medium Sized Sharp Tip Scissors
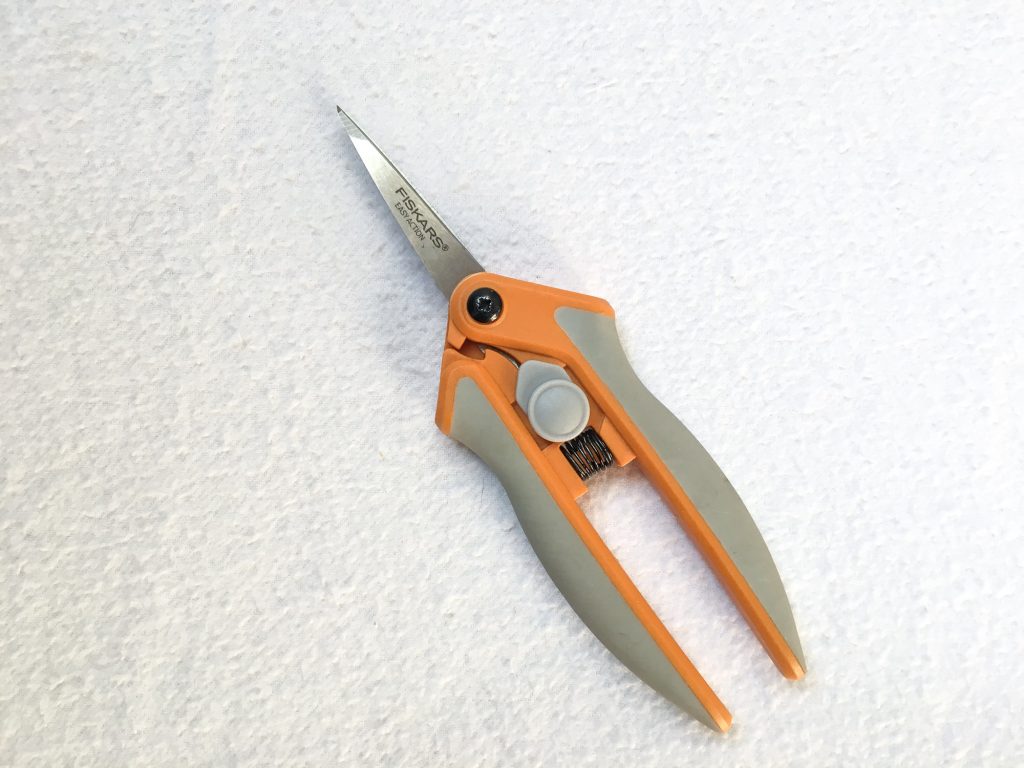
While large handled scissors work great for cutting pieces out of strips or making a lot of progress on a large piece of fabric, they aren’t all that agile when you need to navigate tight corners. For this task, I use a smaller pair with a really sharp tip. (Yup, you guessed it, another a pair of Fiskars.) The pair I use has an extremely sharp tip that works perfectly for fussy cutting. They clip right up to area you want, and no further.
Another nice part about this particular pair is that it’s spring loaded. As a result, you don’t get that “cutting cramp” from opening and closing the scissors repeatedly. I’m told they’re great for folks with arthritis for this reason. I don’t have arthritis, but my Nana did. It definitely affected her ability to do common tasks so many of us take for granted. I appreciate Fiskars for thinking of that.

One thing to beware of with these scissors, especially if you have little ones around, is that they are VERY sharp and VERY pointy. Because of the spring loaded function, they default to being open instead of closed like most scissors. They come with a little lever lock feature, but be mindful that they are pointy and sharp even when they are closed.
Embroidery Scissors/Thread Snips
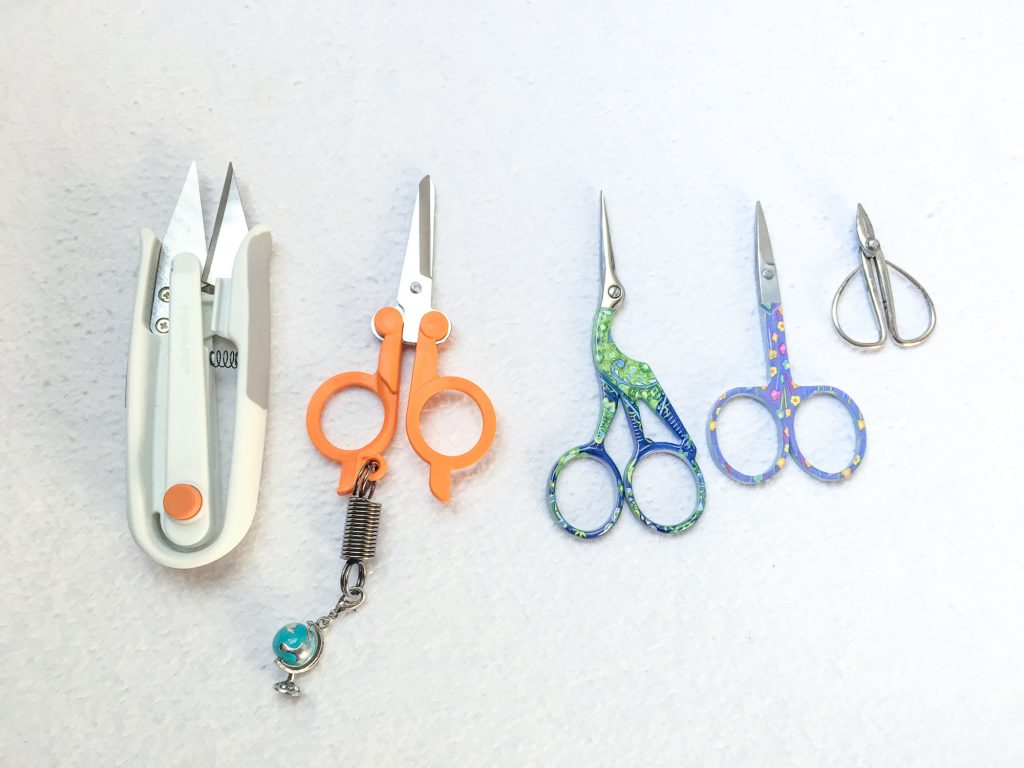
The last pair of scissors I keep on hand are a small pair of embroidery scissors or thread snips for general EPP stitching. I’m slightly less picky about these and can often be found picking up a cheap pair that’s just “cute” rather than highly functional. Sometimes I kick myself for being a little “lazy” in this way, but as long as I can cut my thread, I’m happy.
One little note if you are a frequent air traveler like me, particularly outside of the US. I didn’t know that some places have even stricter rules than the TSA does. So even if you have a pair of scissors that complies with TSA regulations, they may not comply with another country’s rules.
As such, I like to keep a pair of folding scissors on hand (Fiskars again) since they tend to look less threatening in luggage. In addition to these, I have a little pendant thread cutter in case my scissors get confiscated somewhere that I didn’t know the rules. A nail clipper comes in handy if you’re desperate (again, ask me how I know), but I have never had an issue with the other two options.

Stitching Supplies
Now let’s take a look at stitching supplies. I discuss various needle and thread types in the EPP Primer: Starter Supplies post. Here, I will dive a little deeper into thoughtfully choosing which shades of thread to keep on hand, as well as my favorite stitching secret weapon.
Building Your Thread Collection
Whether you are in the cotton or polyester camp regarding thread, there are a few other camps regarding which shades of thread to keep on hand. The most common ones I’ve seen include the “Use-What-You-Have” camp, the “No Nonsense Neutral” camp, the “Chase the Rainbow” camp, and the “Match Your Stash” camp.
I love all of these camps, and I have been a part of each one over the years. However, I have realized in the last year or two that I have settled somewhere between the “rainbow” and “match your stash” camps. Let’s have a look at each one.
Use What You Have
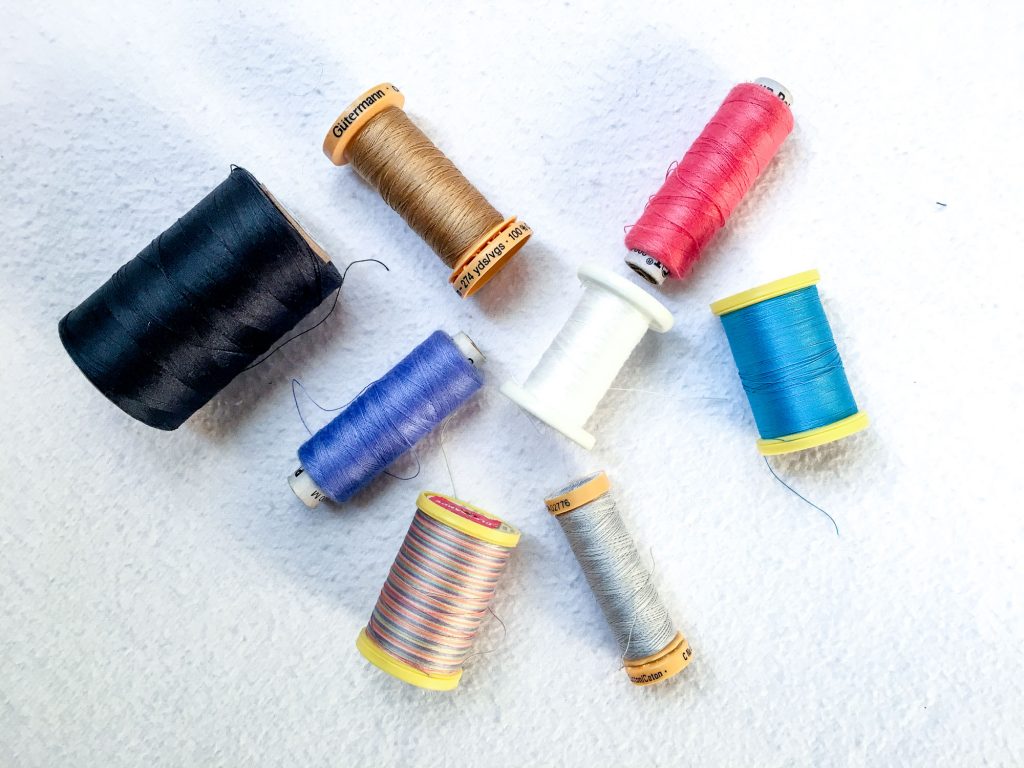
This is where I tell every new EPPer to begin. I’ll say it again that there is beauty in the simplicity of EPP with regards to supplies. As someone who lives in a country that does not carry thread I like, I often find myself back in this camp, as well. A lot can be said for the tiny stitches that pepper themselves amidst a hand stitched quilt and add to its character. So, if you’re new to EPP or just not in a place to purchase new thread, this is a no shame camp.
No Nonsense Neutrals

When I first started to buy thread, I was still pretty new to EPP and quilting in general. So, I took the advice of a blog post I read that advised keeping four basic neutrals in your thread collection: cream, tan, gray, and black. This advice took me a long way. It was really useful as a starting point, and to be sure, my neutrals get the most use. Some folks are really confident in their stitching ability or choice of fabric. If that’s you, this can be a great option.
Chase the Rainbow
As I continued on my stitching journey, I started branching out and trying different color palettes. As a result, I found it increasingly difficult to categorize my thread choices into neutrals. This was particularly challenging when I had two non-neutral fabrics next to each other that highly contrasted one another. So, I jumped in with both feet and bought a whole rainbow of thread.
That choice has served me well. I discovered that when I’m faced with highly contrasted, non-neutral colors next to each other, choosing one color or the other as a thread choice can help diminish the visibility of my stitches. If you are still figuring out which fabrics you like and have a lot of high contrast color pairings, this could be a fun way to liven up your thread collection.
Match Your Stash
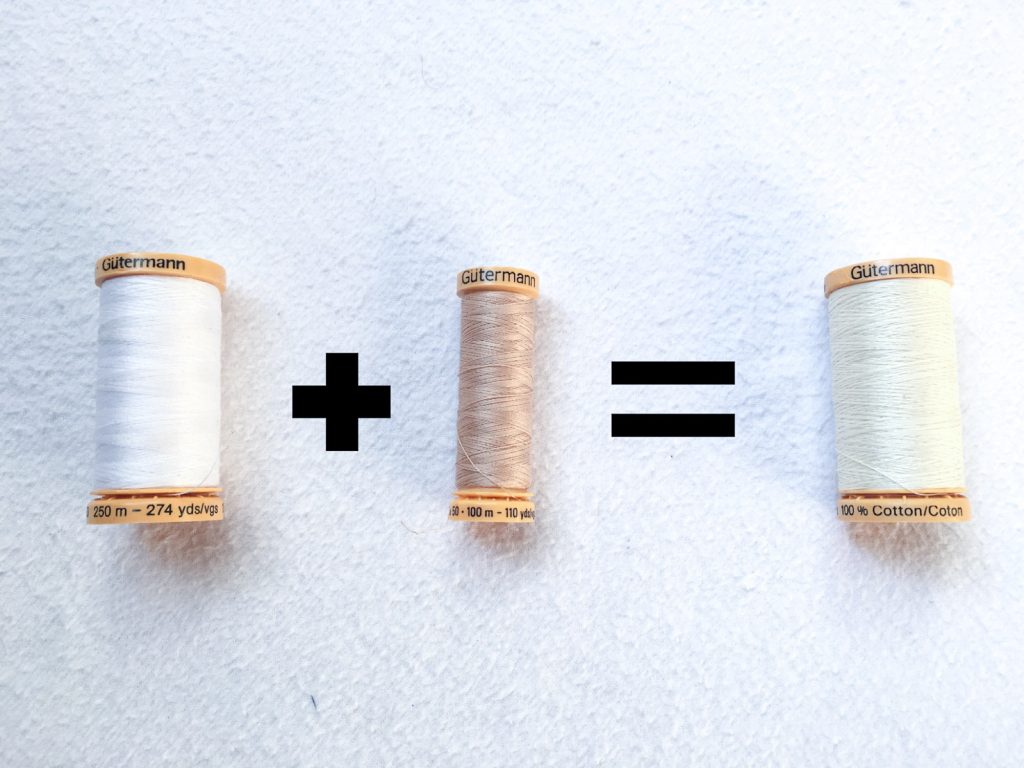
While I love having a rainbow of thread in my sewing box, I have started to take note of what I use most as well as the fabric color palettes I’m drawn to. Interestingly, I still use plenty of high contrast non-neutrals as well as a good bit of neutrals. But, I’ve noticed that I can start buying larger spools of what I call “tween” colors that cover more than one color.
Here is how I implement this concept in my thread collection. Rather than having white and cream, I keep an off white on hand. Instead of buying red and pink, I choose a color that works for both. When I need a green or blue, I use a bluish green that blends well with either. You’d be amazed at how well a color that appears to be very different from the fabric, can actually blend in once you’re stitching with it.
The point of all of this is to pay attention to the actual fabrics in your actual stash that you actually use. While rainbows are delightful, you can end up with a whole lot “pretty” threads that never become “useful” threads. Paying attention to what you actually use can be a great way to focus your thread choices to curate a collection that uniquely works for you.
My Stitching Secret Weapon
I discuss conditioning your thread in the EPP Primer: Starter Supplies post under the thread section, but it deserves a mention here, as well. When I first started hand stitching, I had never heard of thread conditioner or its benefits. So, I suffered through the tangles and twists and knots that I assumed came with hand stitching territory.
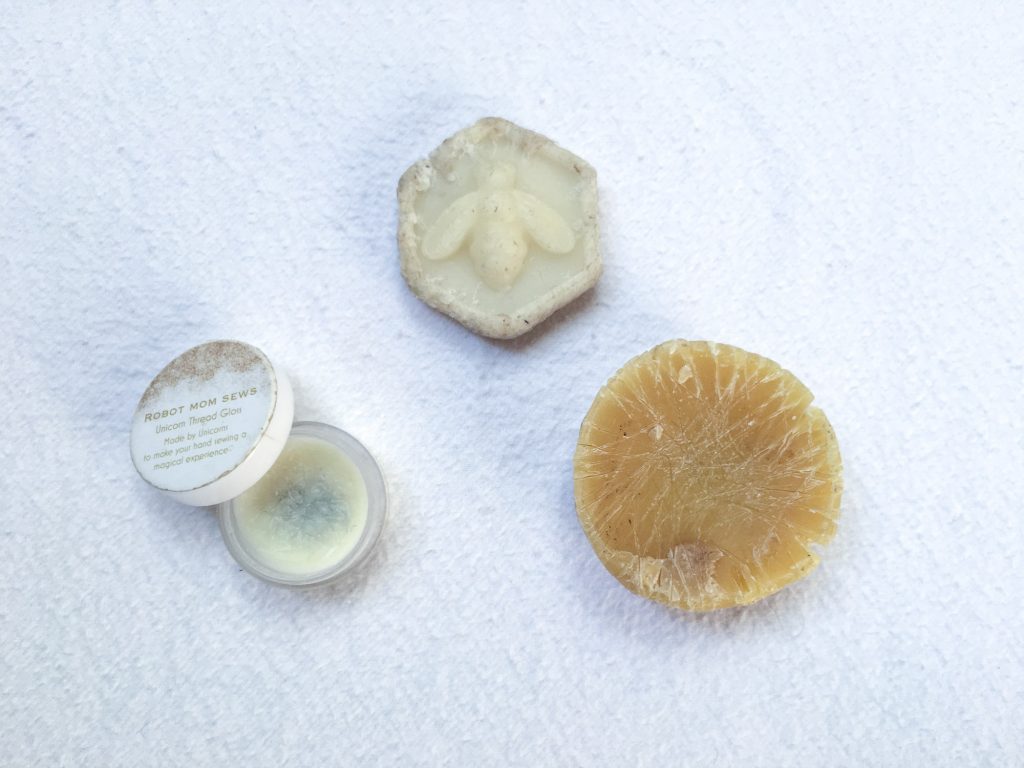
Then I discovered beeswax. I stumbled upon a blog post (again, I’m not sure whose) praising the miracle of beeswax as a thread conditioner. Upon further research, I discovered that beeswax has been used for years by stitchers of old. They used it to condition and strengthen their cotton thread, in particular, with the added benefit of decreasing tangles and knots as they stitched. Say no more.
As soon as I tried it, I knew it was one of the missing links in my stitching supplies toolbox. I use beeswax most often to condition my thread for EPP and binding quilts. There are a number of folks who sell scented beeswax out there, just be mindful to purchase 100% beeswax.
While I do love the scented ones, a friend here recently gave me a chunk of raw beeswax from her friend’s apiary. It has the most wonderful natural honey scent that I think I might be converted to using strictly raw beeswax!
However, you can find wax beads or wax sheets used for candle making online and these are completely unscented if you prefer that. Simply melt it down in a double boiler or the microwave and pour it into a mould. Voila! Your very own thread conditioner. Alternatively, Amazon sells convenient 1 oz bars of it ready to go!
I keep several small chunks of it for my various stitching kits that I keep around the house and in my “to-go” stitching cases, which I’ll talk about next.
Staying Organized

I go into more depth about how I organize my supplies and WIPs in the final post of this EPP Pro series, but for now I’ll just say that having a system of organization can be really helpful.
I discovered a few years ago that if something has a place, I will return that thing to its place when I’m done using it. However, if that thing does not have a place, it is destined to shuffle from surface to surface and finally disappear just when I’m ready to use it. This phenomenon falls into the same category as having dull scissors. It creates frustration which deflates my inspiration. If left unchecked, it can ultimately prevent me from even beginning a project, let alone making progress on it.
From zipper pouches and old biscuit tins, to ziplock bags and IKEA bins, I have several ways to stay organized in my sewing life. But, in its simplest form, my system for organizing EPP supplies falls into two categories: “on the go” and “at home.”
Keeping a set of basic EPP supplies ready for travel, as well as a set that always stays at home in my sewing space, works best for me. It allows me to freely pick up a WIP and take it on the road, as well as easily resume a WIP I’ve been working on at home. Win-win.
What to Expect in the Next Section
I know that was a lot, but I hope that you have learned about a few new supplies or reconsidered a few you already knew about that might serve you well in your EPP stitching journey.
In the next section, EPP Pro: Basting with Brilliance, we will dive into some of the tips and tricks that have revolutionized my EPP basting life. (Sounds wild and crazy right?)
Or, if you’re still new to EPP or a little rusty, check out the EPP Primer: Basting post for a beginner friendly refresher. Until, next time, happy stitching everyone!
For future reference, you can always find all of the sections of the EPP Pro series here. Or you can use these handy pins for easy access from Pinterest.