You might already be an avid quilt labeler. Or, maybe you have never labeled a quilt before in your life. Still more, maybe you label once in a while if you give a quilt as a gift. While I understand that it’s an extra step, I never feel like a quilt is quite complete until I put a label on it. To me, quilt labels are like an artist’s signature on a painting. It tells everyone who ever views that painting, forever afterward, that this artist painted upon this canvas.
In my opinion, quilts are works of art every bit as much as paintings are. While I am by no means a trained painter or artist as such, I have dabbled in watercolor over the years. In my experience, the process in which paint takes to paper very closely reflects the way fabric takes to a quilt design.
Every quilt emerges from the blending of a quilt design, fabric choice, and the quilter herself. As such, every quilt is a work of art on one level or another, which means each quilter is an artist to one degree or another. So, why wouldn’t we give ourselves credit for the beautiful creations we make, just as an artist would for her painting?
Making a Quilt Label
If you need a little bit of direction for where to start, I’ll share my process with you. Most of my quilt labels contain fairly simple information. I generally try to always include my name and the year, sometimes the month. In addition, I often name my quilts, so I typically include this bit, too.
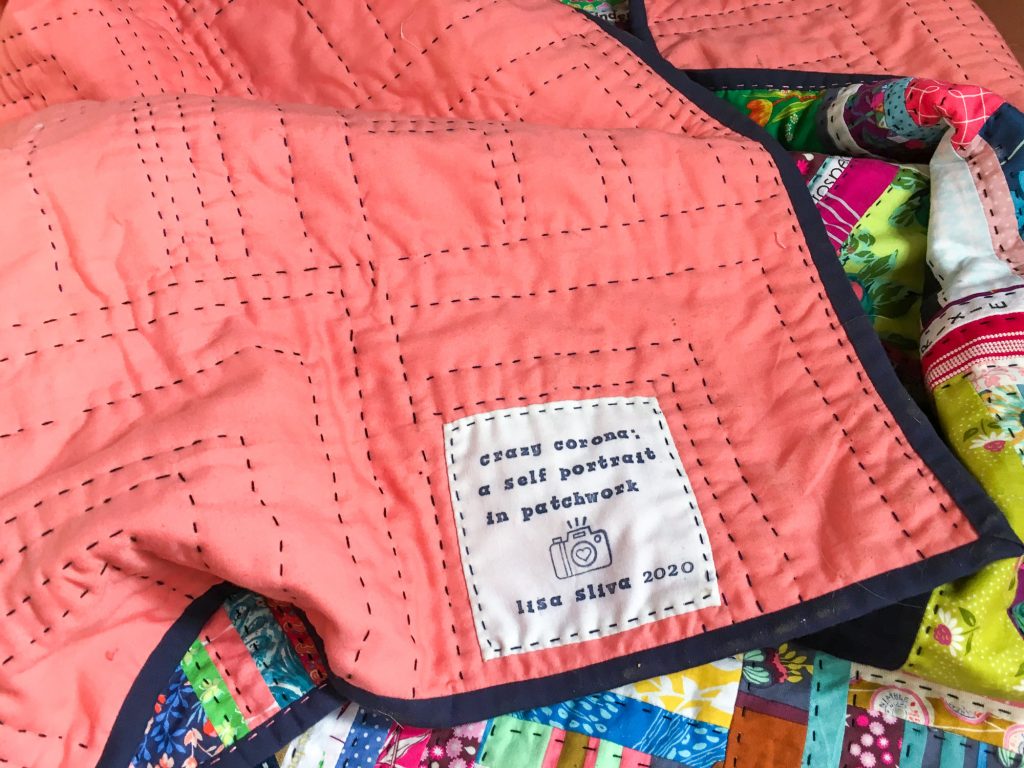
During the global pandemic, I sometimes added “corona” or “coronavirus” on my quilt labels in addition to the year because I felt like was a historic time, and these quilts were born out of otherwise fairly challenging circumstances. (If you want to read a bit about my reflections on stitching through COVID-19, you can find my blog post about it here.)
However, a quilt label can be as simple or elaborate as you choose. I have seen simply initials embroidered onto a quilt backing or corner patch of a quilt. Alternatively, I have also seen entire backstories literally printed onto fabric with an inkjet printer then appliqued onto the back of a quilt. There are truly no rules.
Stamp Your Own Quilt Label
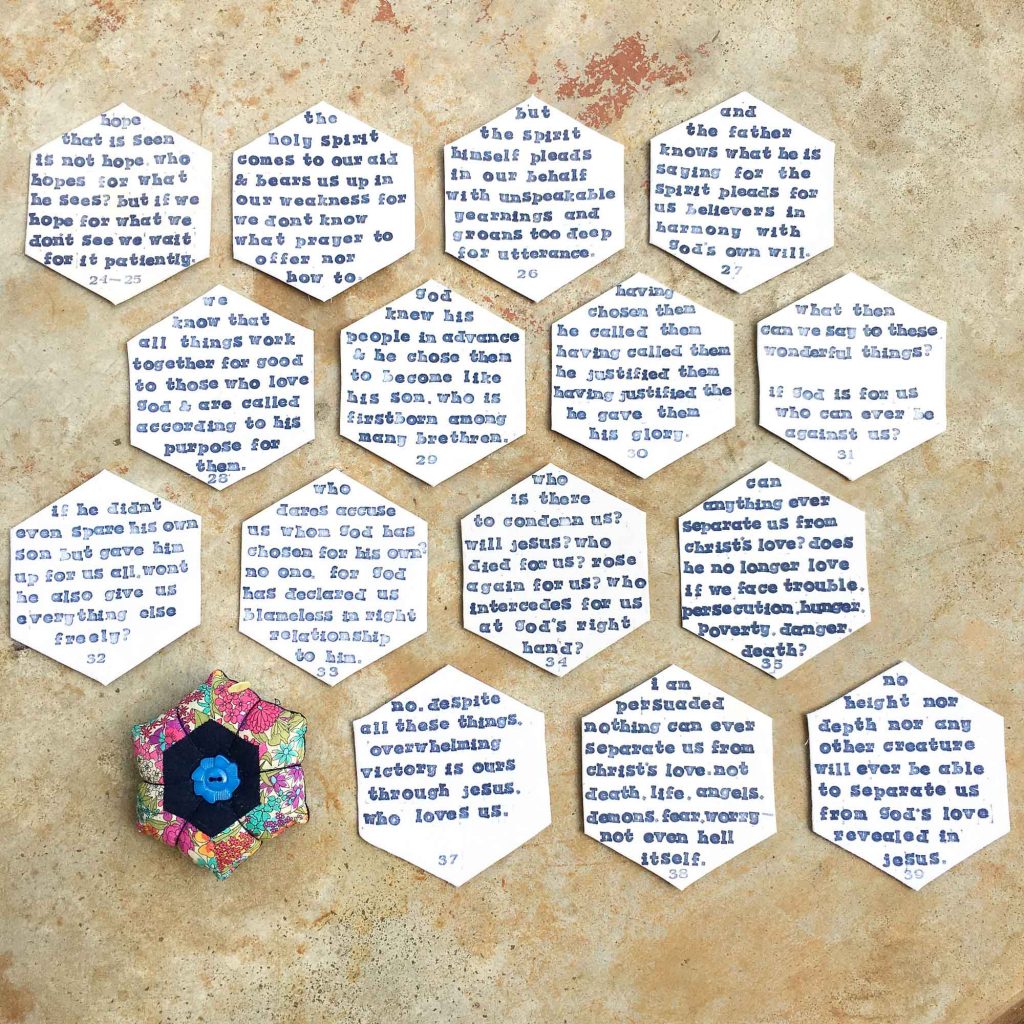
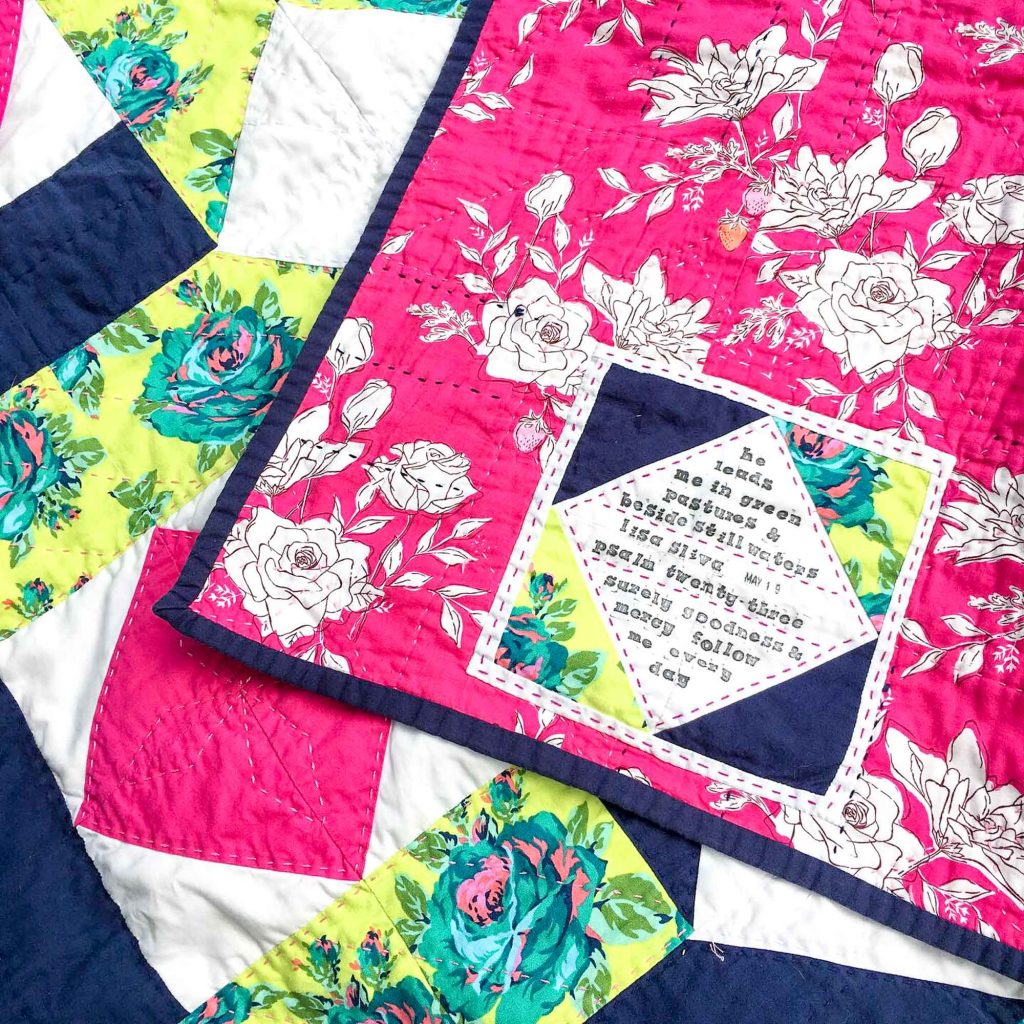
While I have labeled quilts in a number of ways, my favorite method is stamping. For this quilt, I chose to memorize a small section of verses from Romans 8, and stamp them onto blank white hexies before stitching them into the quilt.
However, this is the same process I use to create all of my quilt labels. I thought it might be useful to give a more comprehensive tutorial here if you’re interested in giving it a try yourself.
Of Note:
Regardless of the quilt label shape, I have discovered that using a basted EPP piece provides the best surface for stamping. As such, I keep a 4” square EPP paper on hand solely for this purpose. However, I find 2” hexagons as well as clusters of EPP shapes stitched together ideal options as well. For a set of FREE printable hexagon templates click here.
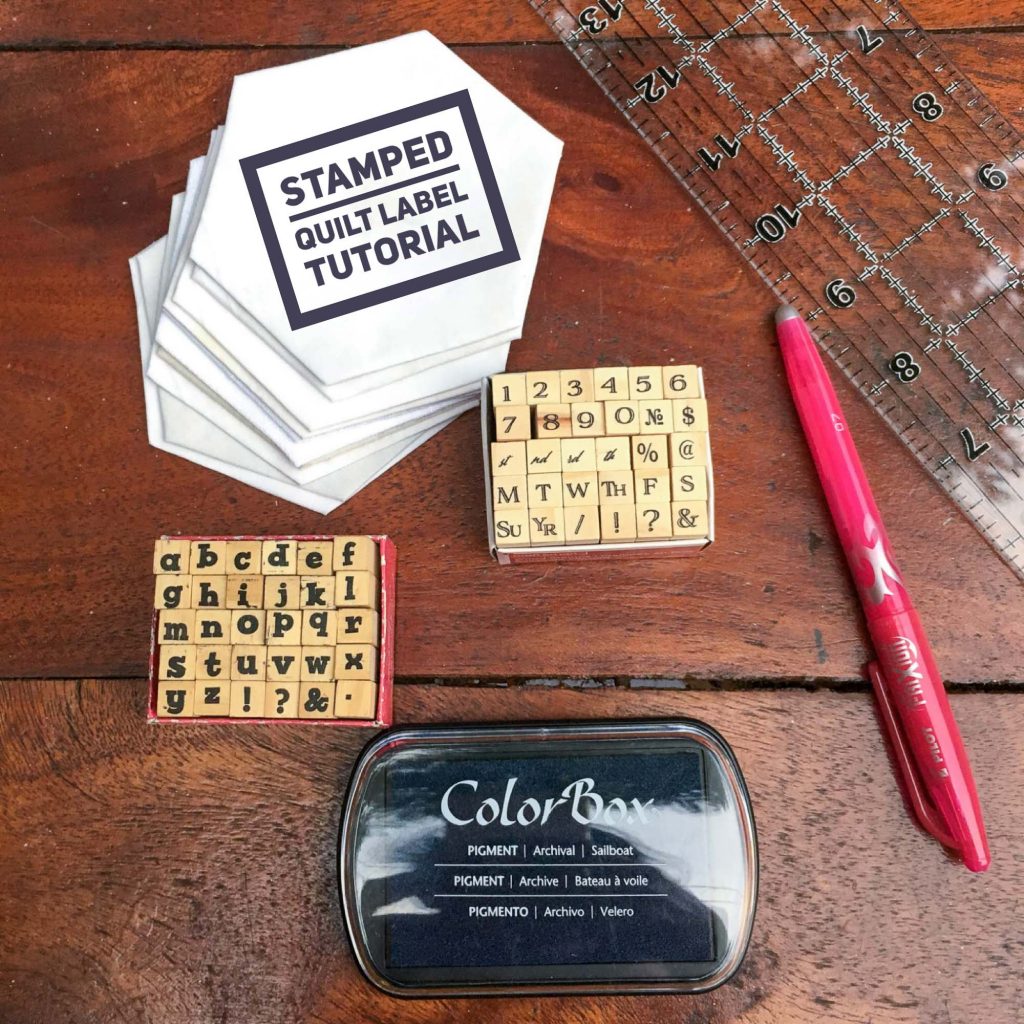
Supplies
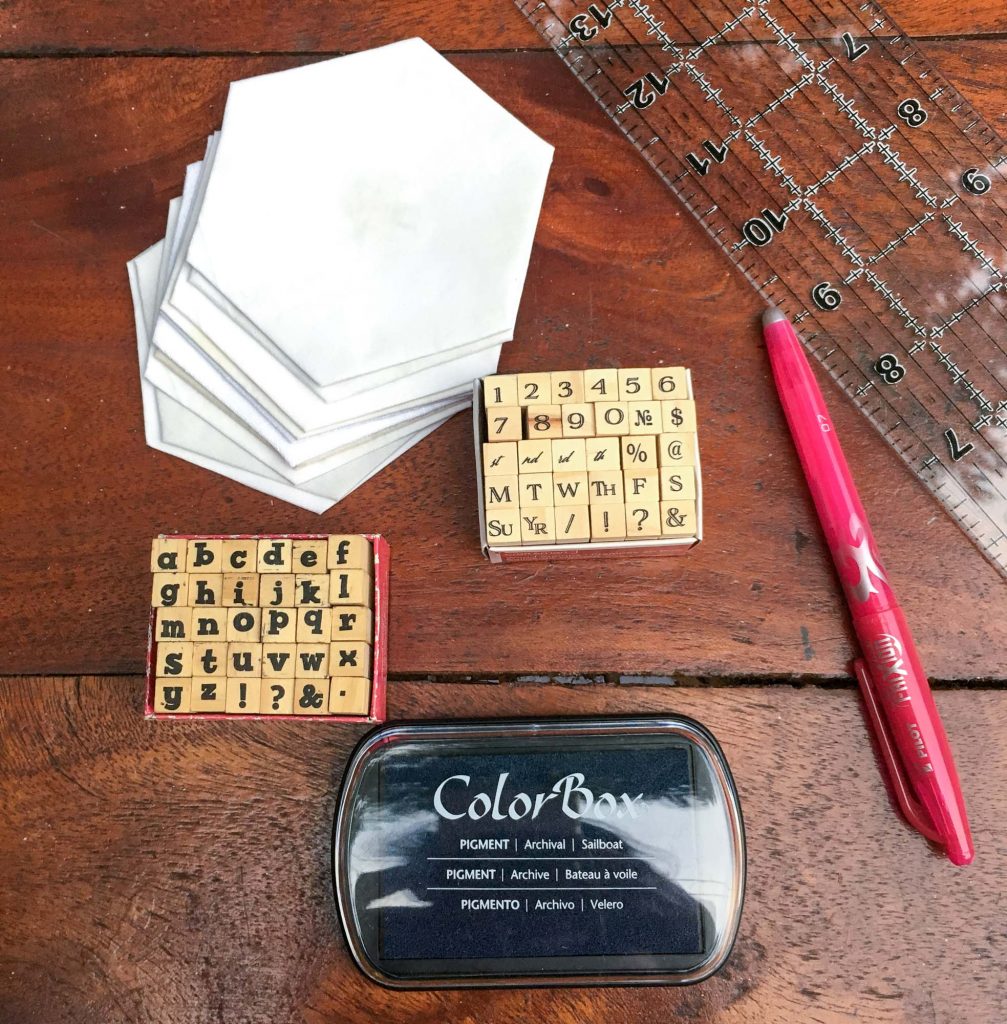
Basted EPP paper of choice (2” hexagon used for demonstration)
Stamps (the alphabet and numeral sets are from the dollar section in the checkout line at Michael’s craft stores in the US)
Ink pad, preferably one that indicates “pigment” ink (this pad is also from Michael’s craft store)
Iron
Pressing cloth
Instructions
One last thing before we begin. I have endeavored to create as aesthetically pleasing a layout as possible with this post in order to enhance readability. As such, desktop users will notice that some steps of the tutorial are staggered with an alternating text block and image. If the images appear too small at any time, simply click on the image and a full scale version will pop up.
1. Decide on information to be included and layout for that information. I will be stamping a verse in this example, so my layout is simply lines of text. However, you can take artistic liberties here as suit your fancy. I will be sharing a few completed quilt labels at the end of this tutorial to give you some inspiration.
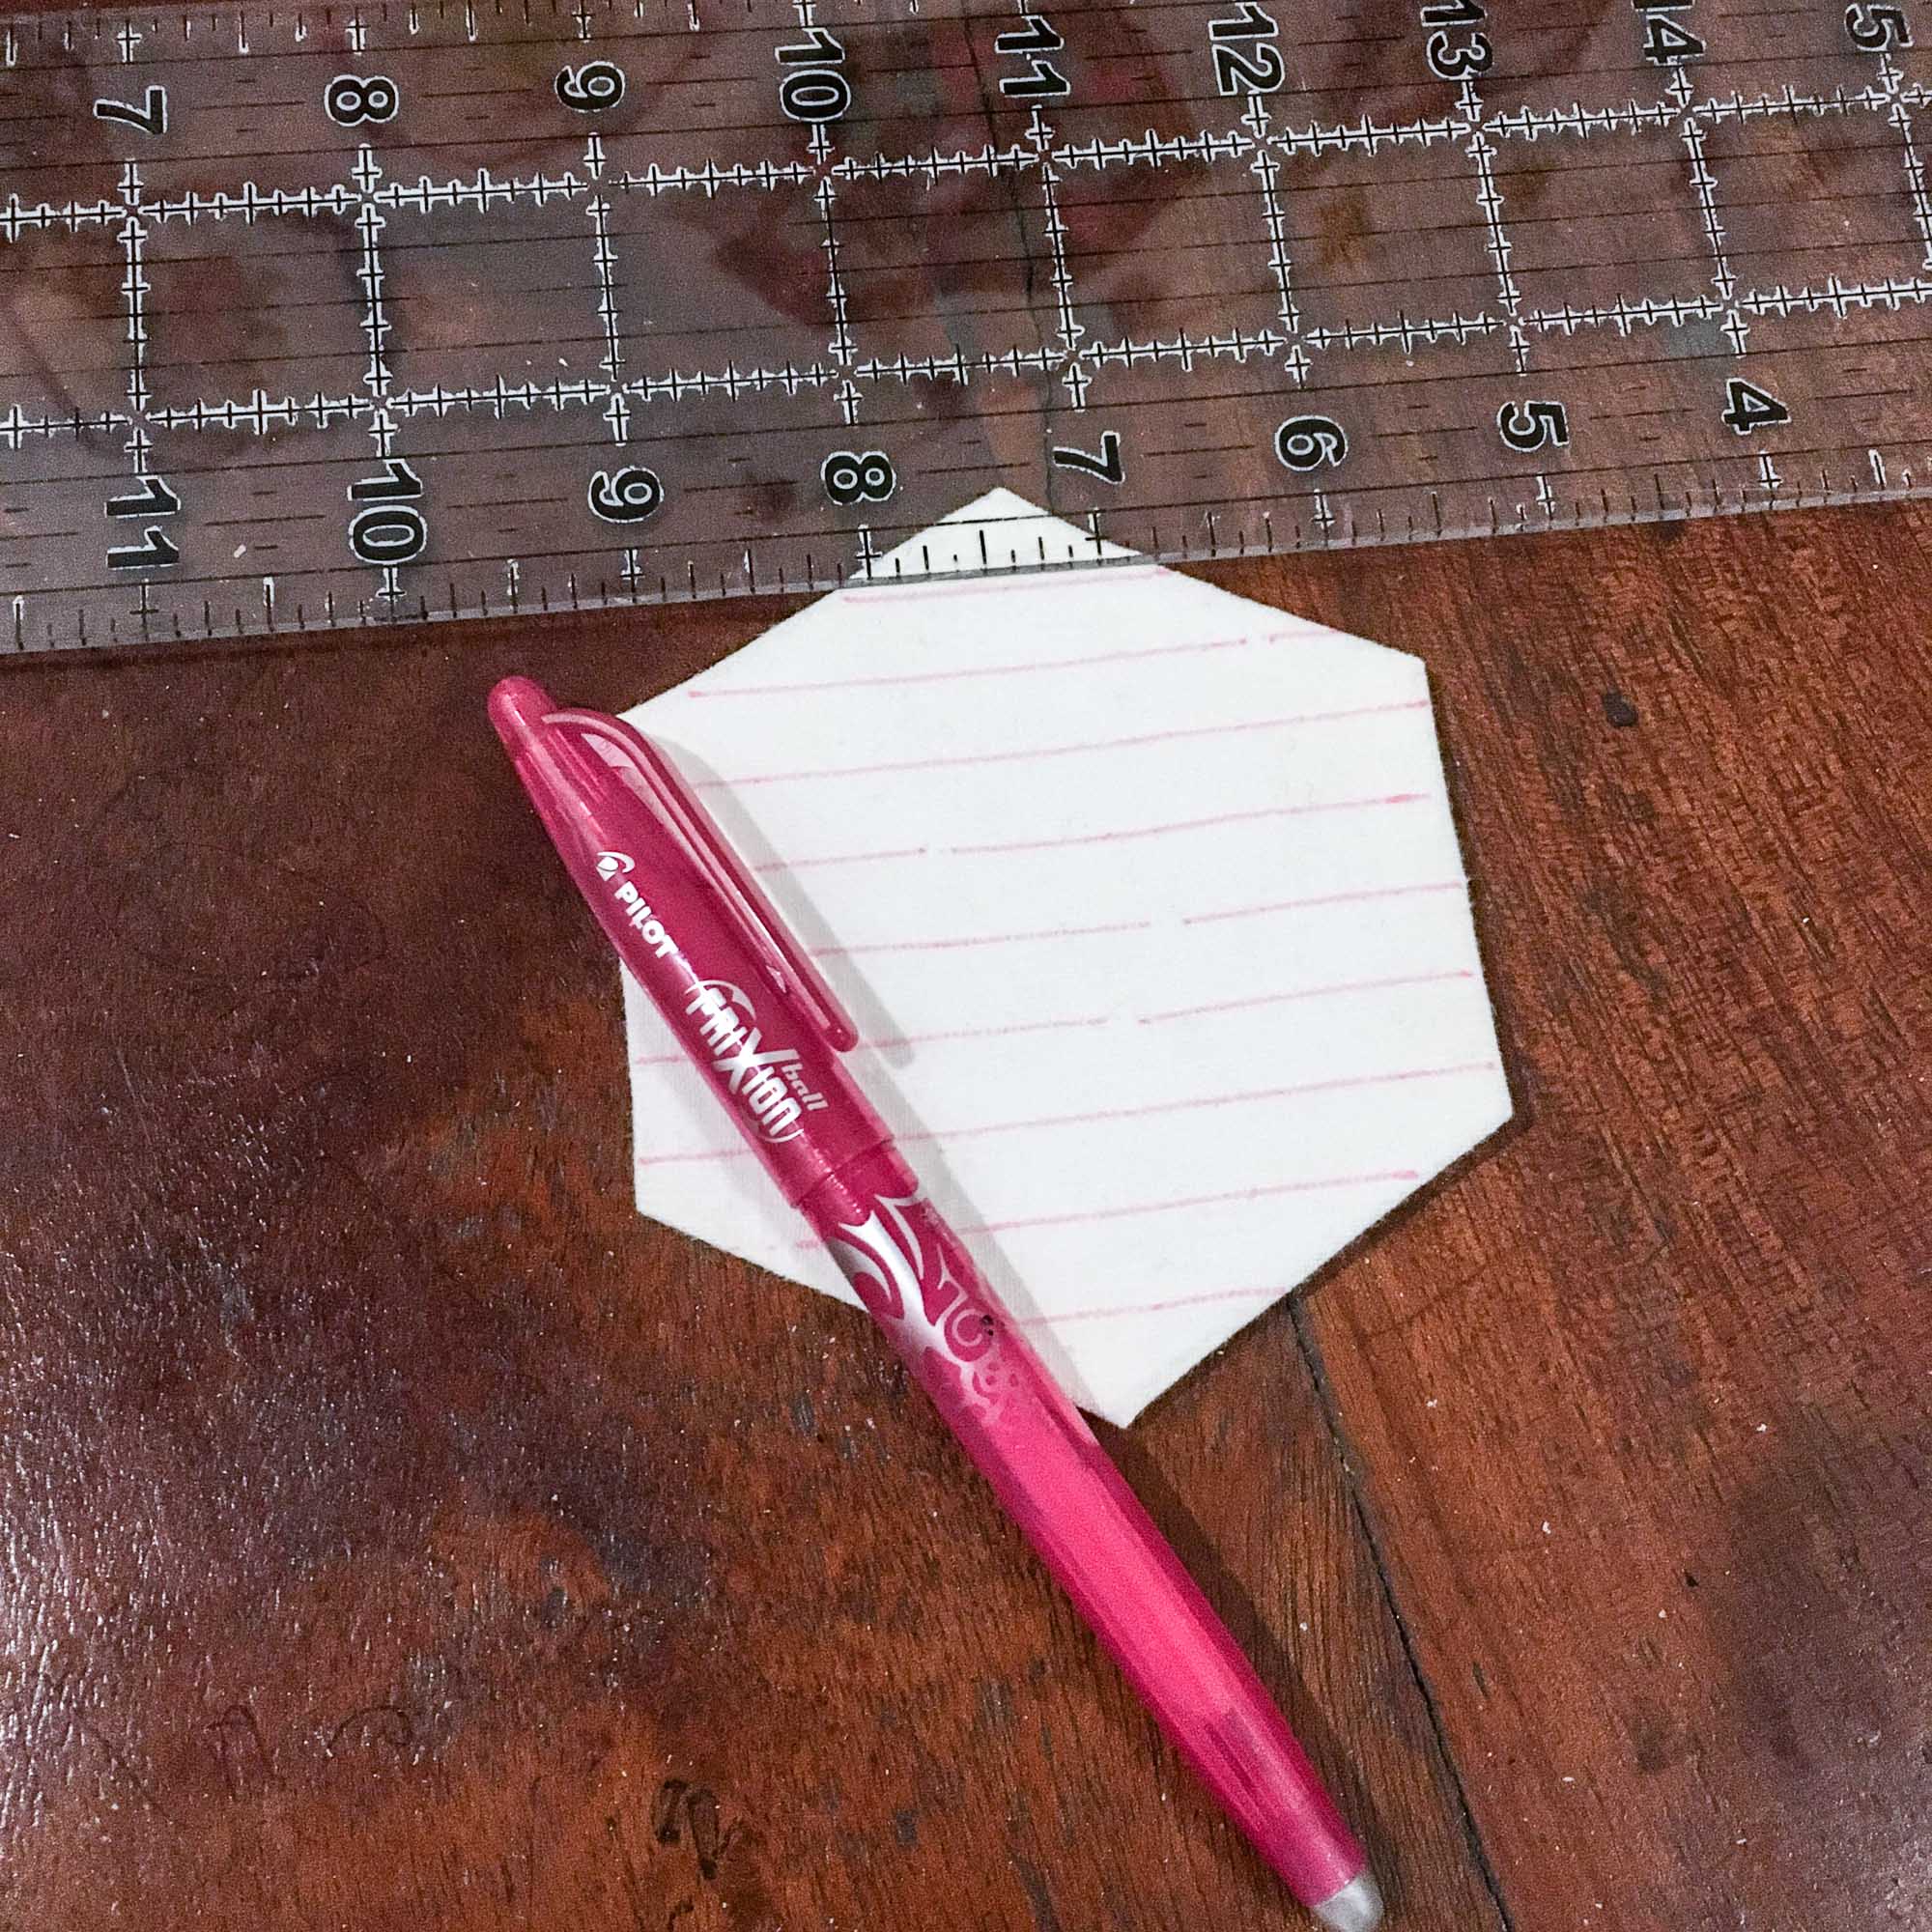
2. If helpful, draw guidelines for where you want to your stamps to go.I like using my Frixion pen for this step.
3. Carefully stamp your information onto the basted EPP piece.Be sure to clean your stamps after use so that ink doesn’t carry over the next time you want to use them. Instructions can usually be found on the back of the ink pad, but I find a damp paper towel works well.
4. Once completed, press your EPP piece with a DRY iron and a pressing cloth.This step heat sets the ink so that it doesn’t bleed or run with laundering. The Frixion guidelines will also disappear with this step.
5.Remove the paper piece, and press again.Label is now ready for appliqué.
A Few Examples
In the following examples, I opted to finish off my label in different ways before appliquéing them to my quilt backing.
For “The Adventures of Matt and Lisa” I chose to use two 2″ jewels that I stitched together, stamped, and then appliquéd after removing the papers.
For “Two Mites,” I chose to layout the whole Haypenny block before I stamped it. Then I proceeded to stitch it, pull all of the papers, and, finally, appliqué it to the backing.
And as you might remember from my “Merry Macadamia” Christmas quilt from this post, I opted for a hexagon star embellished with some embroidery.
I think these give a little bit of sparkle to the quilt backing, which often gets neglected. Not to mention the options are endless! I hope that these give you a little idea of how you can try it for yourself.
This post may contain affiliate links. You can read my affiliate disclosure here.
That’s absolute genius! I had to try it as soon as I read it, and it works beautifully. Thank you so much! I always was looking for an attractive way to lable my quilts, and finally found the solution, thanks to you.


2 Responses
That’s absolute genius! I had to try it as soon as I read it, and it works beautifully. Thank you so much! I always was looking for an attractive way to lable my quilts, and finally found the solution, thanks to you.
Imagine me doing a very happy dance.
Hi Nicole! I’m so glad for your happy dance! I wish I got this kind of reply on every post lol! All the best to you and happy labeling!
Lisa