This post has been a so much fun to put together! While I covered the basics of English Paper Piecing (EPP) in the EPP Primer and several ways to take your EPP to the next level in the EPP Pro tutorial series, each EPP hack featured here serves as yet another way to enjoy your stitching life that much more.
My stitching life has been a patchwork of tips and tricks accumulated from several sources mixed with a few “aha” moments of my own. As such, where applicable, I have endeavored to give credit to whomever I learned a particular EPP hack from. So, let’s get—uh—hacking?
One last thing before we begin. I have endeavored to create as aesthetically pleasing a layout as possible with this post in order to enhance readability. As such, desktop users will notice that each step of these hacks are staggered with an alternating text block and image. If the images appear too small at any time, simply click on the image and a full scale version will pop up.
EPP Hack 01: Create a Slip Knot on Your Needle
Have you ever nearly thrown your stitching across the room because your thread keeps slipping out of your needle and you have to rethread it? No? Just me? Well, in the event that you’d like to avoid such an episode, try securing your thread to your needle before stitching.
My favorite way to do this is by creating a slip knot at the end of my needle when I thread it. But, before I go any further, I have to give full credit to where I learned this tip, which has been used with permission. It was featured in Flossie Teacakes Guide to English Paper Piecing by Florence Knapp (@flossieteacakes) on page 82 for those who have the book already. If you don’t, it’s one of my very favorite EPP books, and I HIGHLY recommend it! Since adding this step to my stitching routine, I have never looked back.
Here’s how to create a slip knot on your needle. I have added a few of my own idiosyncrasies and expounded a bit upon Florence’s example in her book because I enjoy breaking things down into ridiculously small steps. 😉
Of Note:
The finer your thread, the easier this process will be.
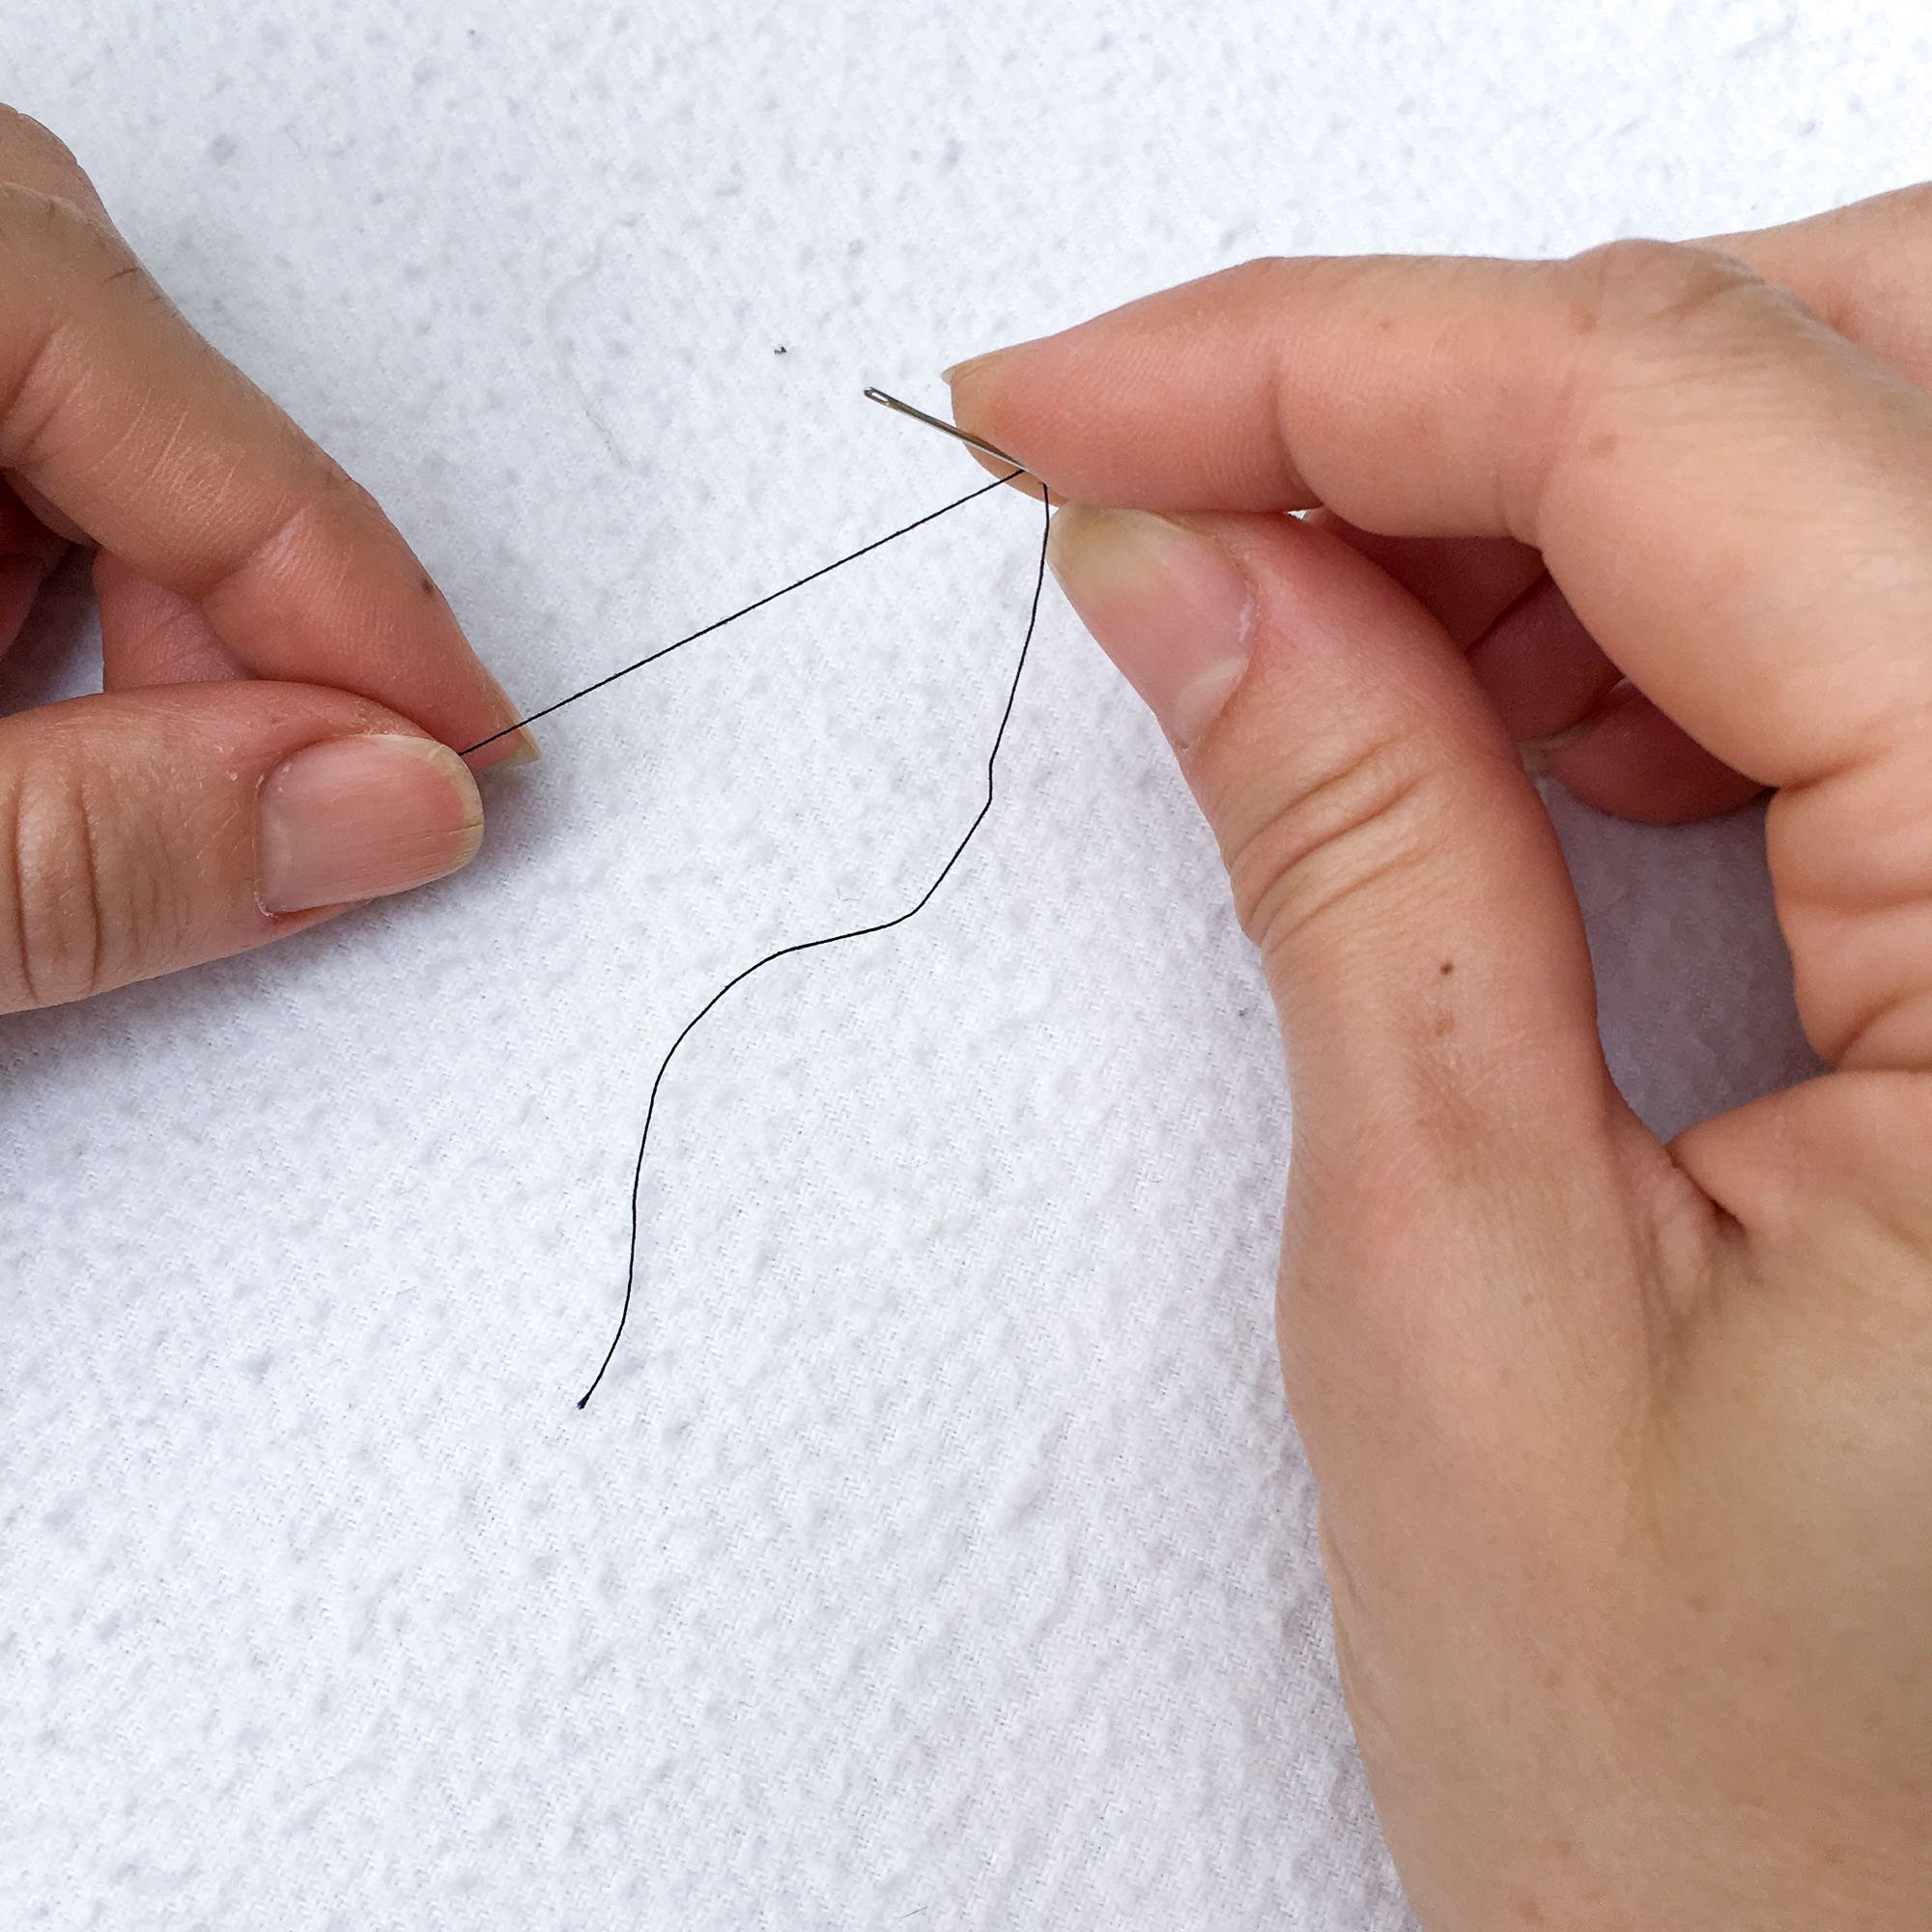
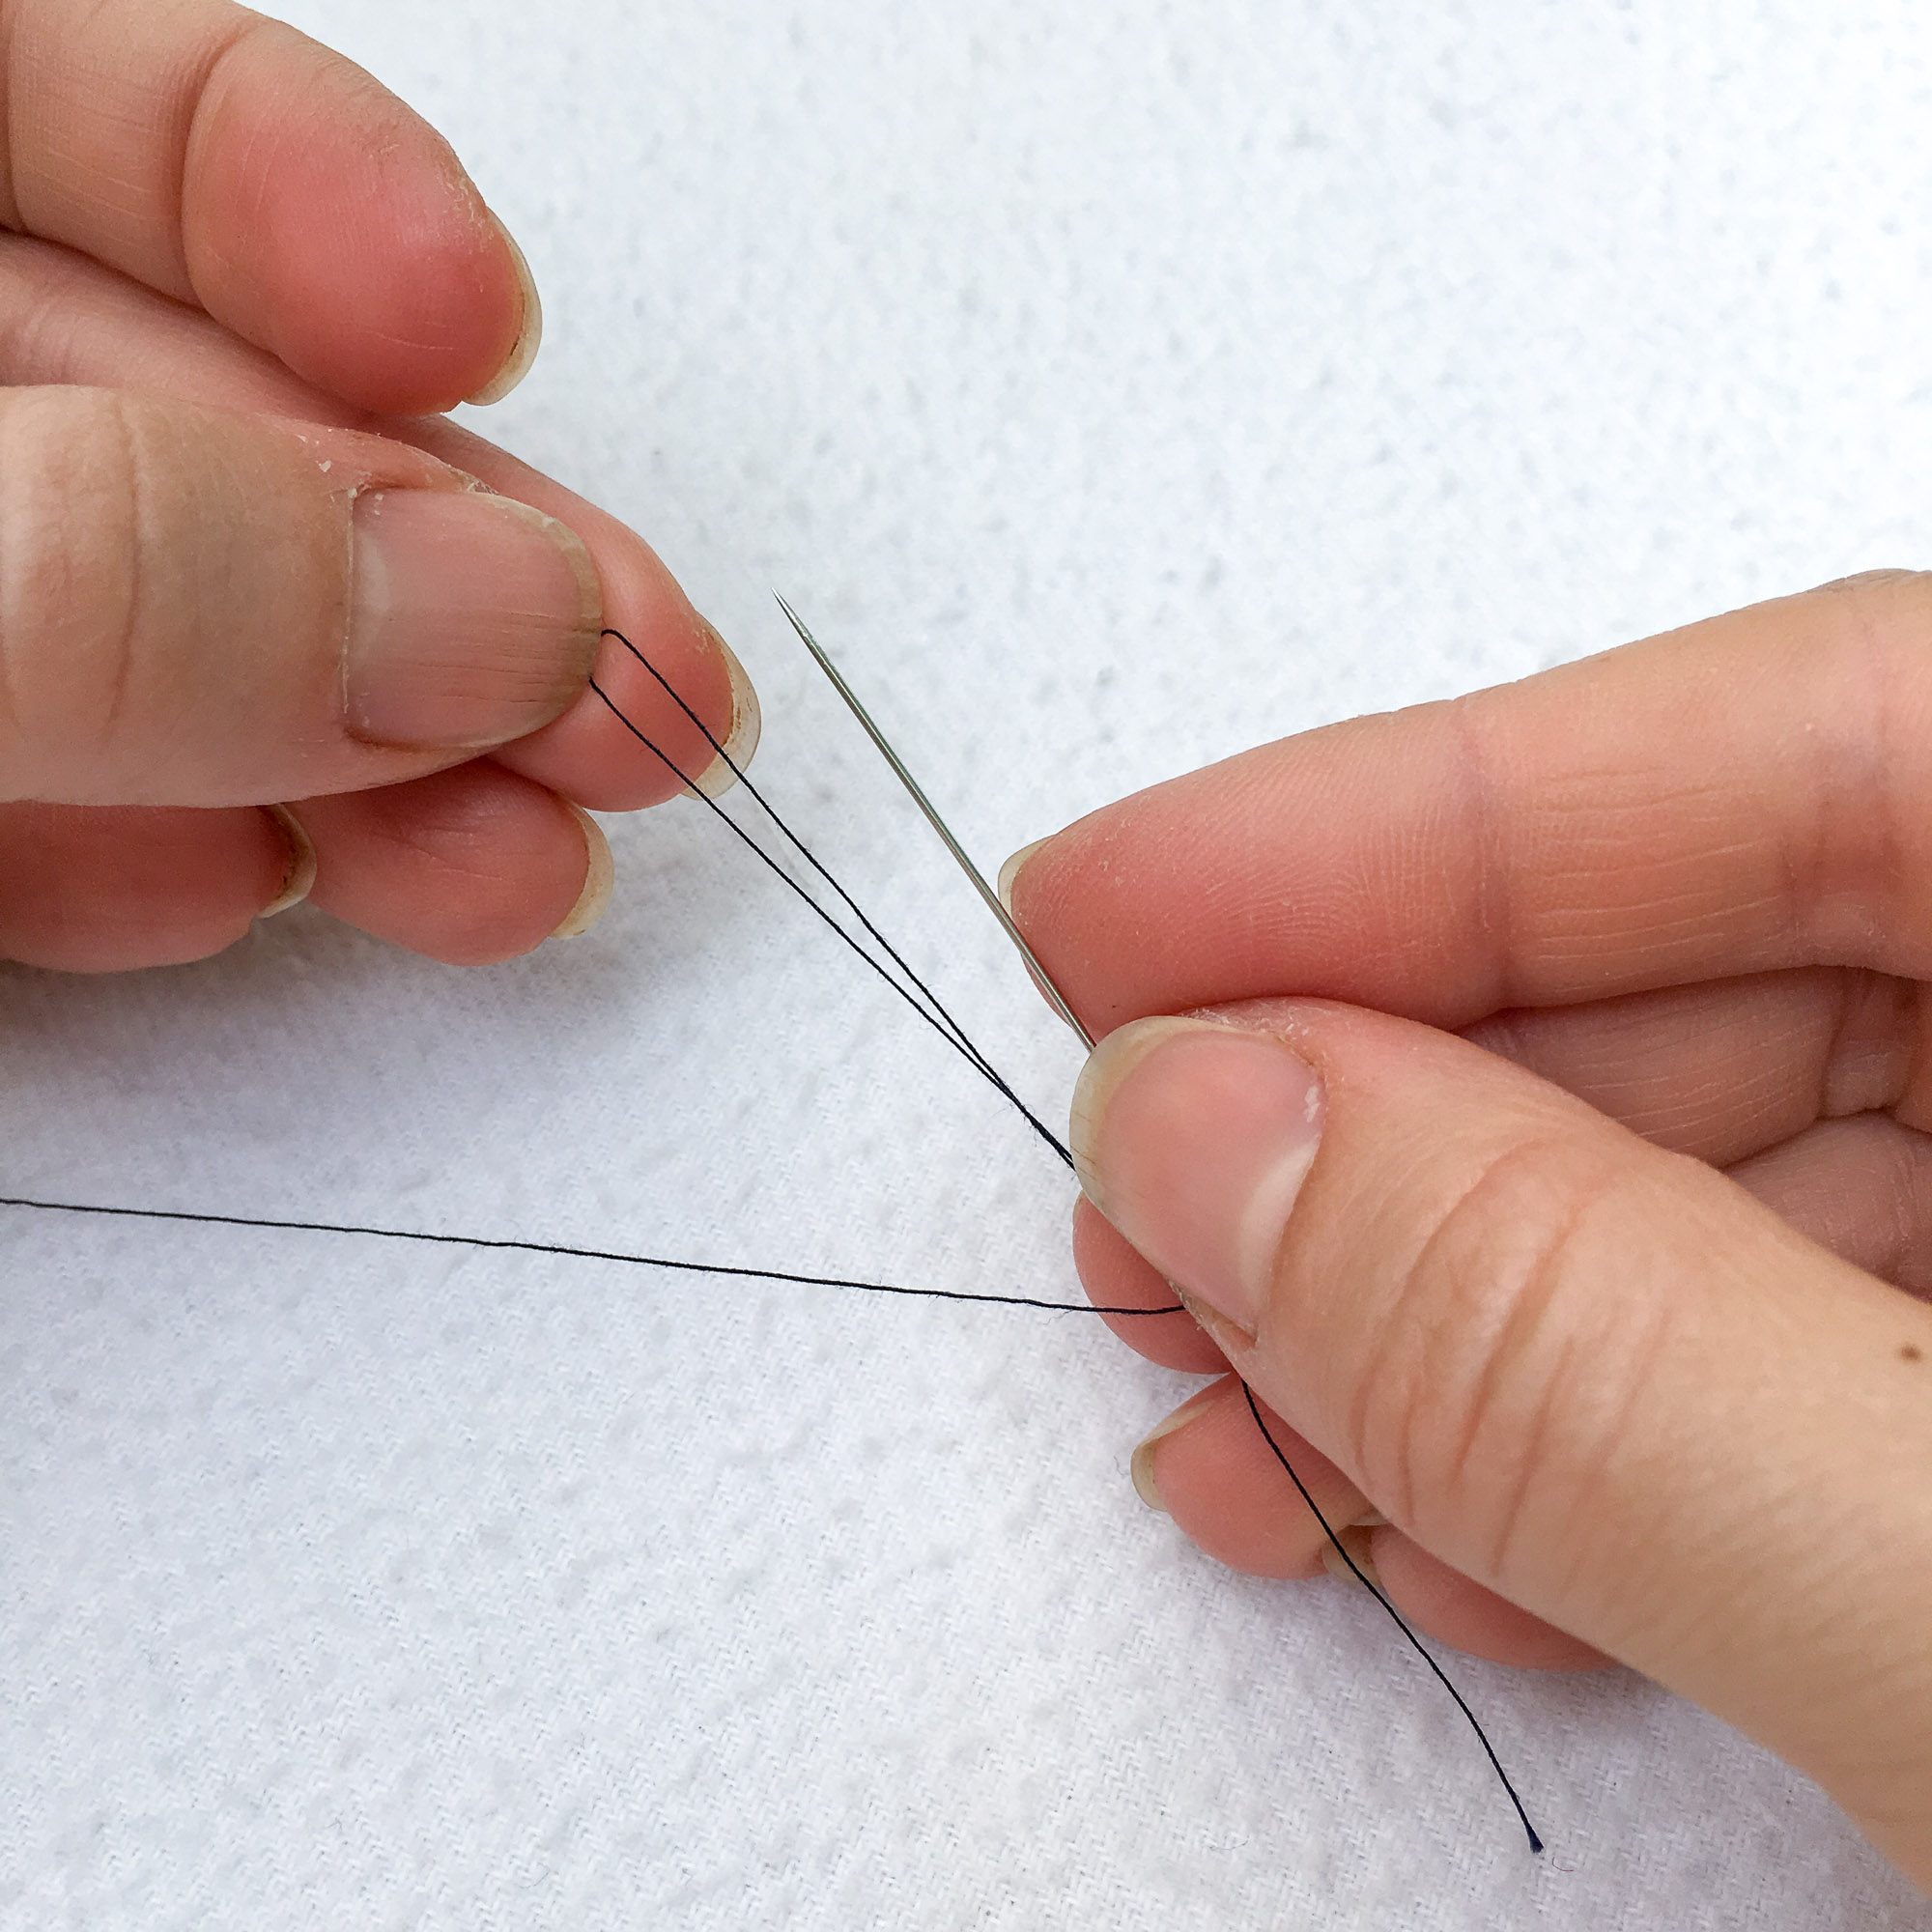
1. Fold about 3”-4″ of thread over your needle.
2. Pull the thread taut around the needle with your non-dominant thumb and forefinger.
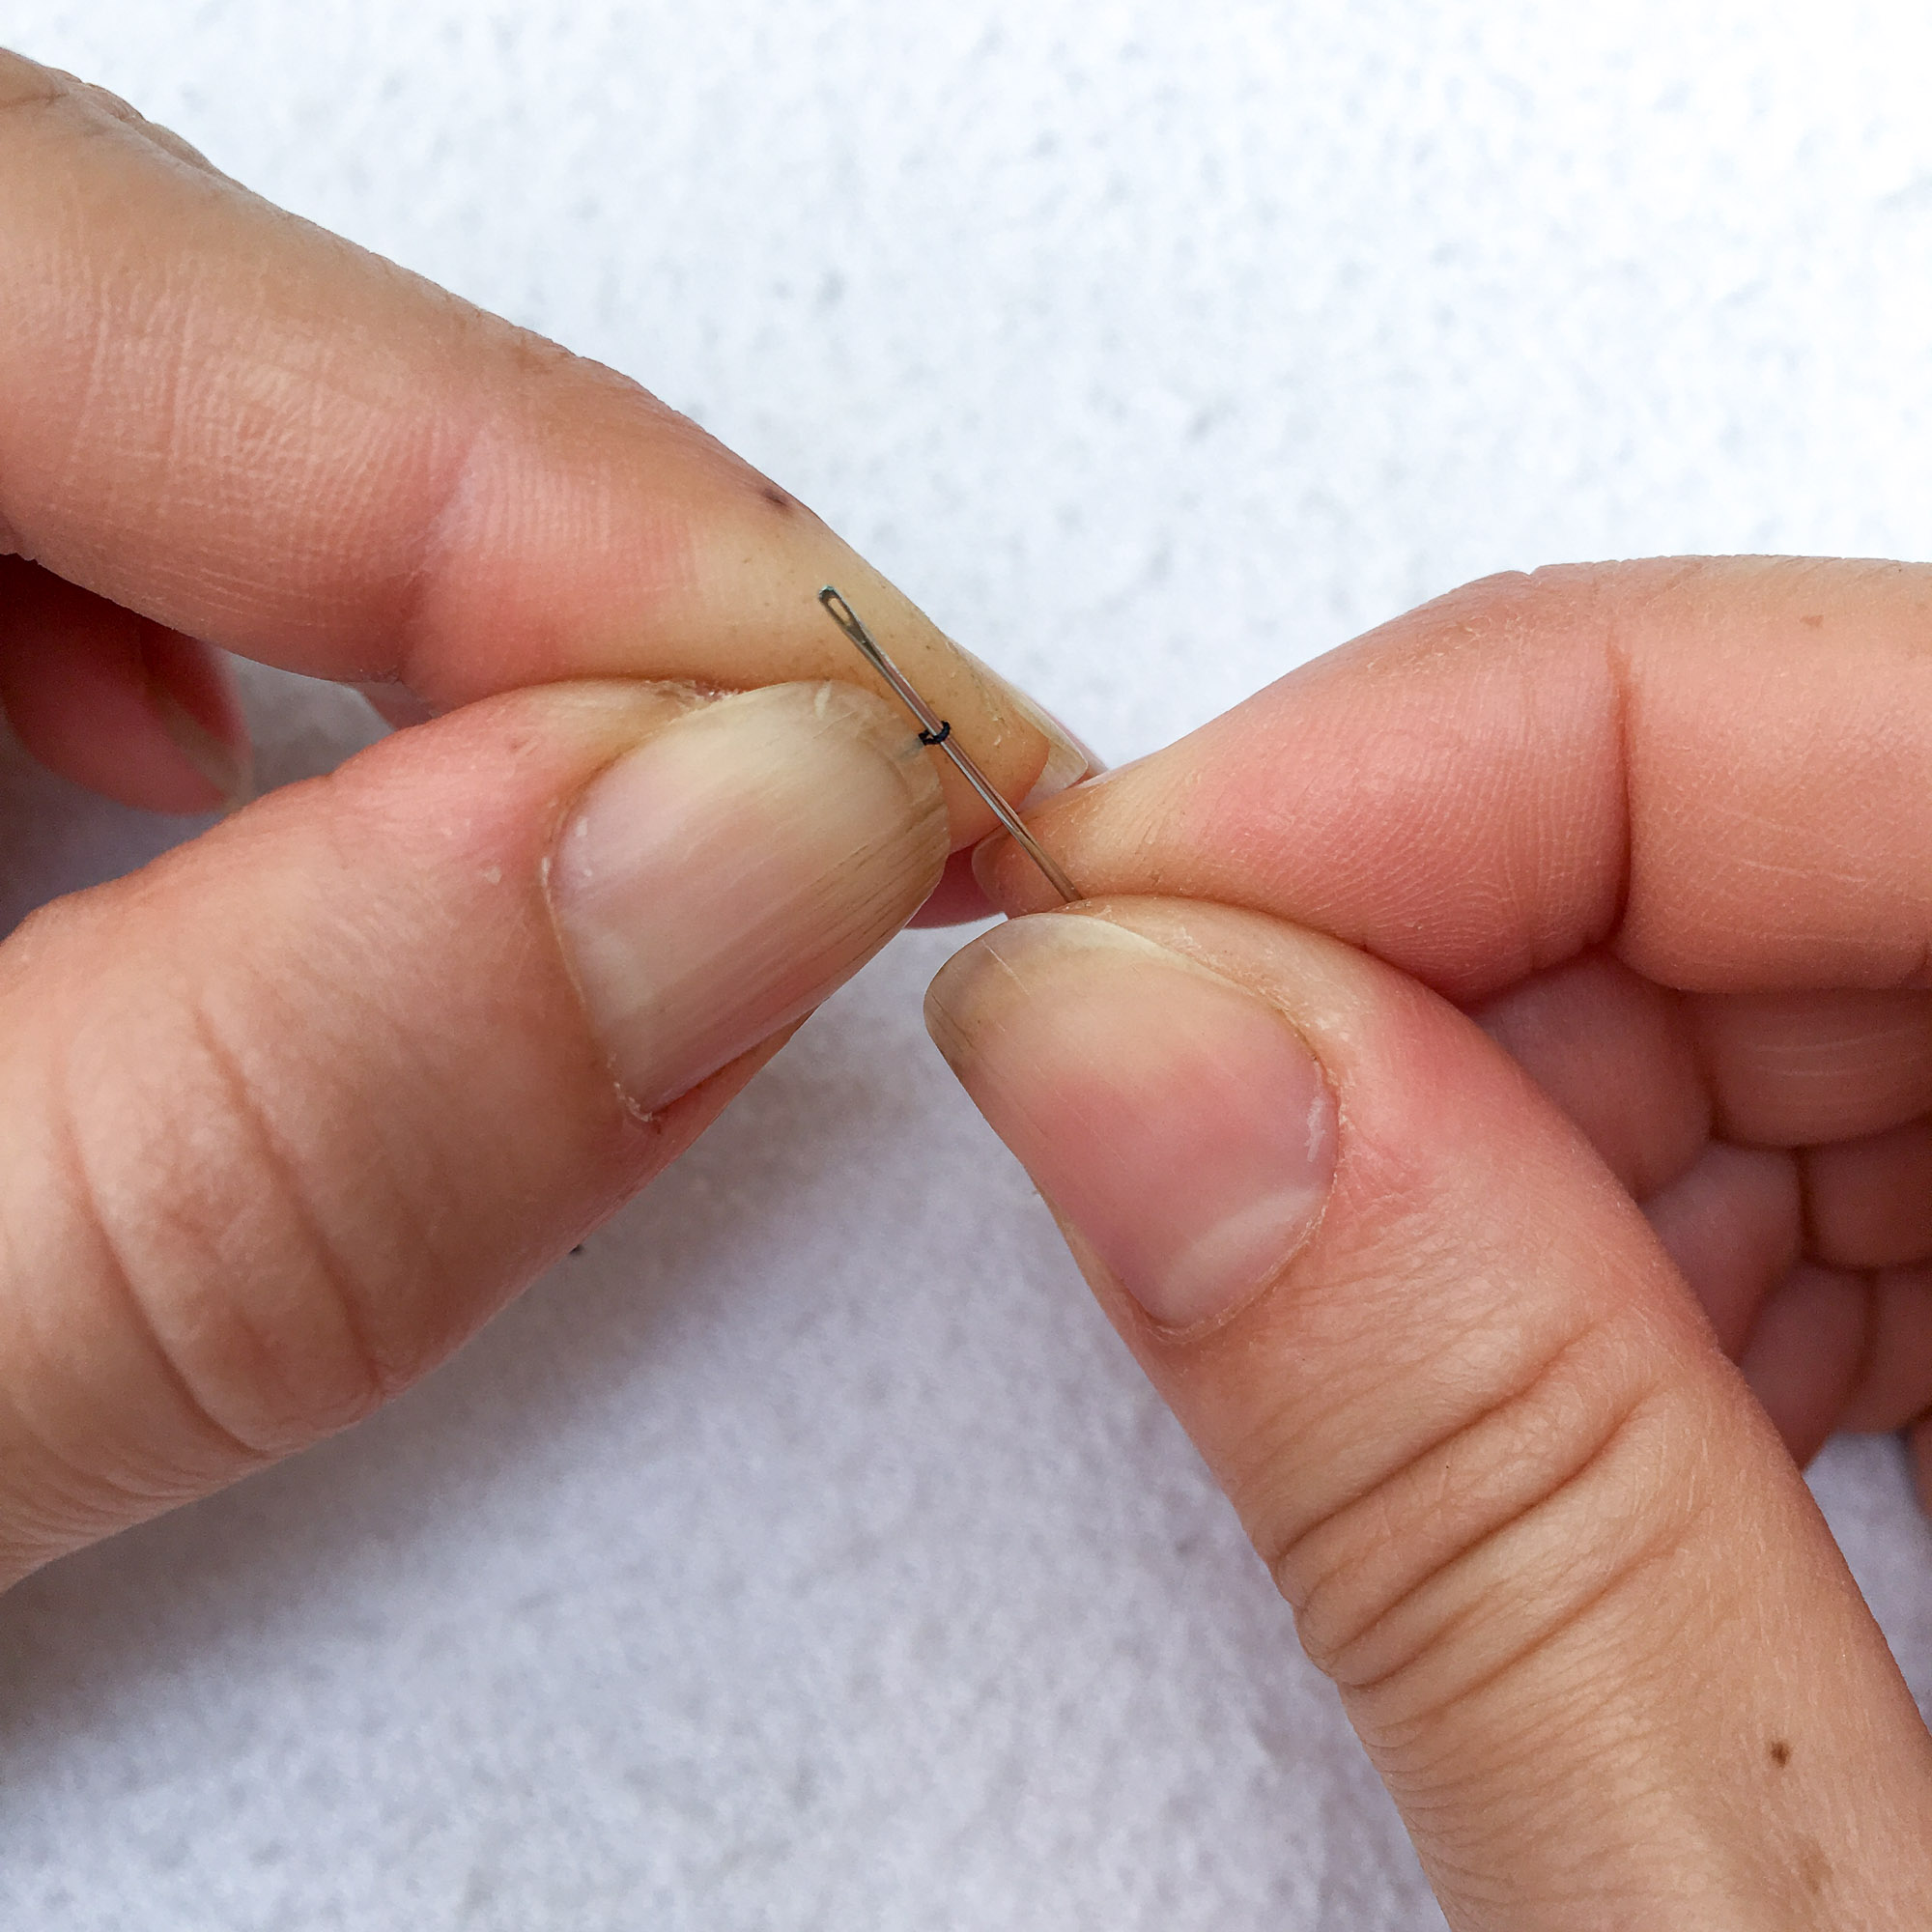
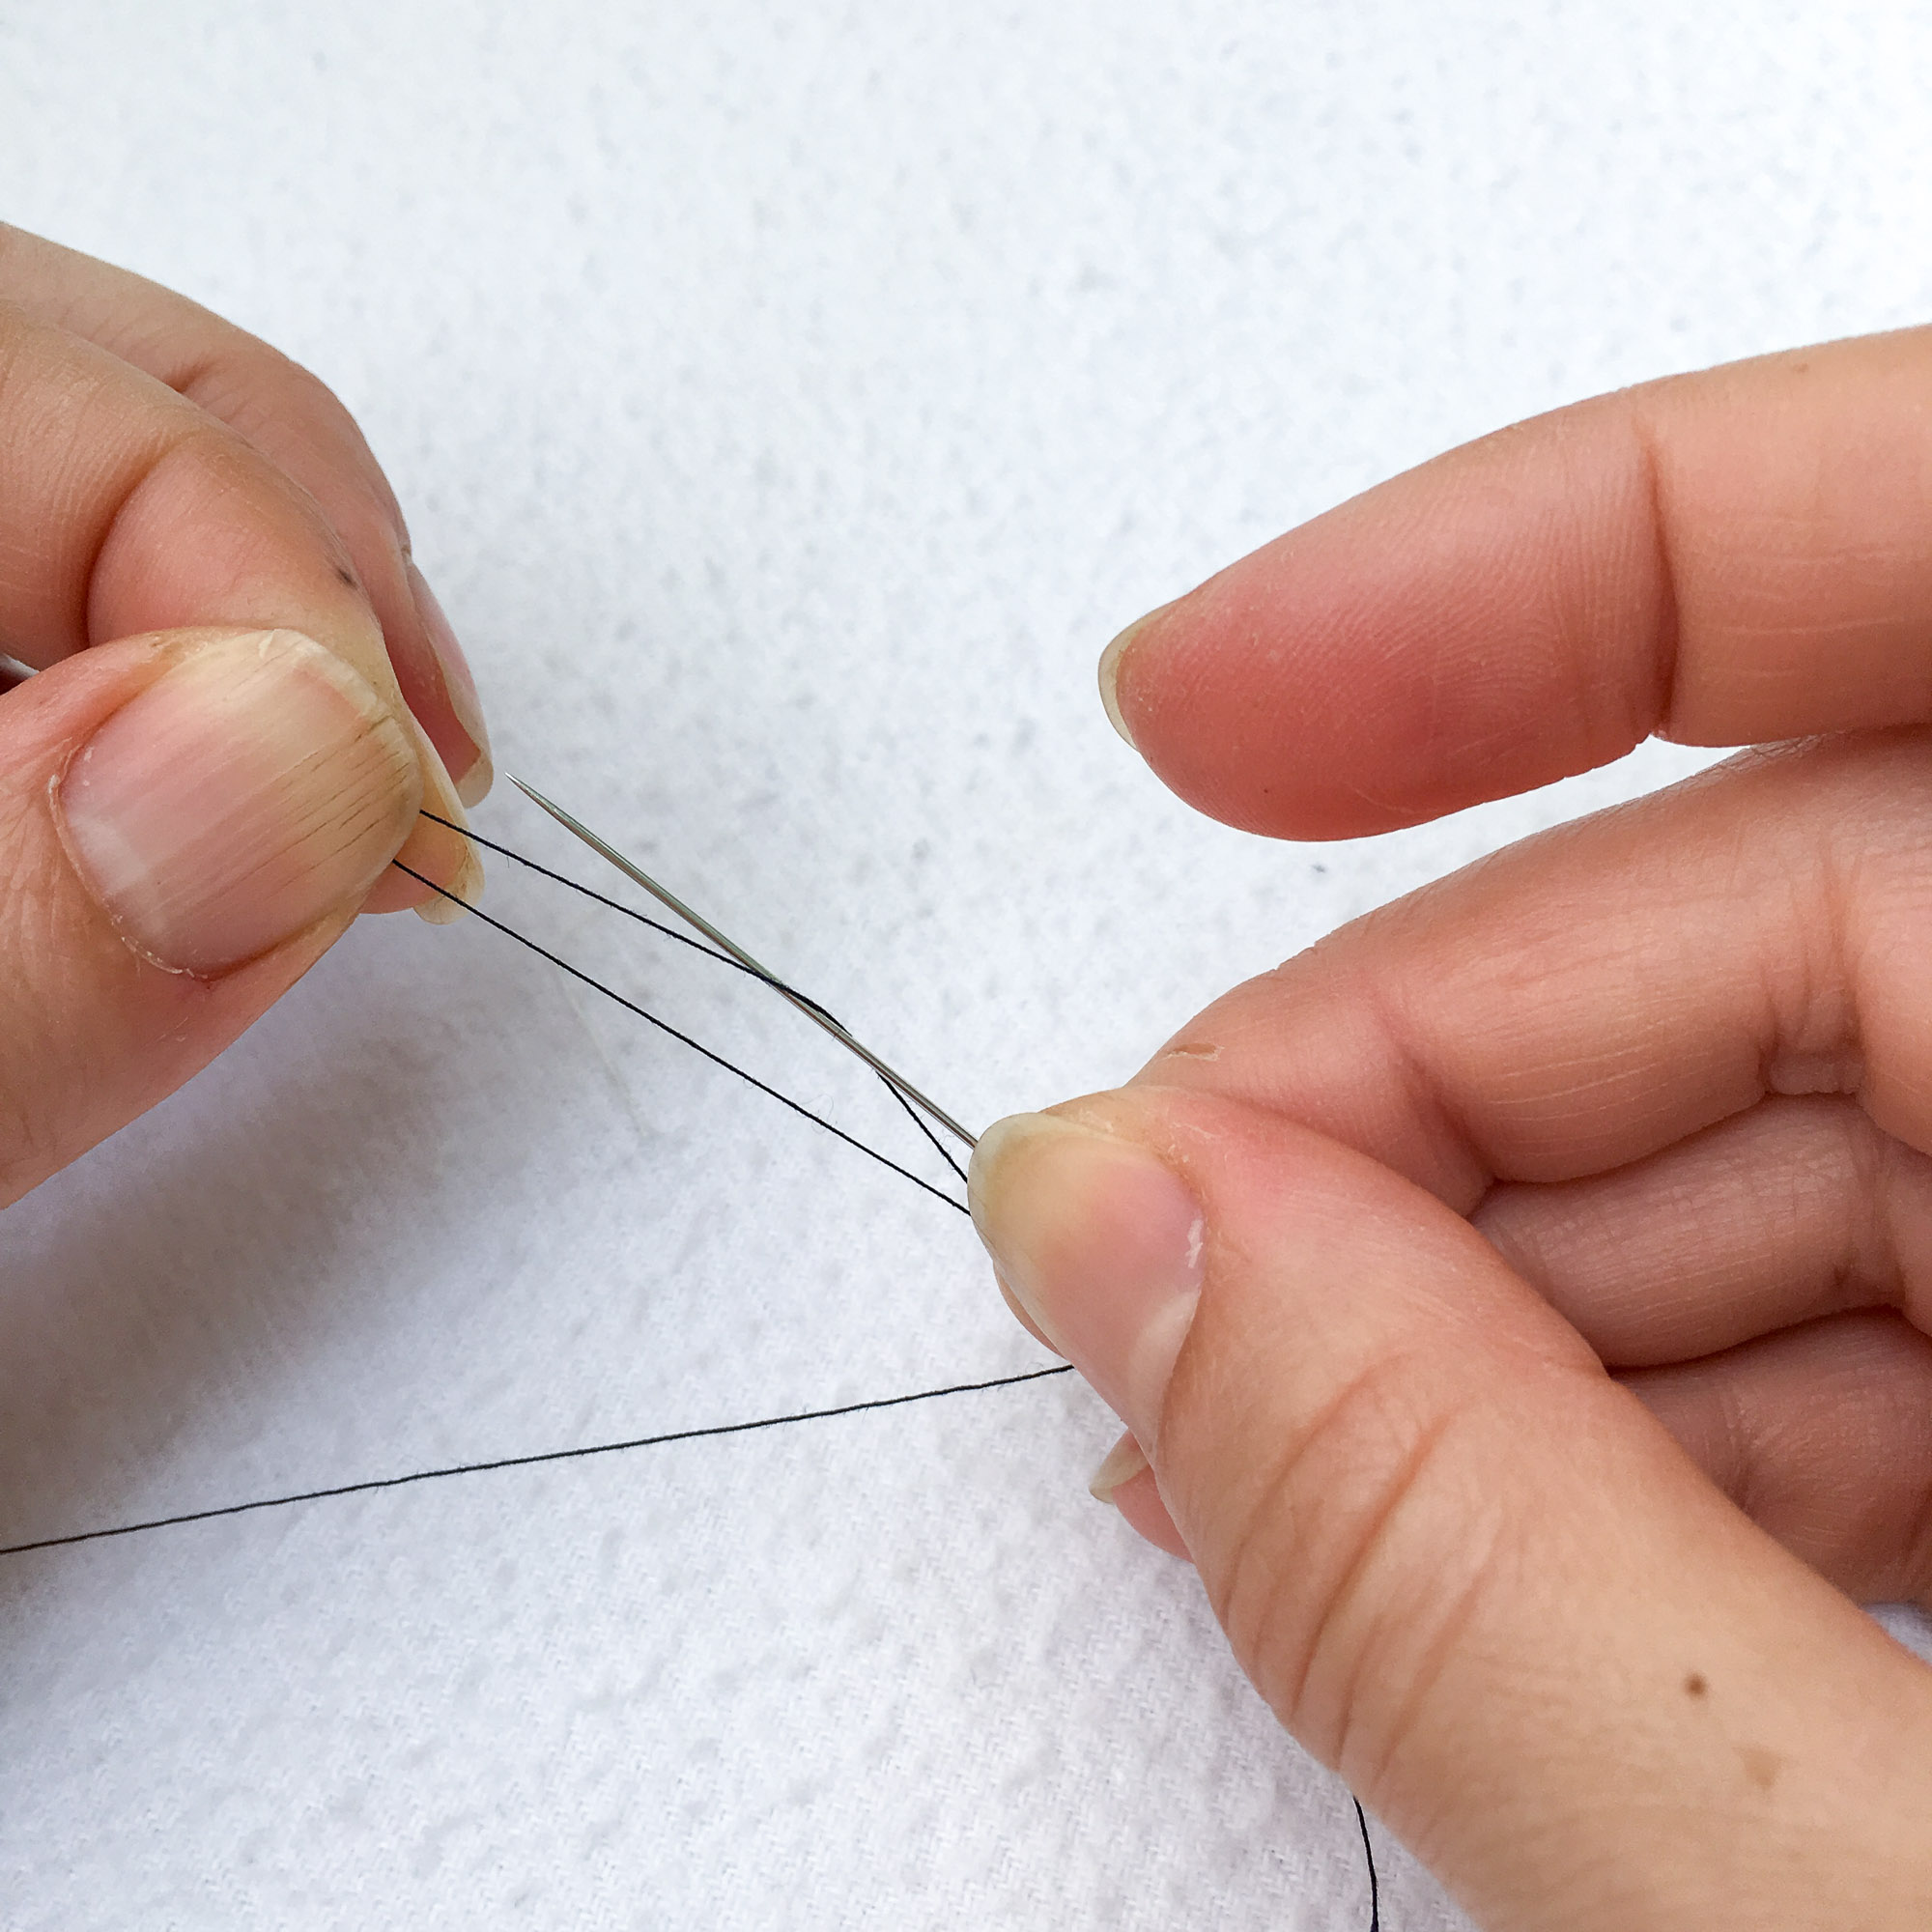
3. Gently slide the thread off the end of the needle, being careful to maintain the tiny loop.
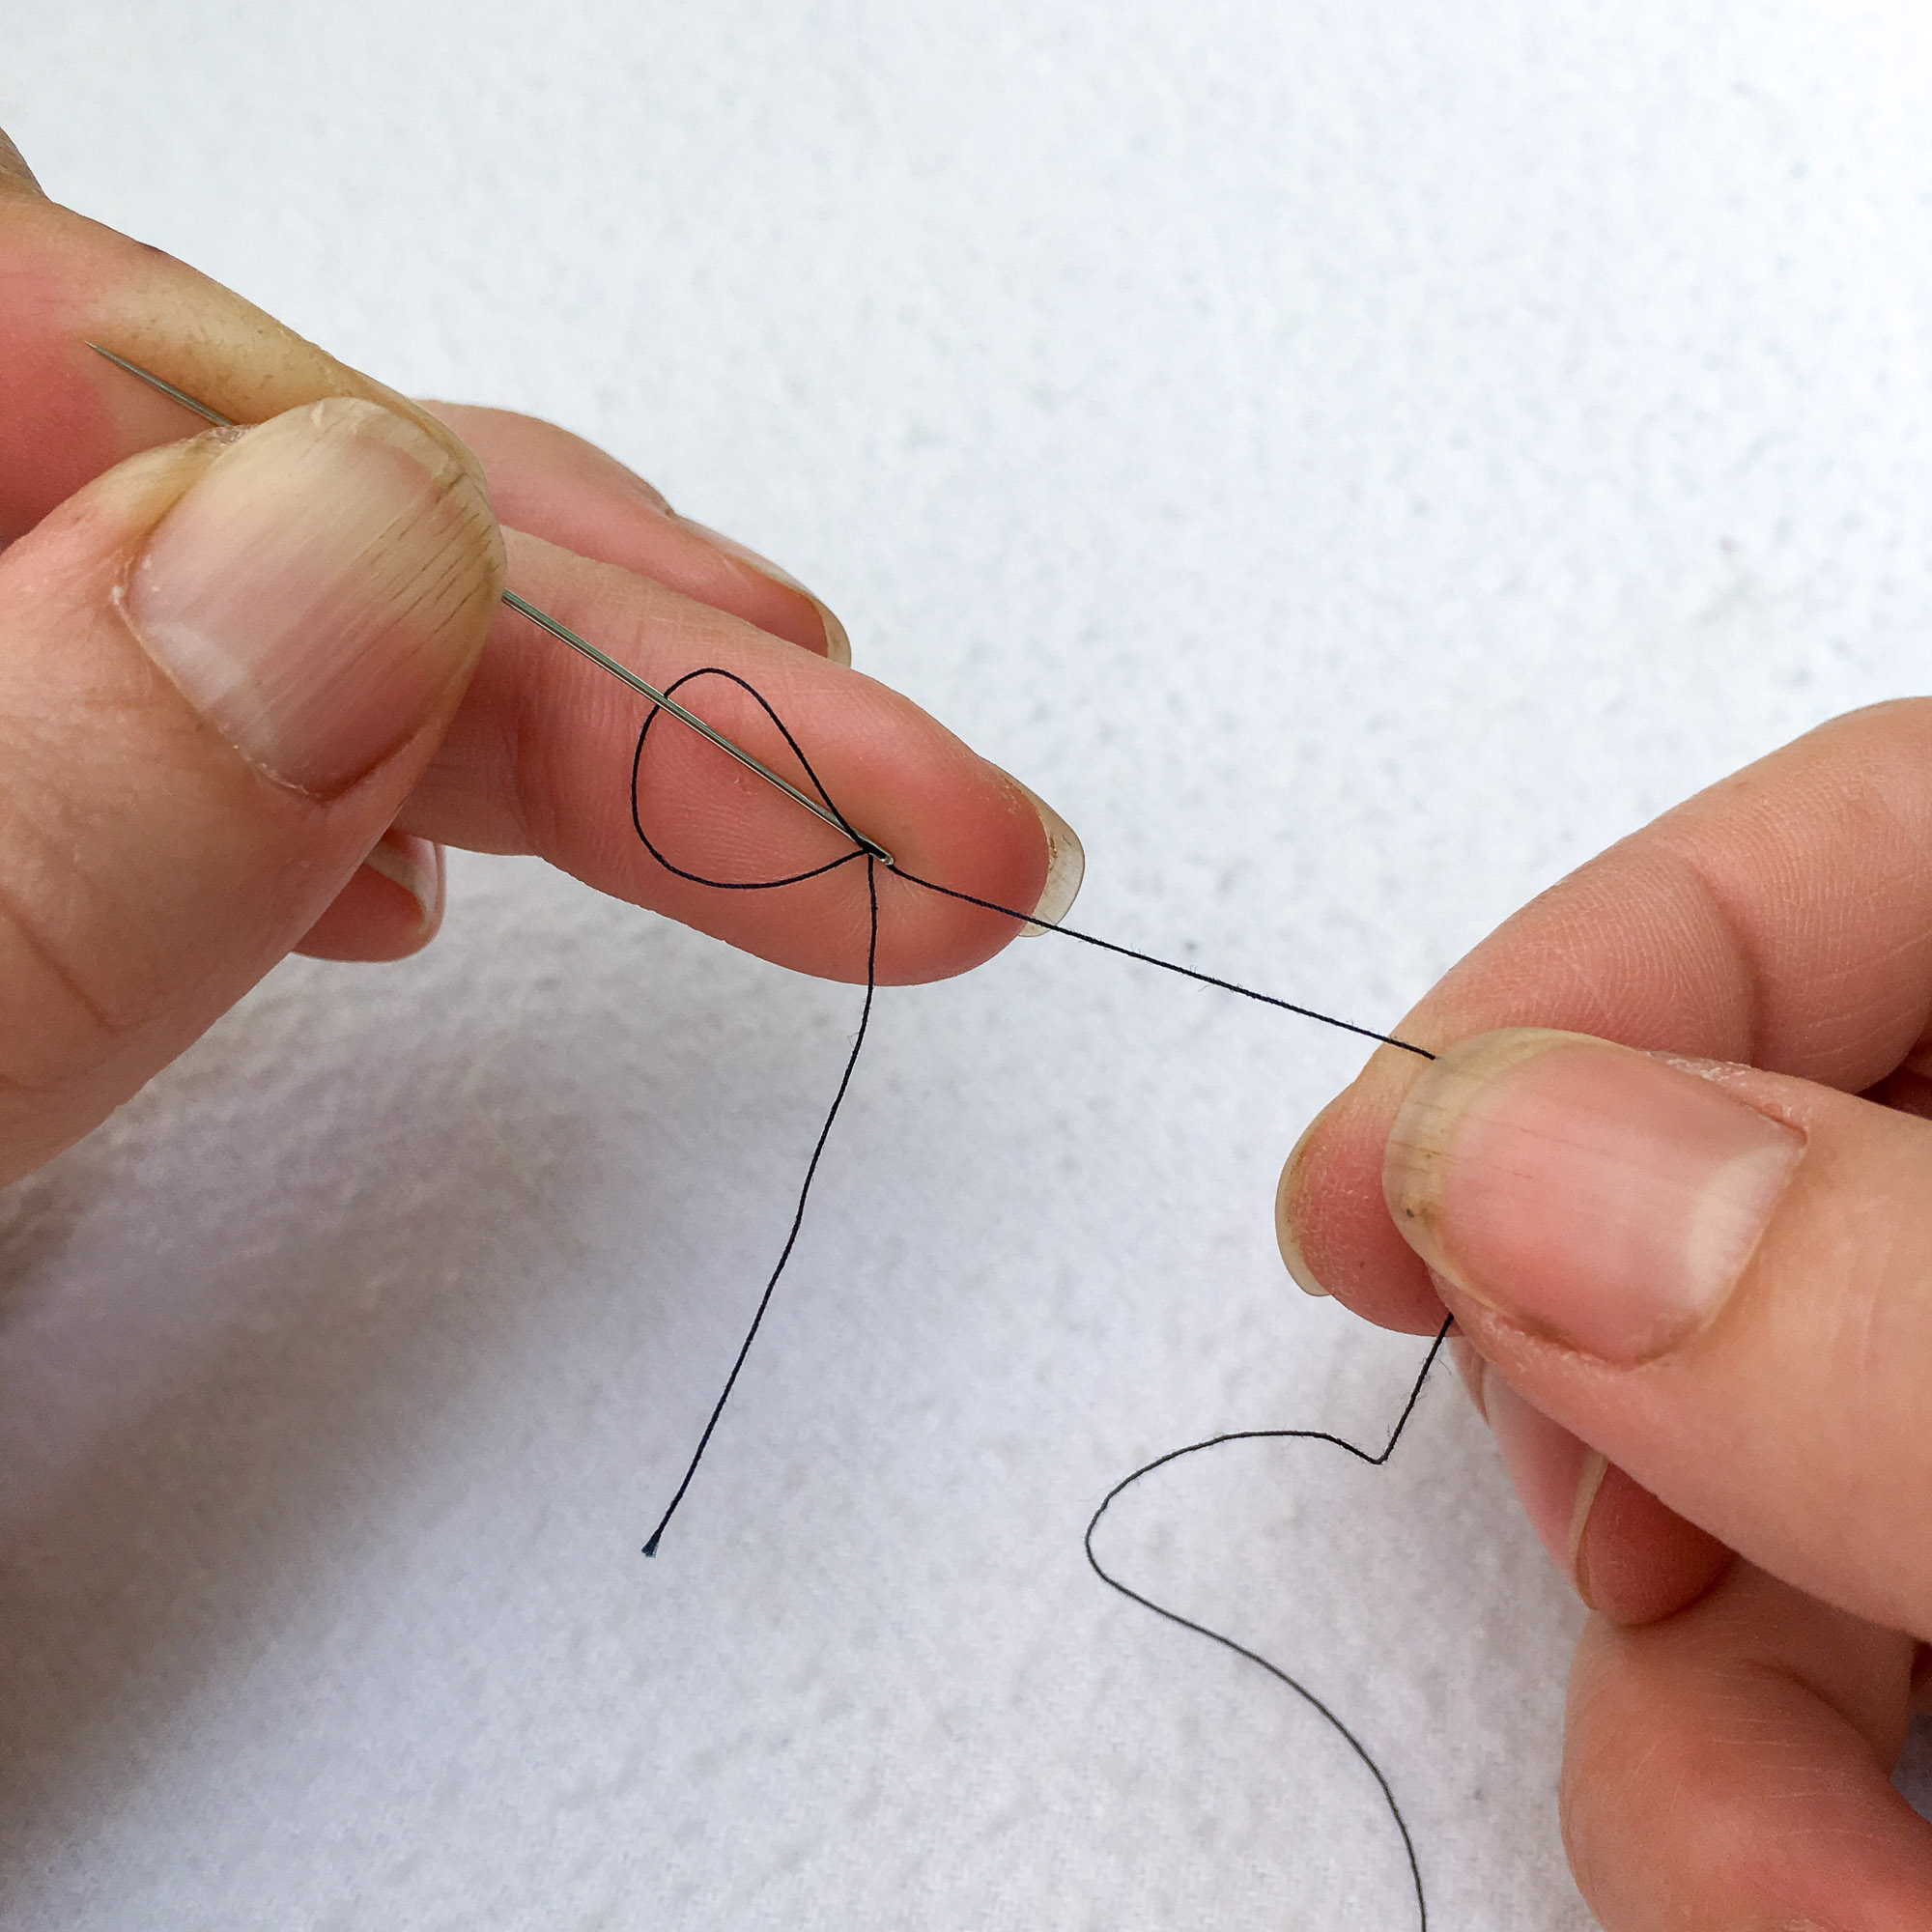
4. Carefully insert the tiny loop through the eye of the needle. DO NOT PULL THE THREAD ALL THE WAY THROUGH.*
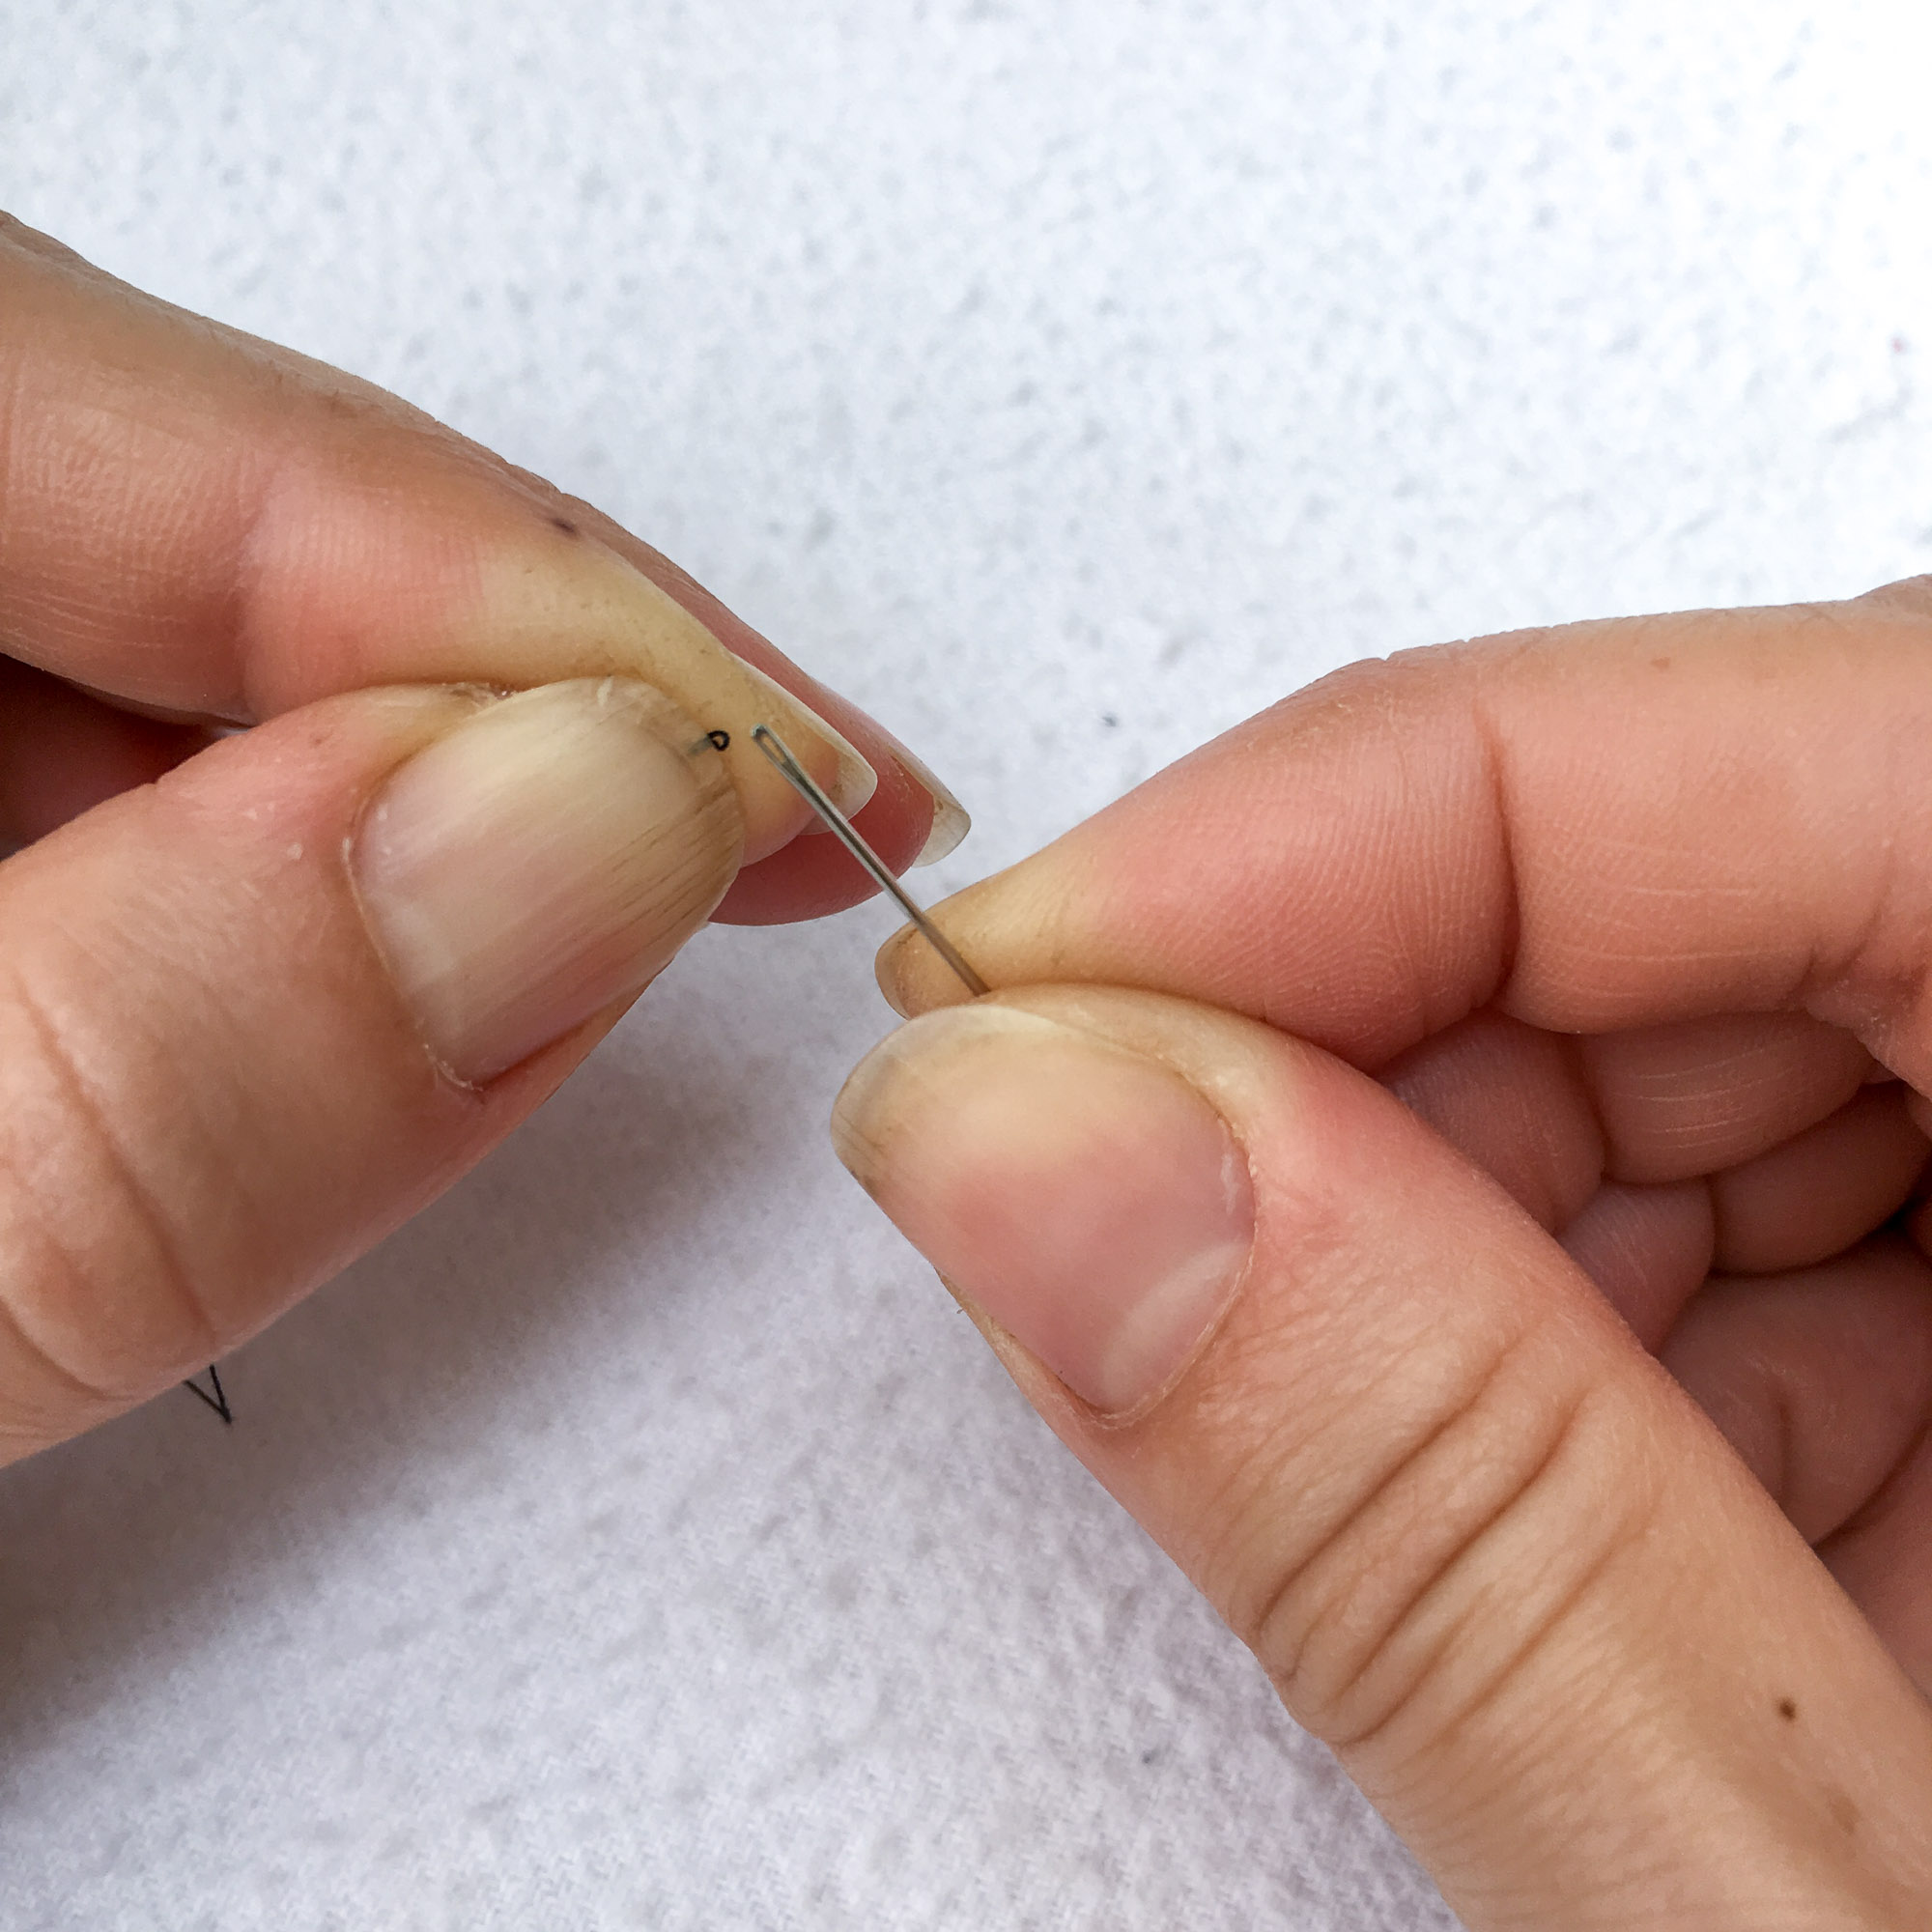
5. Lengthen the loop so that it is a little longer than the needle, but DO NOT PULL THE TAIL THROUGH.
6. Pass the needle through the loop.
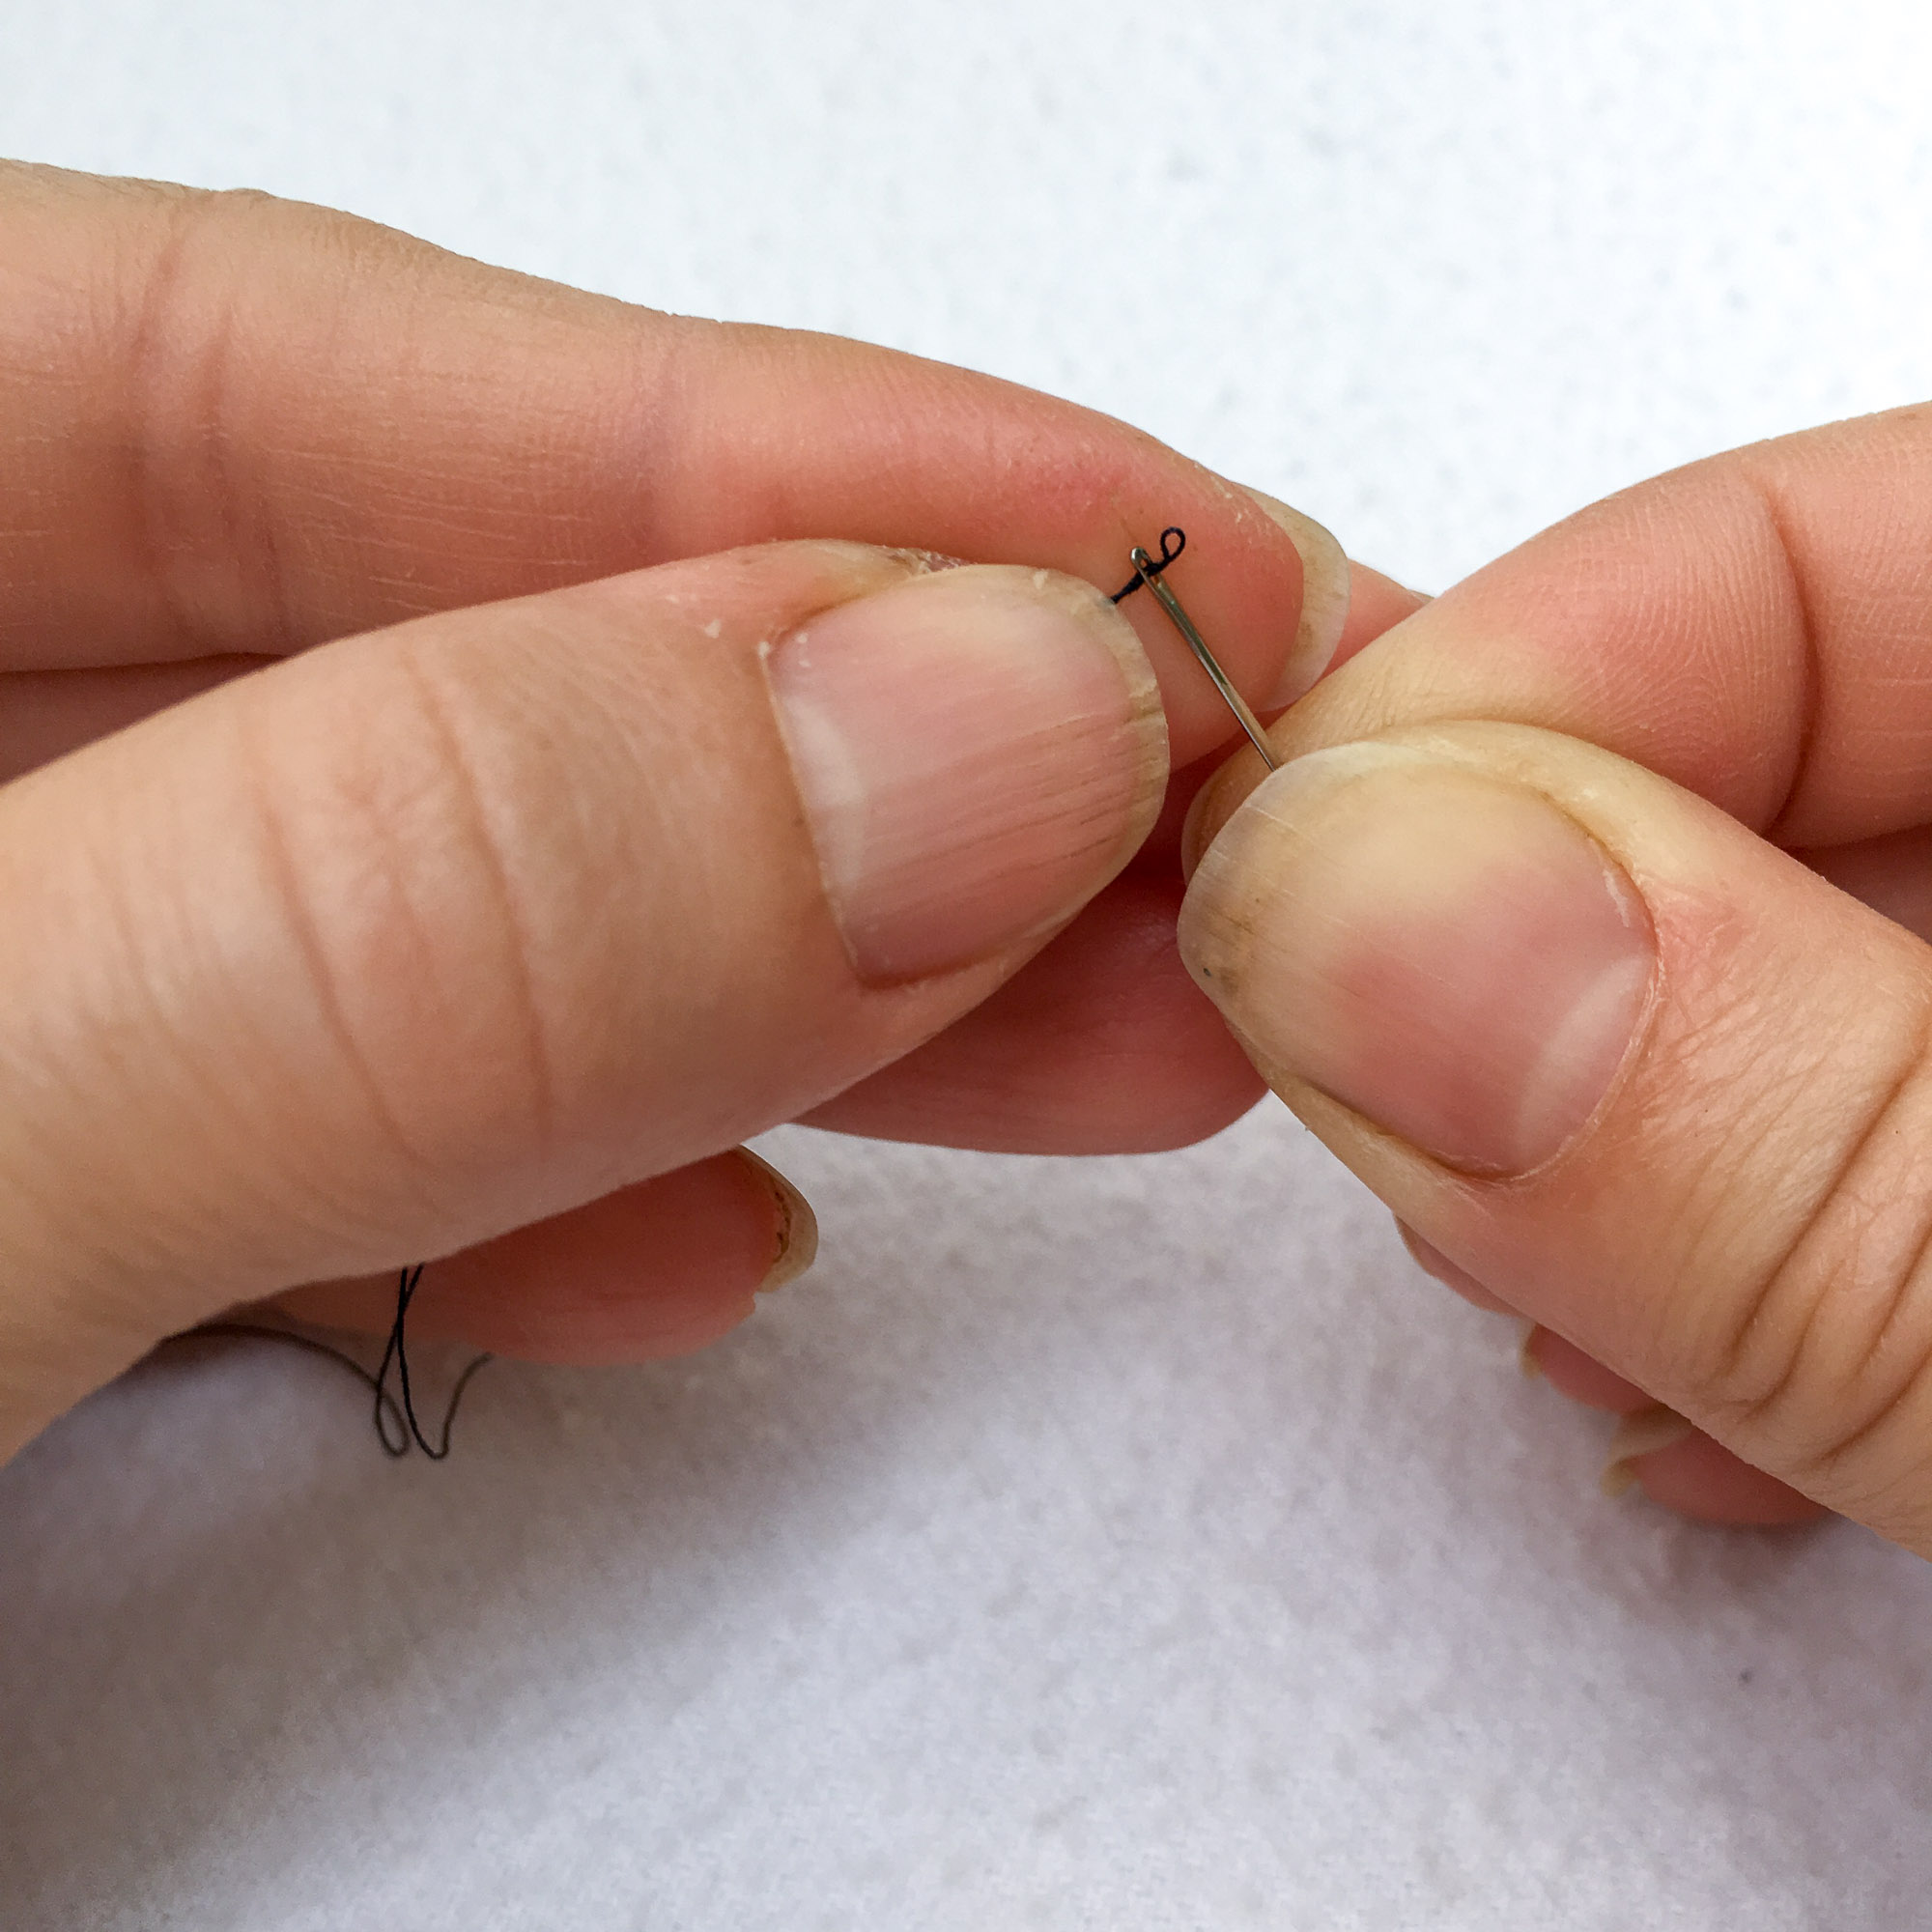
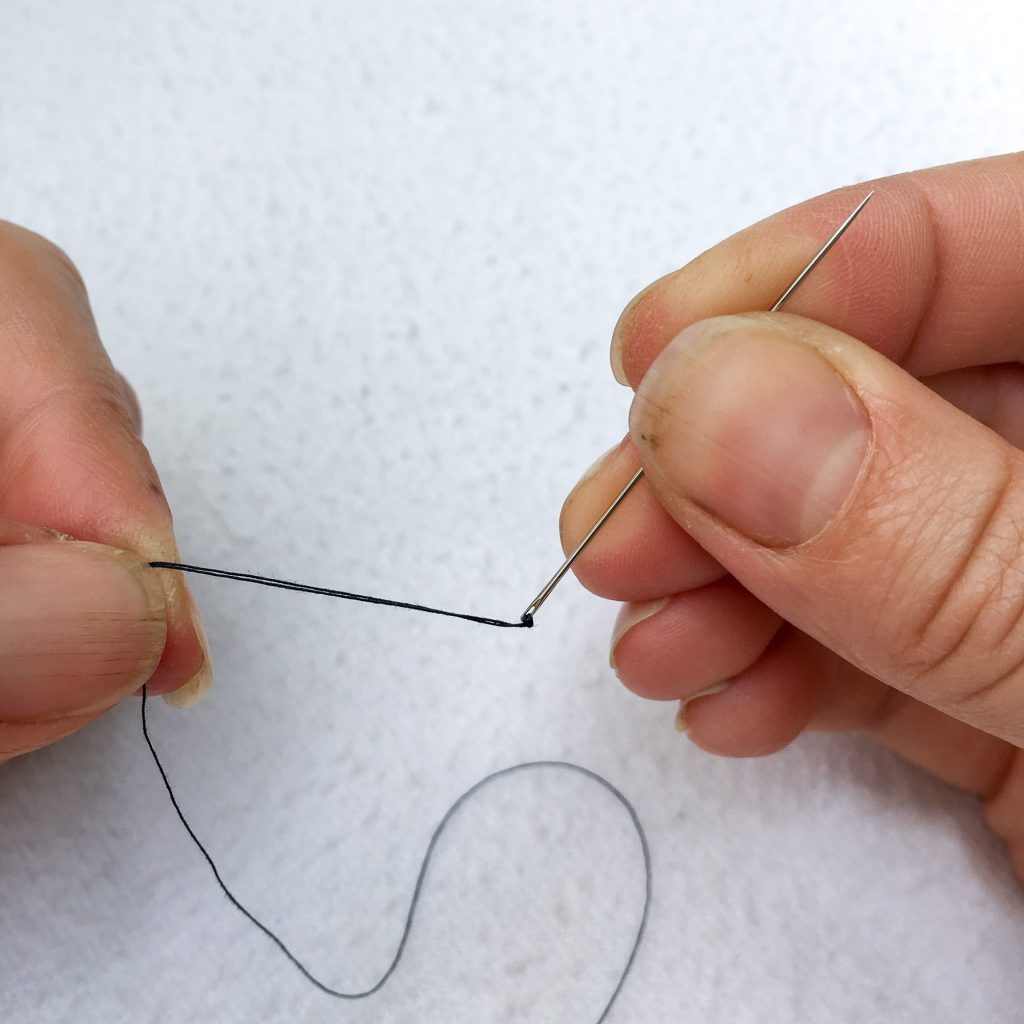
7. Gently pull on the long end of the thread until the slip knot tightens around the eye of the needle.
And, you’re ready to stitch!
Of Note:
Sometimes the thread still slips off of the needle or the thread breaks around the eye because of the added bulk of the knot. However, I have found it MUCH less frequent than rethreading the needle every time it simply slips out from stitching.
* If you find steps 1-4 challenging, you can use this handy contraption to perform the same task for you. Then, proceed to steps 5-7.
PRO TIP:
Thread a few needles at a time to maintain the flow of your stitching.
EPP Hack 02: Cut Out Paper Pieces with Old Rotary Cutter Blades
I alluded to this EPP hack in my most recent newsletter. And, today I’m sharing the full reveal! (For those of you who don’t know what I’m talking about, each of my monthly newsletters contains a “Tip of the Month” to help you cultivate a bit more of the joy and healing that creativity brings. If you don’t already receive that newsletter, you can subscribe to it here and receive that tip along with lots of other stitchy goodness!)
Have you ever wondered what to do with your old rotary cutter blades once they are retired from cutting fabric? Well, here’s a great solution! Even if your old blades aren’t good for cutting fabric any longer, it doesn’t mean that they aren’t useful. Old rotary cutter blades too dull for cutting fabric can still cut through paper like butter. Enter printable EPP templates. I have created a FREE printable PDF with 1/2”, 3/4”, 1”, and 2″ hexagons in an easy to cut format that I’ll happily drop directly into your inbox for immediate download here!
So, go print those out, and follow along with me as you give your I-should-have-changed-my-blade-ages-ago rotary cutter blade one last hurrah! (And once you’re done, your future fabric cutting self with thank you for a fresh fabric blade, as well!)
Of Note:
For the purposes of this tutorial, I am using the petal templates from the Daisy Jane quilt pattern. However, the process is exactly the same for the printable hexagon templates I created using classic hexagon dimensions.
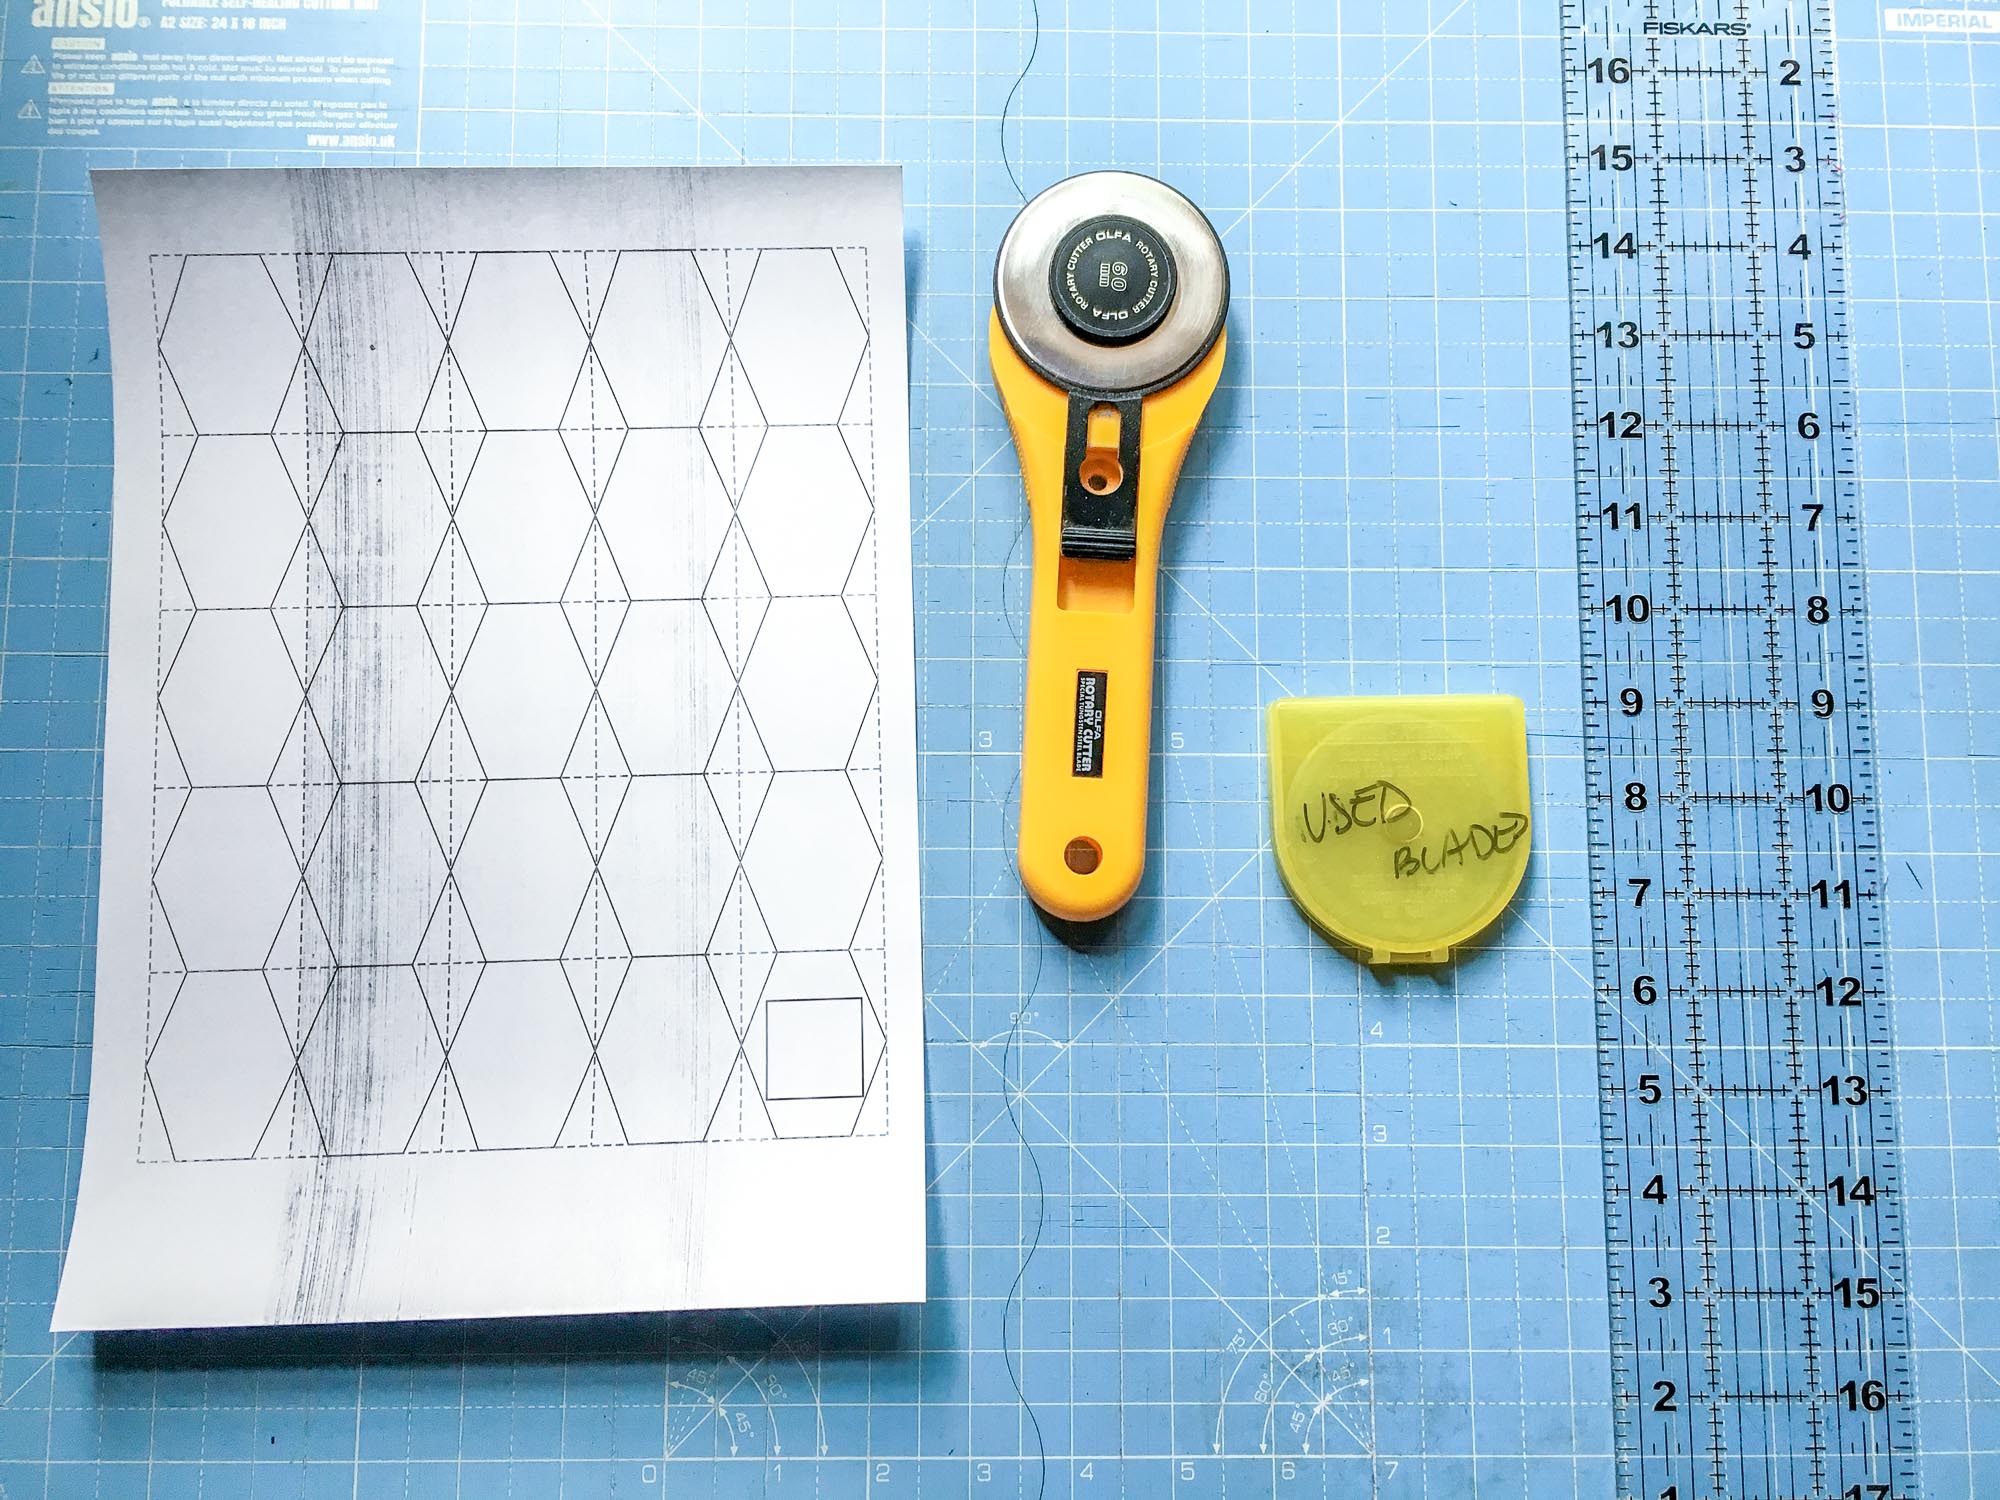
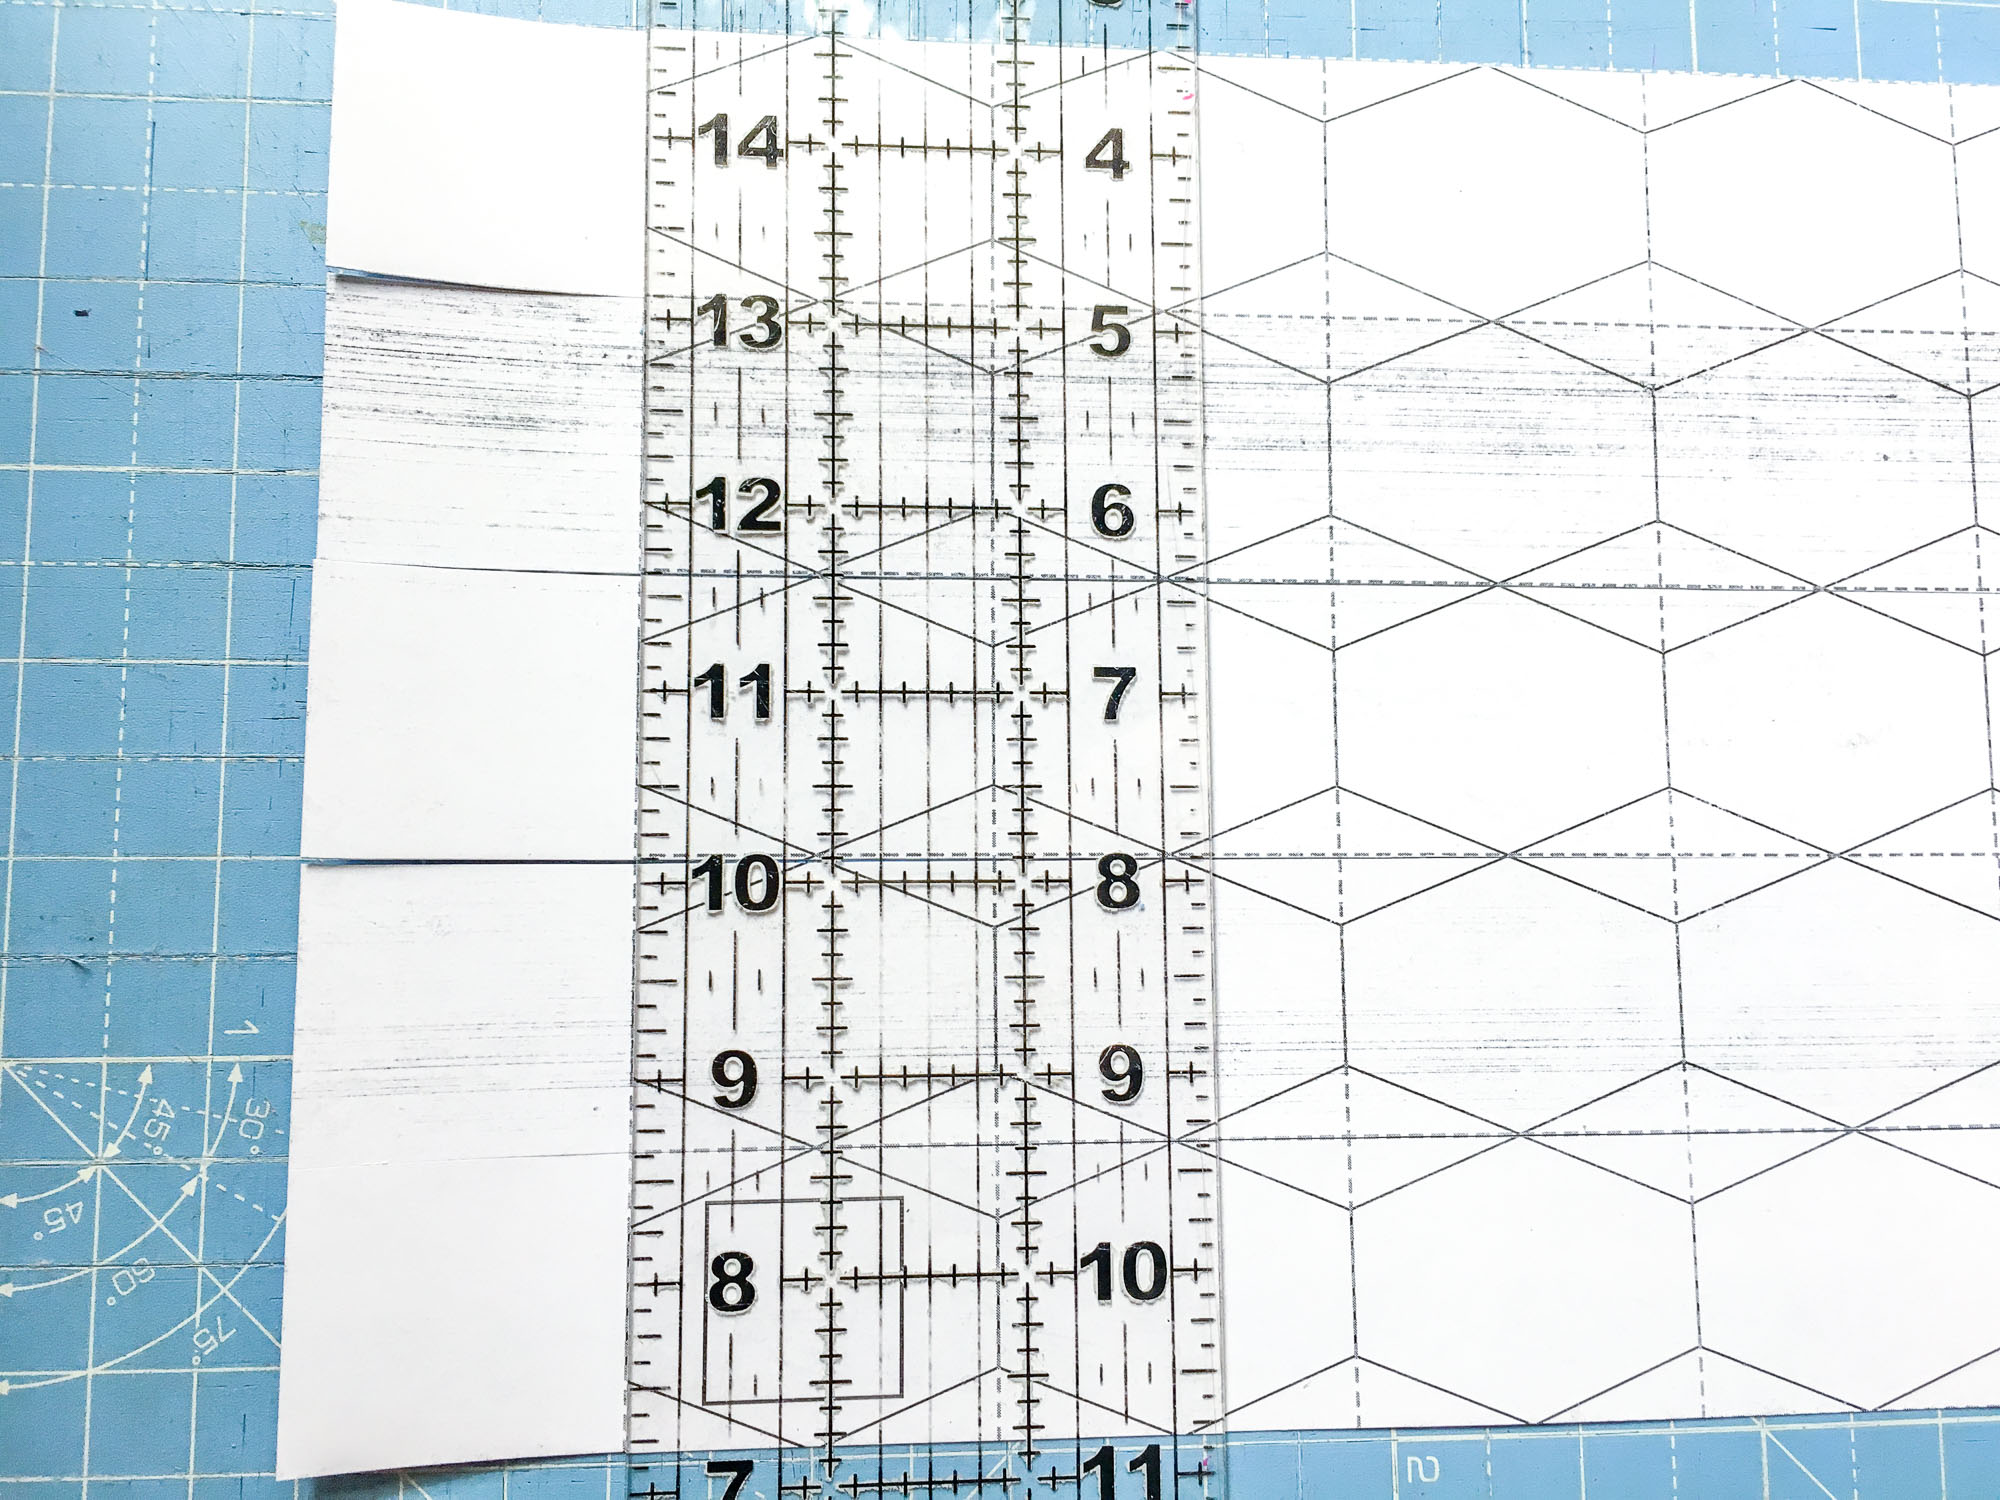
1. Begin by collecting your paper template, a rotary cutter with an old blade, a ruler, and cutting mat. (I mark old rotary cutter blades with an “X” in black permanent marker and keep them together in a case marked “used blades” so I don’t mix them up with my fabric ones.)
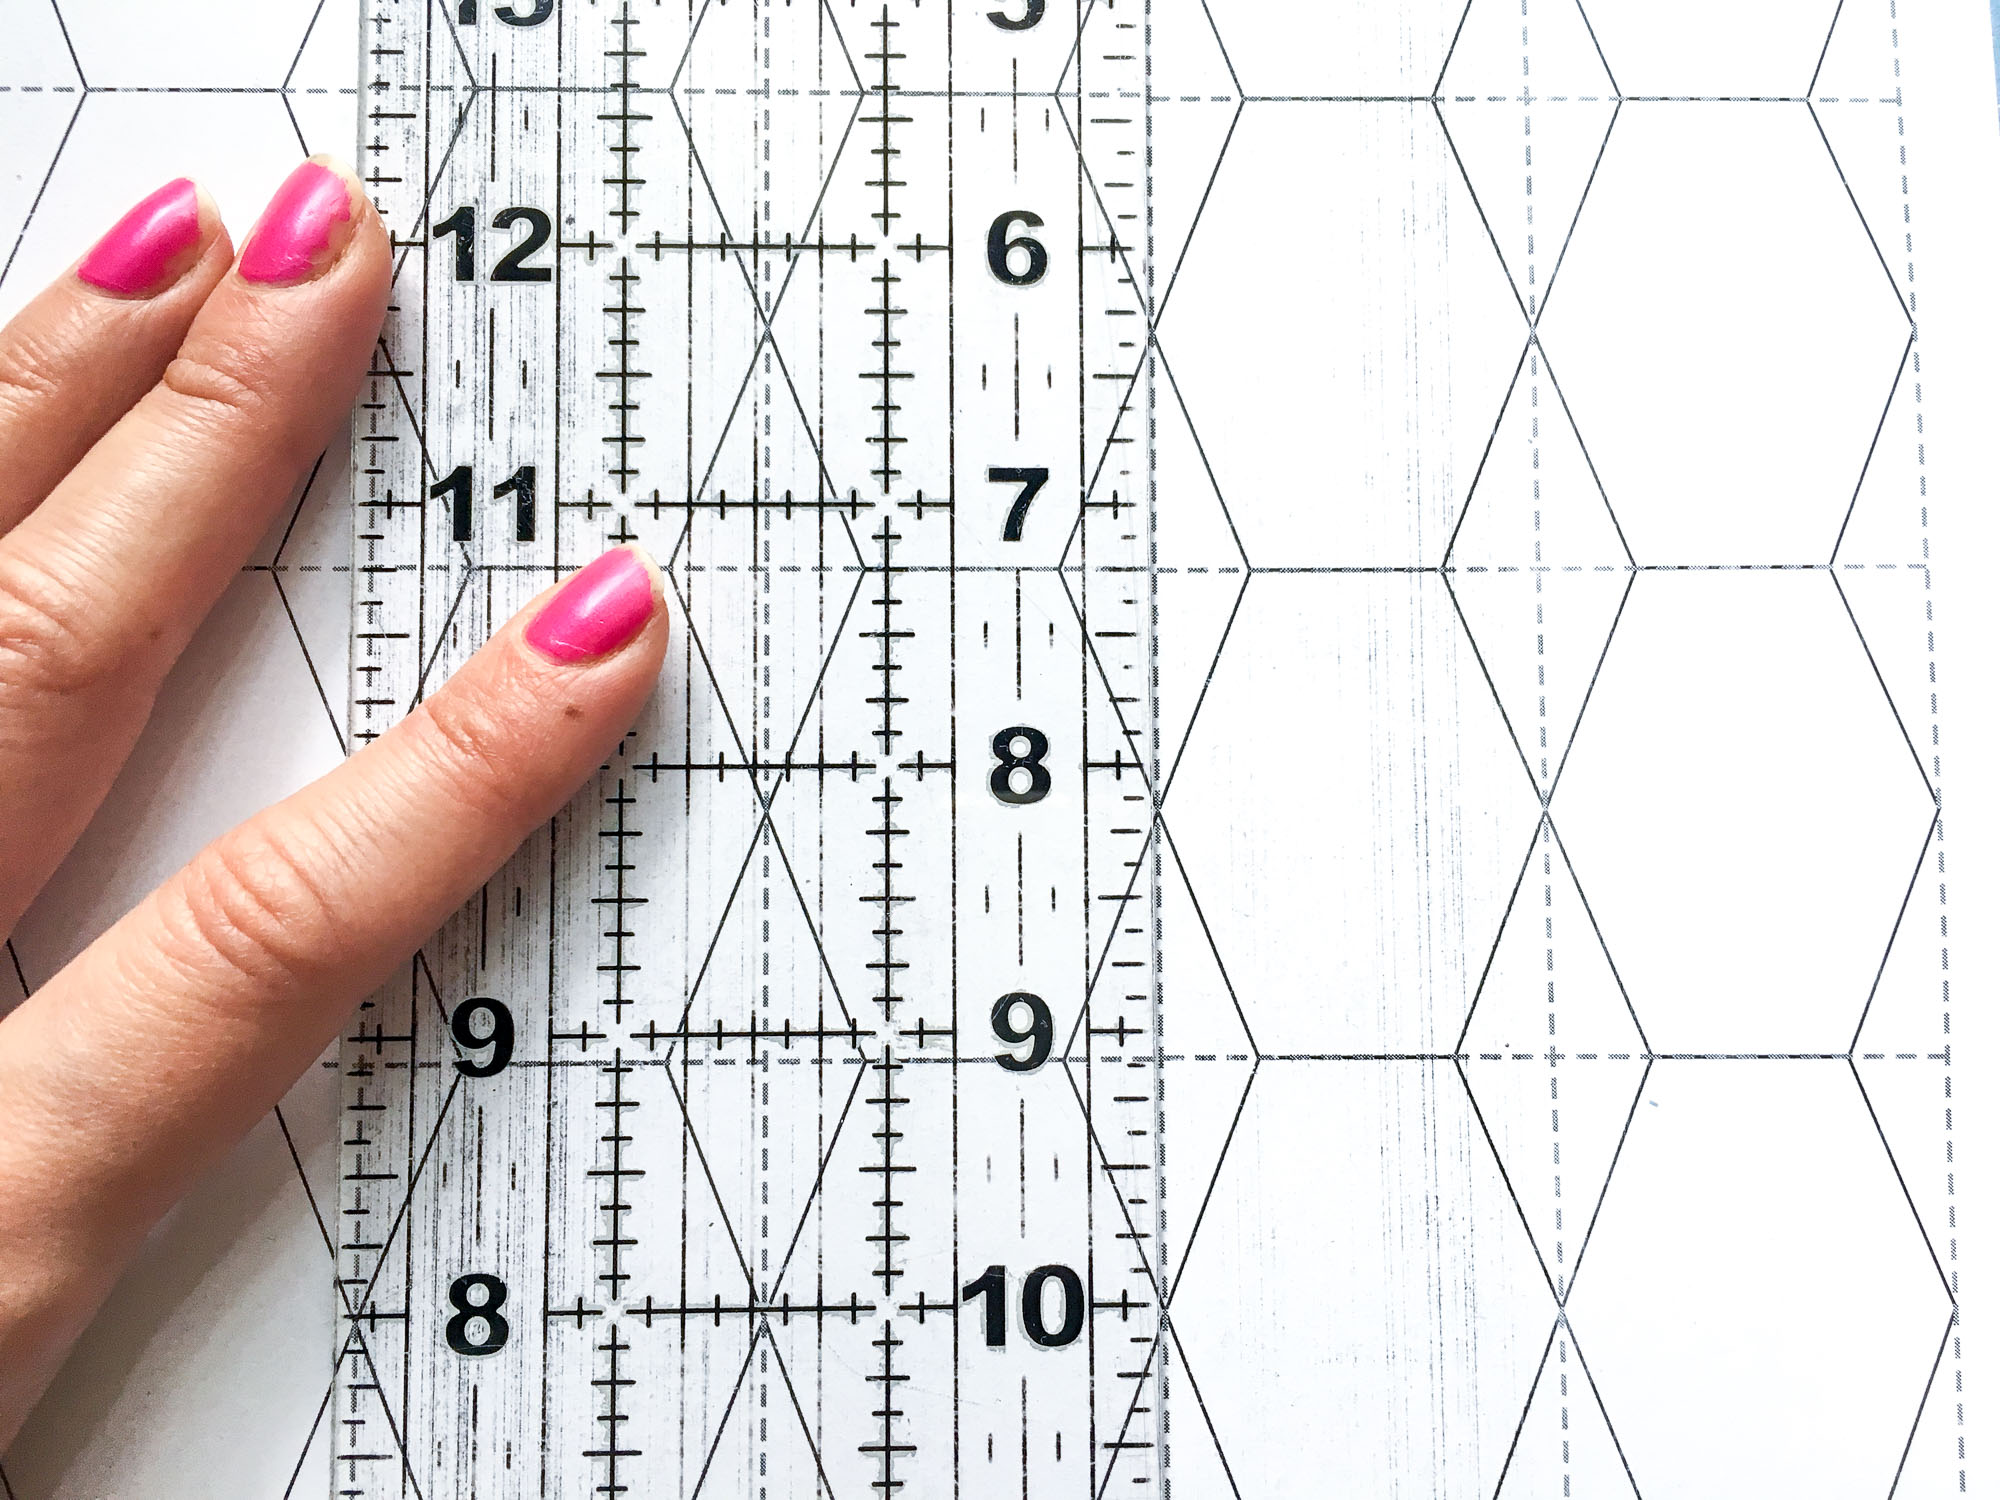
2. Line up your ruler with the cutting lines on the template, and cut with your rotary cutter as you would fabric.
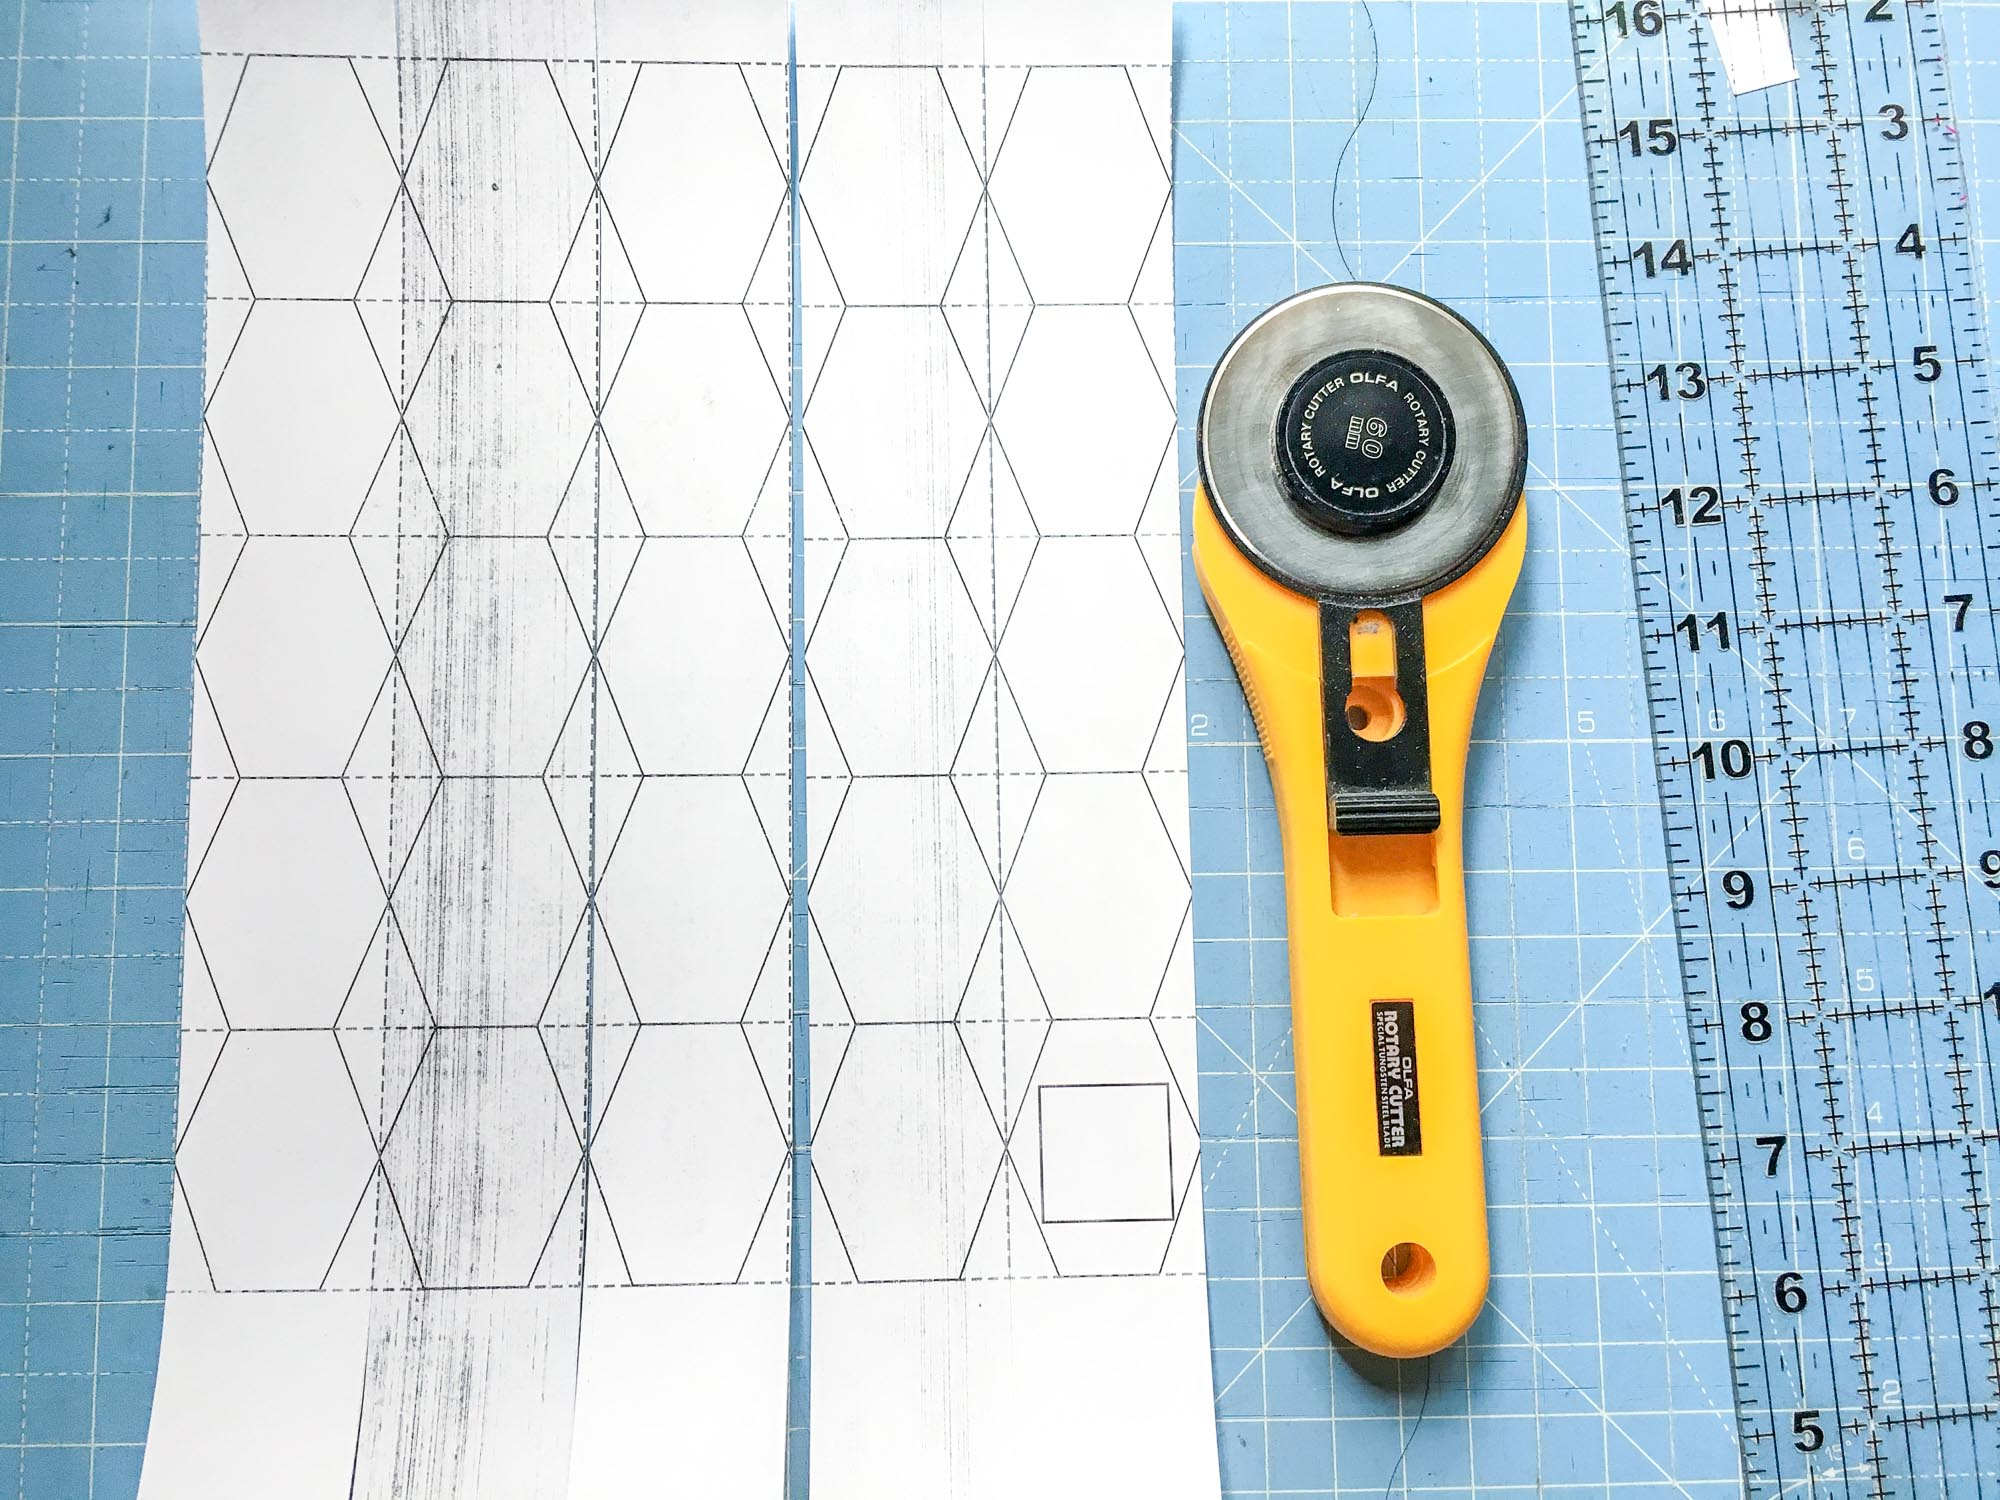
3. Continue across the template until all of the strips have been cut.
Of Note:
Keeping your ruler pressed over the cut strips as you go prevents them from flying around the mat. I am right handed so I find cutting from left to right helpful.
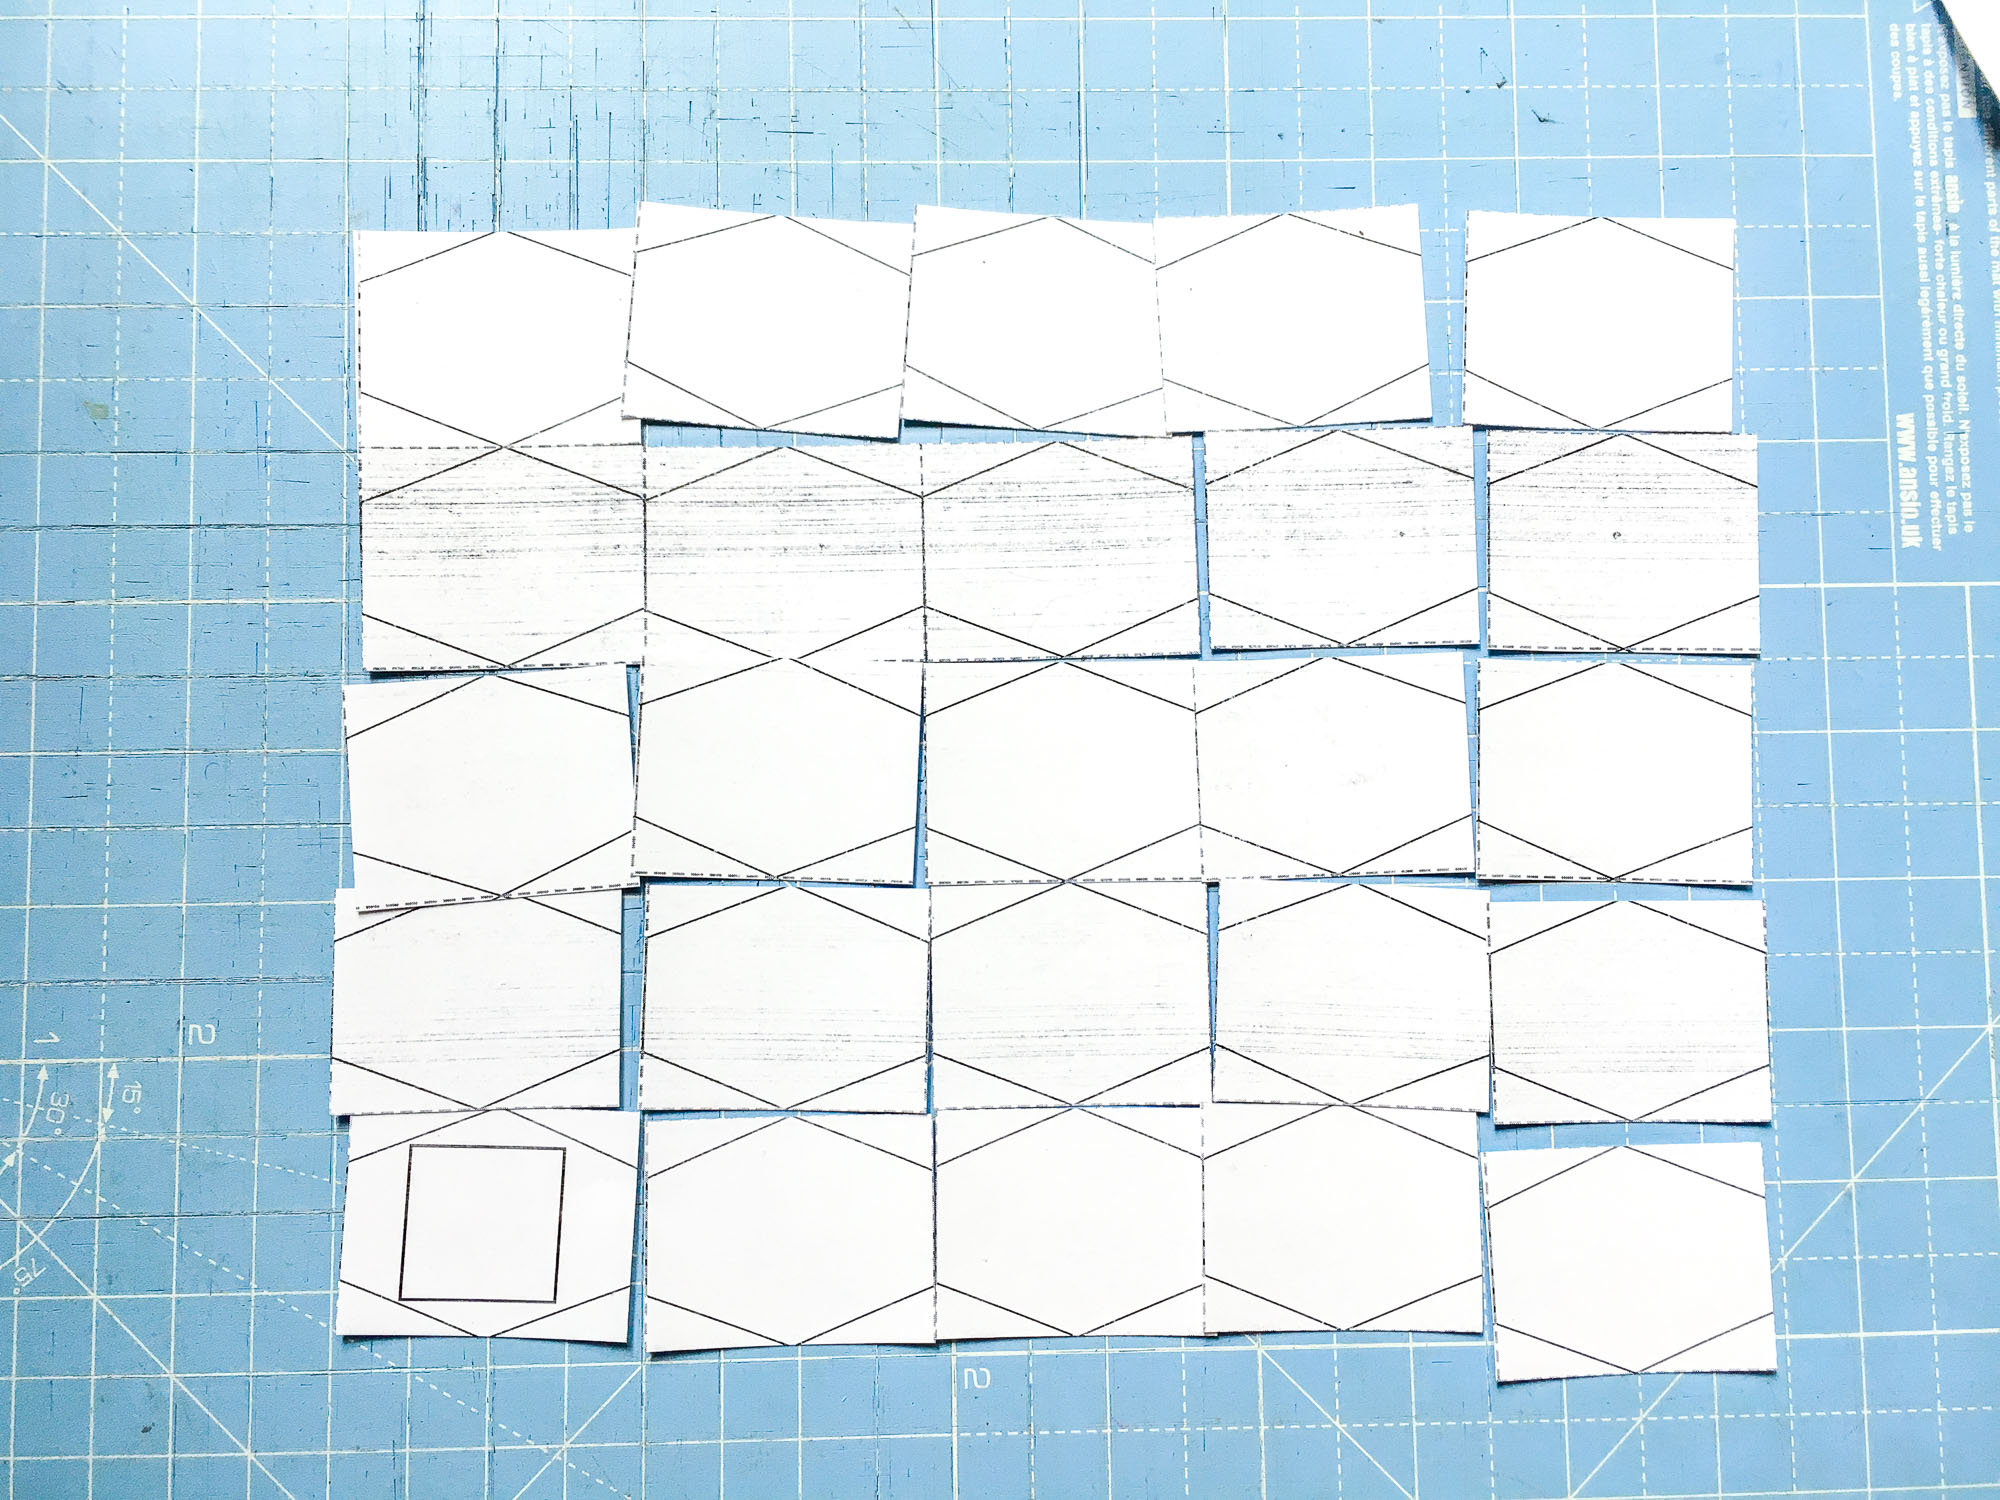
4. Once you have completed cutting the strips in one direction, turn your mat and begin cutting along the perpendicular cutting lines. Be sure to align the strips so that cutting lines match up.
5. After cutting along both sets of cutting lines, your pieces will look something like this.
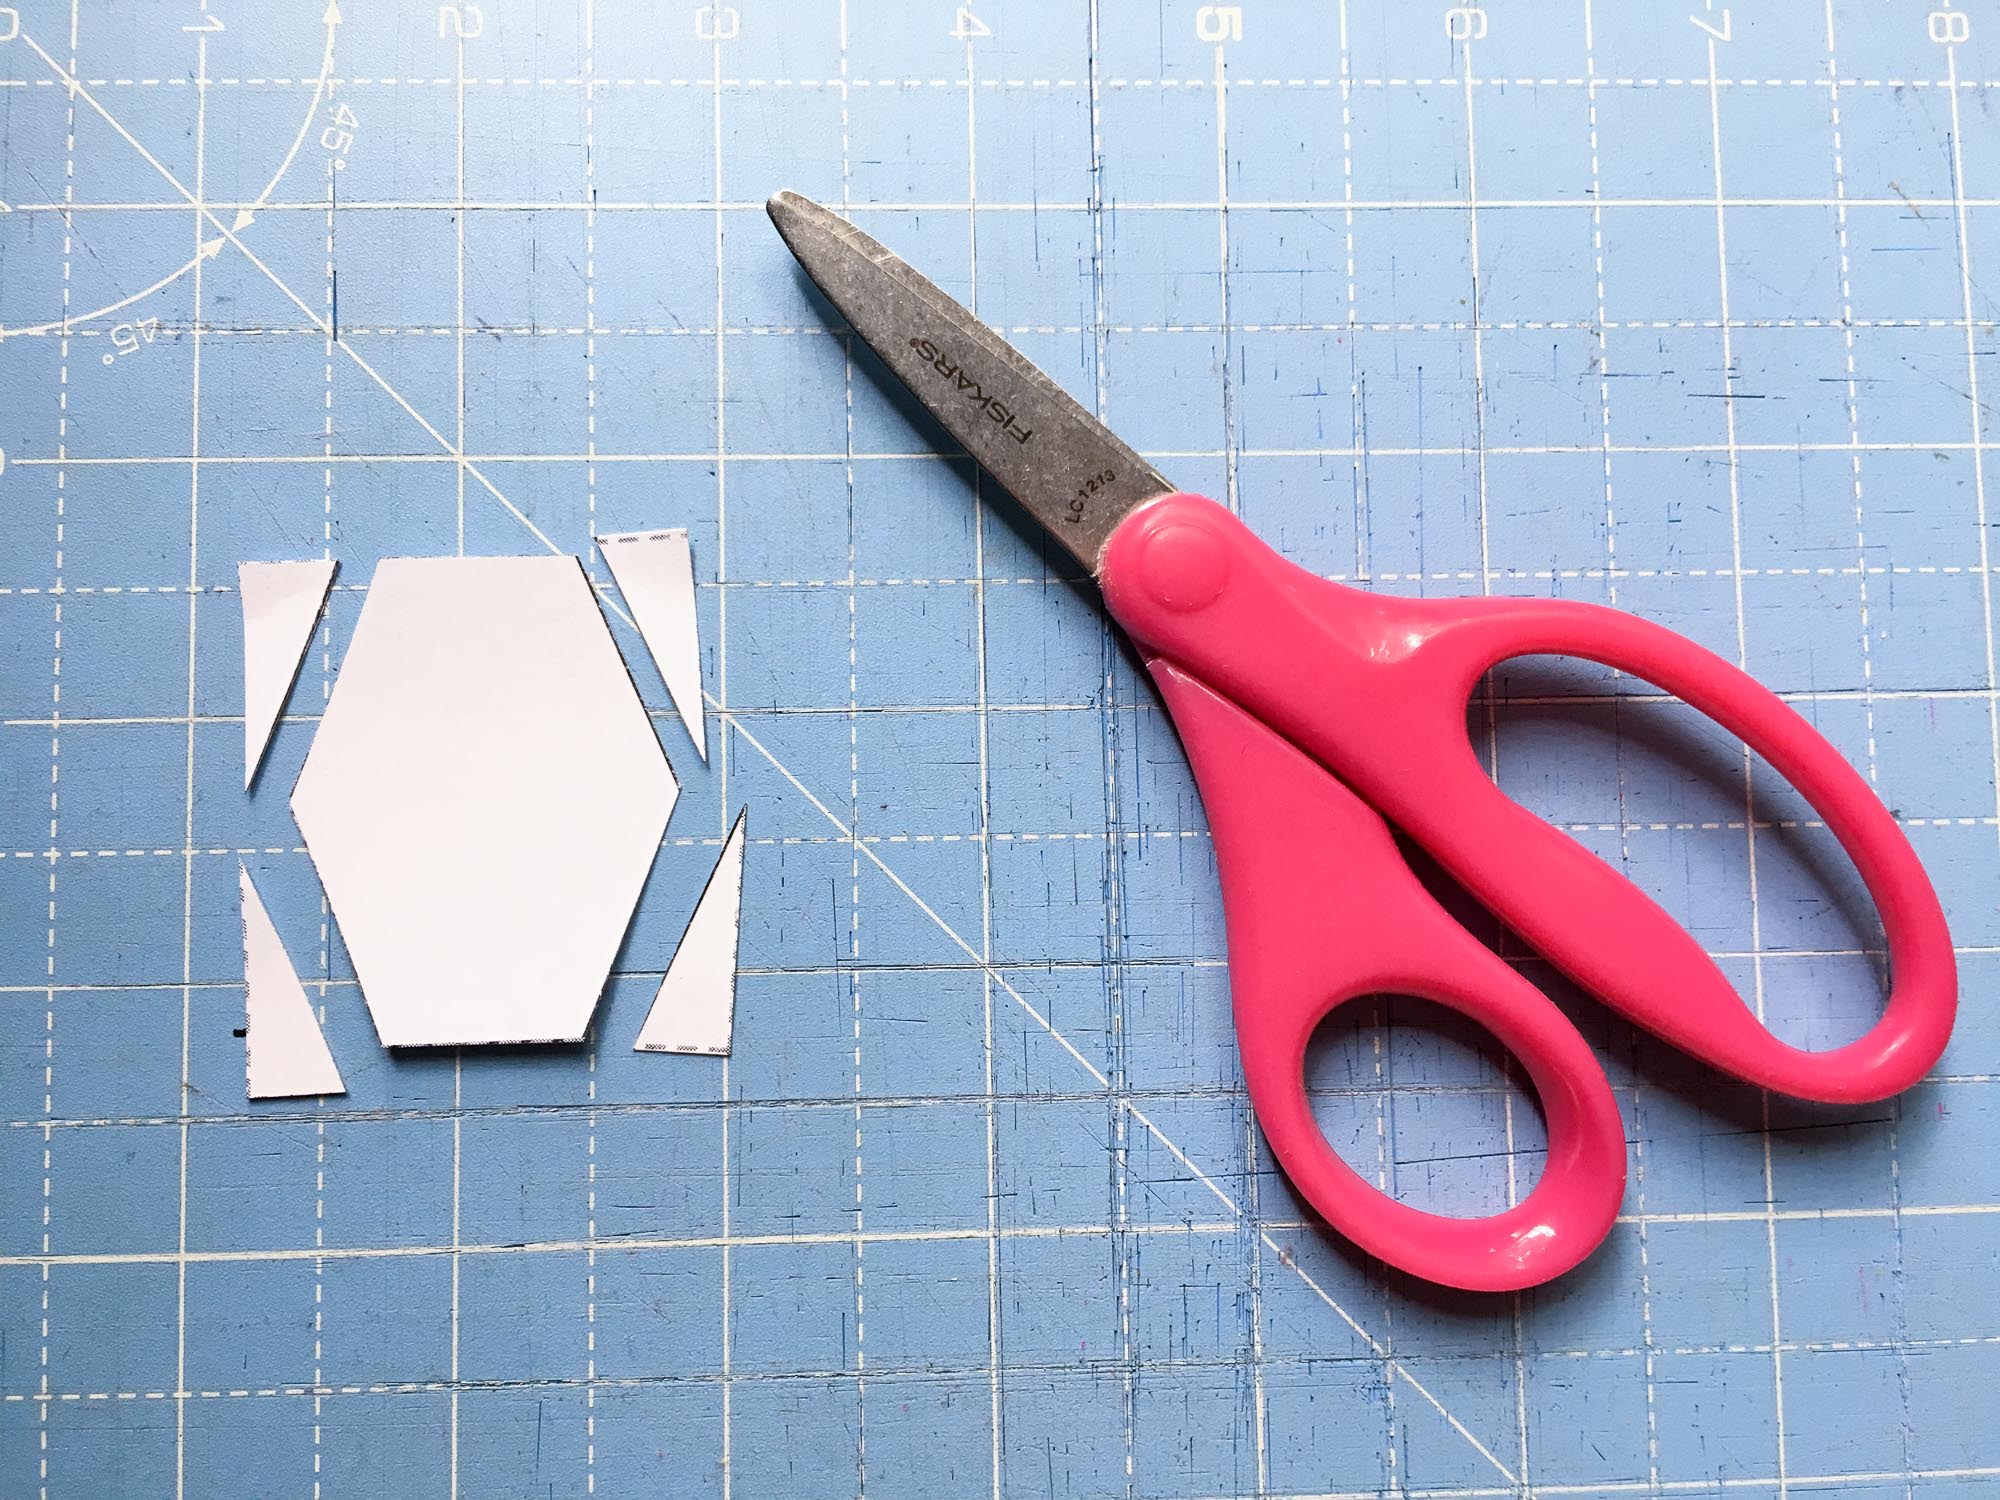
6. Next, grab your PAPER scissors and trim off the remaining side triangles to reveal your paper pieces ready for basting!
Of Note:
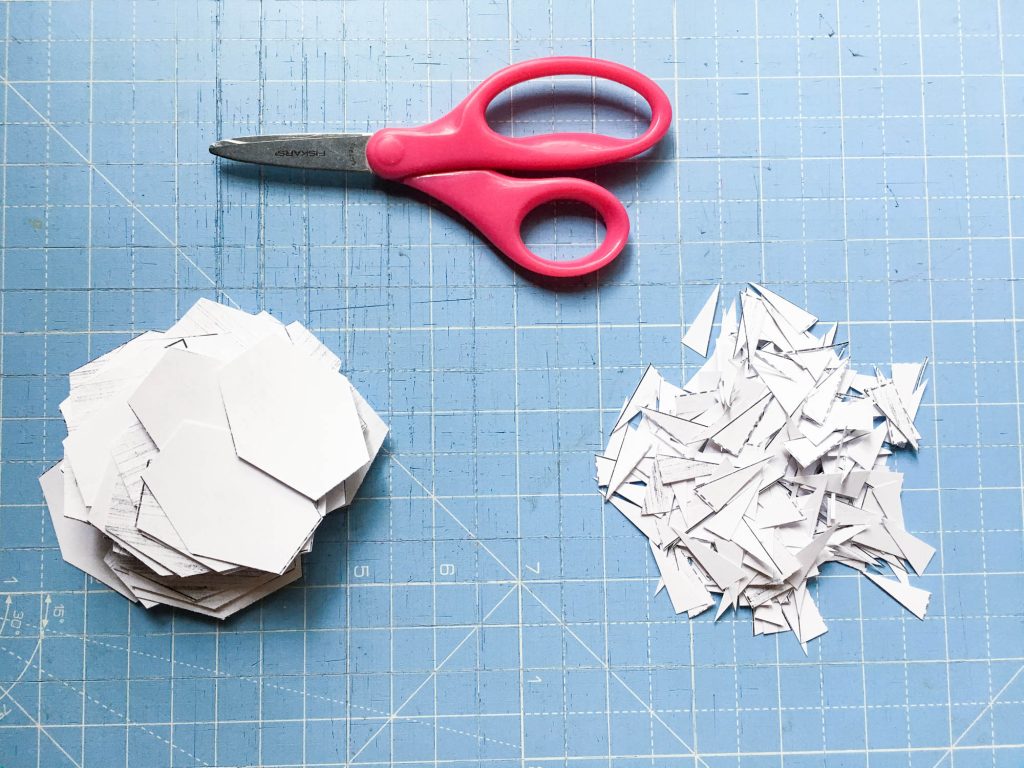
I printed three pages of templates and batch cut them. Each page of these Daisy Jane templates contains 25 petals, for a total of 75 paper pieces, which is enough to create nine Daisy Jane flowers. It took me 20 minutes to cut them all out using this method. In my opinion it’s pretty quick if it’s the only thing that stands between you and beginning a new EPP project!
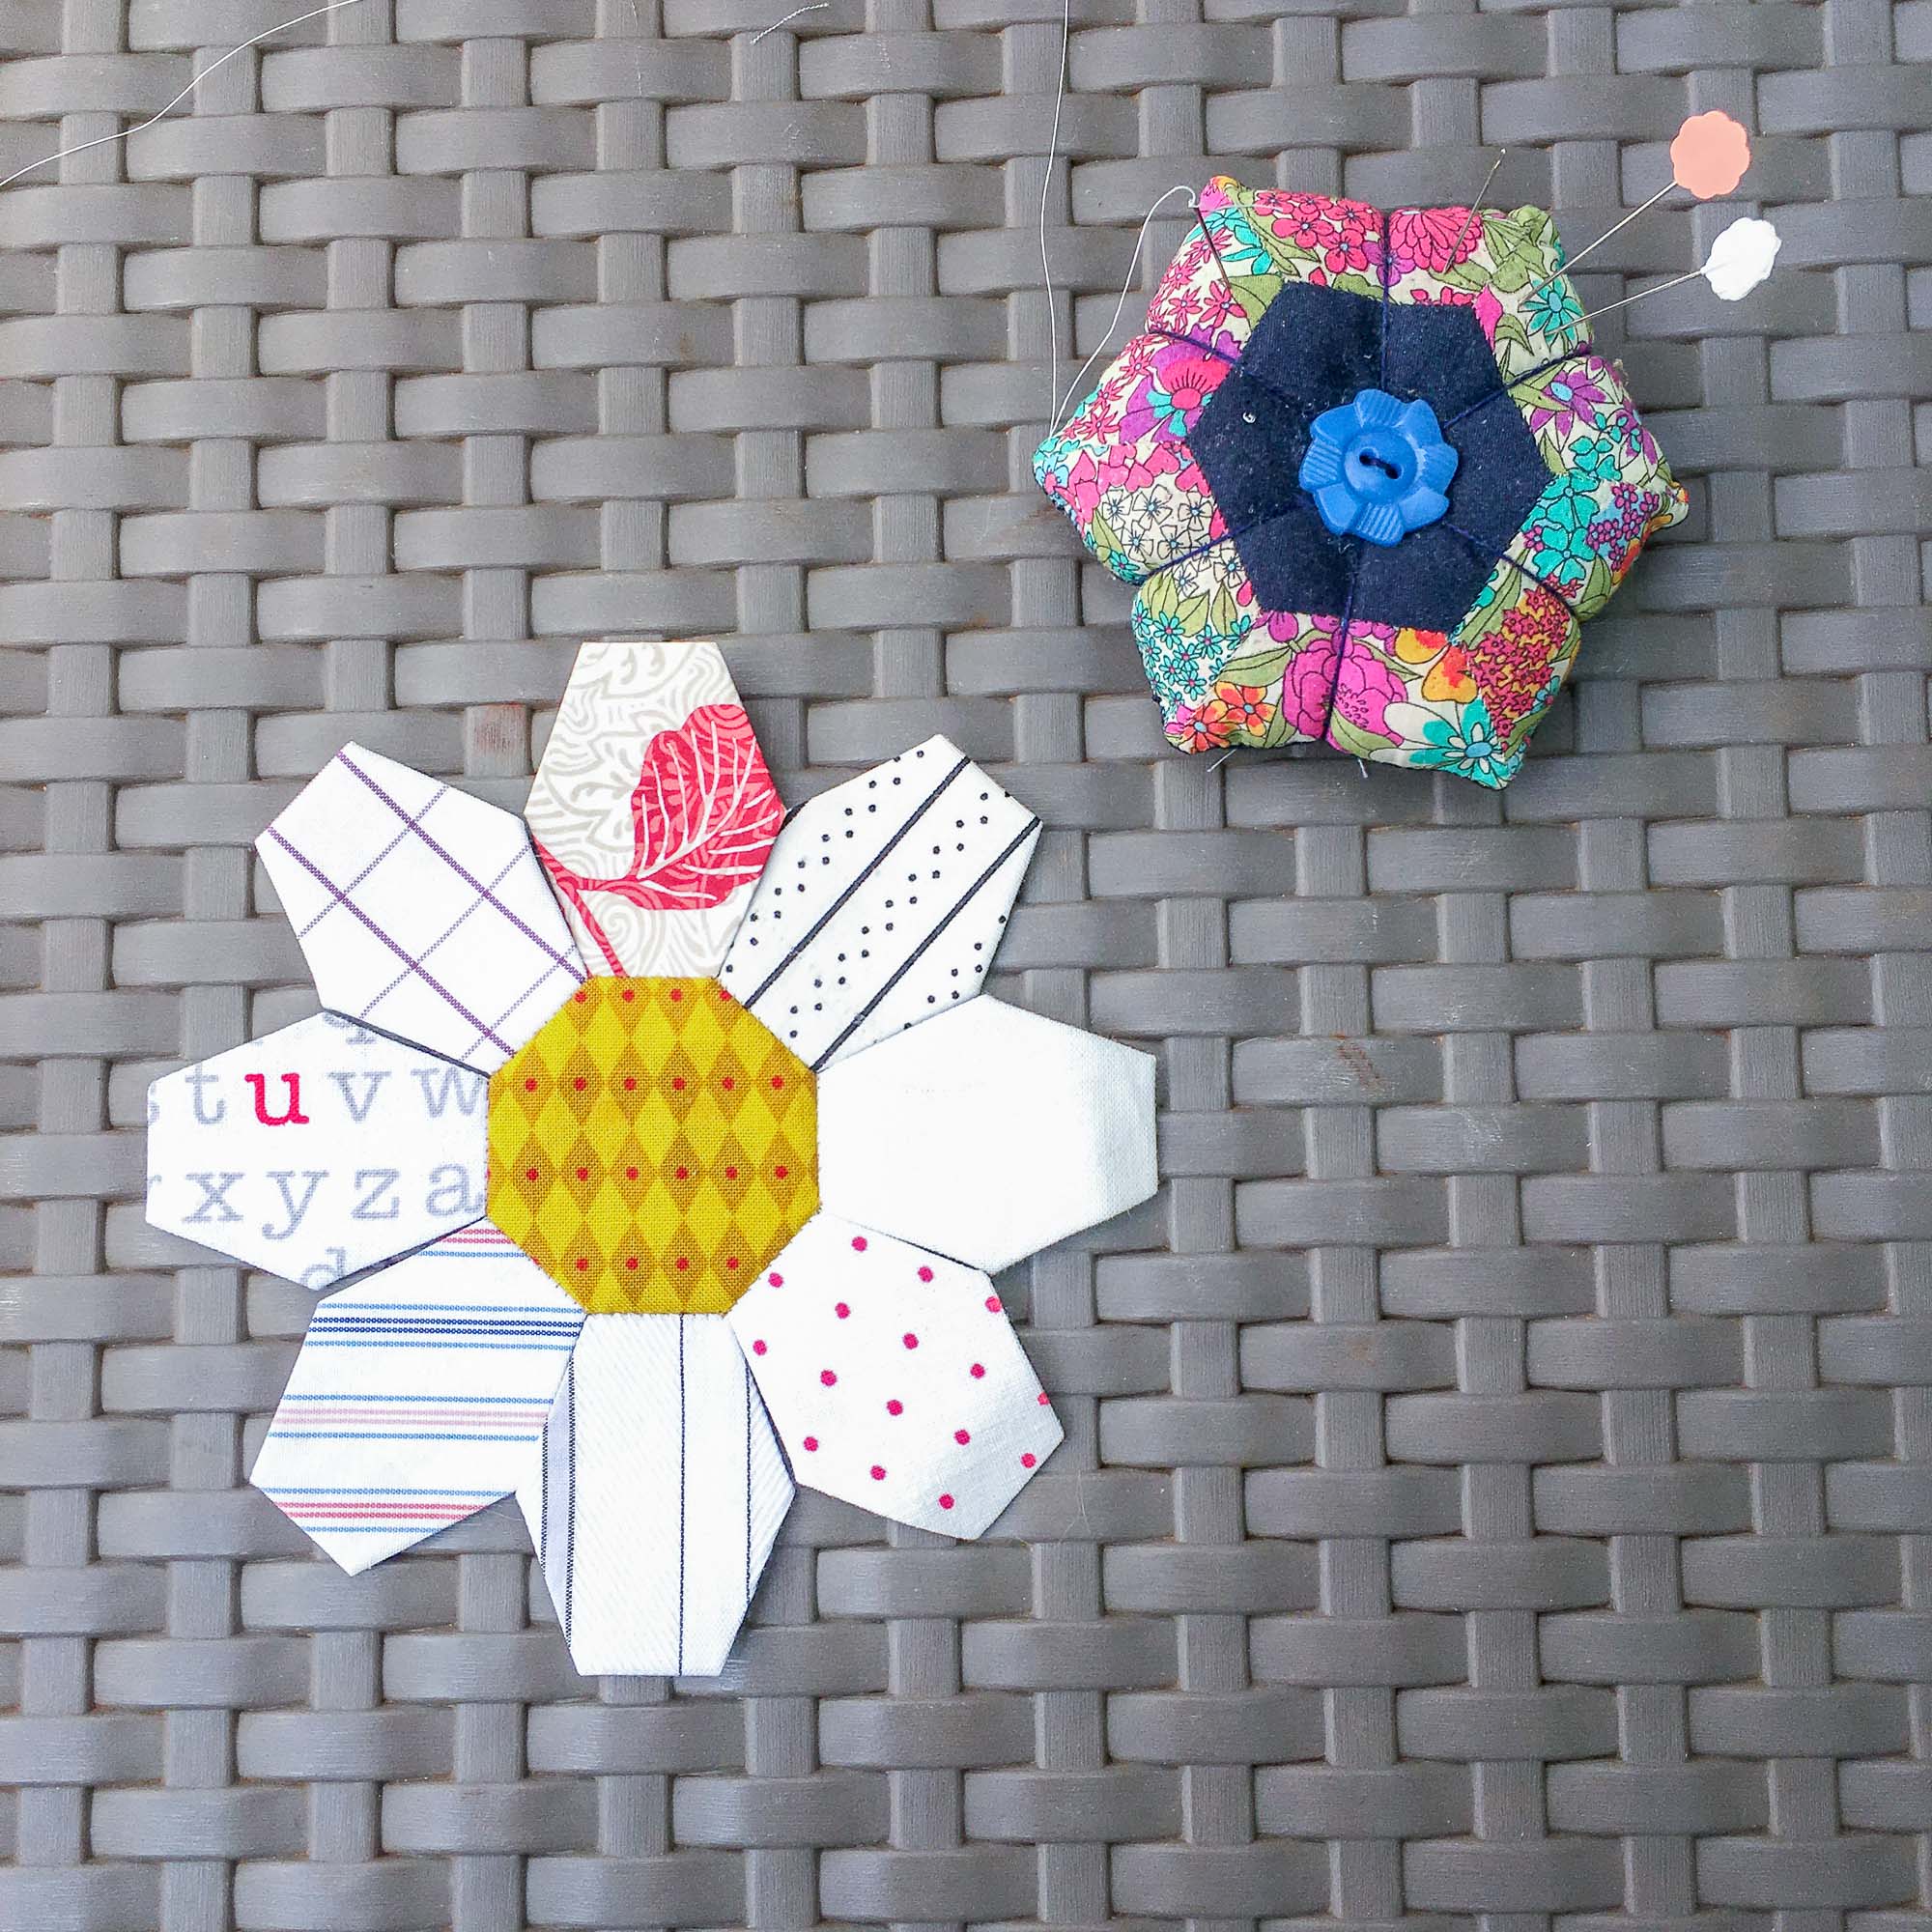
EPP Hack 03: How I Stitch Flower Petals
This next EPP hack feels like second nature to me, so I hardly notice that I’m doing it anymore. However, I’d like to give a shout out to Sarah Hunter (@lazycozyquilts) who suggested I share this process after reading through the EPP Primer. Thanks for the input Sarah! (If you have a suggestion for a tutorial you’d like to see at Stitching the Journey, please feel free to share! I can’t promise I’ll get to all of them, but I’d love to know what you’d like to see.)
In the EPP Primer: Stitching tutorial, I share the basics of EPP stitching, including how to construct a hexie flower. However, there is a little hack that can save you from constantly clipping your thread as you go along.
Of Note:
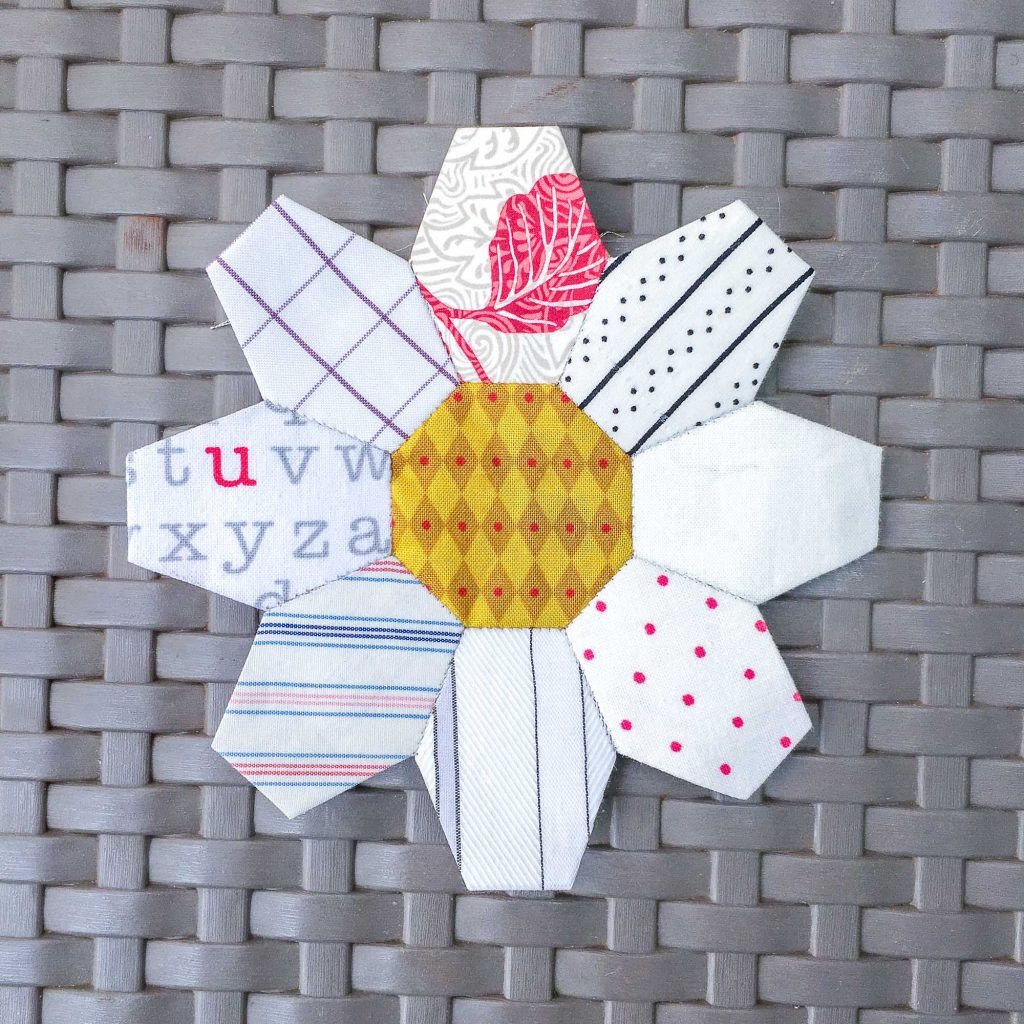
This works for any flower/rosette style EPP block in which the petals touch each other. I will be demonstrating using a Daisy Jane block for the purposes of this tutorial.
1. Begin by stitching all of the petals to the center of the flower.
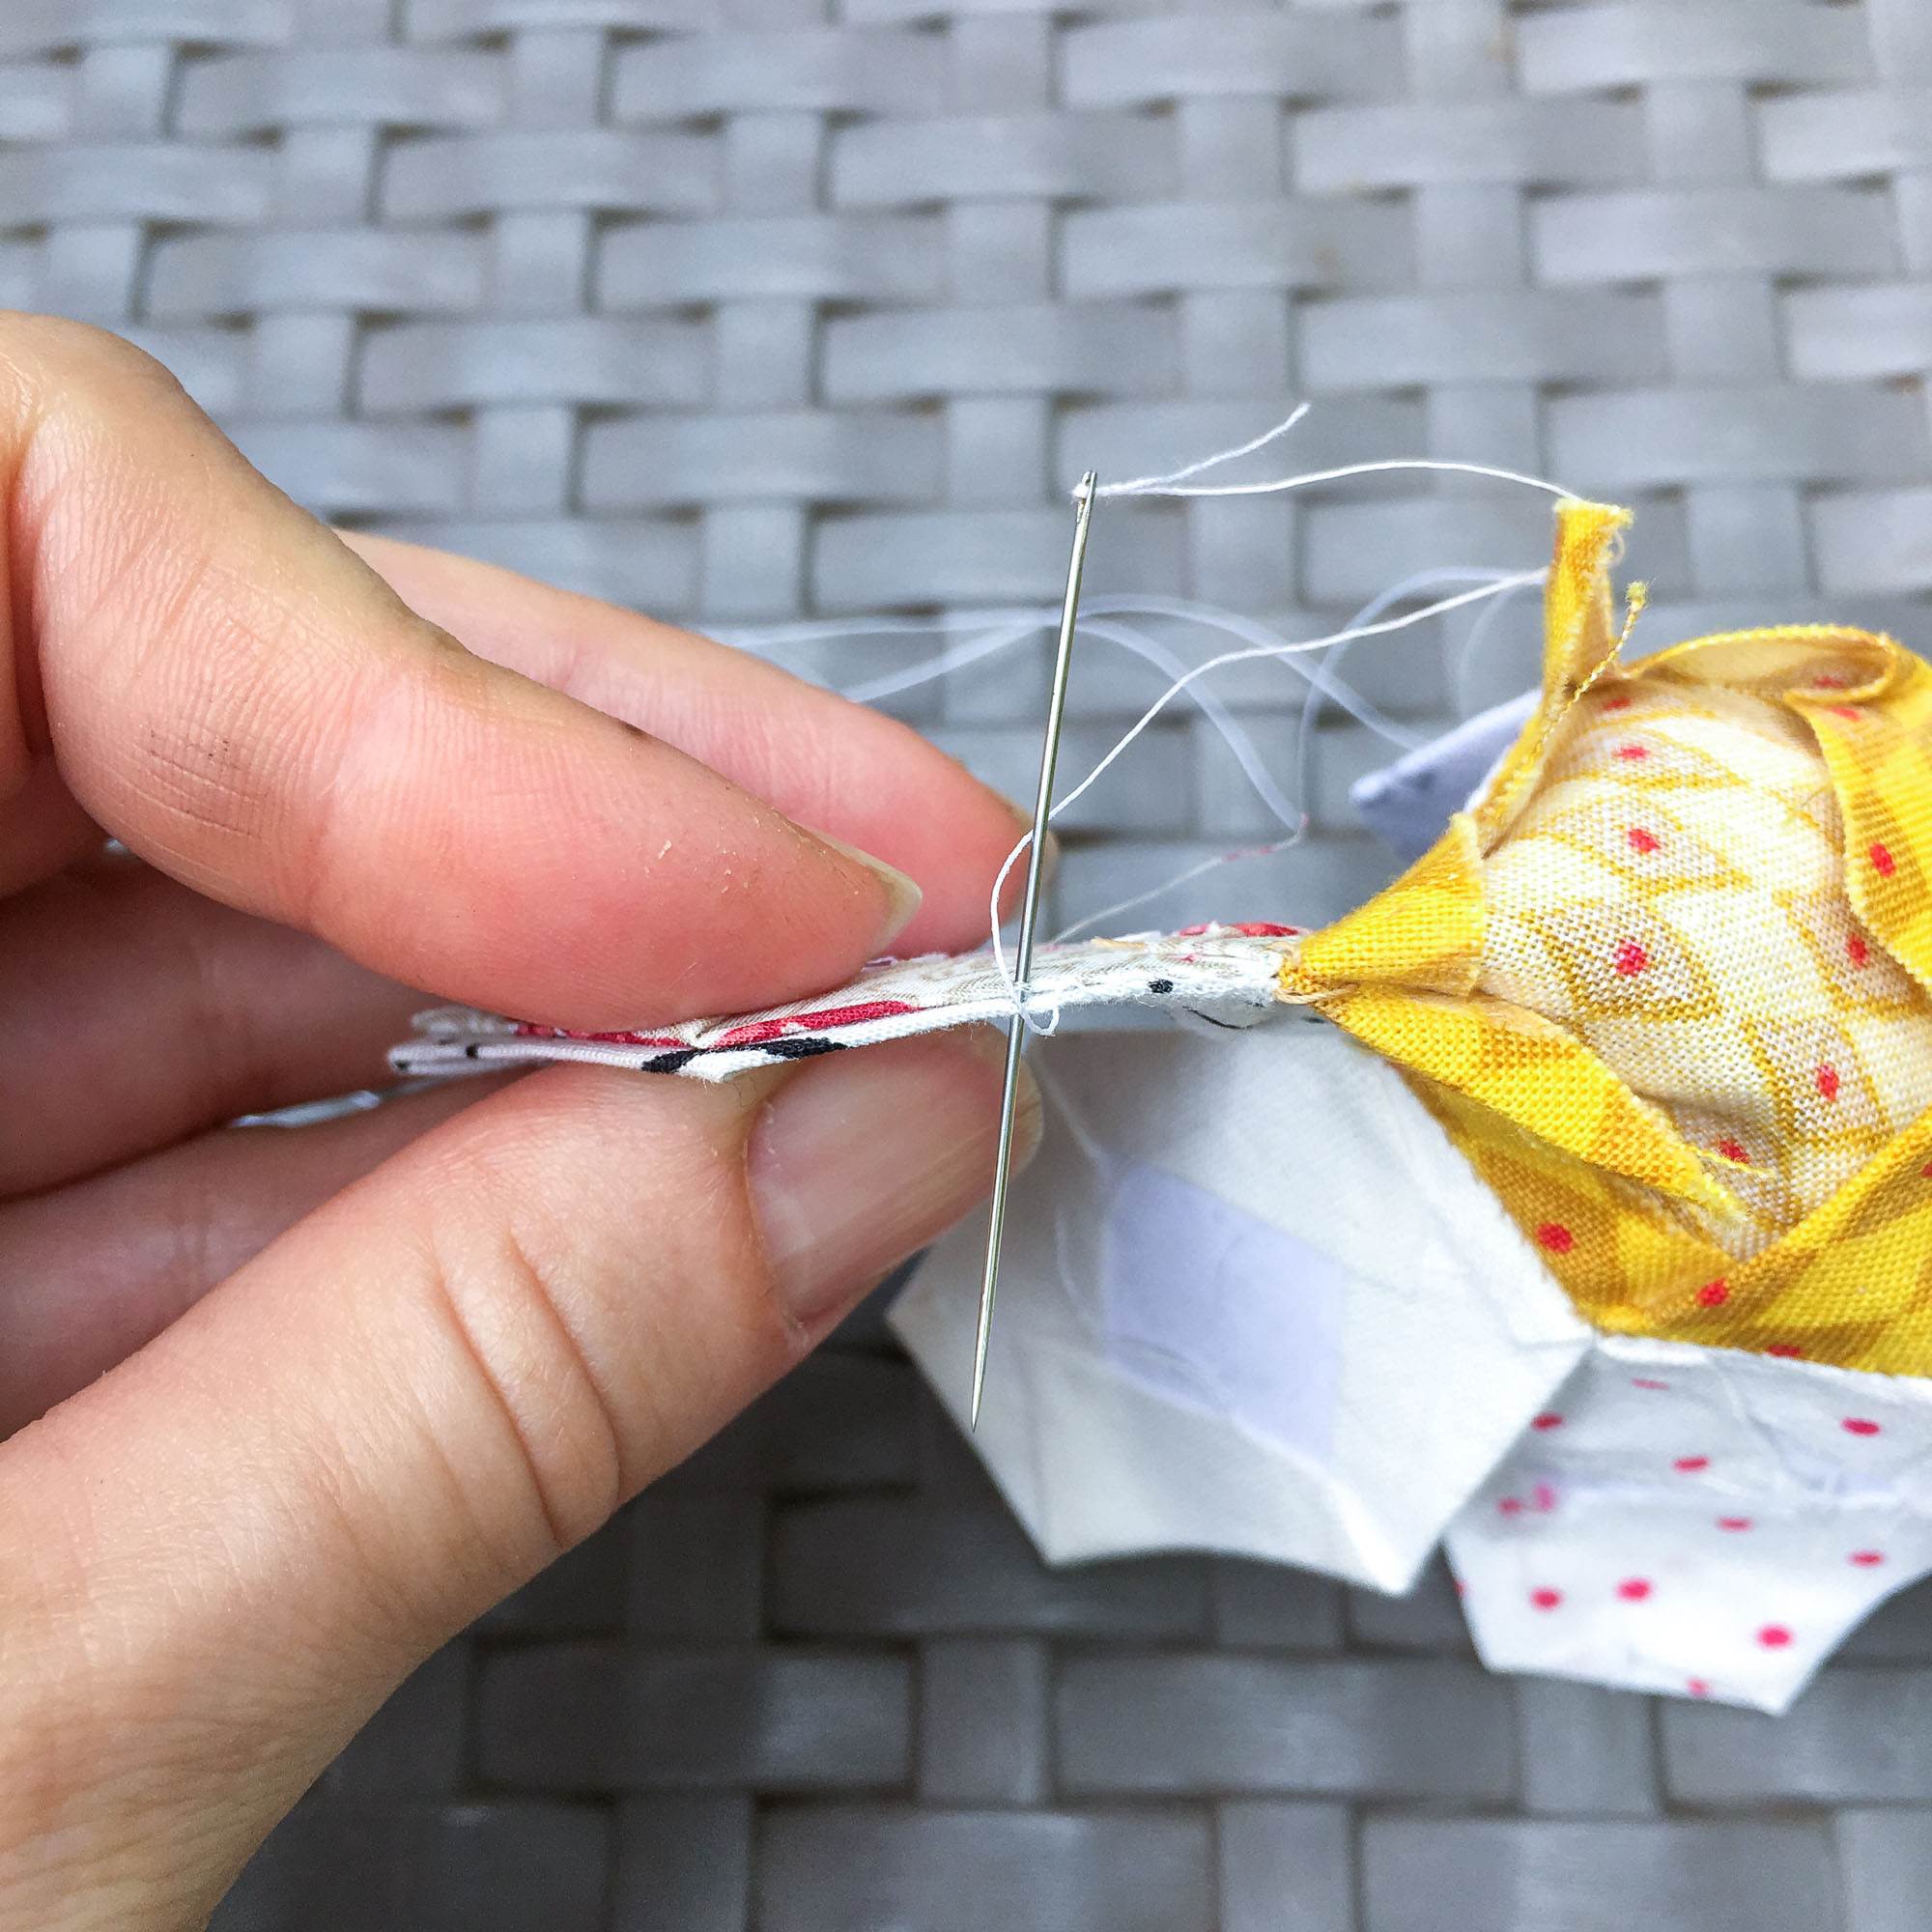
2. Next, align two petals for stitching.
3. Stitch the seam from the center outwards. (Check out the EPP Primer: Stitching post if you need a little refresher.)
4. After you have completed the seam and secured your stitching, slip the needle under the seam allowance and pull through. DO NOT CUT YOUR THREAD.
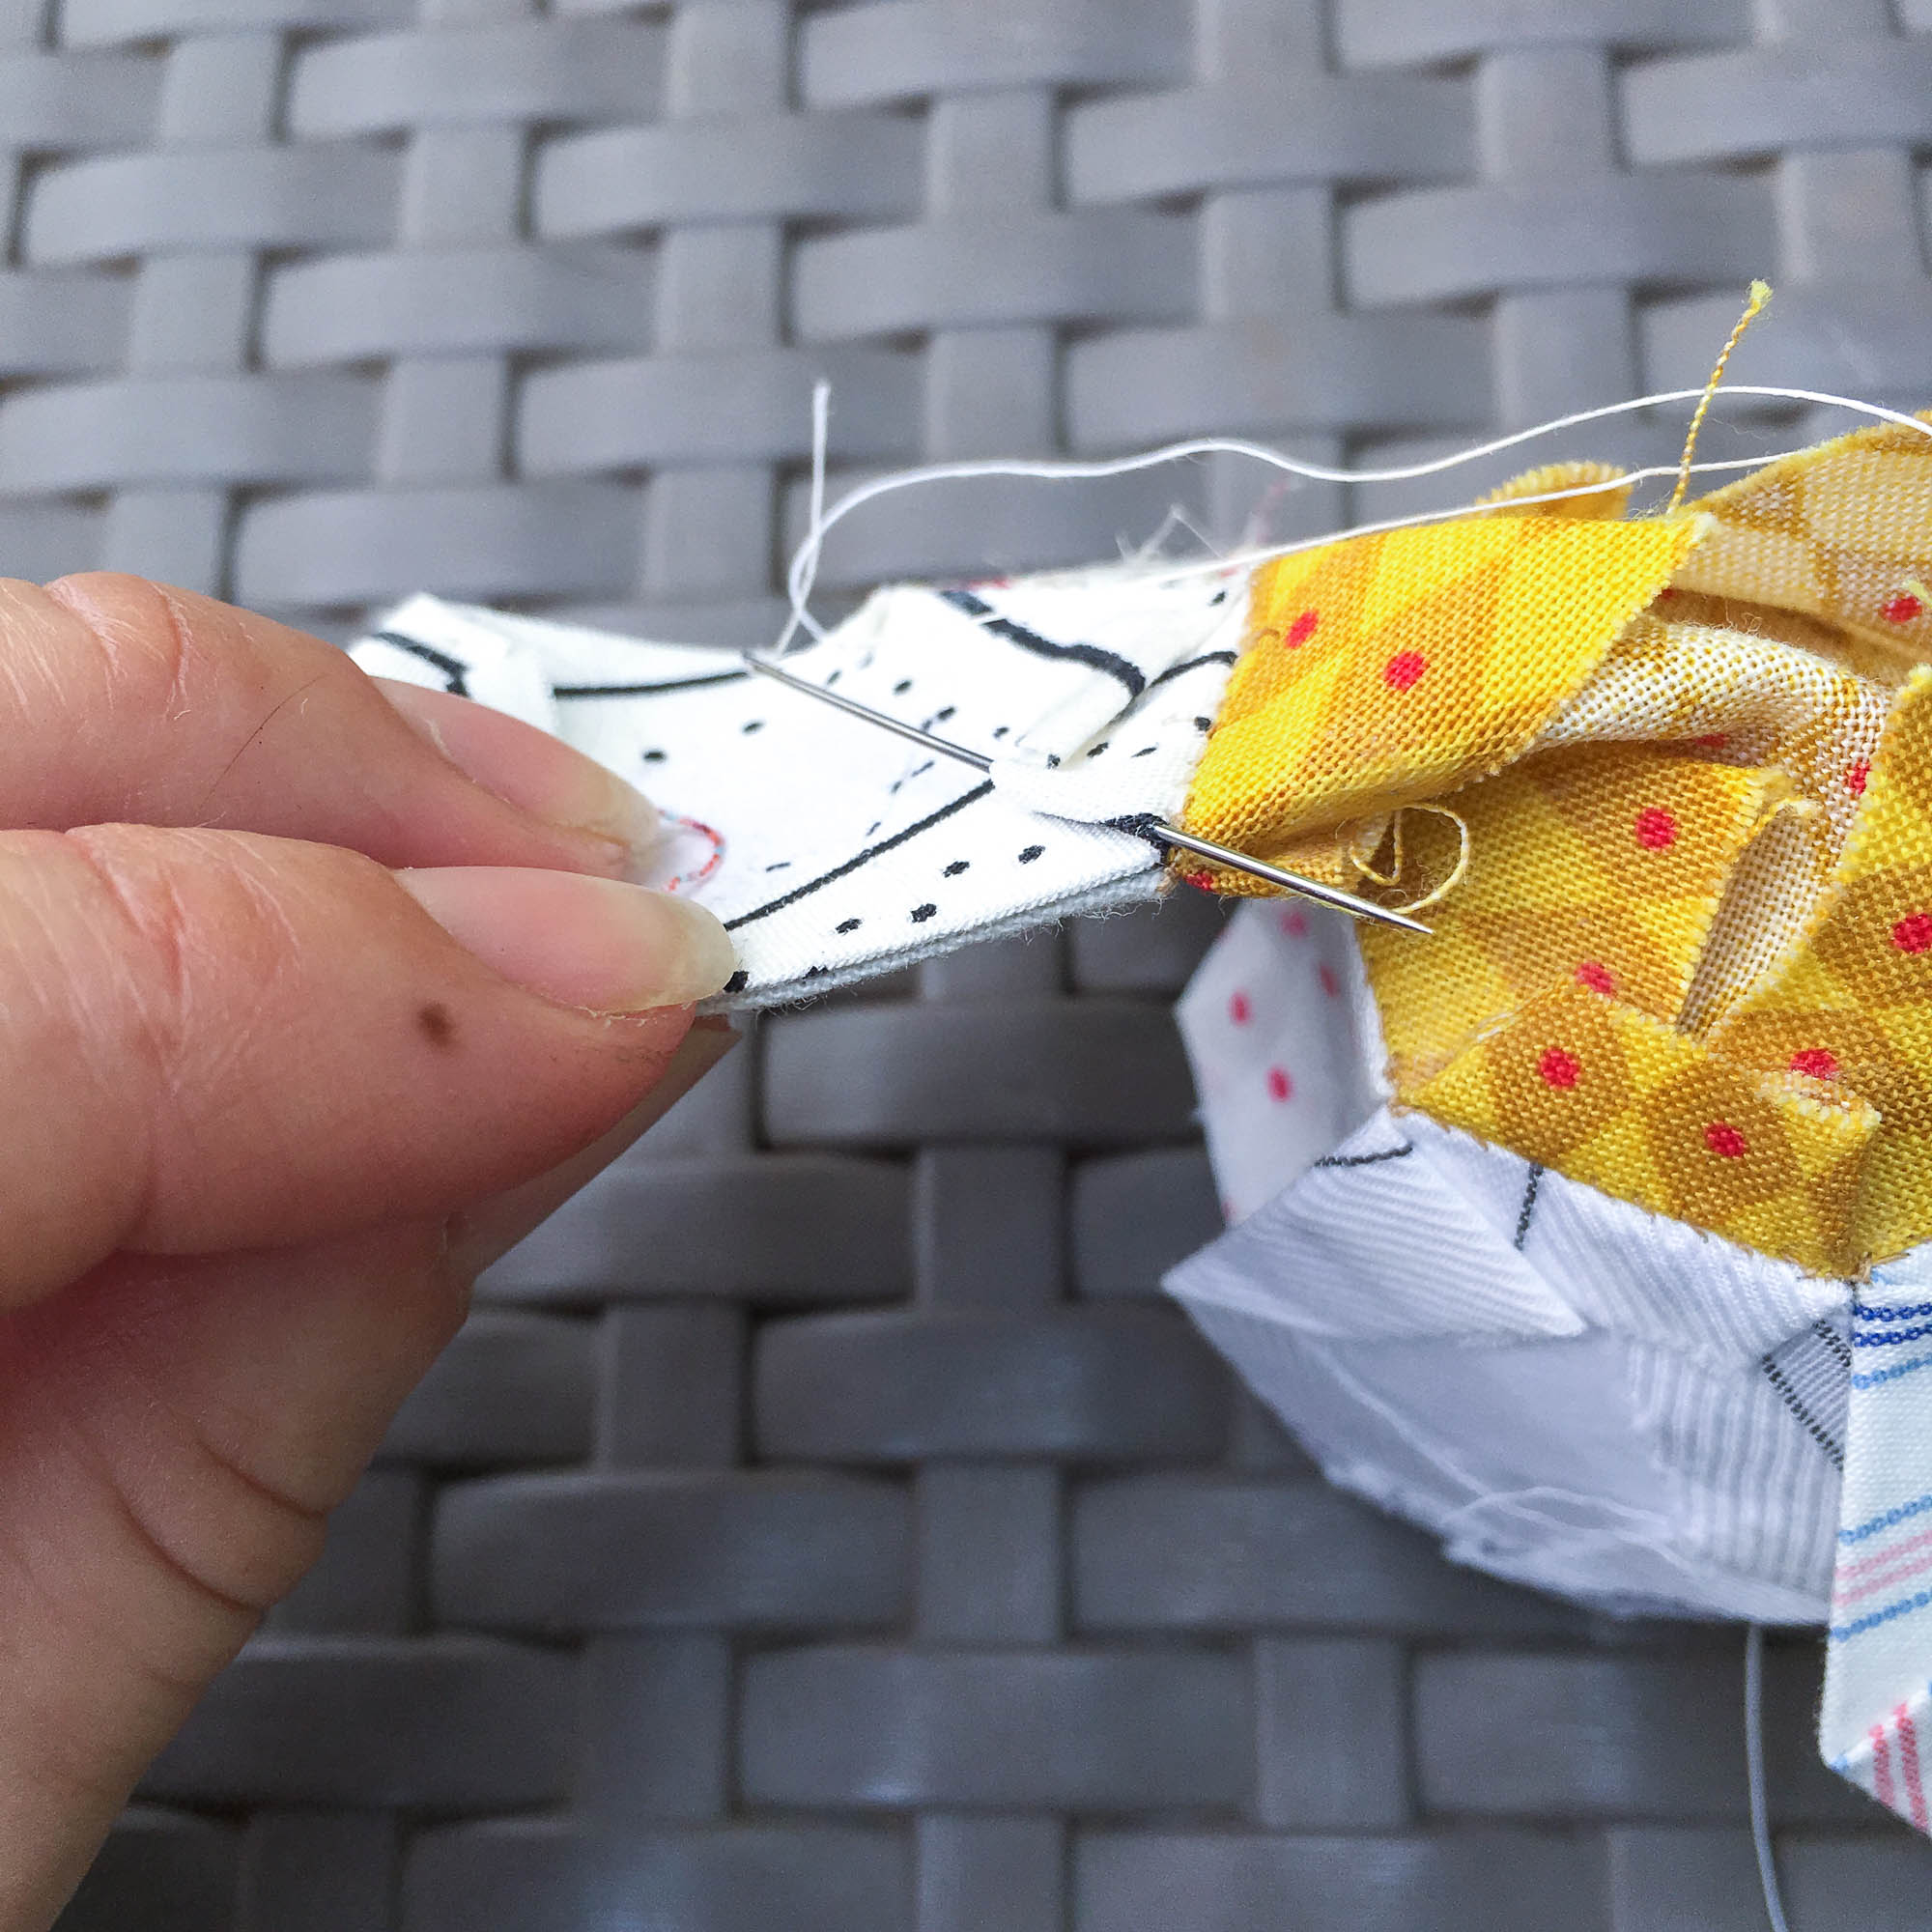
5. Now, without cutting your thread, slip the needle under the seam allowance at the beginning of the next two petals that are ready for stitching. Pull the thread taut, and stitch the seam as usual.
6.Repeat steps 2-5 until all petals are stitched to each other.
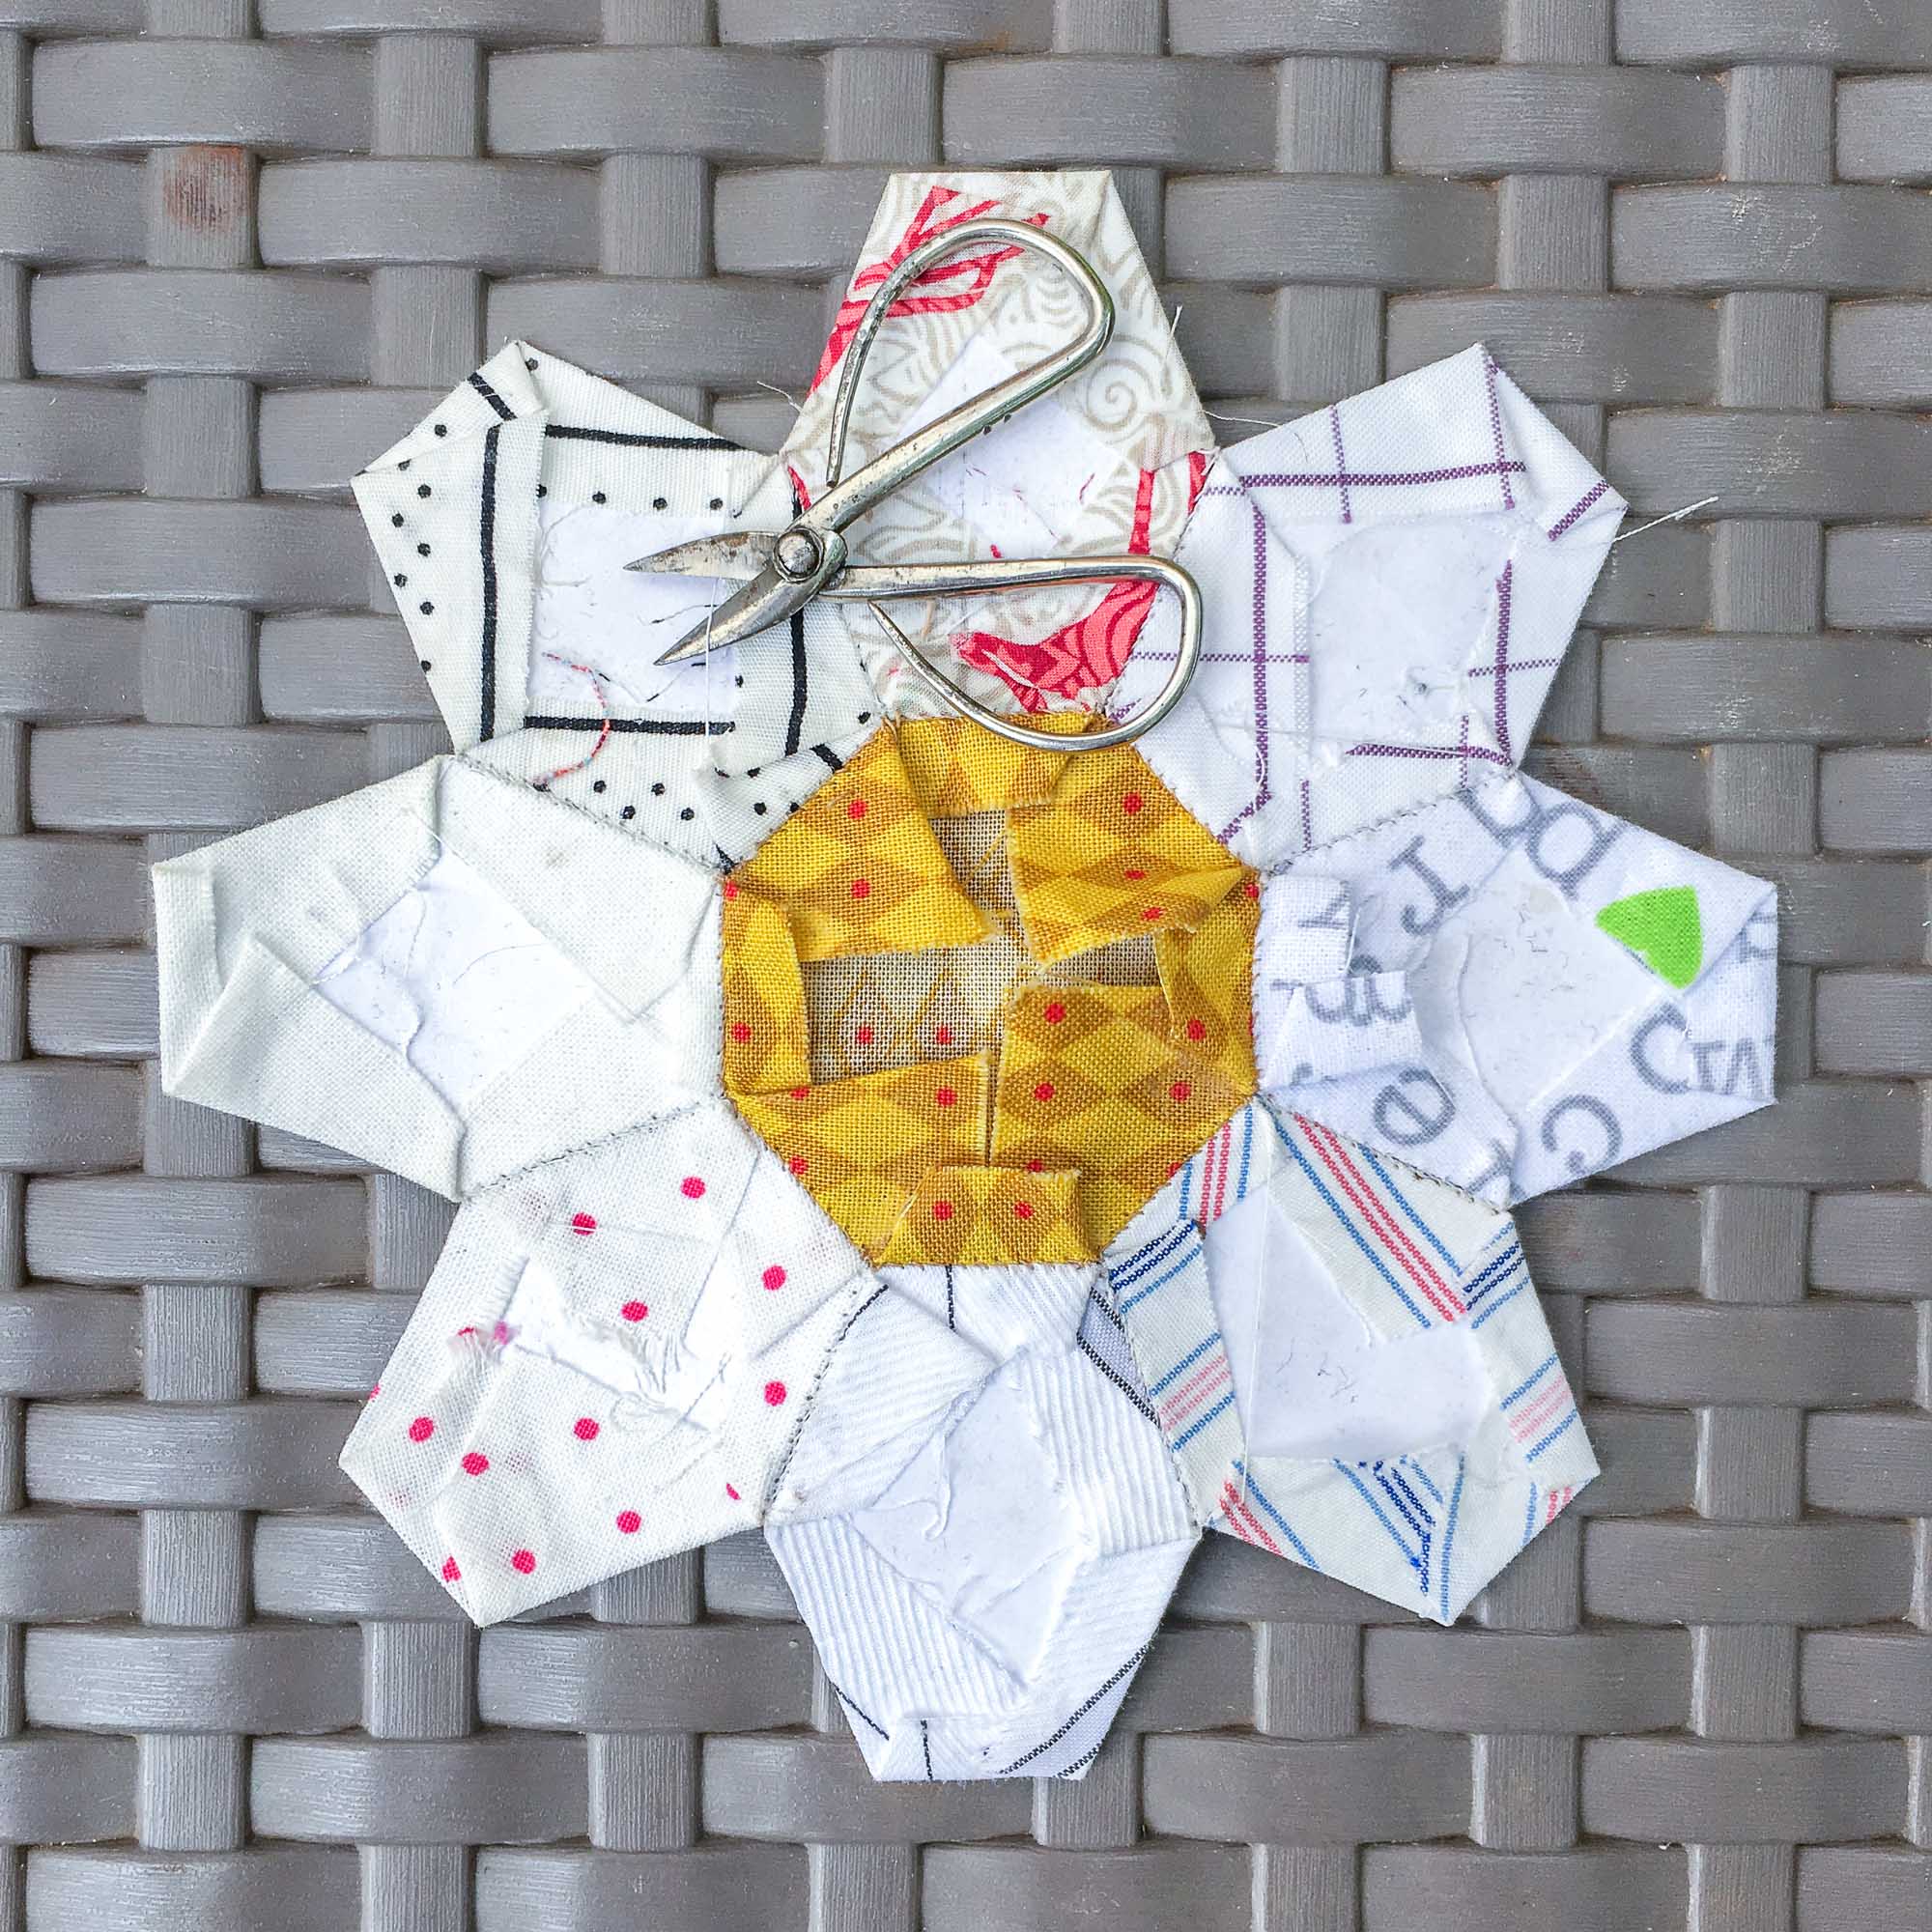
7. Turn your flower over, and clip the connecting threads behind each petal.
All done! It’s a small step, but I enjoy the process so much more this way!
EPP Hack 04: How I Stitch Rows of Hexagons
This EPP hack gets credited to my fellow missionary friend here in Malawi, Julie Arman (@julie.c.makes). I was trying to teach her about stitching rows of hexagons together through some late night text messages, and this was her interpretation of what I was trying to say. Once I saw her method, I loved it so much better than the way I had been doing it, and I use it with all of my non-flower hexagon projects! Thanks Julie!
Of Note:
This method is similar to the previous flower petal hack in that you don’t cut your thread as you go along.
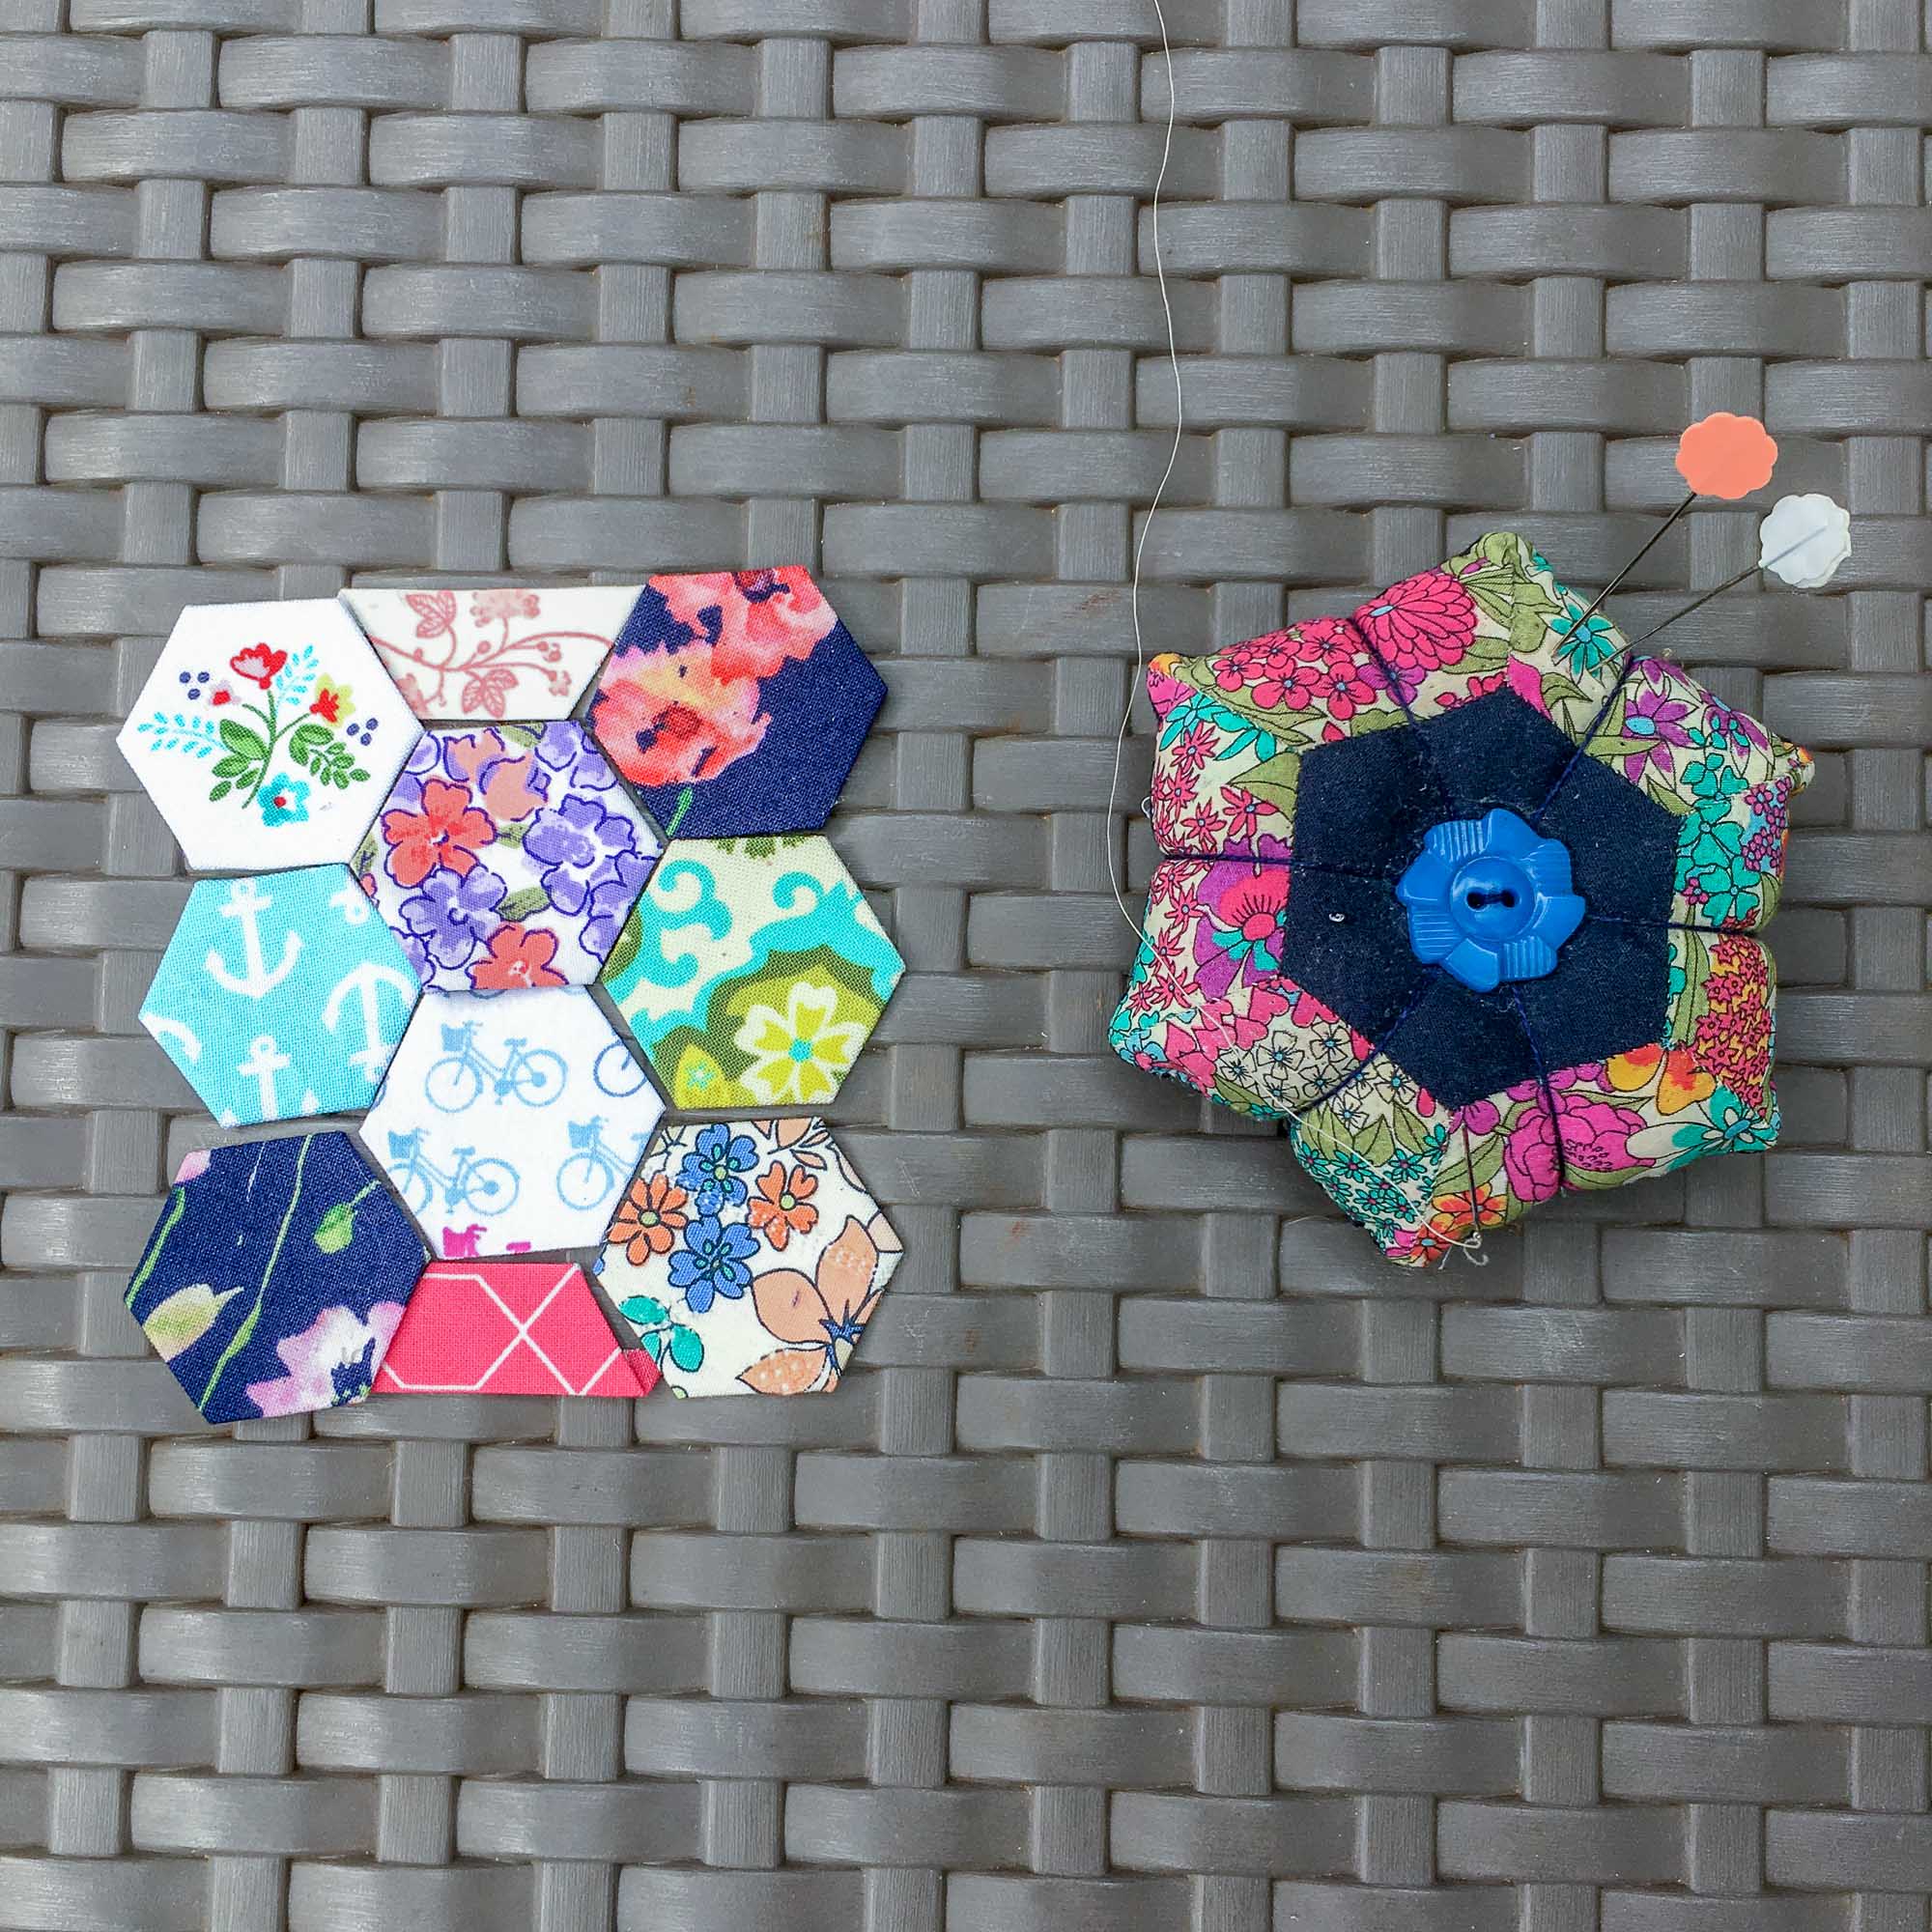
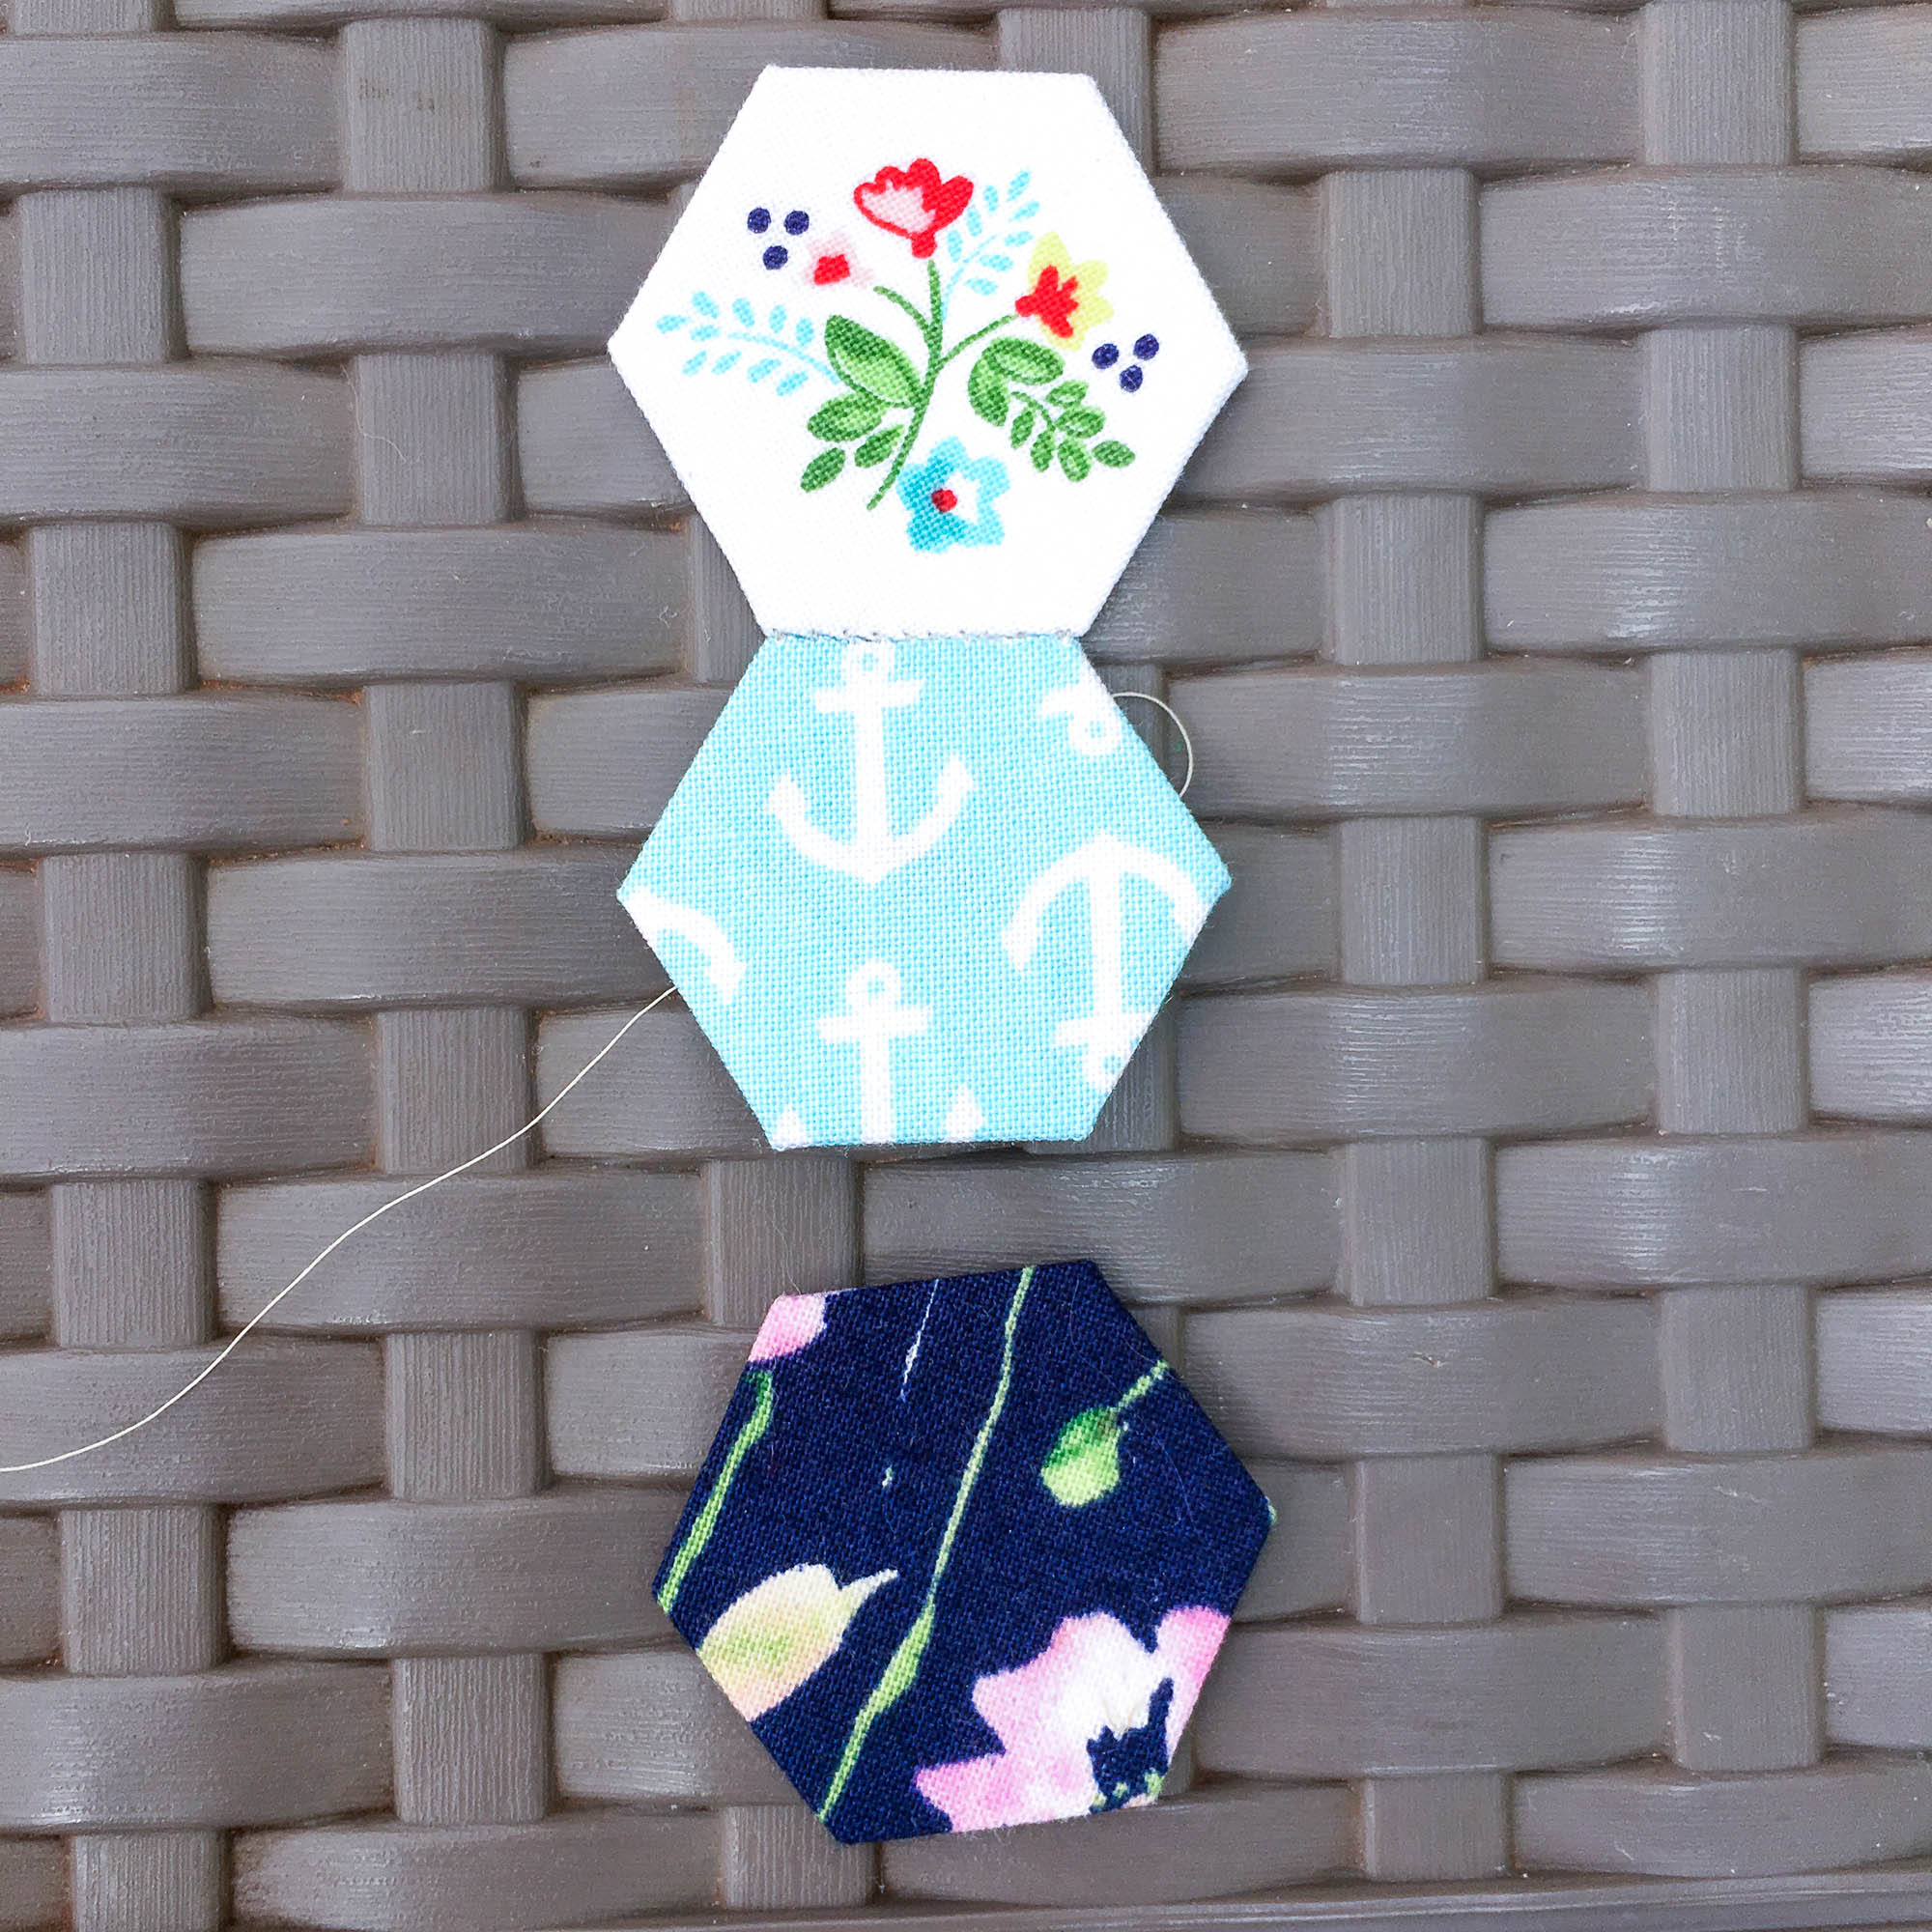
1. Begin by laying out your hexagons in rows for stitching.
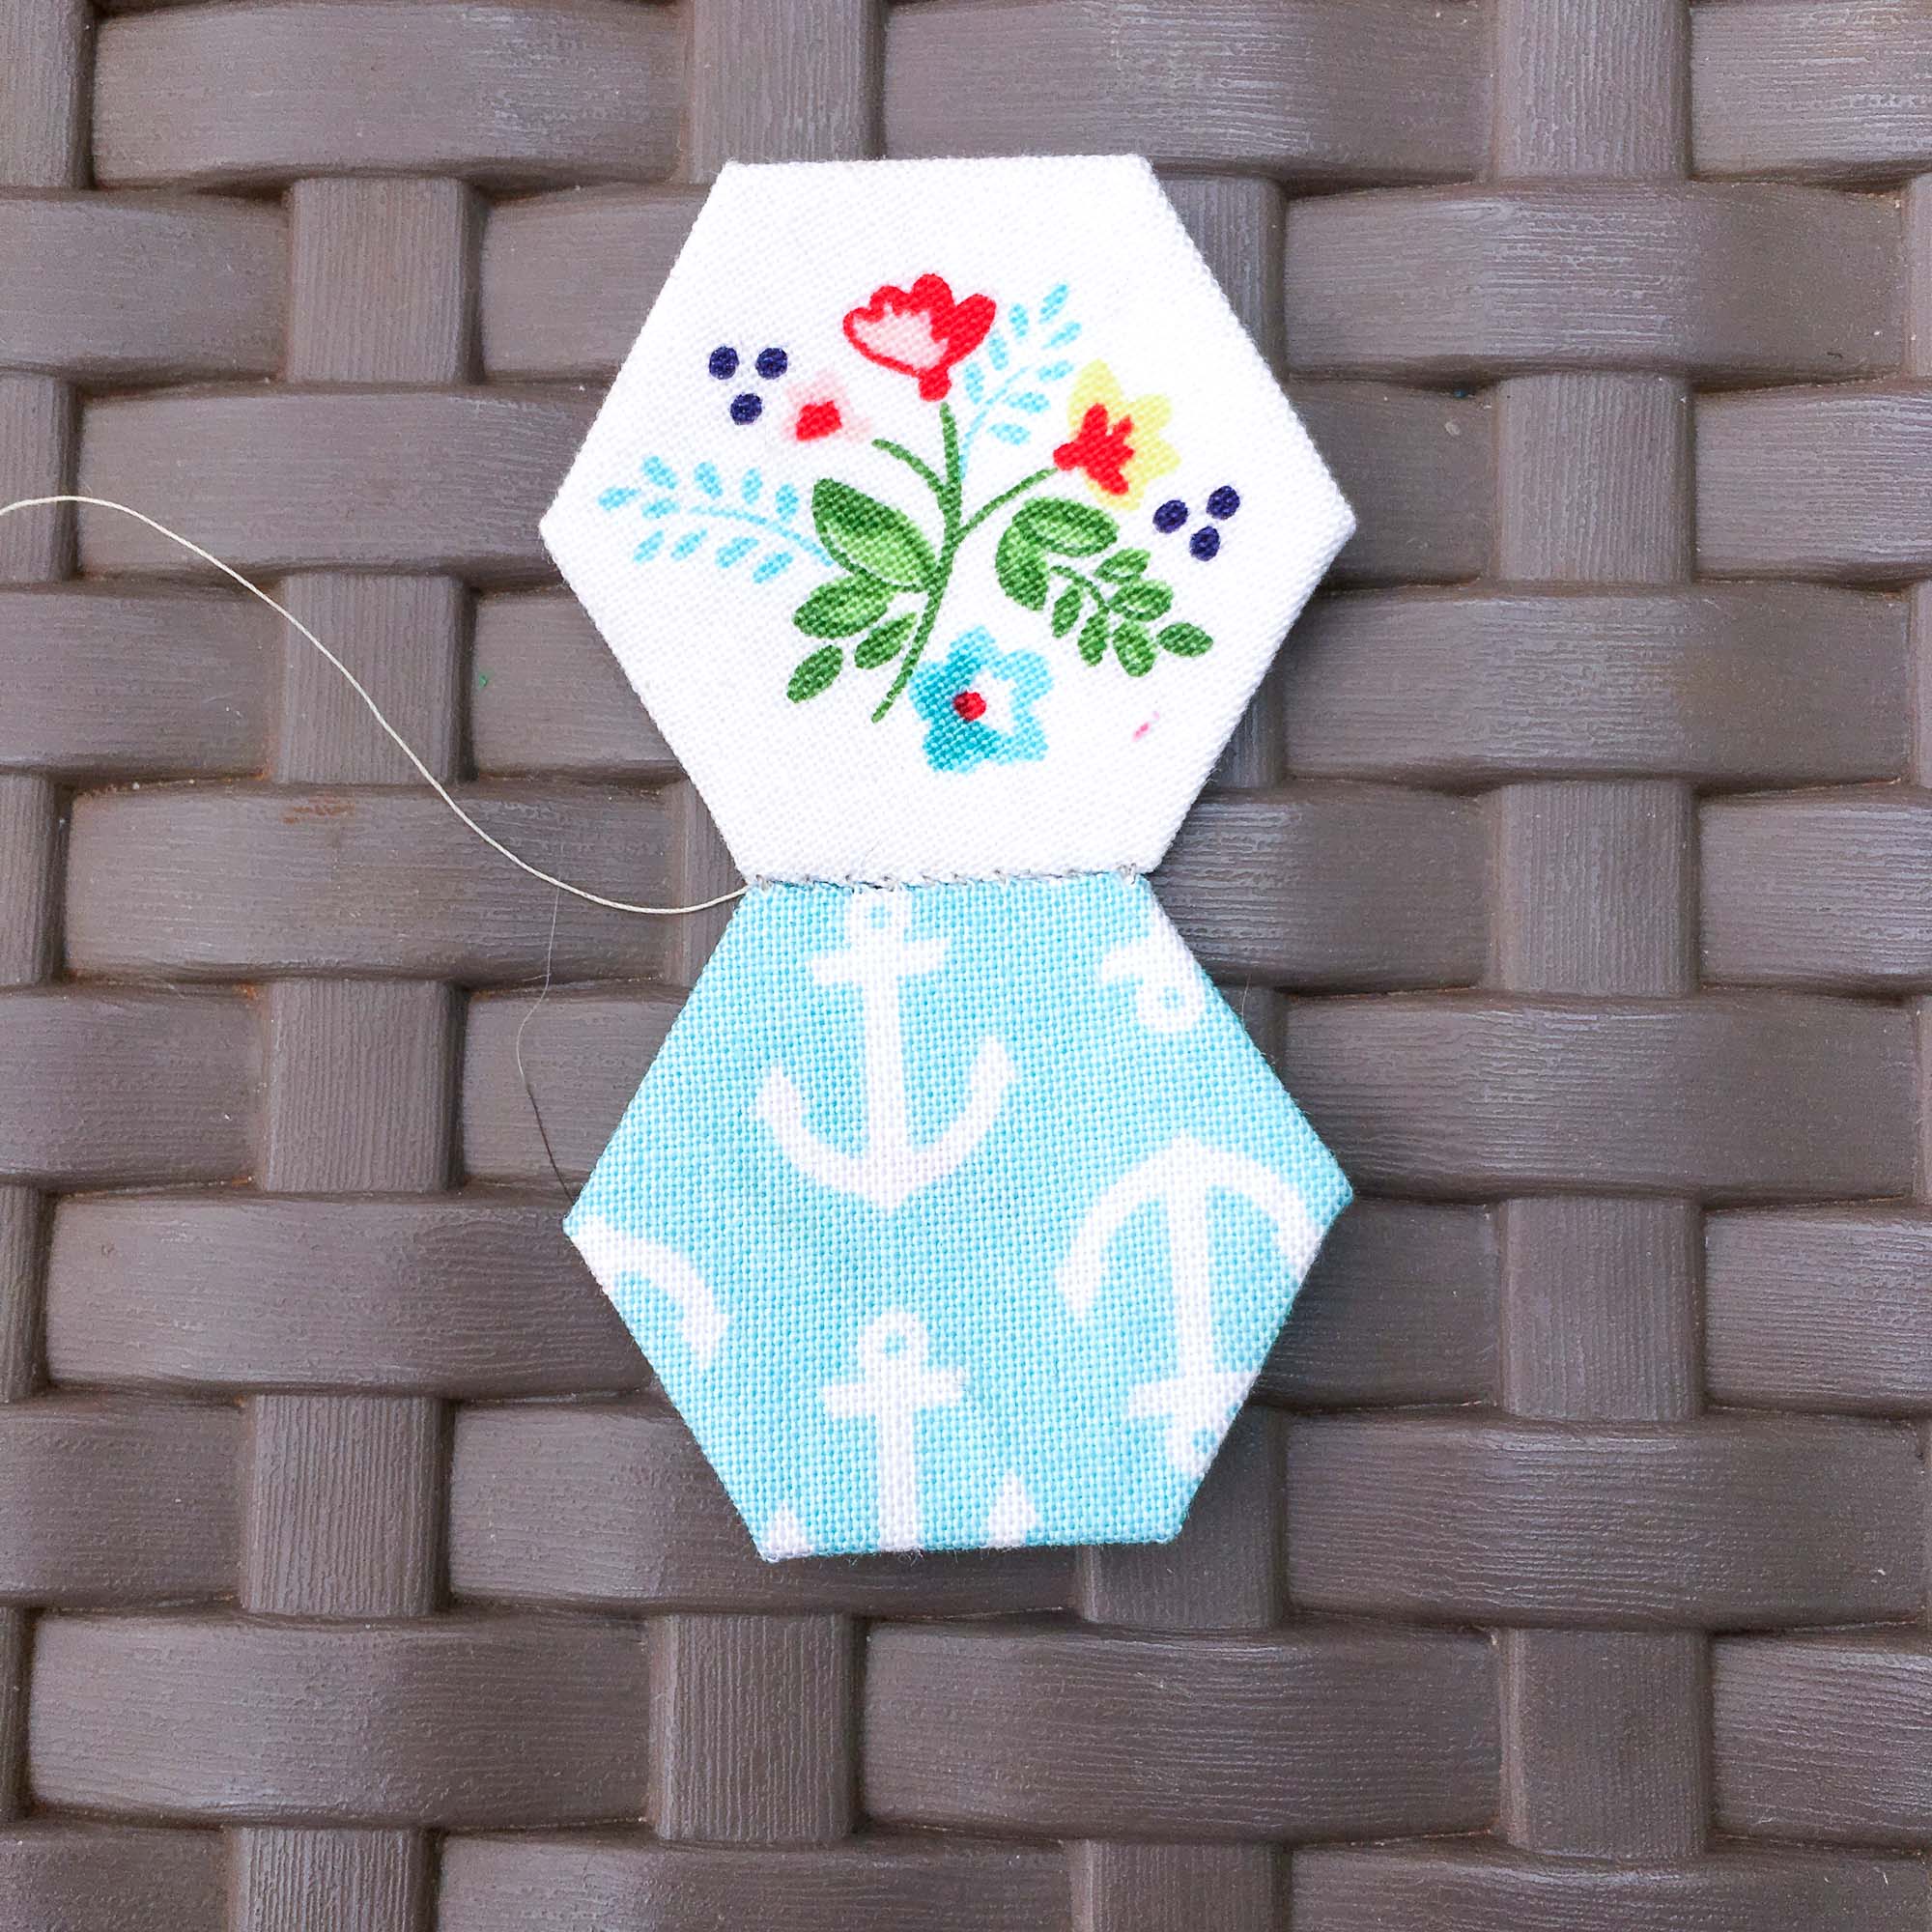
2. Take the first two hexagons in the first row and stitch as usual. DO NOT CUT YOUR THREAD.
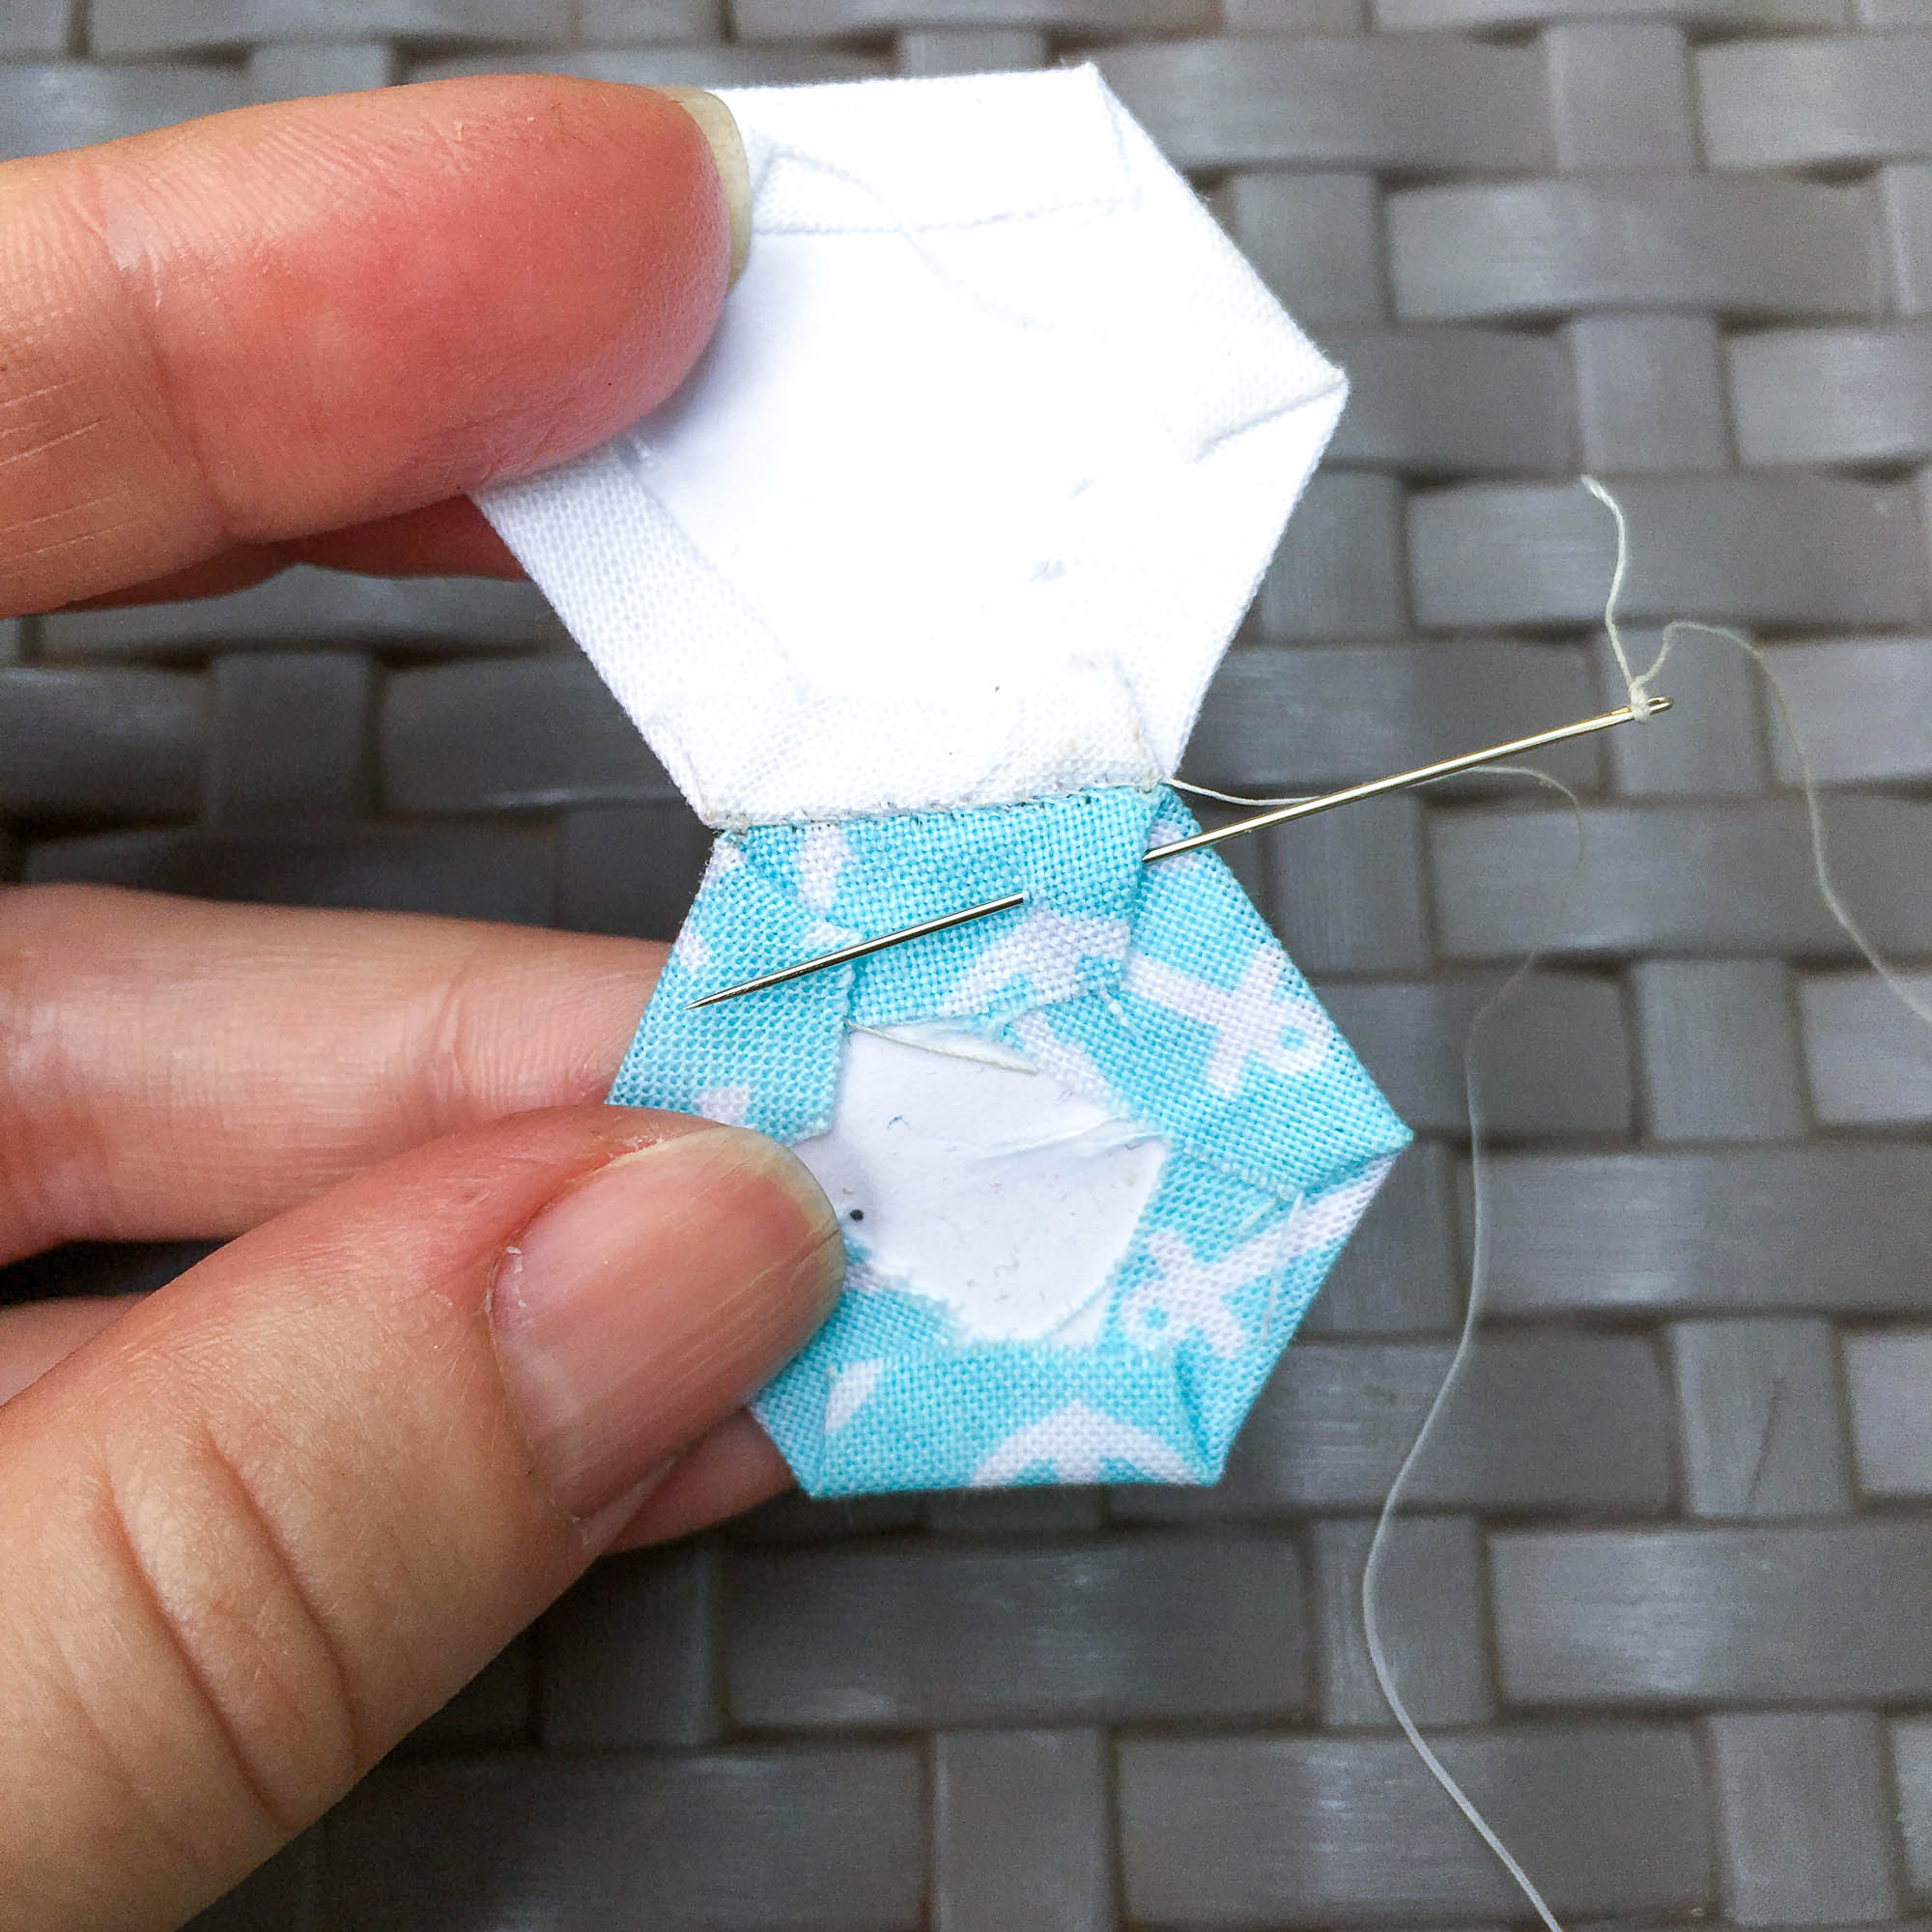
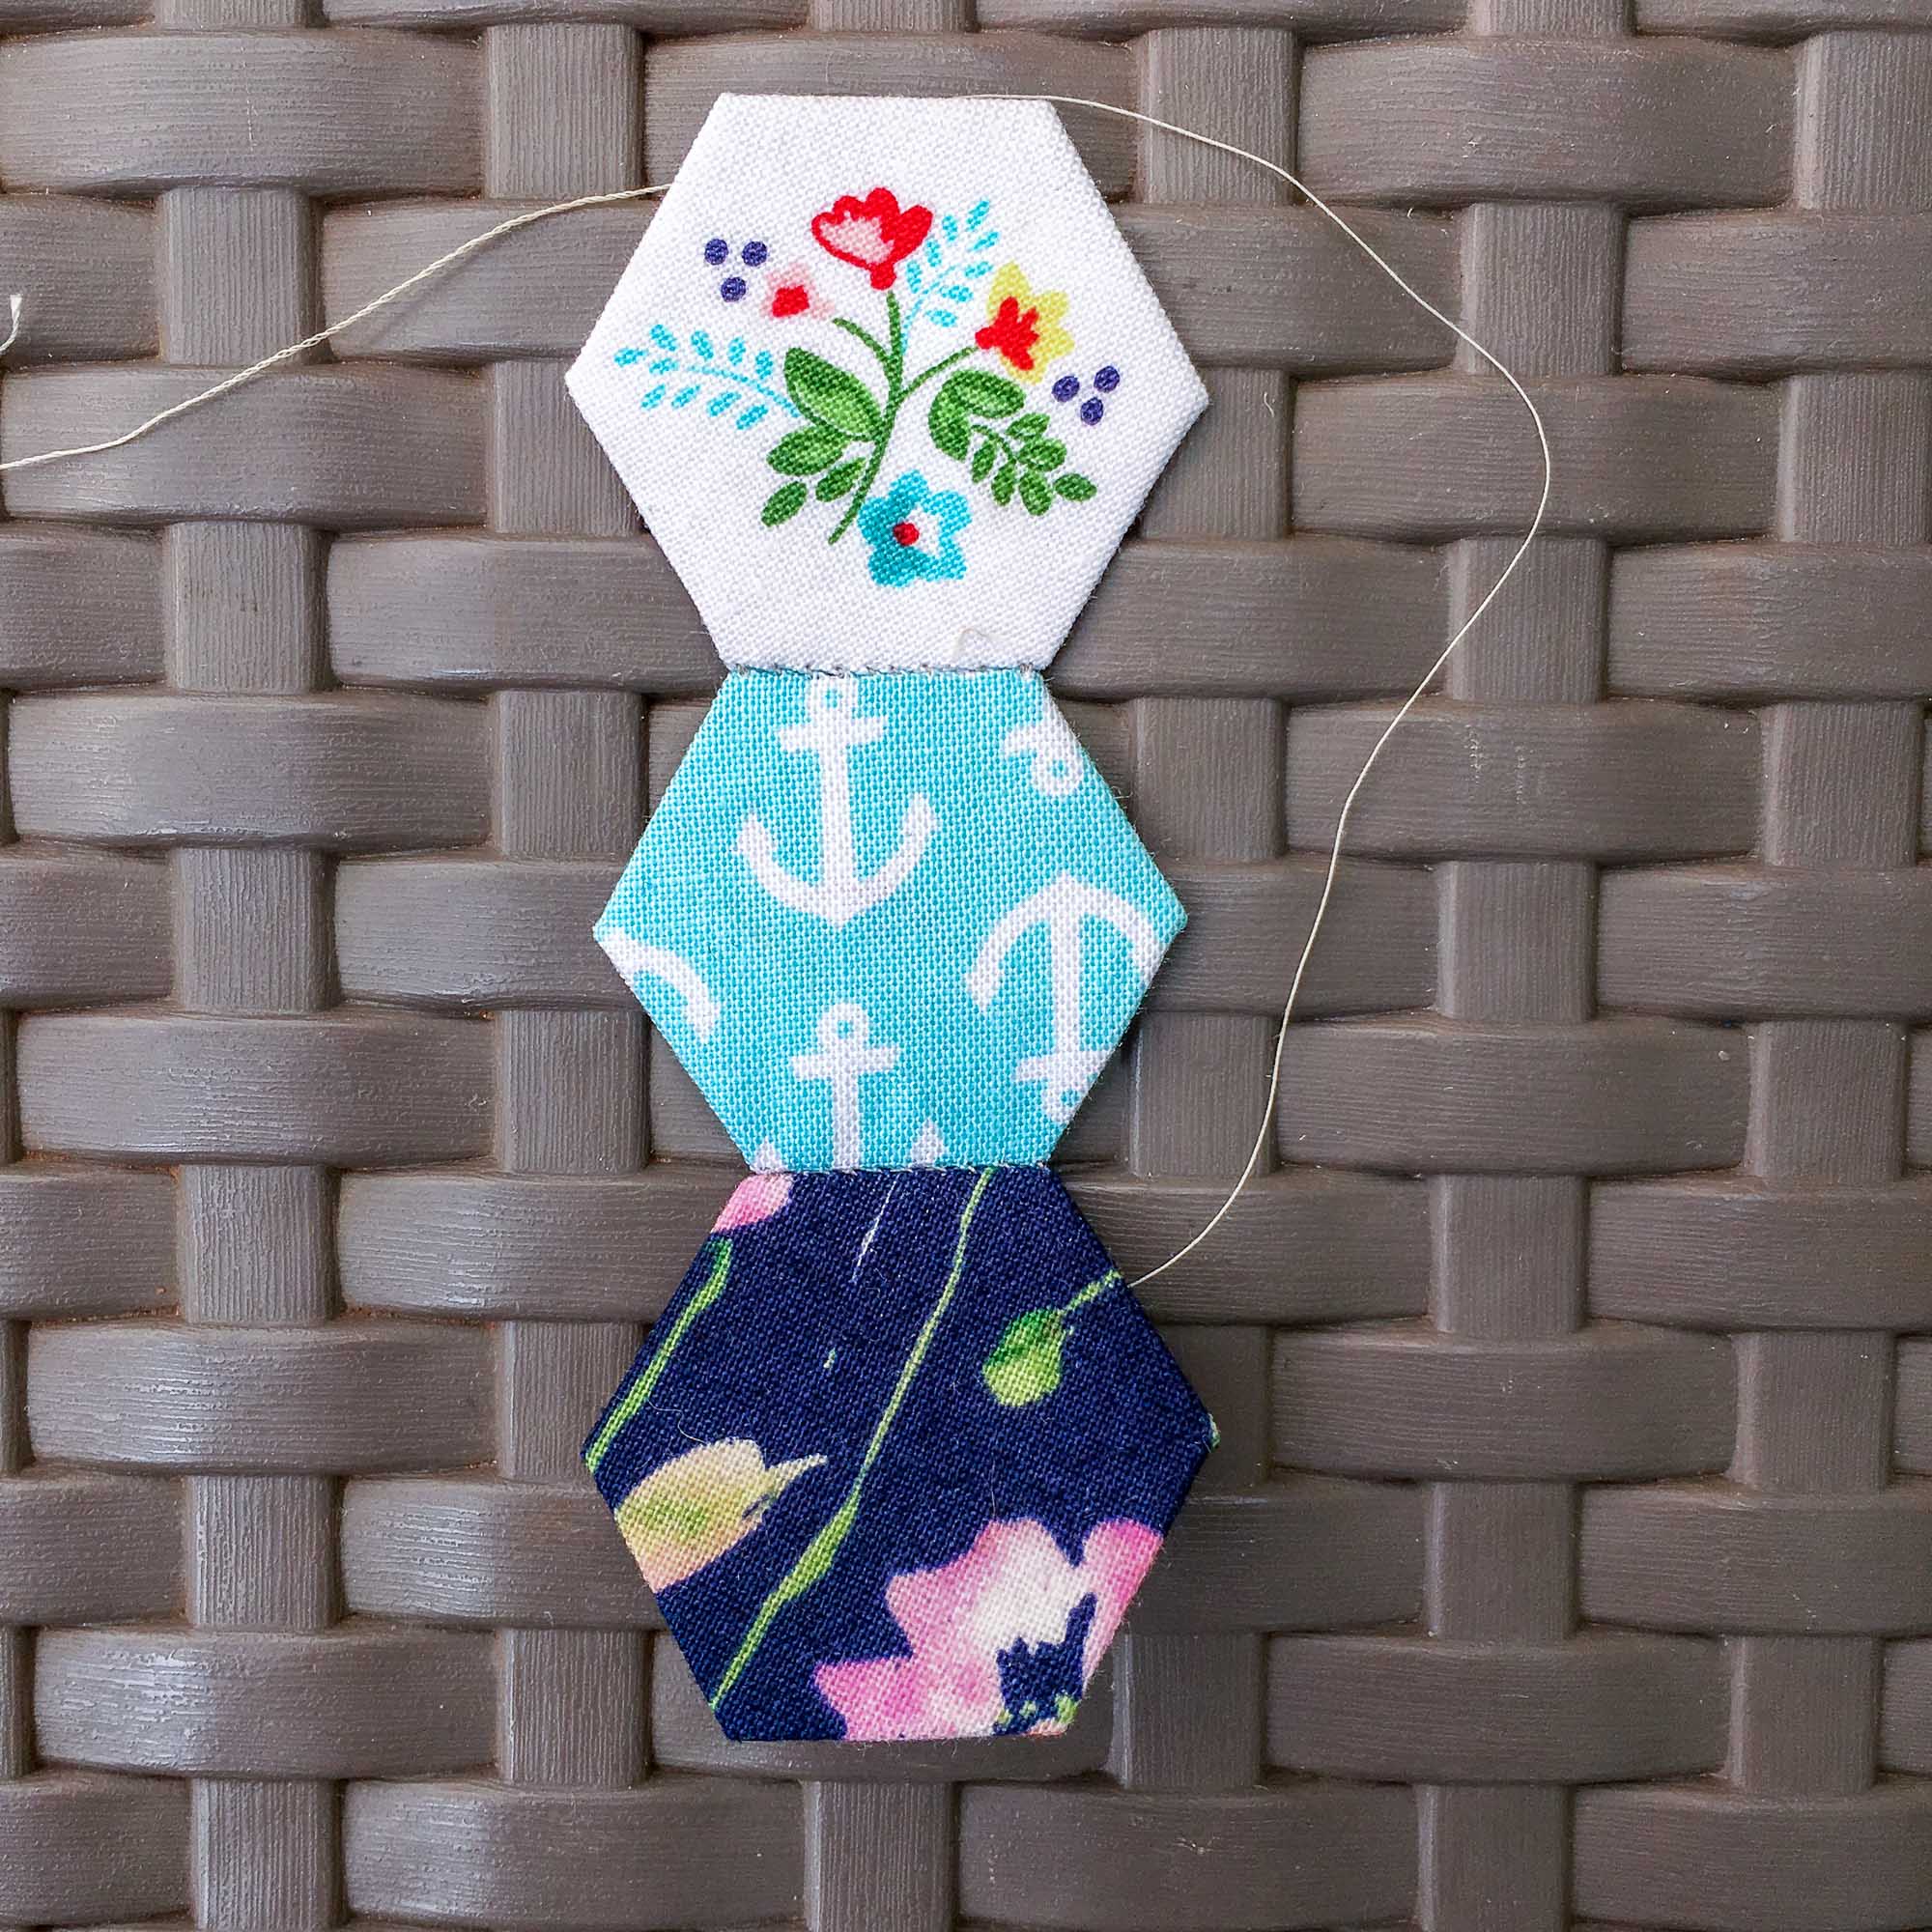
3. After you have completed the seam and secured your stitching, slip the needle under the seam allowance of the bottom hexagon and pull through. DO NOT CUT YOUR THREAD.
4. Align the next hexagon in the row for stitching.
5. Slip the needle under the seam allowance directly across from where the last seam was completed to the beginning of the next seam. Pull the thread taut. Stitch the seam as usual.
6. Repeat steps 2-5 until you have completed the row.
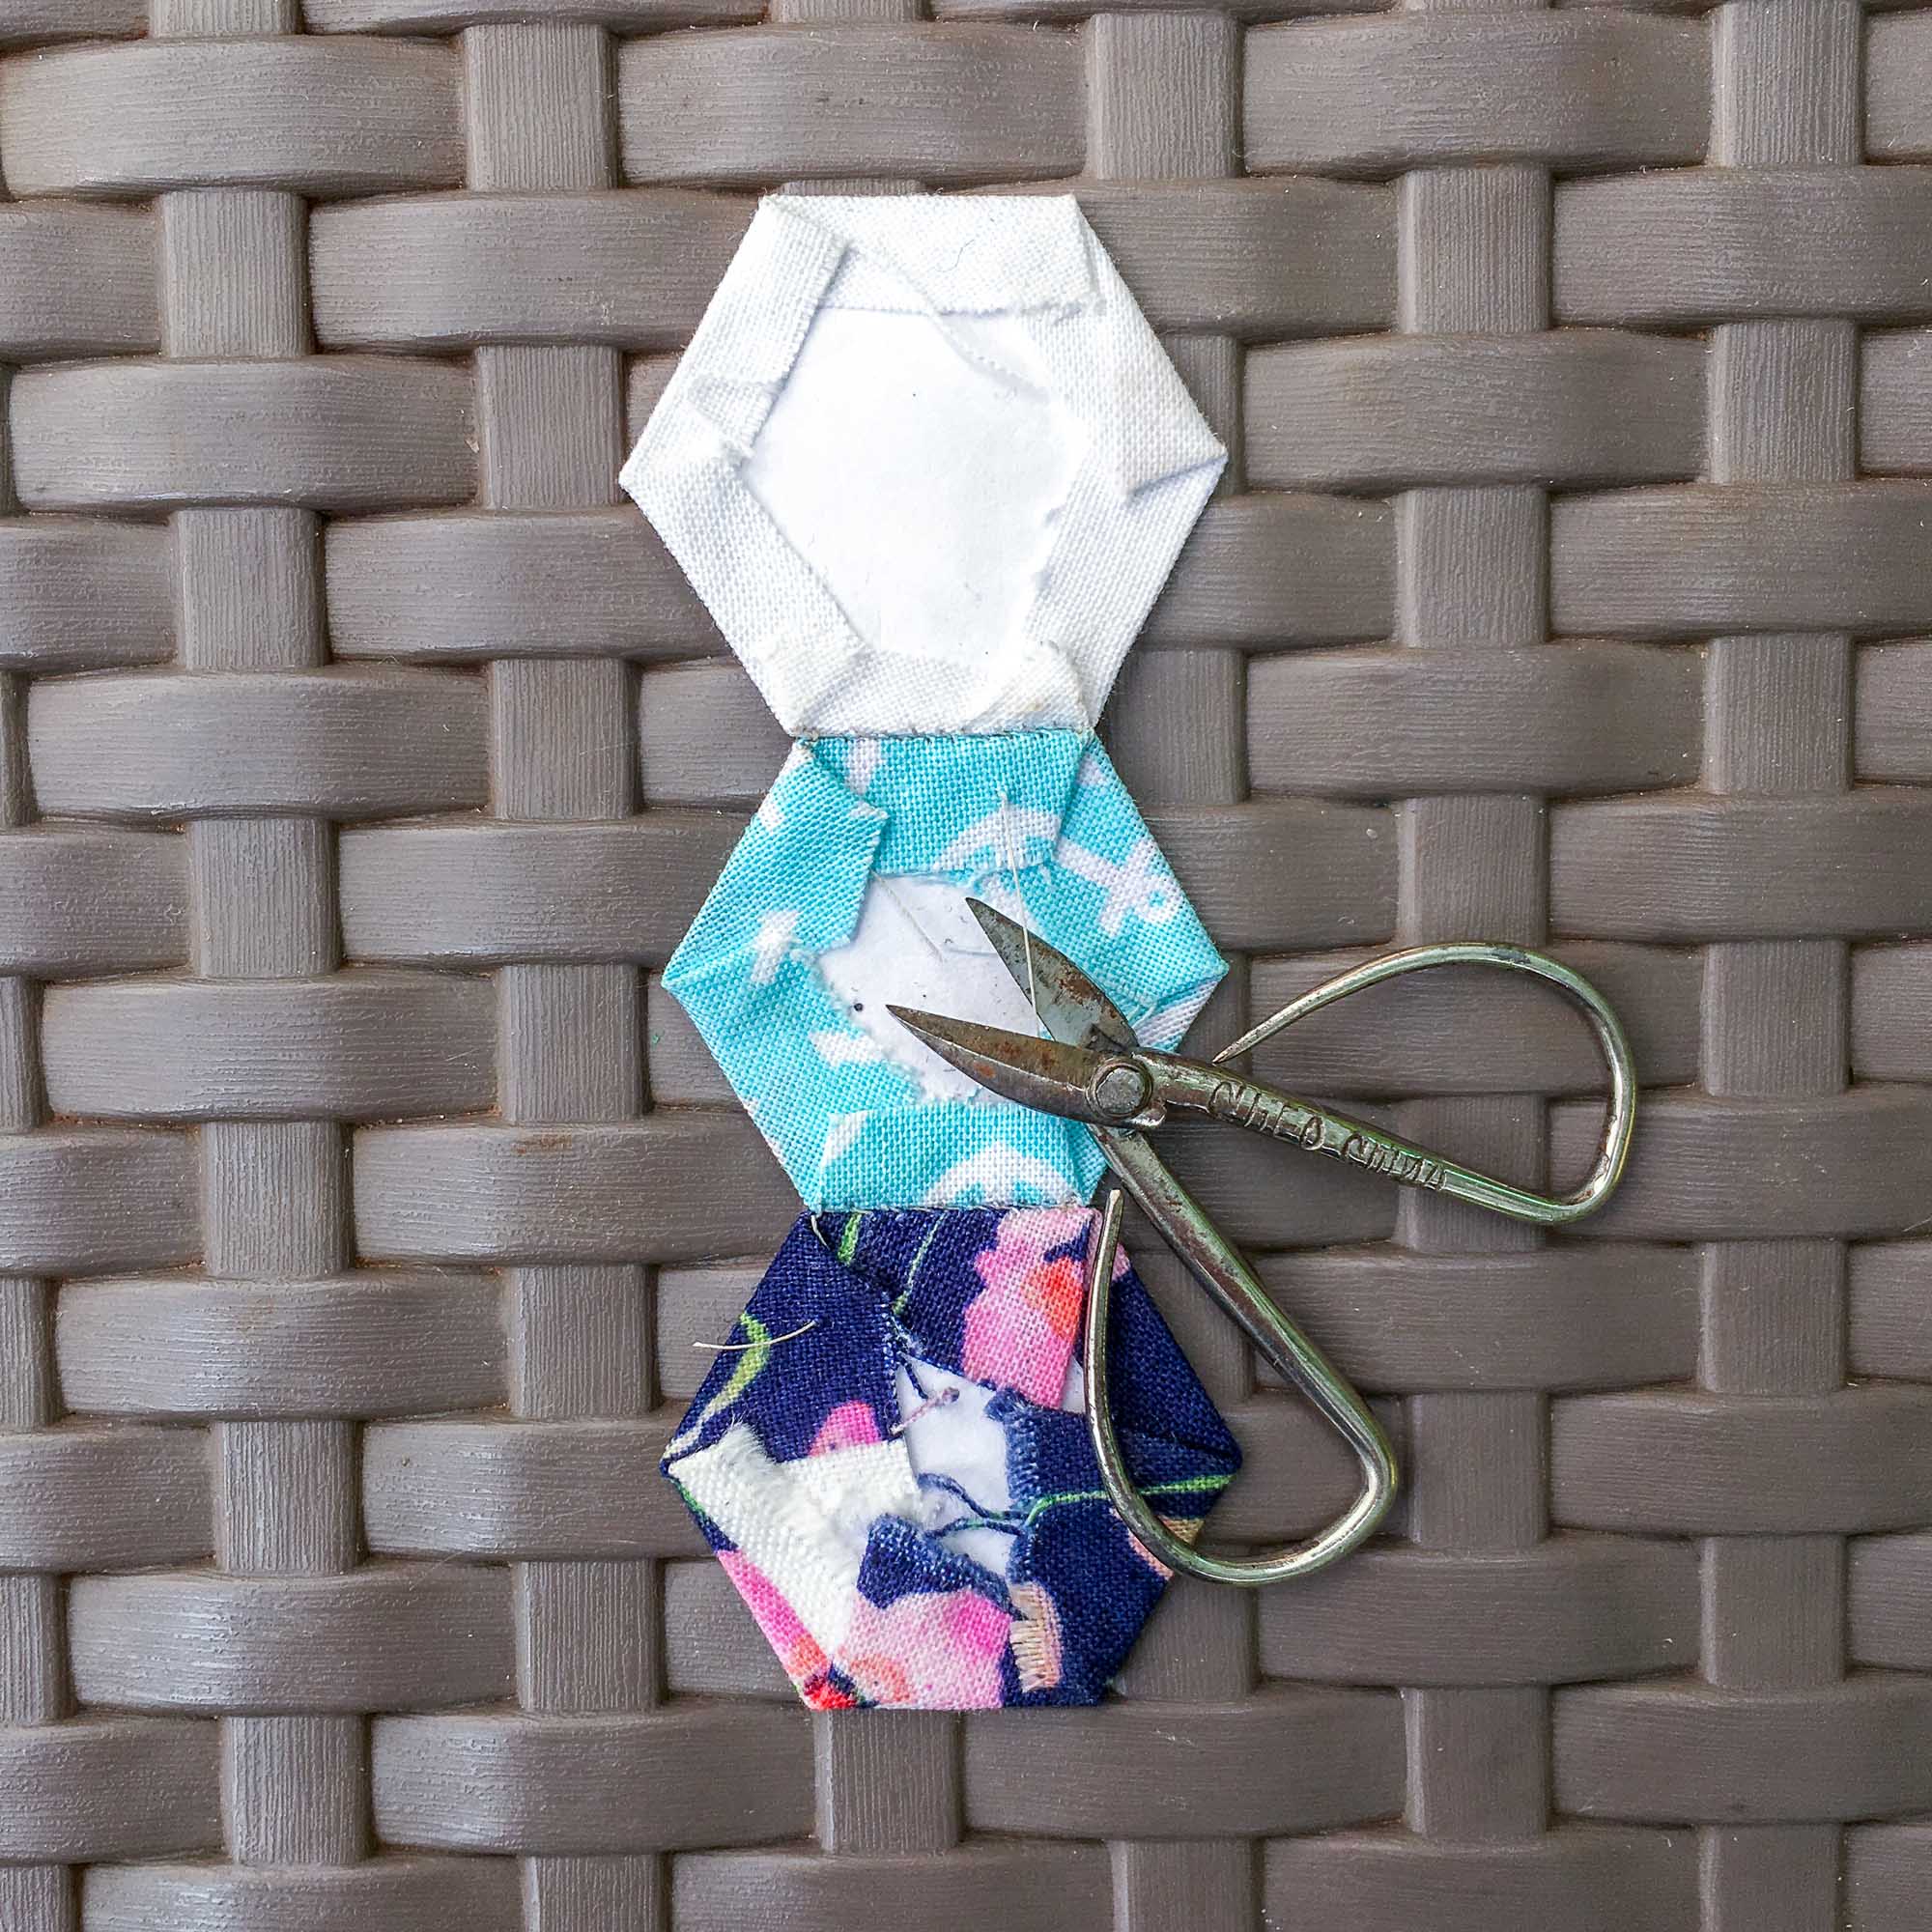
7. Turn the row over, and clip the connecting threads.
8. Repeat for all rows in patchwork. It’s so fast!
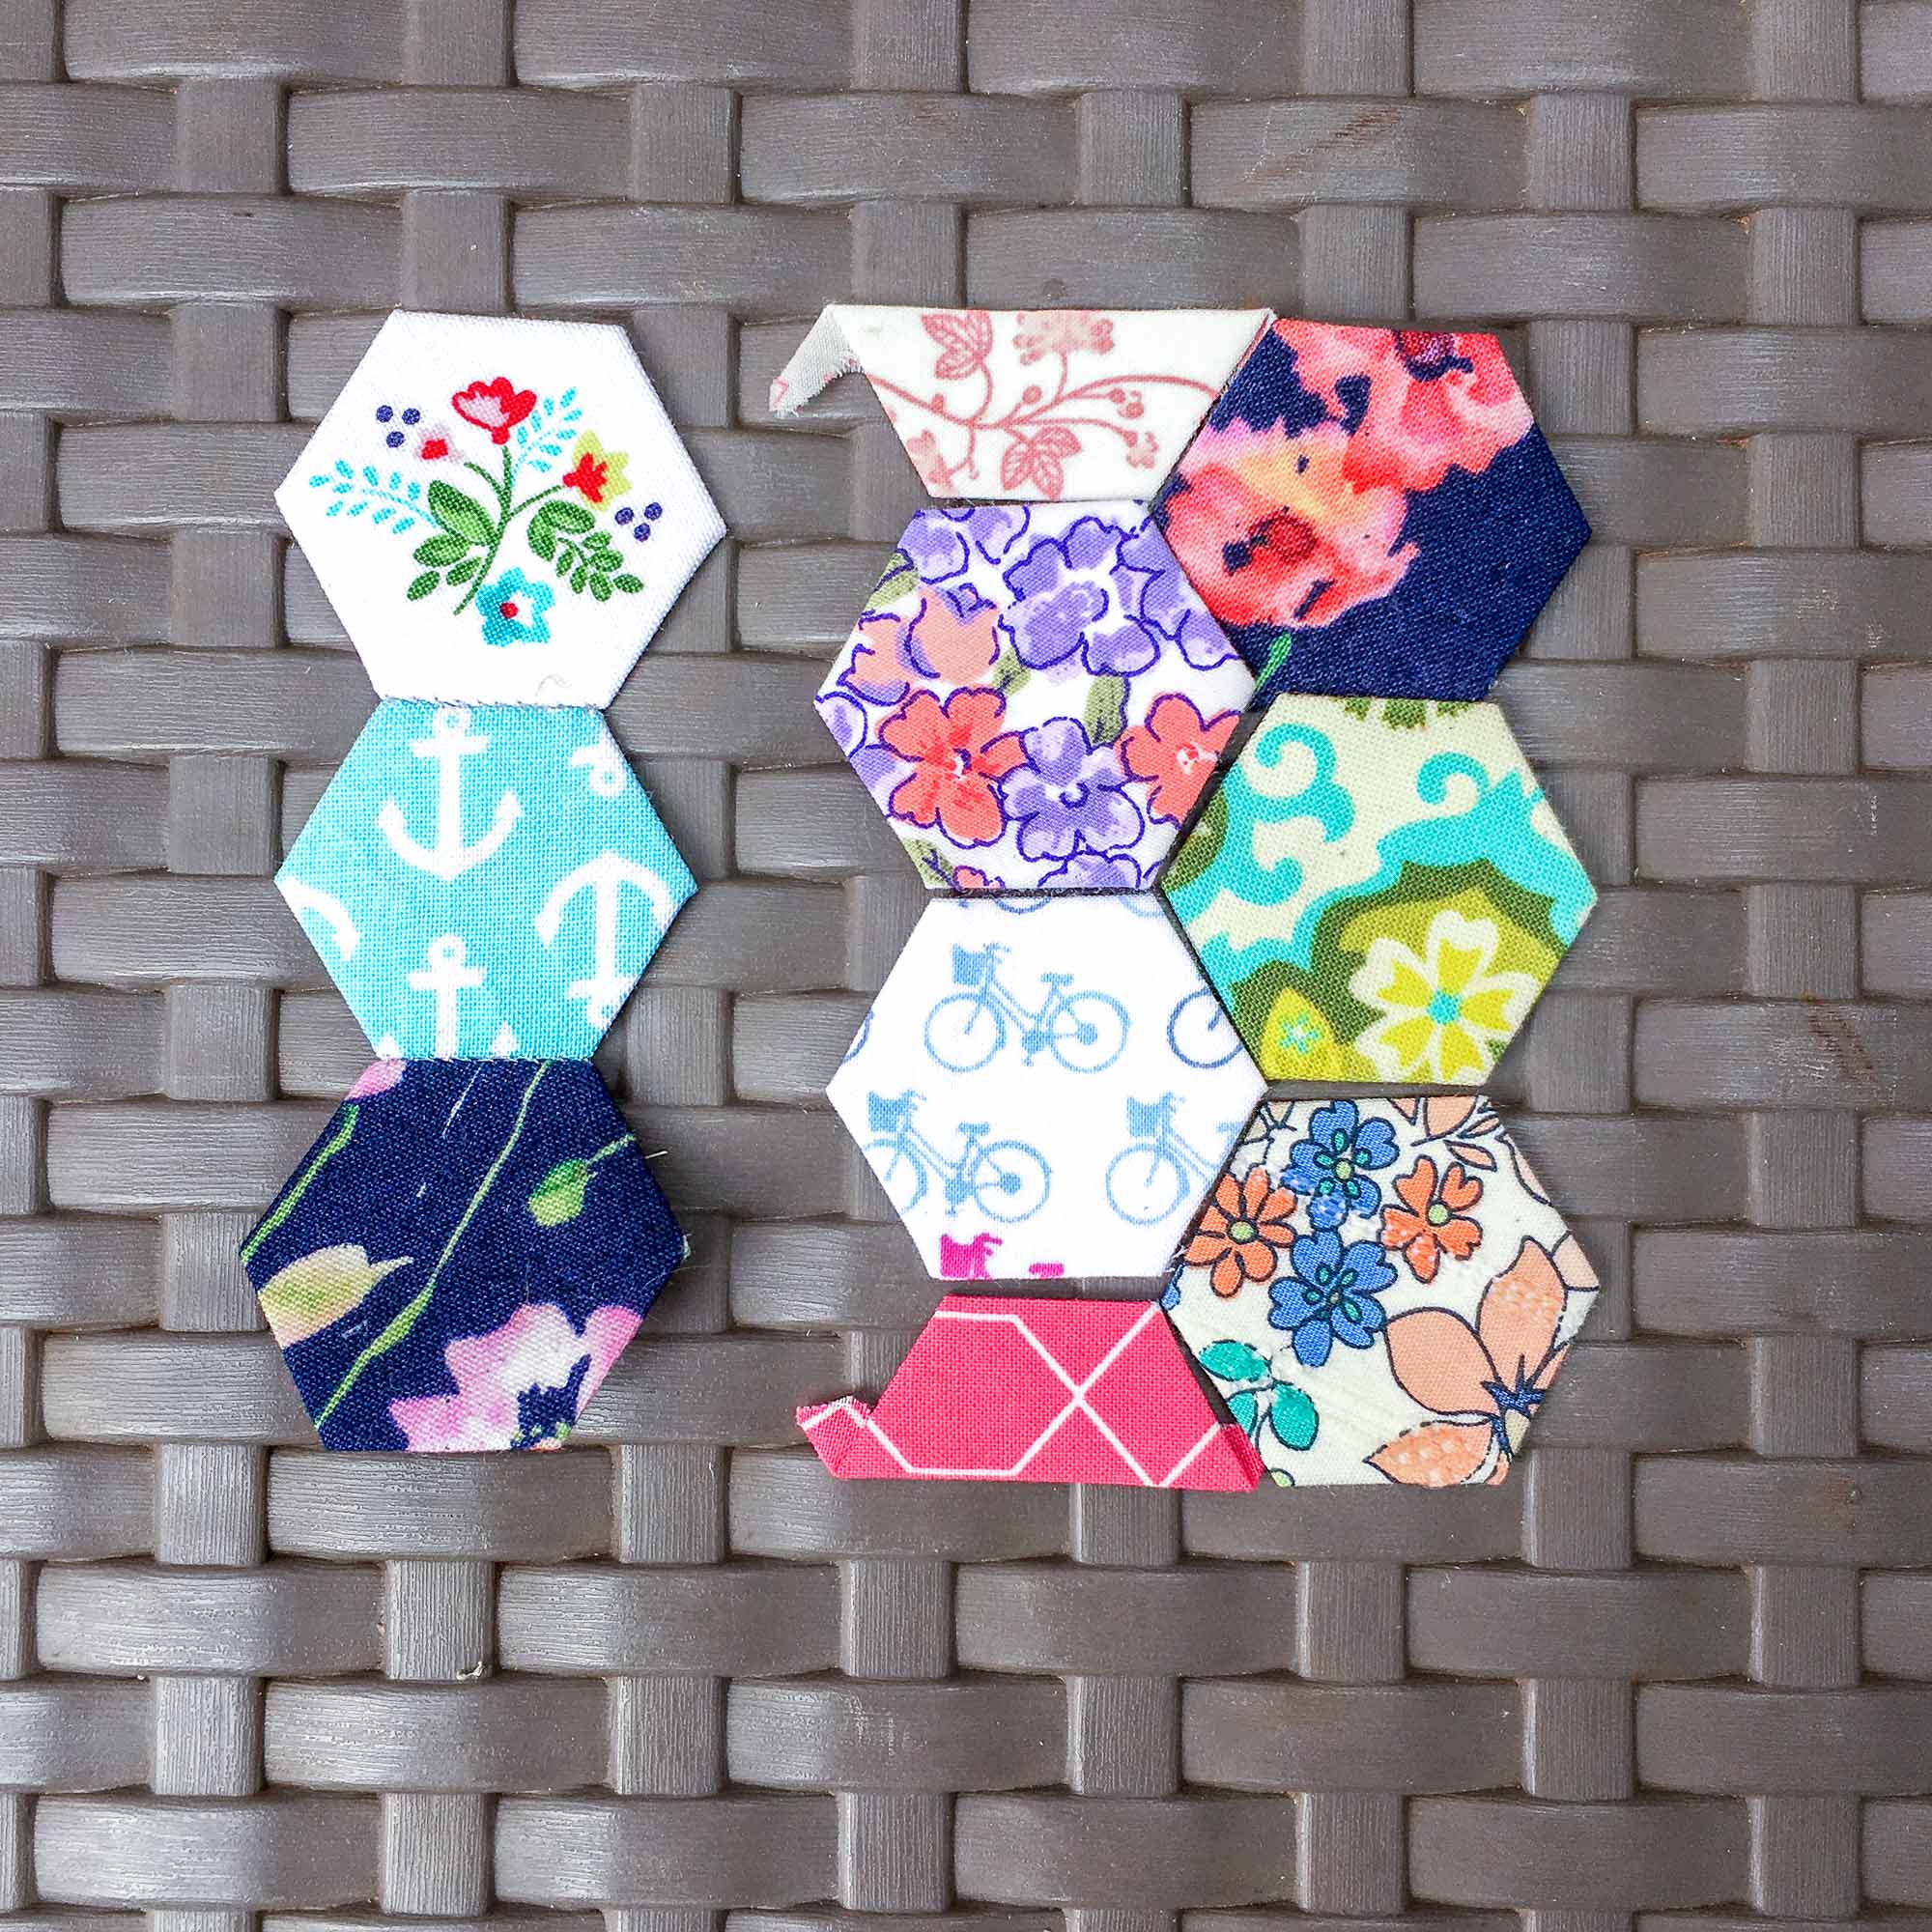
Of Note:
This example uses some orphaned 3/4” hexagons I had lying around, so the thread waste is very minimal. However, I have used the same technique with 2” hexagons. Even though there is a bit more thread waste, the process is so much more enjoyable that it’s worth it in my opinion.
EPP Hack 05: Open Heart EPP
This final EPP hack is something I was afraid to try until I saw Jodi Godfrey (@talesofcloth) do it on one of her blocks. It’s not something I do often, but I’m grateful that I can change my mind with minimal block dismemberment.
So, if you discover after all of your painstaking planning and stitching that you just don’t love the color or fabric of a particular piece, you can actually perform a bit of “open heart surgery” on your block to exchange it.
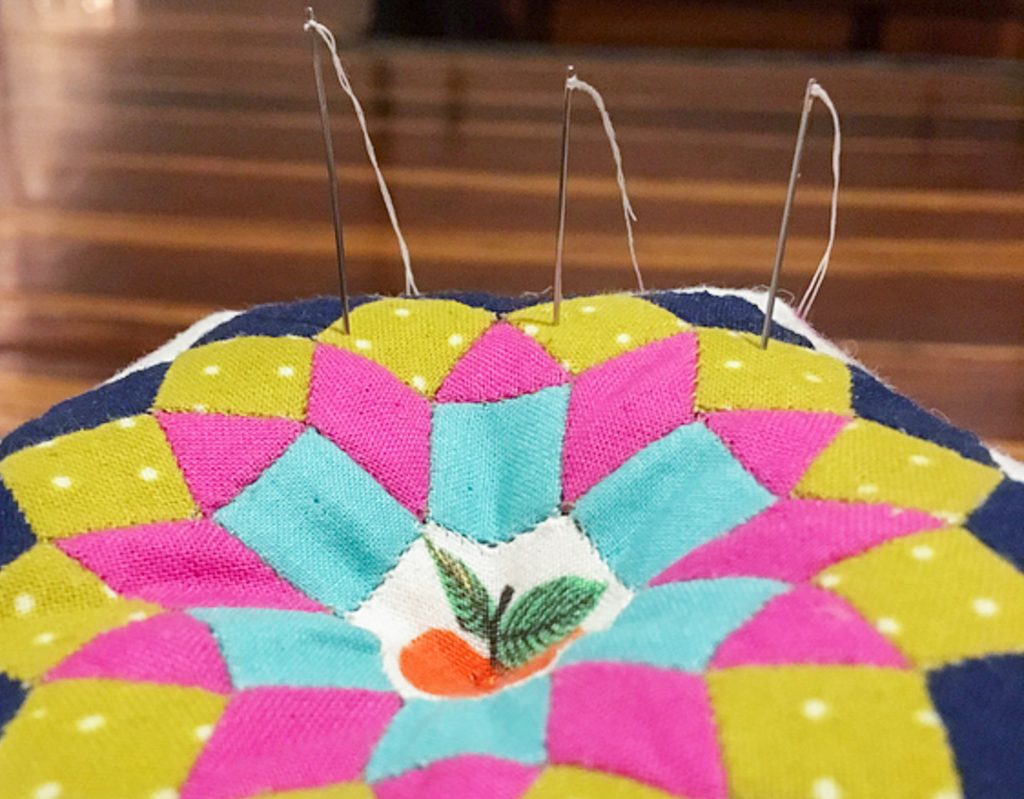
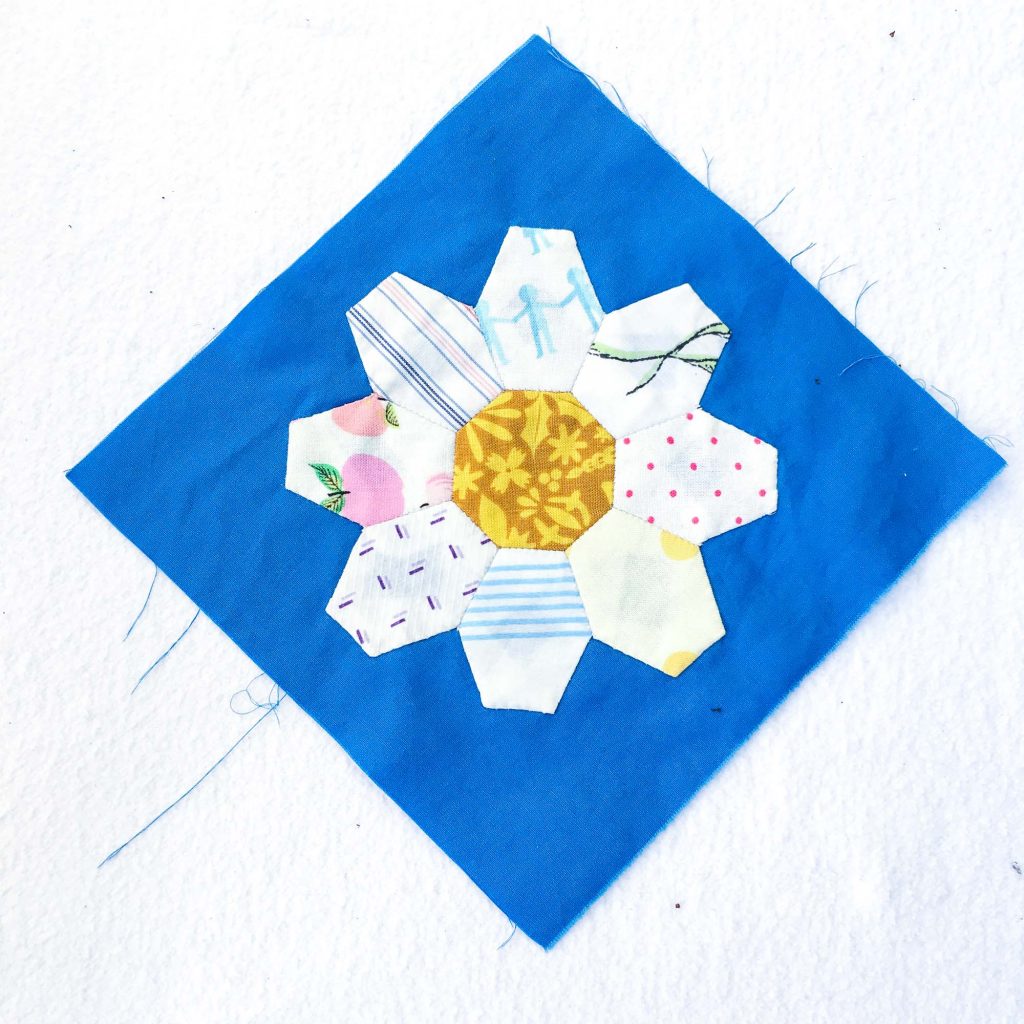
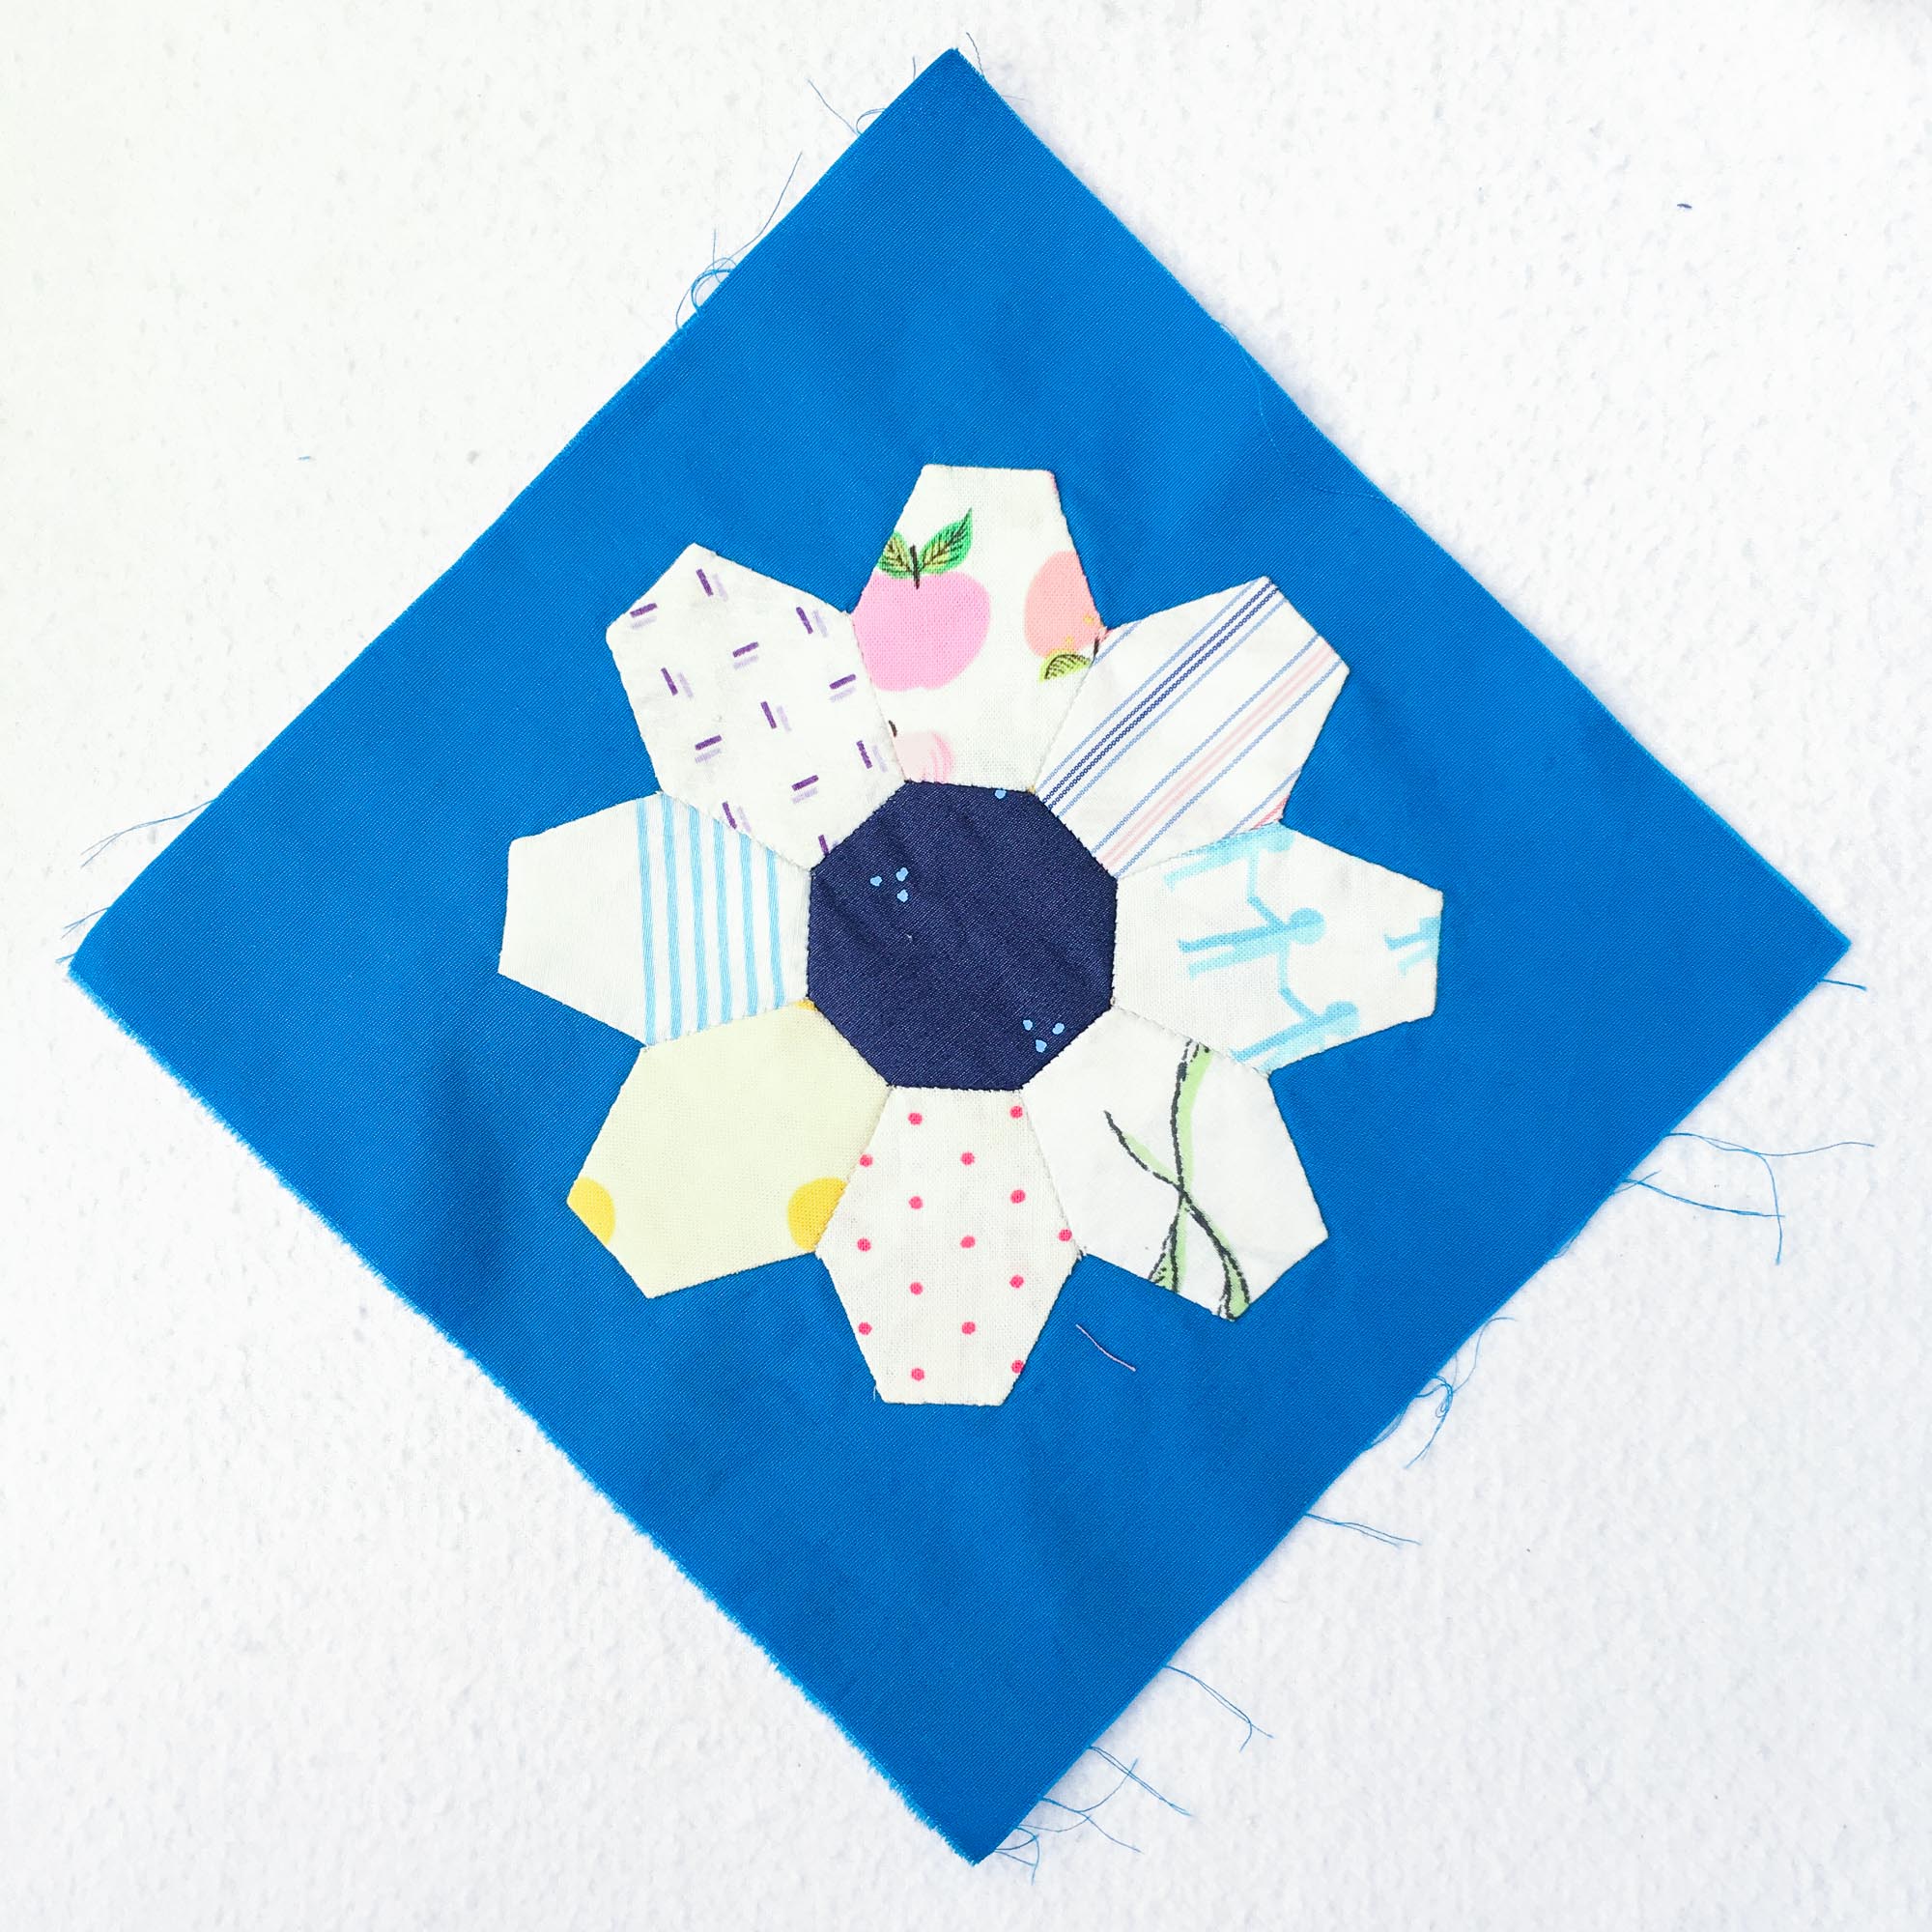
Generally speaking, this process is easiest to perform if all of your paper pieces are still in place. However, I realized that I wasn’t crazy about the yellow center of this Daisy Jane block (pictured above) after I had gone to to the trouble of appliqueing it and even cutting out the background fabric (as I shared in the Applique All Day tutorial).
If I hadn’t already cut out the background fabric, I would have unpicked the applique and simply switched out the background fabric. But, I was afraid that I wouldn’t be able to preserve the background fabric if I did that in this instance. So, open heart surgery it is!
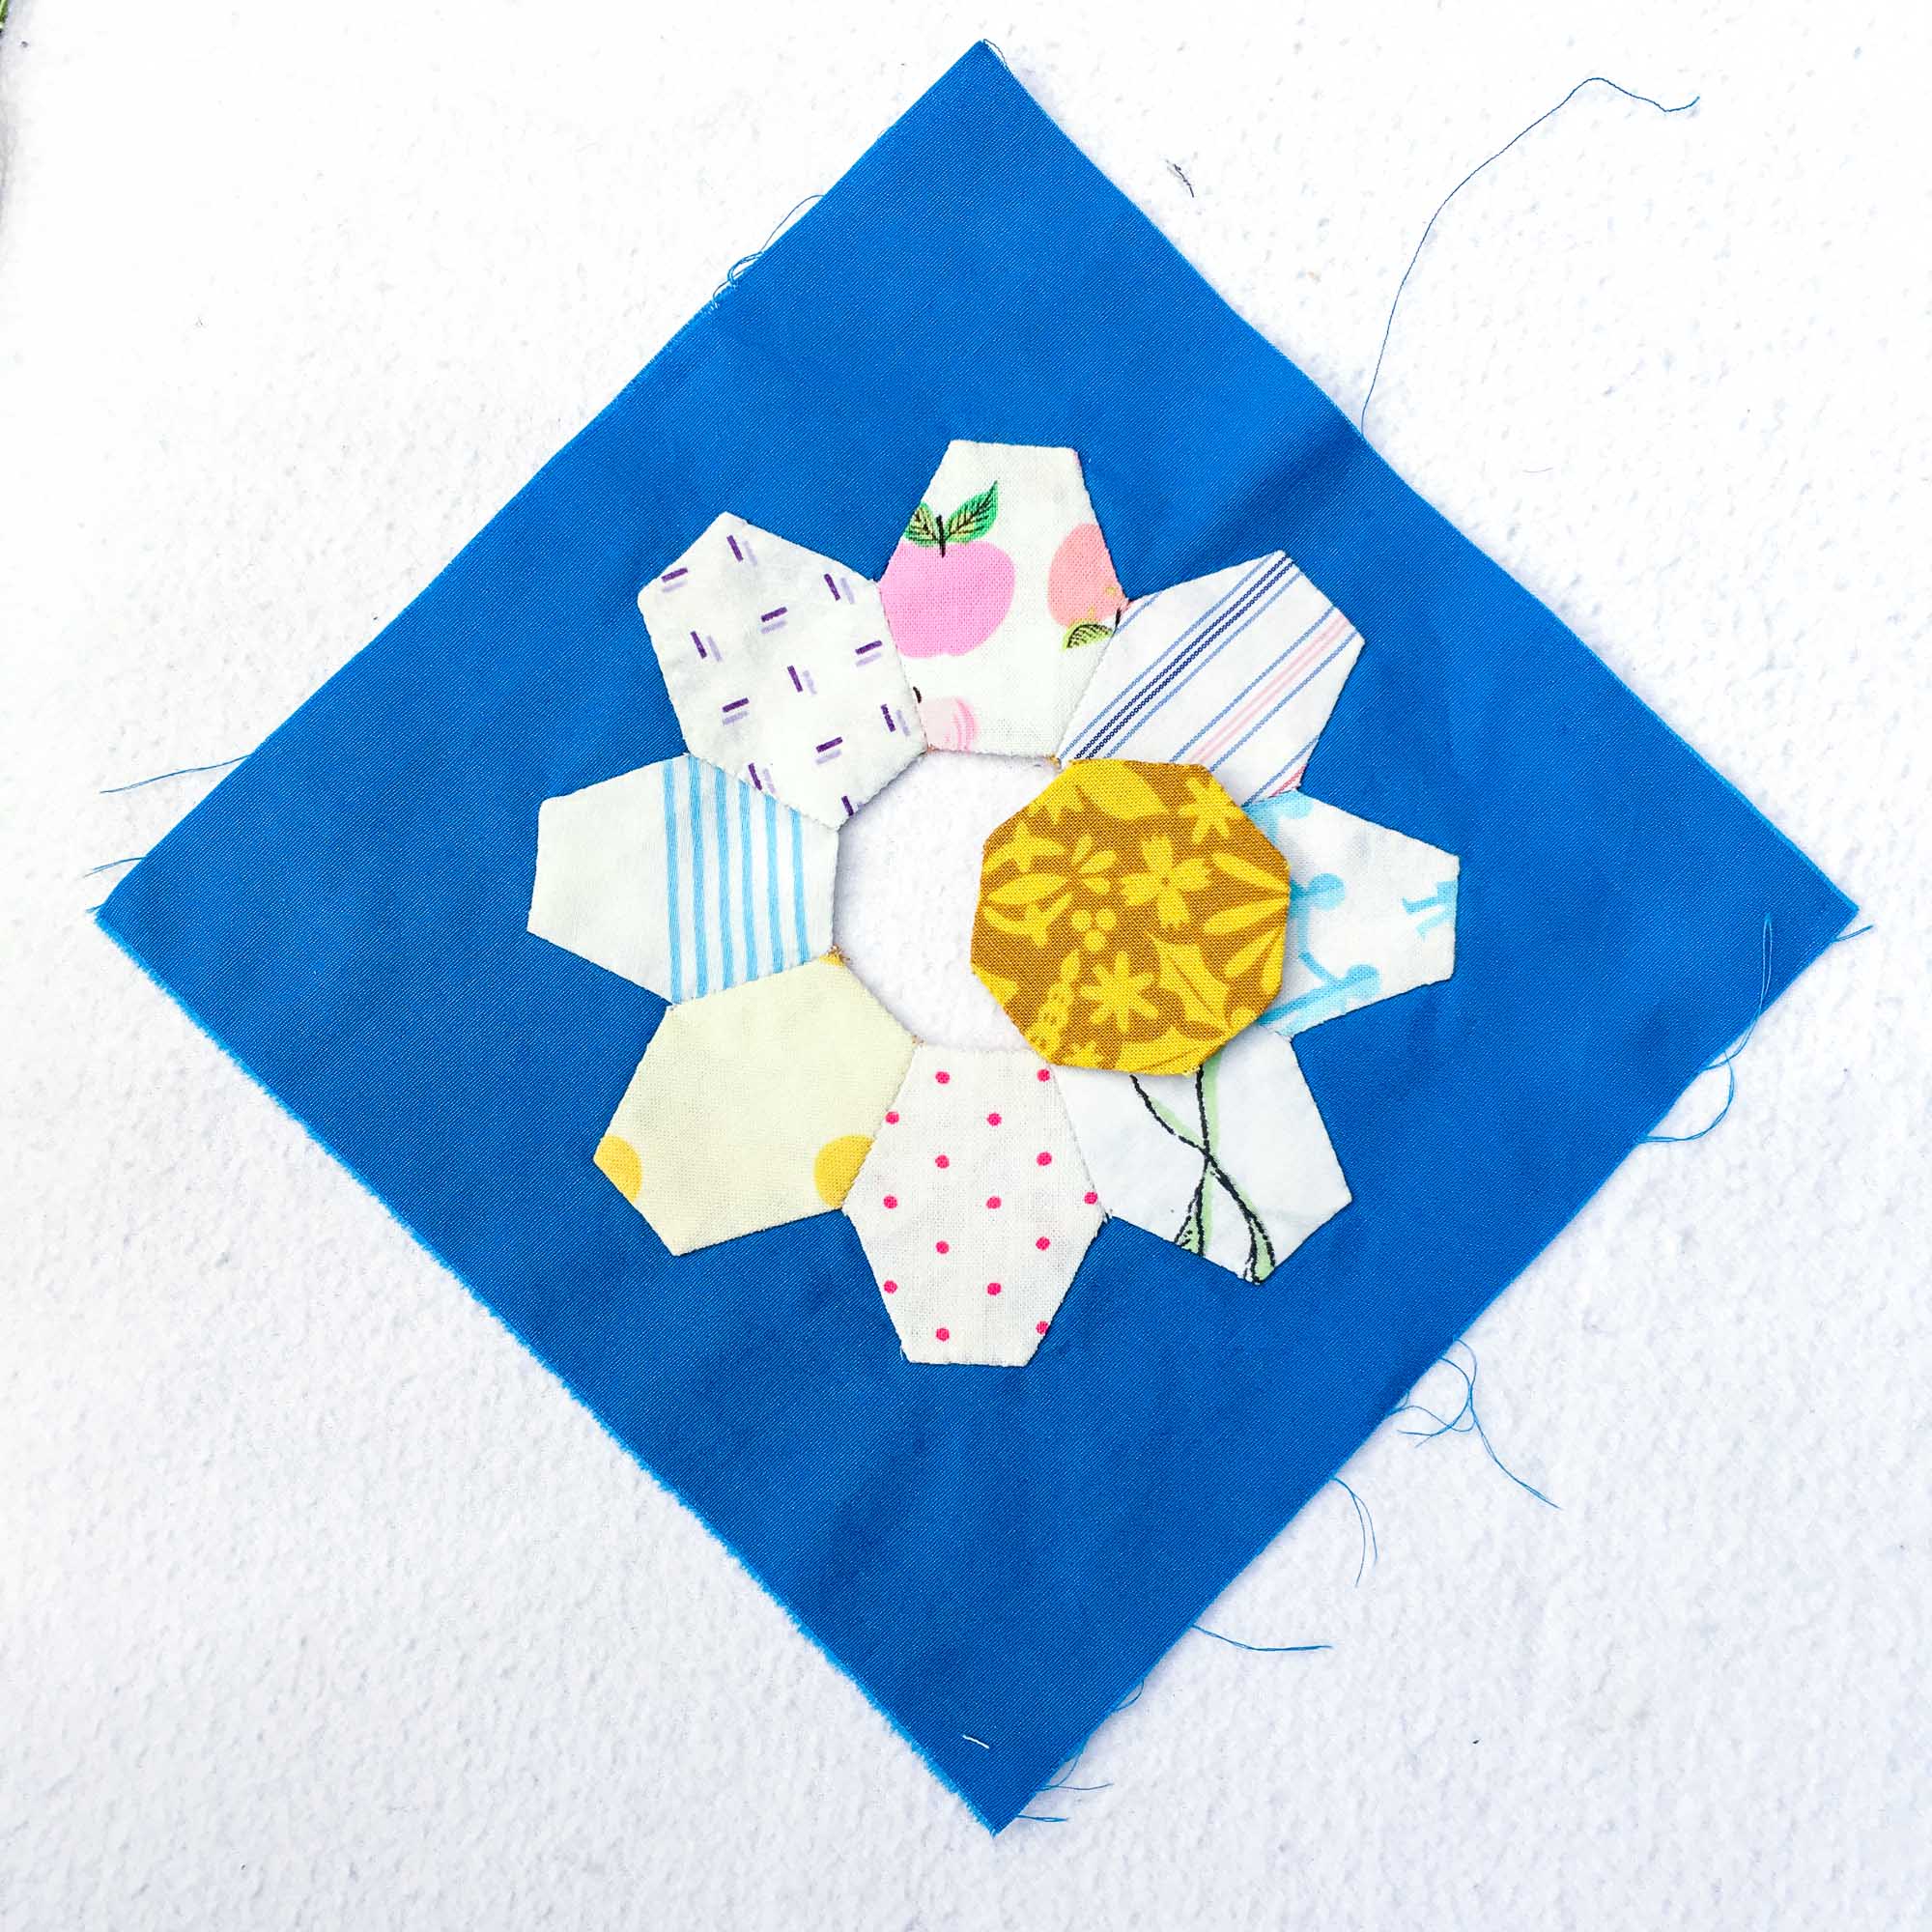
1. Begin by carefully unpicking the fabric you want to replace.
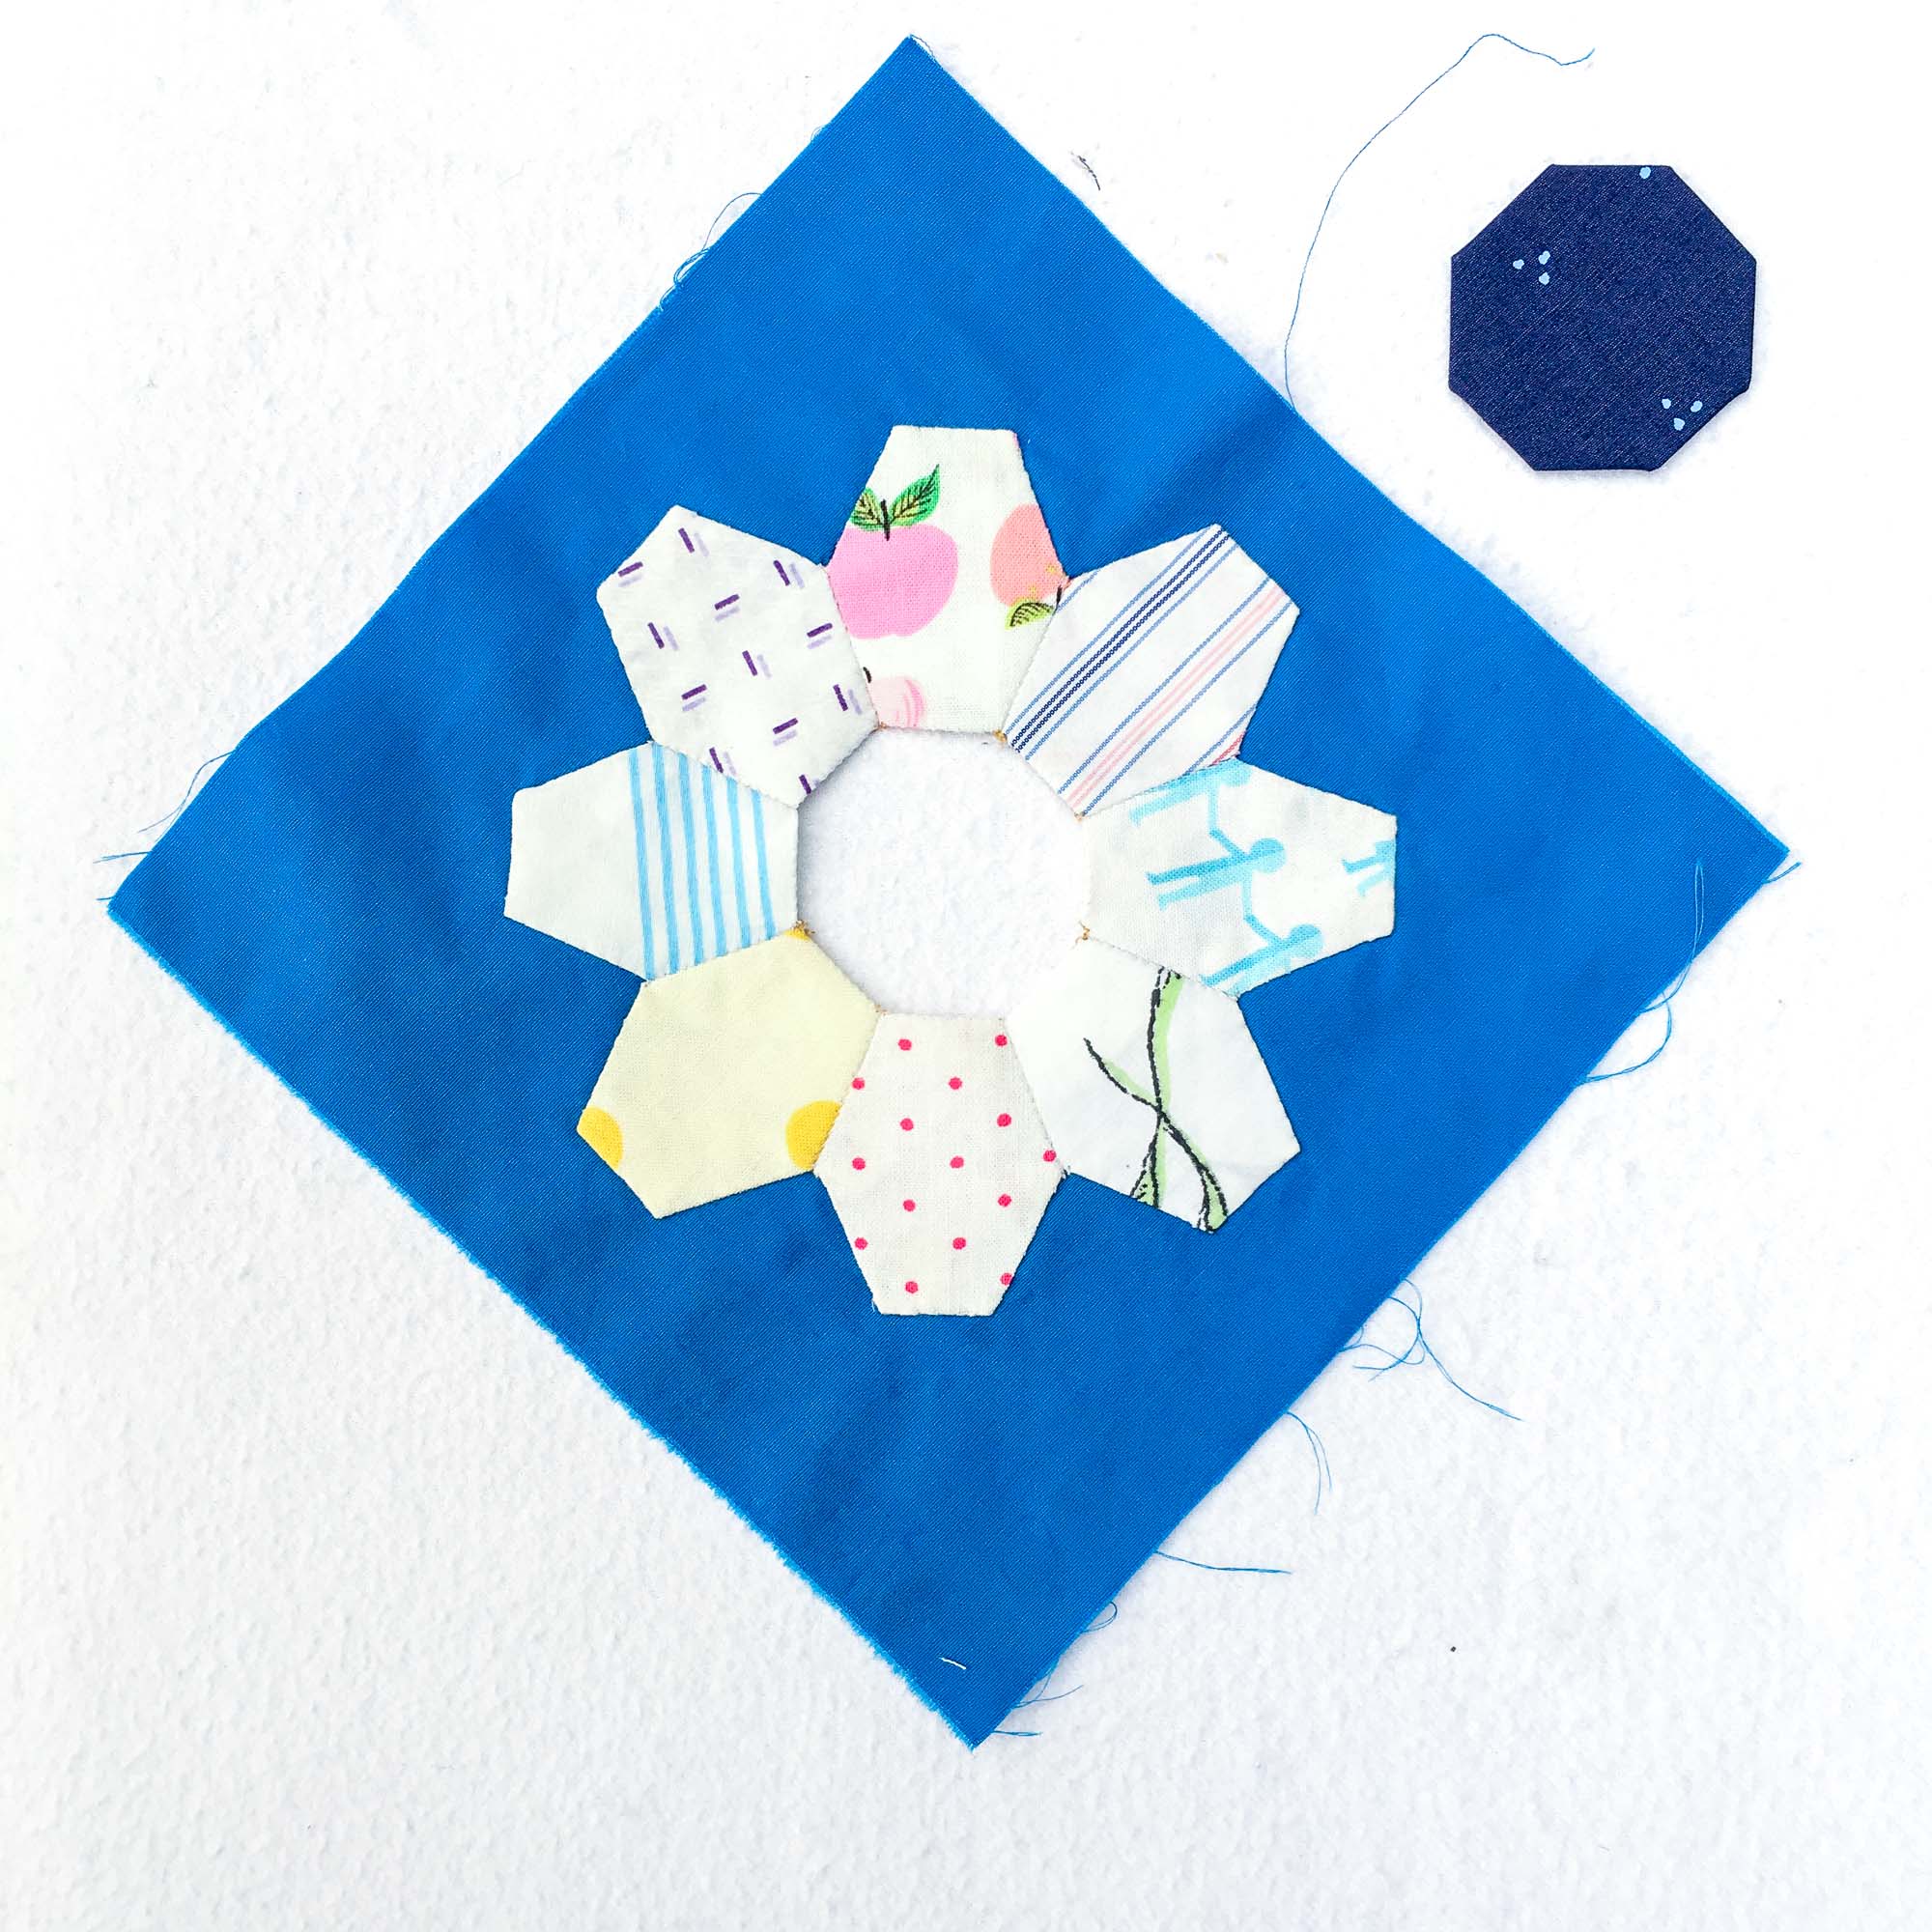
2. Determine the new fabric you’d like to use instead, and baste the fabric to the paper piece. (Check out the EPP Primer: Basting post if you need a little refresher.)
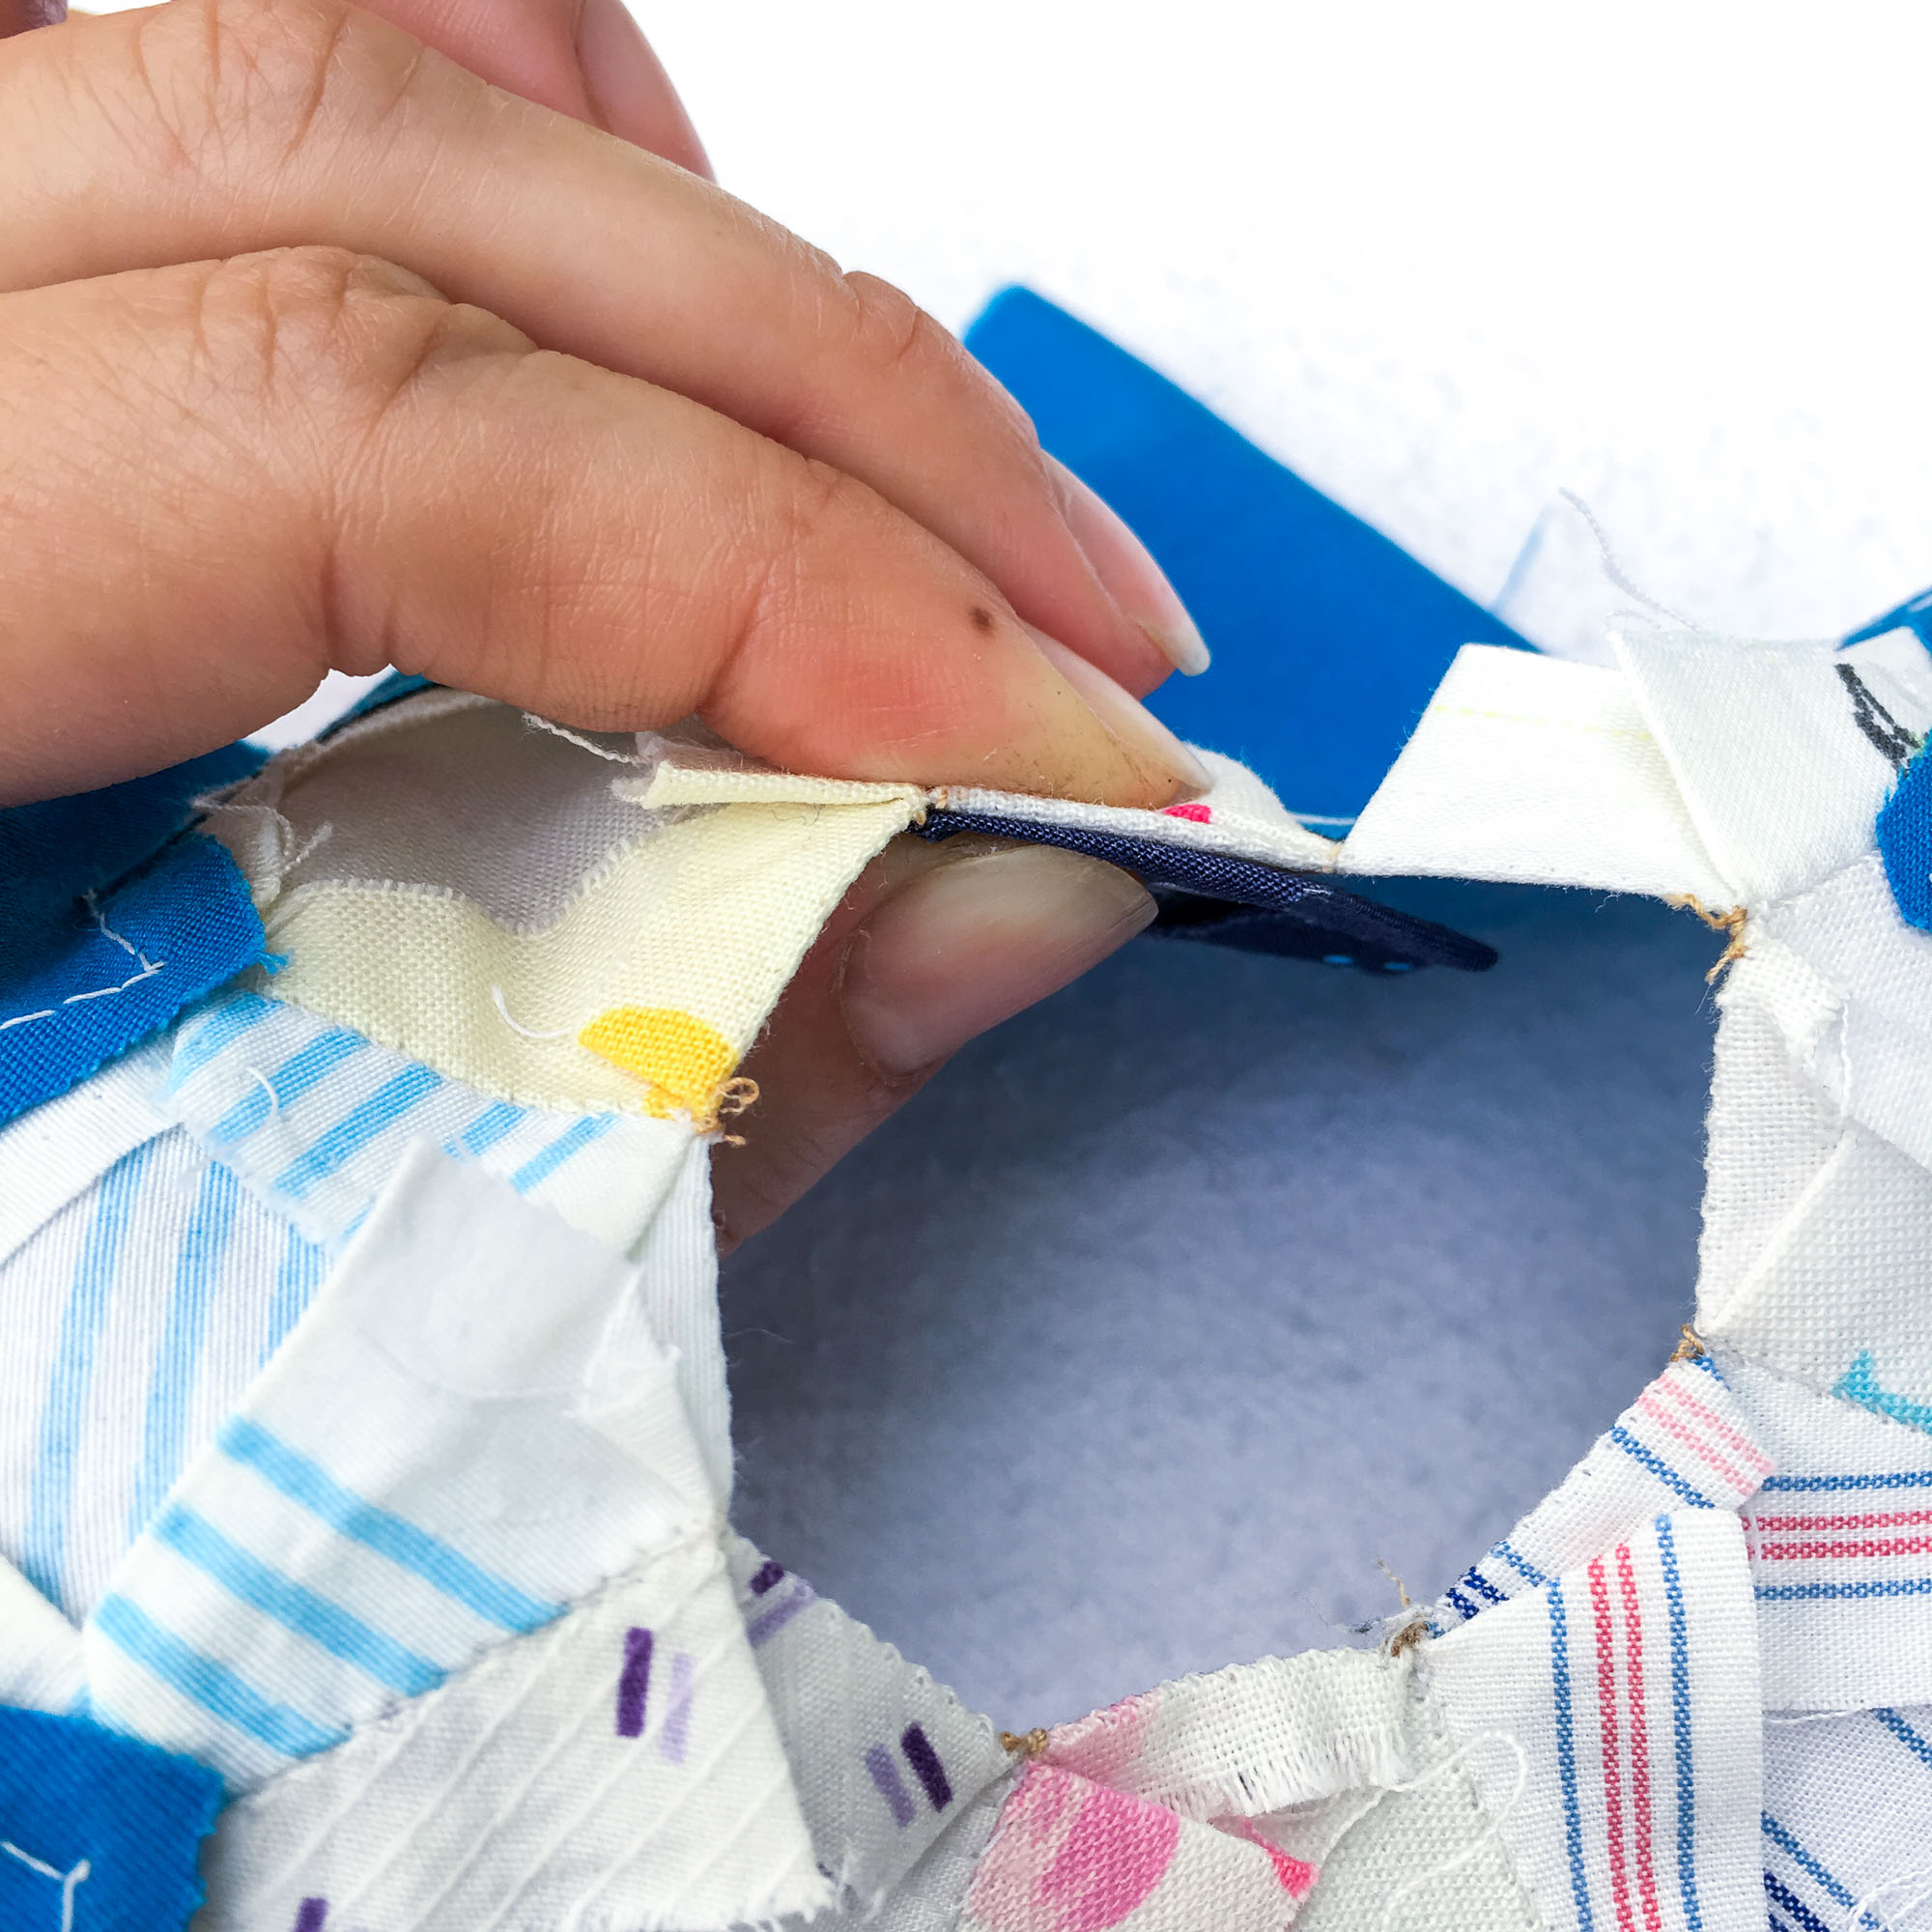
3. Carefully align the newly basted paper piece with an adjacent piece. In this case, I aligned a petal with one side of the center octagon.
4. Stitch the seam.
Of Note:
As I already mentioned, it would be easiest if these pieces still had papers in them. However, there is still a clear seam allowance from the crease where the fabric has been pressed in place. So simply take care to stitch only a tiny bit of the seam allowance as you would if the paper were still in place. (Wonder clips or binder clips can be helpful for keeping things in place as you stitch.)
5. Continue stitching around the entire replacement piece until it is completely stitched in place. Press and remove the paper.
Successful surgery indeed!
Happy Hacking?
I hope you enjoy these EPP hacks as much as I do! And, if you have a favorite stitching hack of your own, please feel free to share in the comments! I love learning a new way of doing something that makes the process even more enjoyable.
And, if you found this post helpful, you might enjoy the EPP Pro tutorial series if you haven’t checked it out already. It contains several EPP hacks/Pro Tips sprinkled within its contents. From finding time to sew to basting with brilliance and stitching with style you’ll be sure to find something new to add to your stitching routine. Most of all, I hope that it helps you cultivate a little more of the joy and healing that creativity brings. Happy stitching!
Don’t forget that you can always pin this post to Pinterest for easy access later.
This post may contain affiliate links. You can read my affiliate disclosure here.
Haha wow I forgot about this 😂 this is great and really was my own interpretation of instructions (you know how much I love those 🙄😂) and convenience ha! And as you would say, Lisa: I am happy to enable 😆


One Response
Haha wow I forgot about this 😂 this is great and really was my own interpretation of instructions (you know how much I love those 🙄😂) and convenience ha! And as you would say, Lisa: I am happy to enable 😆