This stitching post is part of the EPP Pro tutorial series. For the most fluid experience, I recommend starting at the beginning since the posts build upon each other. If you missed any of the previous posts, you can find them here.
I love the hand stitched character of my EPP quilts. They discreetly display the diligence and care stitched into each seam. However, while I love that you can see my stitches, I don’t like them to distract from the overall quilt. As such, I have discovered a few tips and tricks that cleverly camouflage the stitches from afar, but still clearly credit the hand stitching up close. Let’s have a look!
Thread Matching
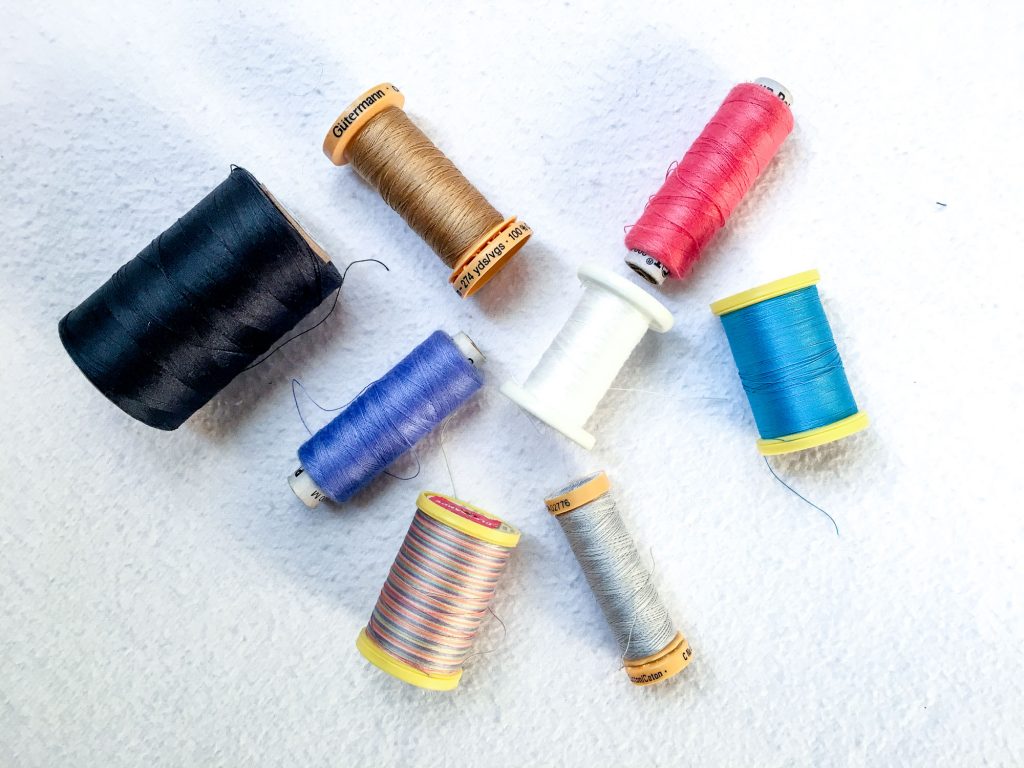
I covered the various thread camps in the EPP Pro: Streamlining Your Supplies post. Here, I’d like to dive a little deeper into choosing thread to match your fabrics.
Use What You Have
I mentioned this in the supplies post, but I feel like it deserves a mention here again. If you are just starting out or simply not in the place to purchase additional thread at the moment, do your best to use what you have. There is a lot to be said for your stitching technique, which we’ll discuss in a minute, regardless of the color of your thread. So, even if you don’t have the exact match for your fabrics, I hope the following tips will guide you through choosing a suitable thread from amongst your current stash.
Neutralize It
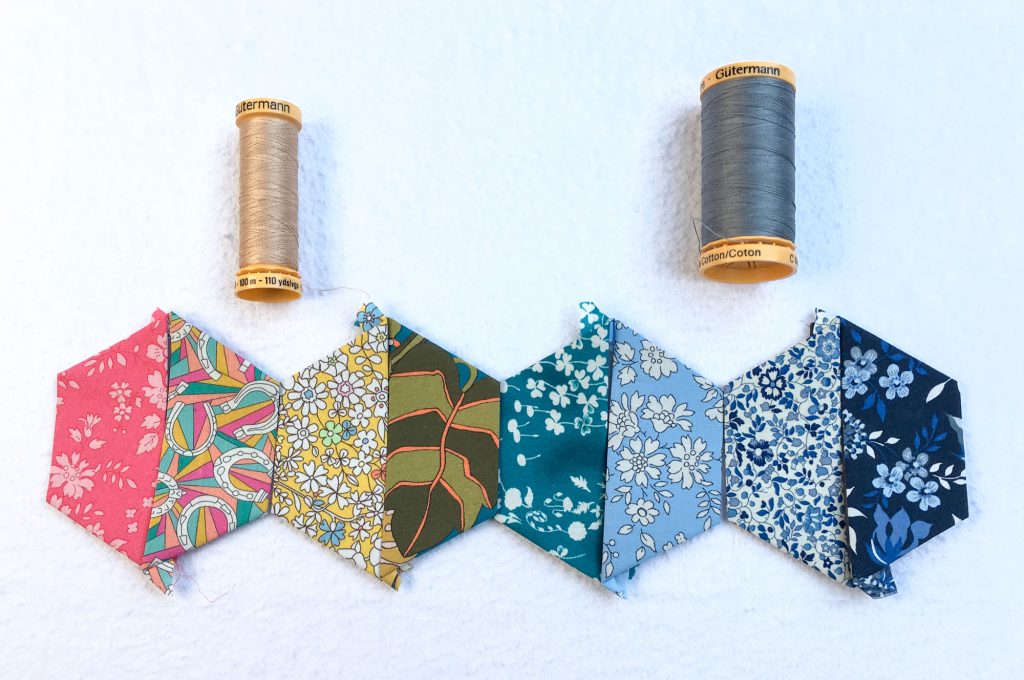
As I stated in the supplies post, neutrals can be a great place to start. If you have two fabrics in the same color family adjacent to each other, such as two grays, obviously gray is a great choice. However, even if you have several colors such as greens, blues, and even reds next to each other, have a look at the cast of the colors. Do they have a warm tone or a cool tone? If they run warmer, try a tan. If they run cooler, try a gray.
You’d be surprised at how thread colors across a scrappy quilt can really disappear once you get stitching even if the color doesn’t seem to coordinate at all next to one fabric at a time. I like auditioning thread across several rows to determine which one to use.
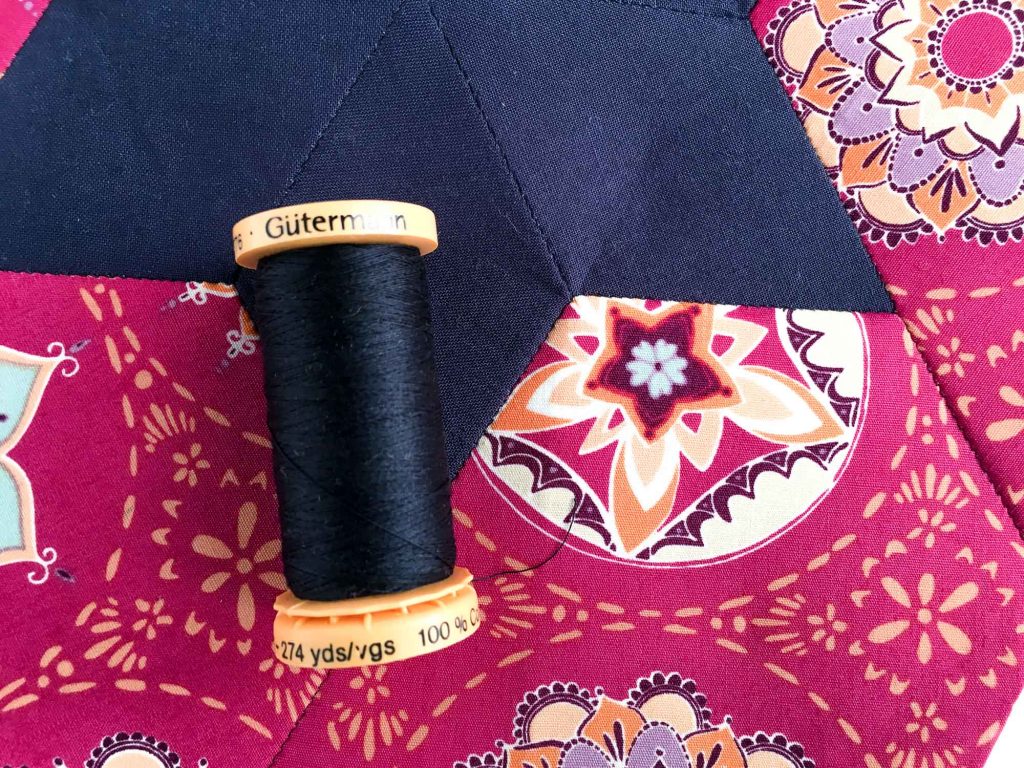
Choose a Side
Another method to employ to decide which thread to use is to match one of the fabrics and not the other. This works particularly well when you have two highly contrasted fabrics. For example, I use a lot of navy blue in my quilts. After trying to choose a neutral that blended nicely with whichever fabric I paired with the navy blue, I realized that simply stitching with navy blue thread next to any other fabric basically made the thread disappear into the navy blue fabric. It was magical!
I discovered that this works very well with whites next to other colors (except navy blue, when I use navy blue thread). It works famously when stitching high contrast colors next to other high contrast colors like red and green. Depending on which thread I have on hand, I will choose to match either the red or the green as closely as I can, and the thread tends to blend beautifully with whichever one I chose to match.
Hopefully, one of these techniques will serve as a starting point for choosing thread in your future EPP endeavors. I have found that simply choosing suitable threads can cover a multitude of messy stitches. However, there is something to be said for taking neat and tidy stitches, so let’s talk about that next.
Straightforward Stitching
When I first started with EPP, I was terribly afraid of huge, wonky whipstitches detracting from my painstaking hand stitching. So imagine my delight when, early on in my stitching journey, I discovered a tutorial for using the ladder stitch (also known as slip stitch) for EPP. This helpful stitch works great for creating blind hems, closing seams, and binding. And, I utilized it on a handful of EPP projects, initially. The stitches are invisible, and work wonderfully if the final product won’t receive a lot of strain from use.
However, as I later discovered, this stitch is very weak for EPP. Since the stitches run parallel to the seam, there is no counter strength if the seam is pulled. As such, I have had to repair a number of seams that have unraveled with simple every day use.
Enter the whipstitch. While, several folks have adopted variations of the whipstitch to make it less visible, I have found that a few little strategies can work wonders for creating barely visible whipstitches. Let’s have a look!
Thread Matching
I already covered this concept at the beginning of this post, but it’s really one of the best methods for disguising your stitches regardless of how tidy they are. If your thread blends well with your fabric, the likelihood of seeing your stitches diminishes greatly.
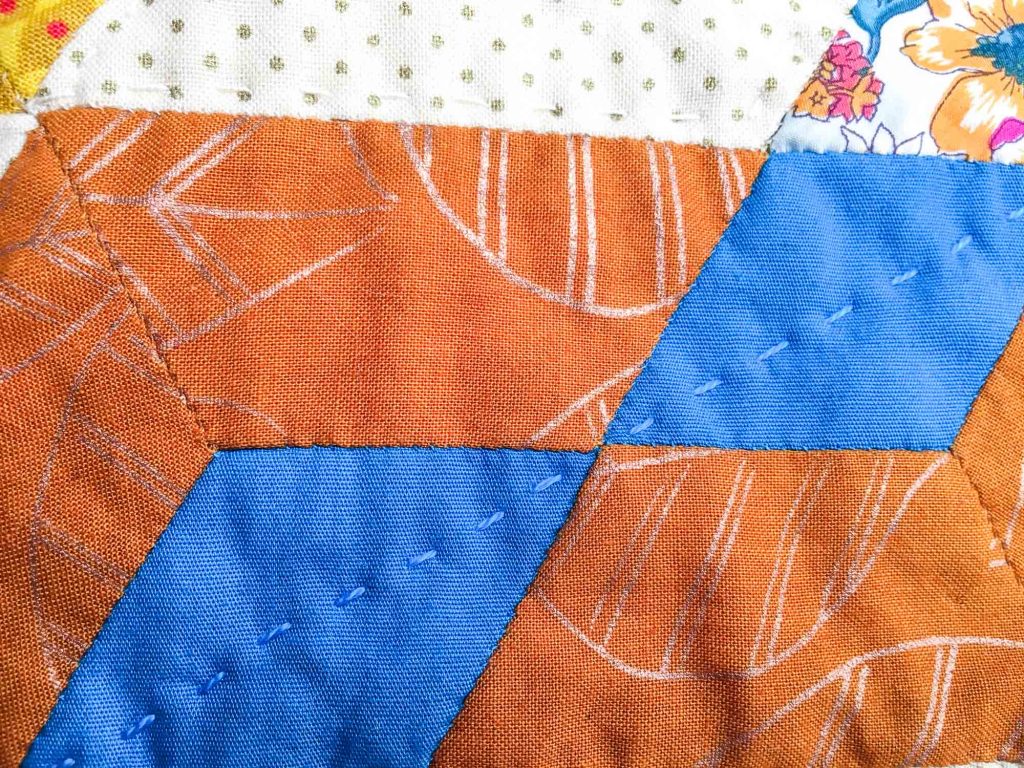
Only Stitch a Tiny Bit of the Seam
This takes a bit of practice, but can work wonders. As you know, with EPP, the fabric is basted to a piece of paper, and the papers line up along adjacent seams. The stitches are generally taken across these adjacent seams. (For a more detailed description of the whipstitch, see the EPP Primer: Stitching post.)
As such, there is only a tiny bit of fabric to actually catch before you hit the paper. If you can focus on catching only a few threads of this seam allowance with each stitch, rather than digging into the paper, your stitches will be far less visible. Because the stitches are taken perpendicularly, rather than parallel to the seam, the stitches are stronger, even if you don’t catch as much fabric.
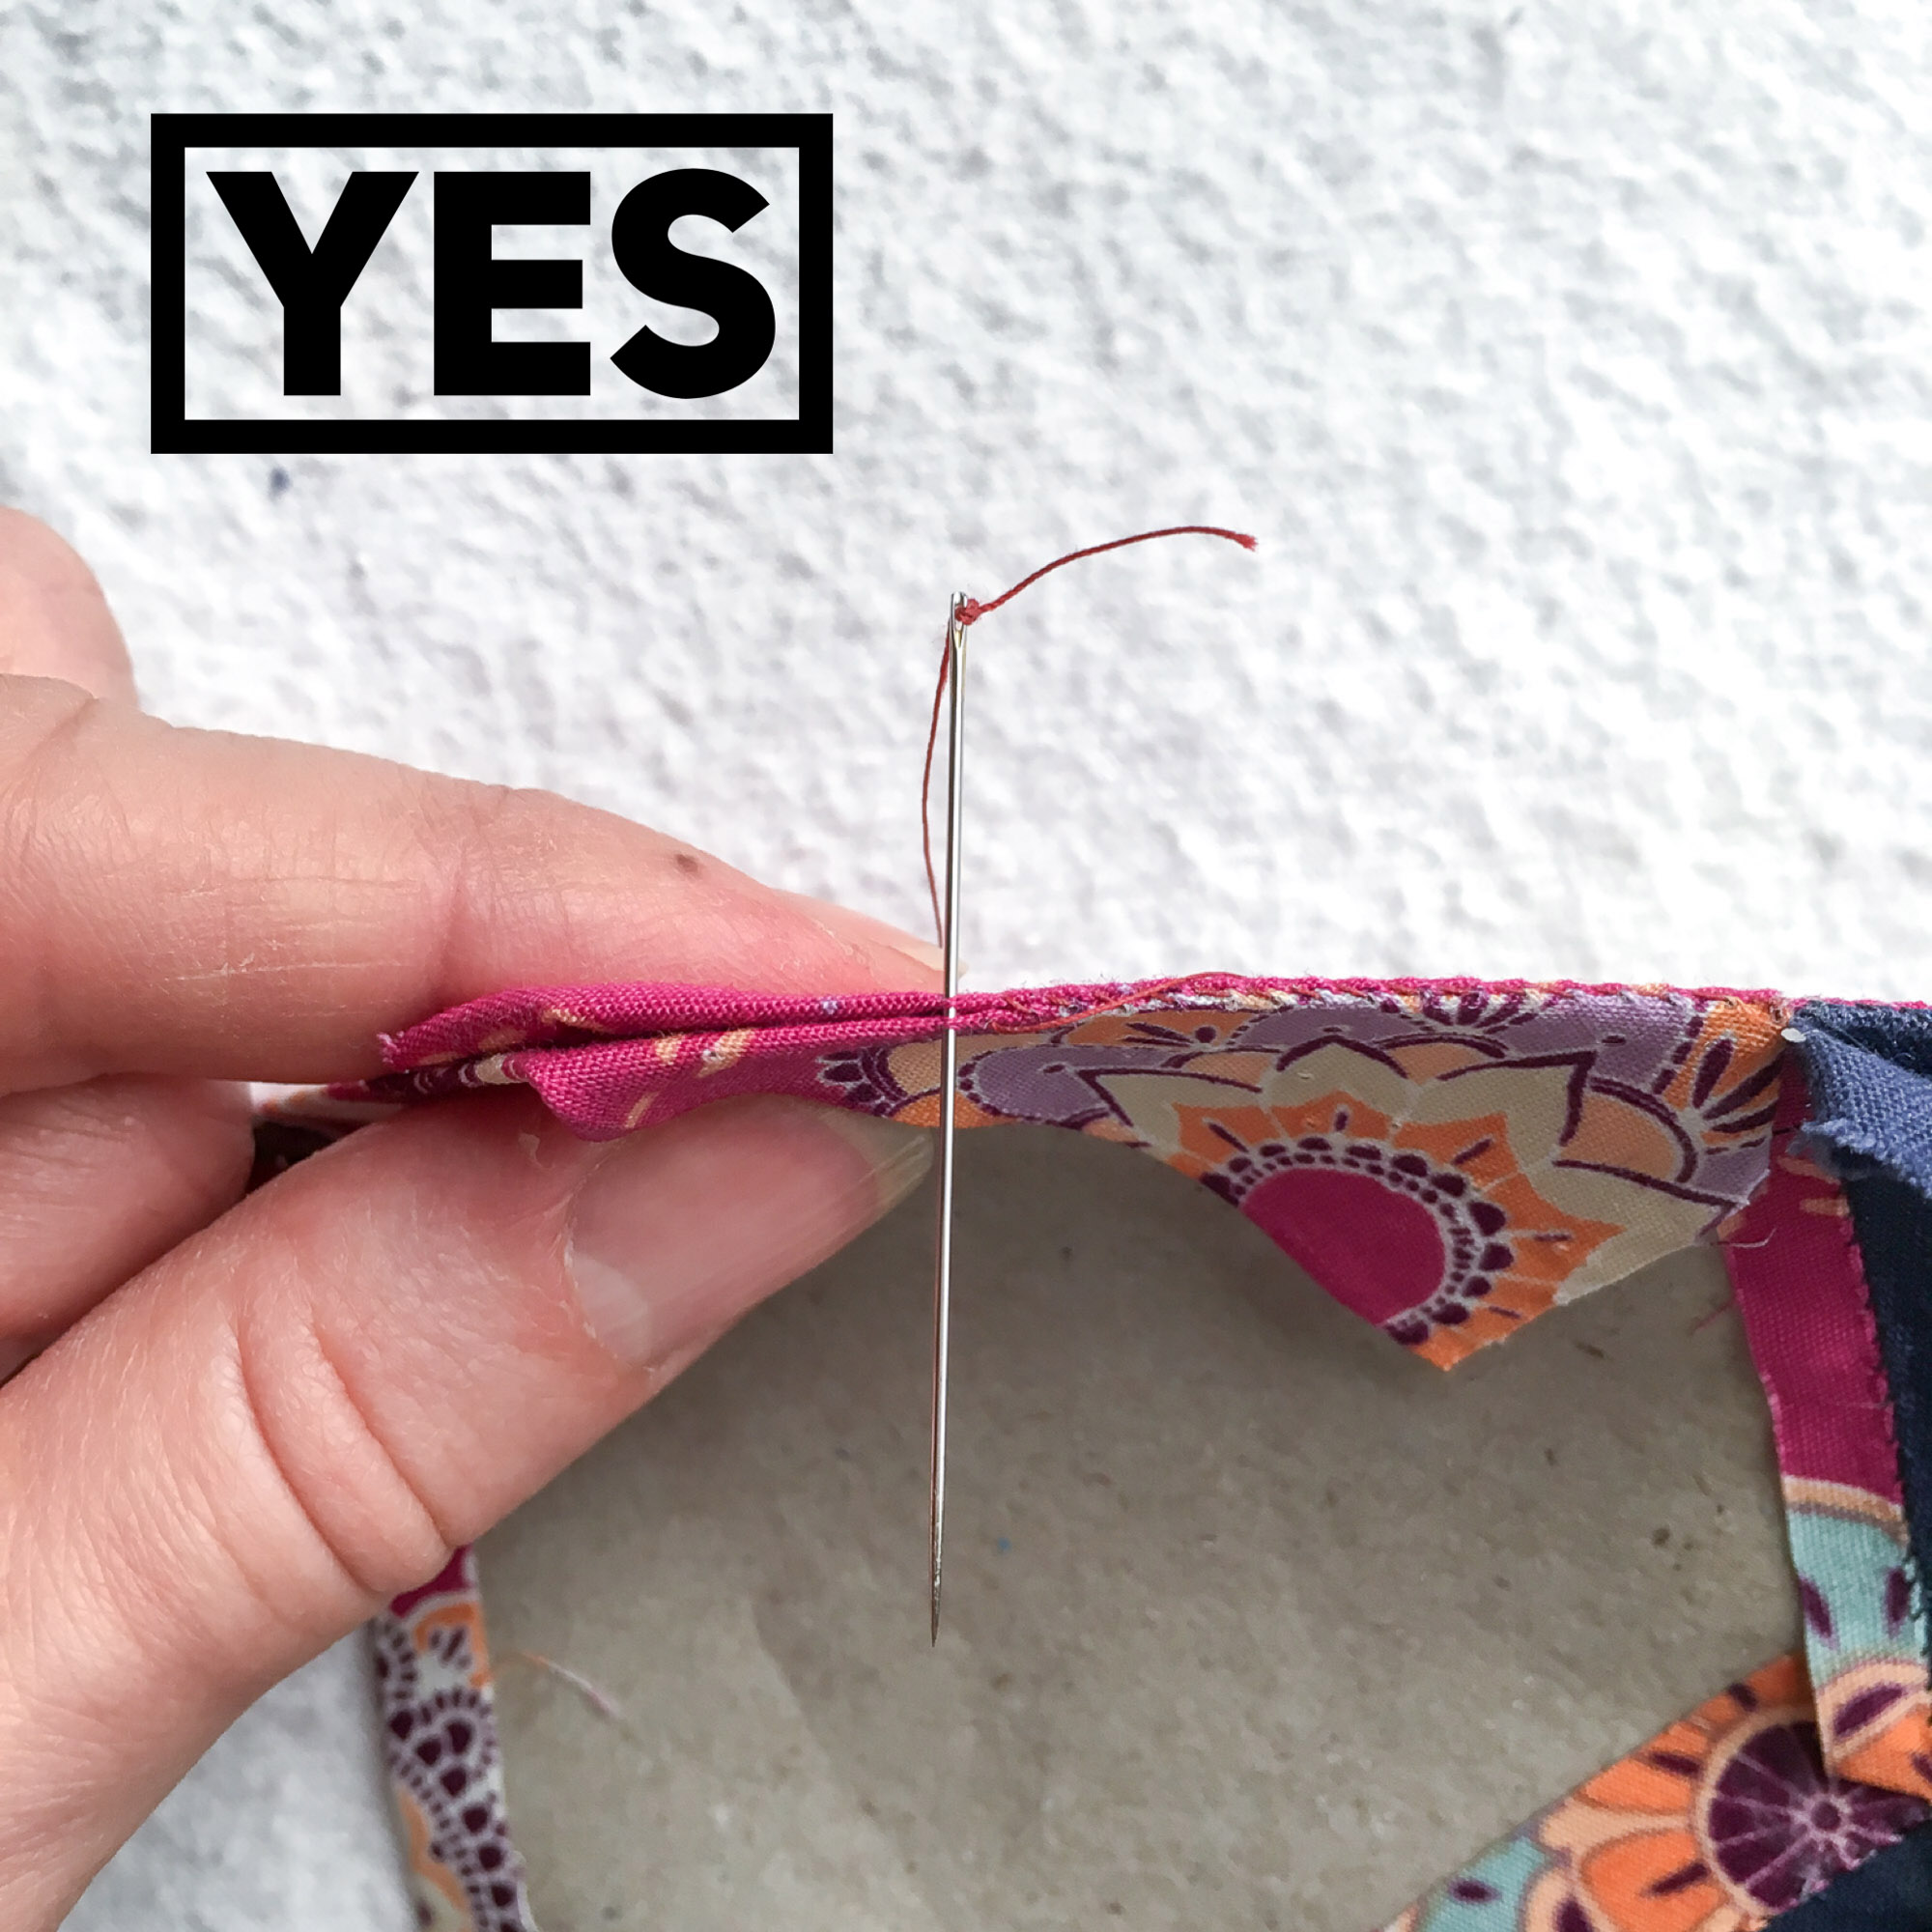
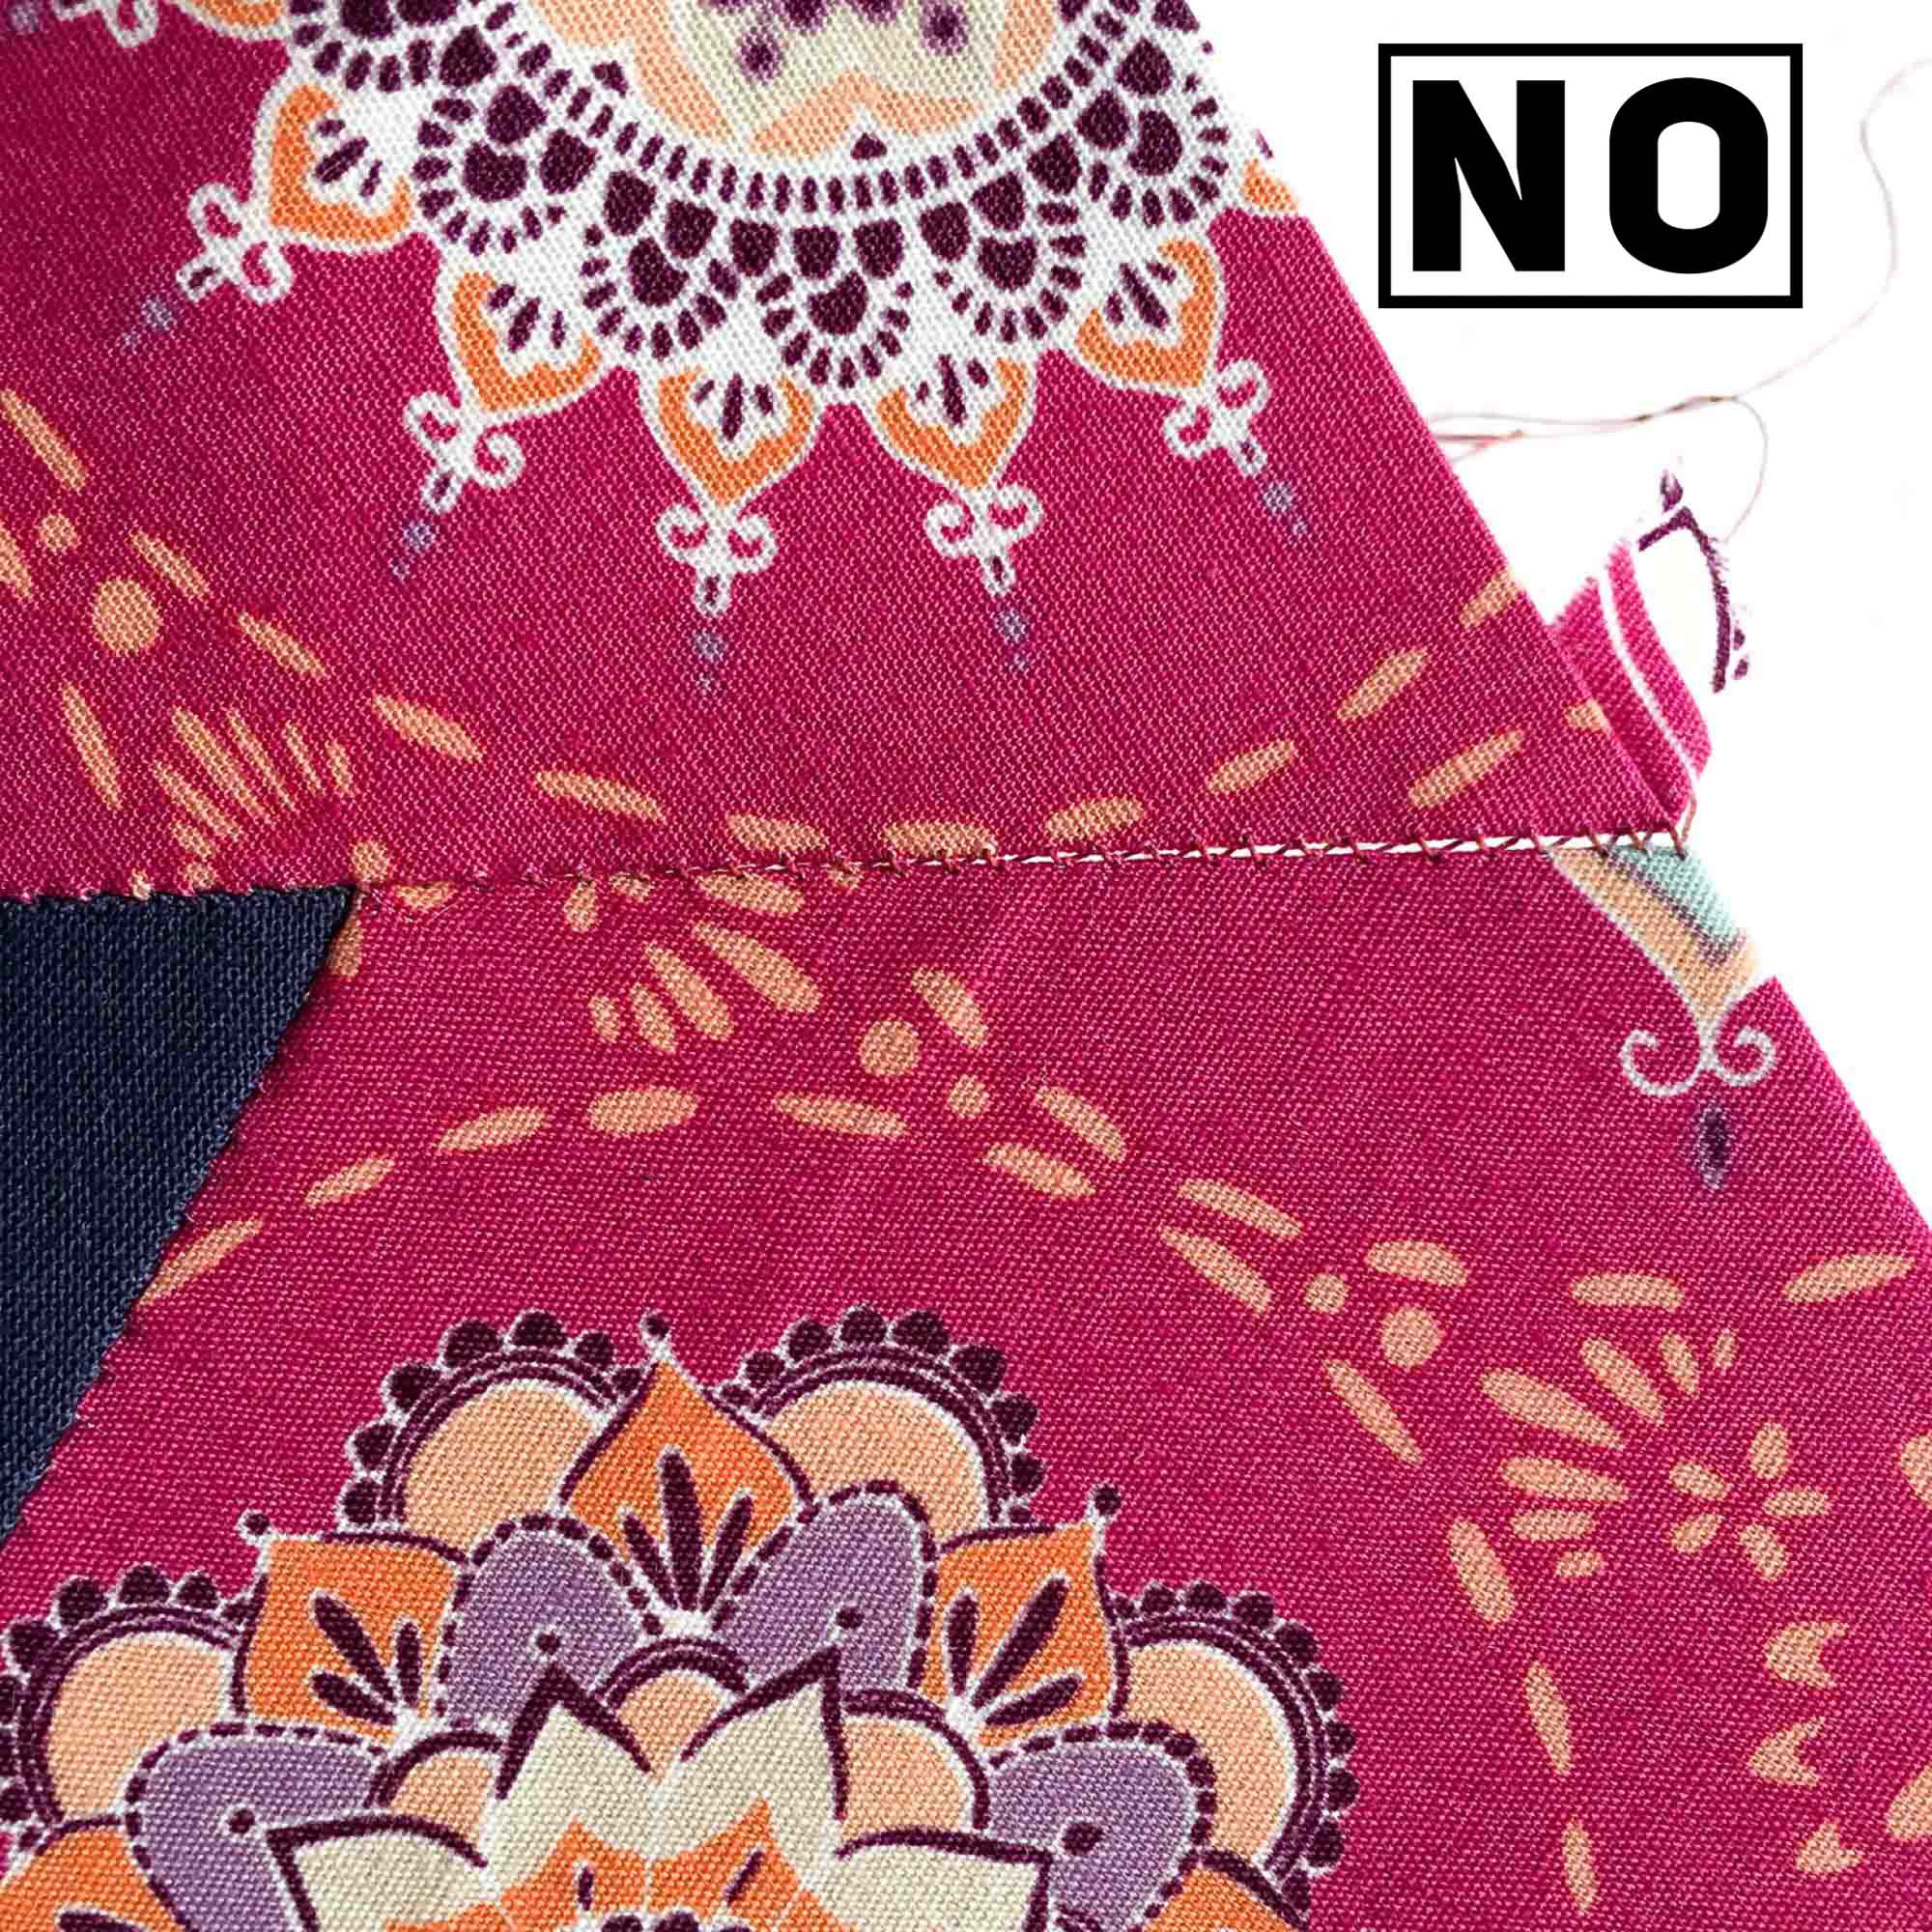
Take Perpendicular Stitches
This technique has proven one of the best in my experience. Even while thread matching and taking tiny stitches can be helpful, at some point I discovered that the position of the needle as I take a stitch makes a difference, as well.
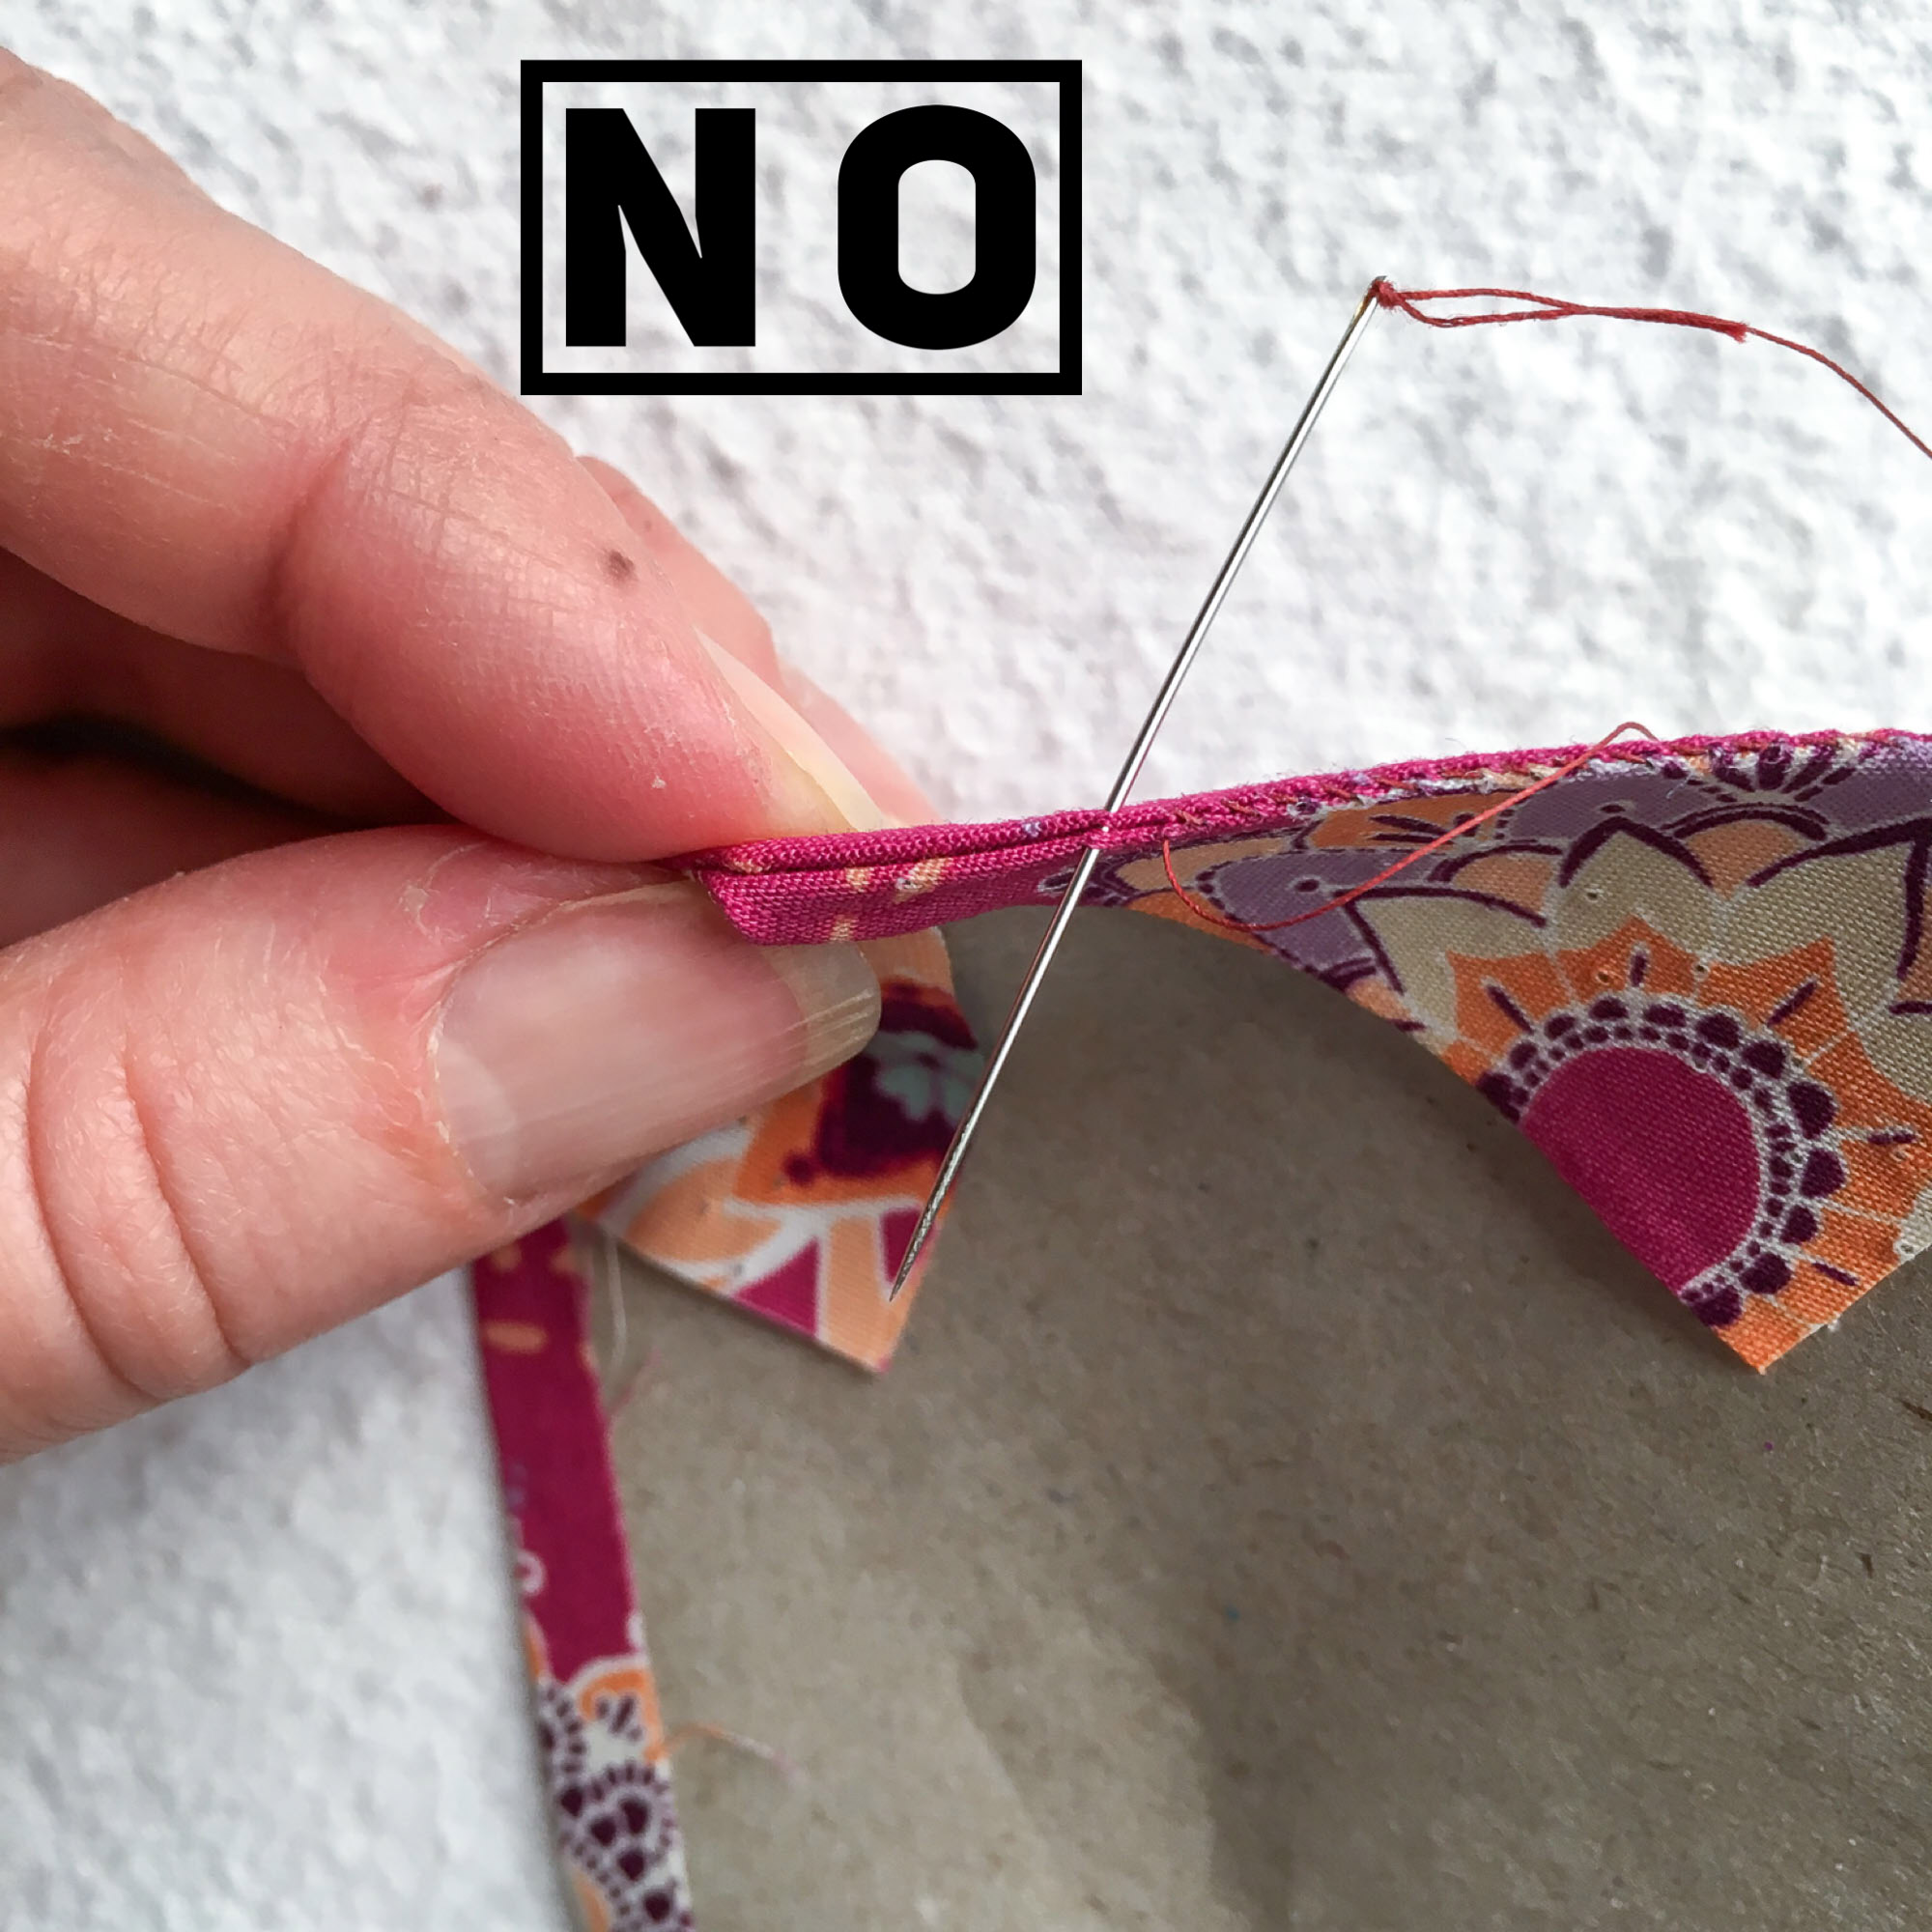
Once you get a handle on whipstitching, it is easy to find a mindless rhythm to your stitching. While this muscle memory is lovely, one hazard is that your needle can begin to find itself inserted at odd angles as it crosses from one side of the seam to the other. This habit proves problematic in that it creates more visible stitches in the final stitching.
Conversely, if you make the effort to consciously keep your needle inserted perpendicularly to your seam as much as possible, these stitches will find themselves melting into the seam with ease.
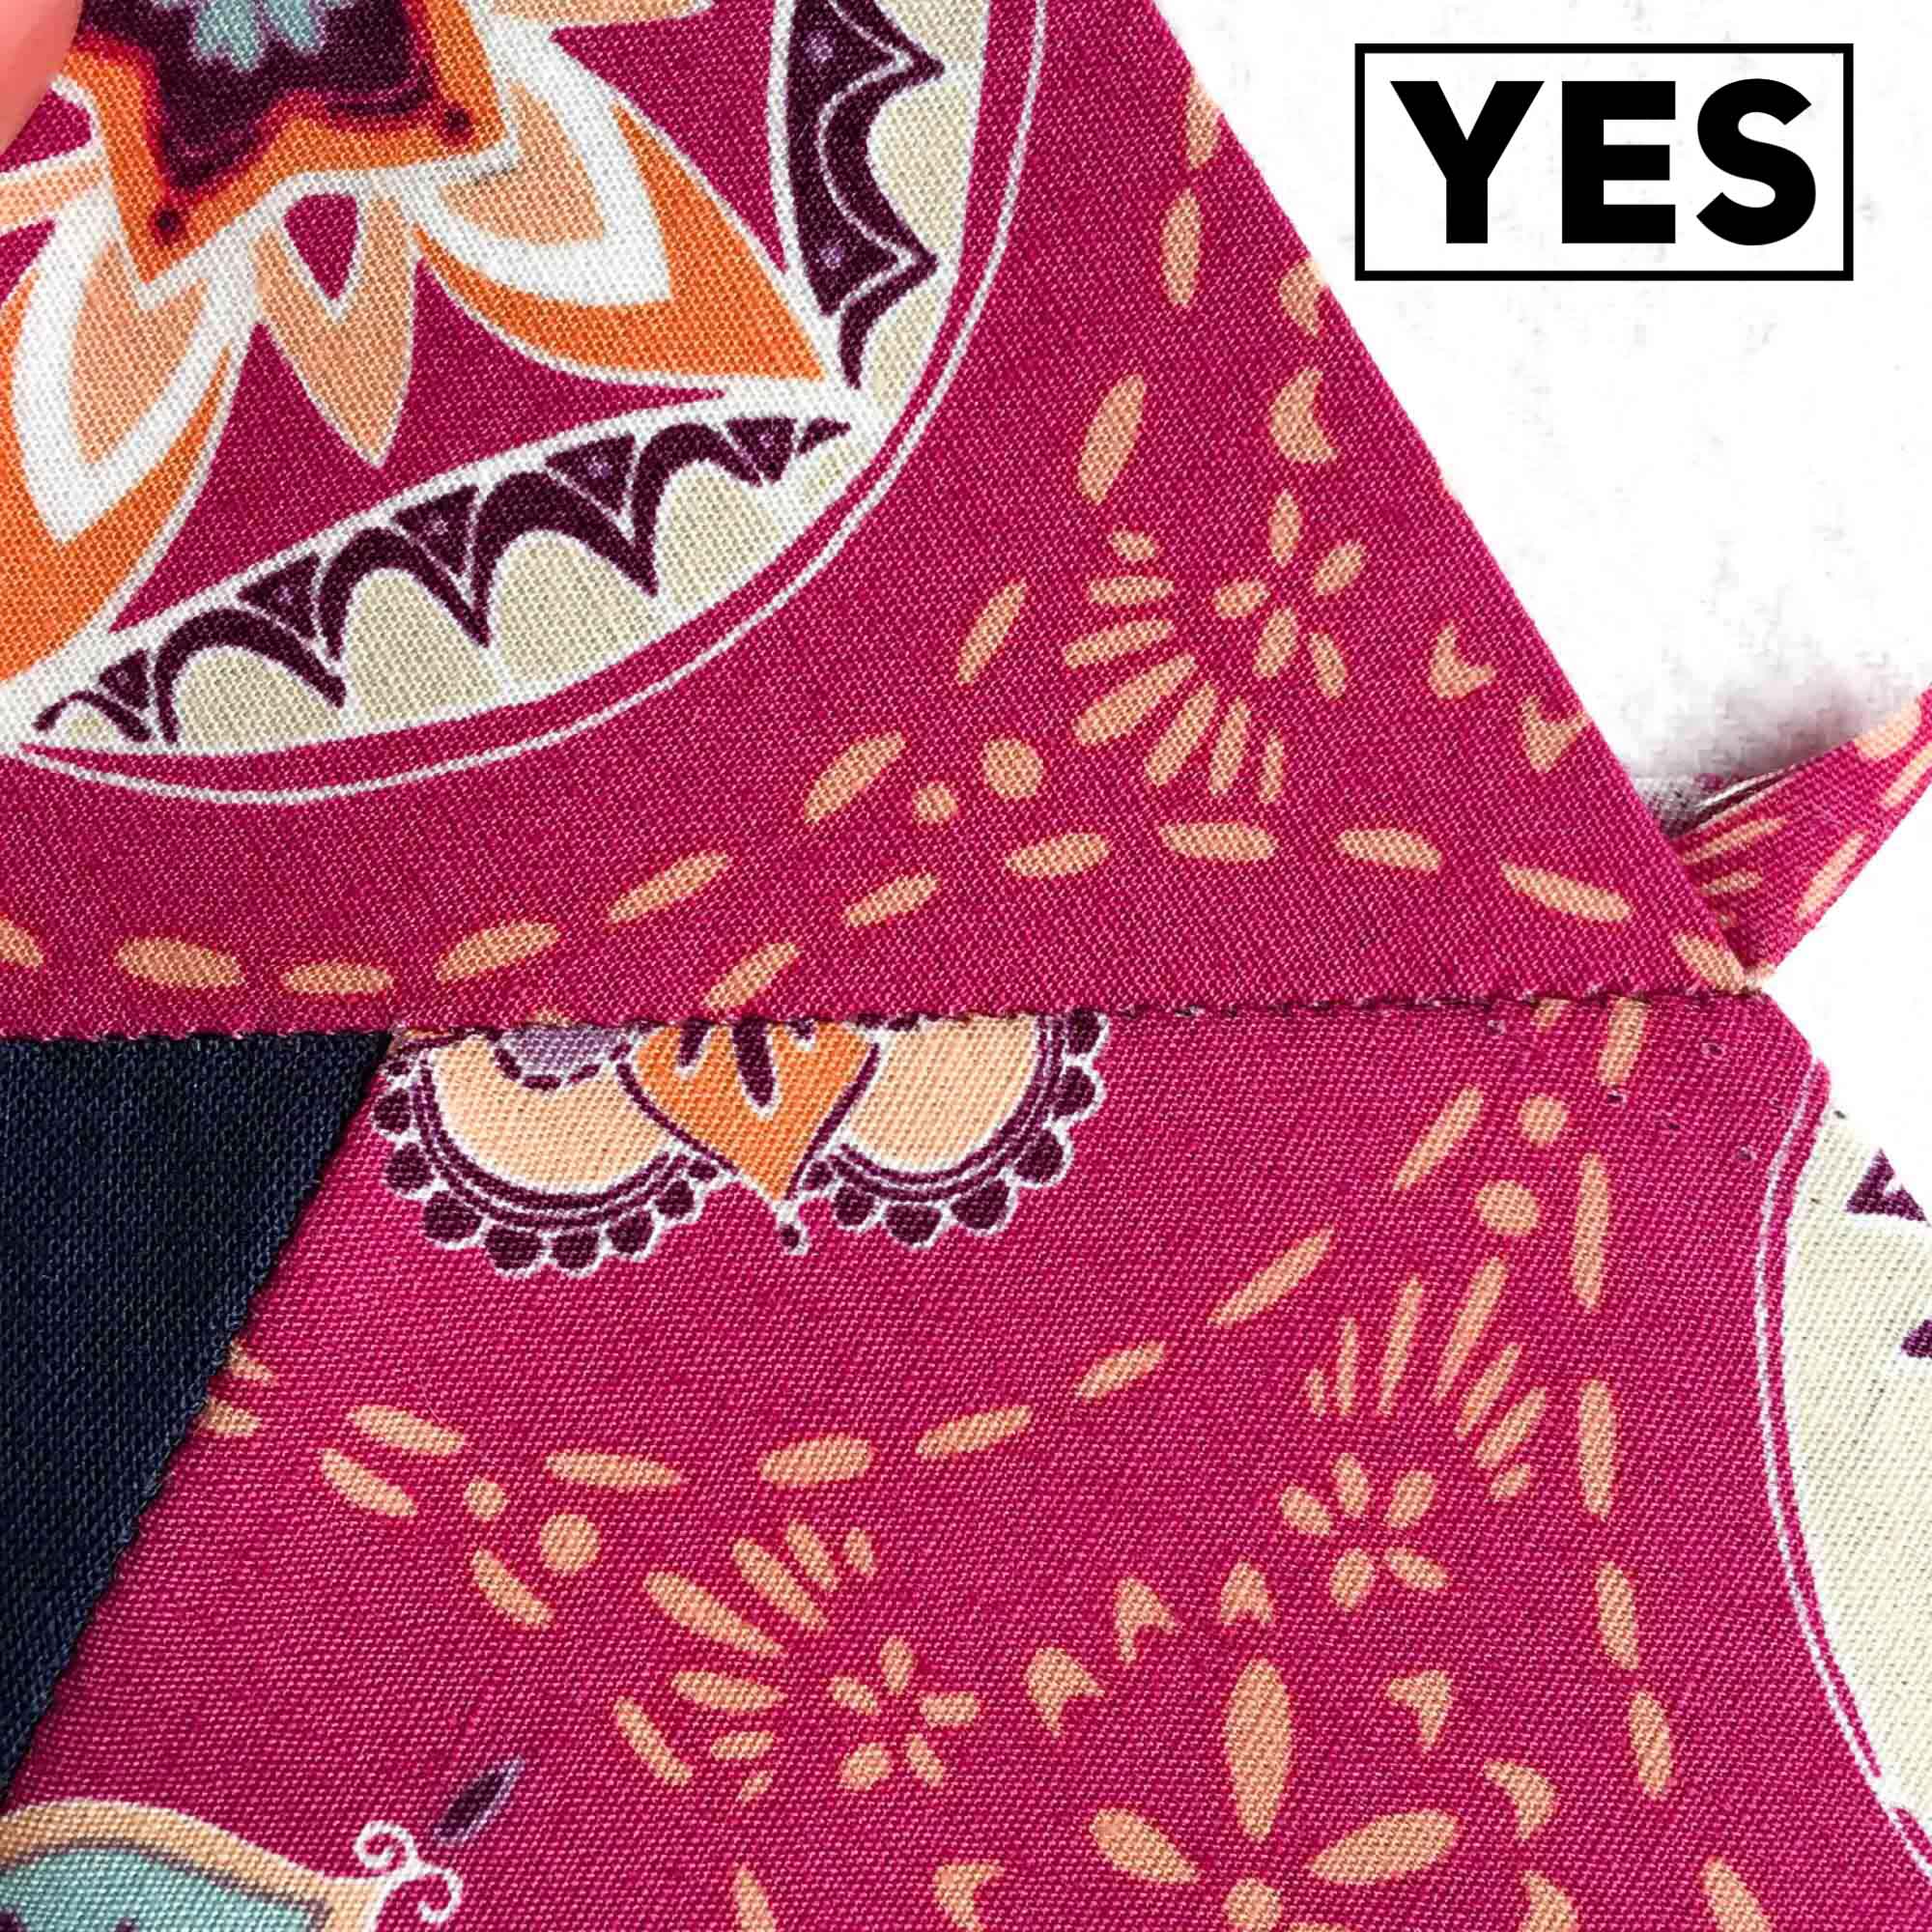
Pull Your Stitches Taut
This idea correlates well with thread tension on a sewing machine. If your thread tension deviates, your stitches appear loose or loopy. With hand stitching, you control the tension. If you leave your thread loose with each stitch, the final seam will gape. However, if you pull the thread taut, the seams will fit snuggly together.
This does not mean that you need to yank on the thread with each stitch. The paper structure under the fabric will serve as a healthy stopping point with each gentle tug of the thread. The end result reveals little stitches tucked neatly into the seam allowance when you finally remove the papers.
Space Your Stitches Evenly
Since working on my Kindred Crosses community quilt, I have marveled over the various ways folks stitch. The differences reflect the uniqueness of each individual as much as their handwriting does.
However, I can always tell the seasoned stitchers from the newer ones. The charm remains with both, but the more seasoned stitchers have one great commonality. The evenness of their stitches. Some folks take hundreds of stitches per inch, while others leave space for each stitch to breathe.
Whatever your preference, a plethora of stitches, or a steadily sufficient number, do your best to take them evenly. Our brains register patterns easily and forgive continuity far quicker than inconsistency. So even if your stitches aren’t particularly invisible, if they are even, they will fade into the background sooner than you think.
Practice
This last point may seem redundant, but truly, this habit yields the greatest results of all. In addition to fine tuning your technique, practice is the surest way to finding a rhythm and style that suits you best. Give yourself permission to grow and learn, and then, periodically, compare your earlier EPP stitching with your current work. You’ll likely be surprised at the change.
Chain Piecing
Let’s switch gears from stitching techniques to a time saving stitching strategy. (Say that five times fast…) A number of you may be familiar with the concept of chain piecing with regards to machine sewing. This process entails sewing similar pieces or blocks together assembly line style on the sewing machine. It is wonderfully productive and efficient. However, this method can also be translated to EPP with a little creativity.
Of Note:
This method works most efficiently when stitching similar seams/blocks together repeatedly. This is where bulk basting comes in handy as I shared in the last section, EPP Pro: Basting with Brilliance.
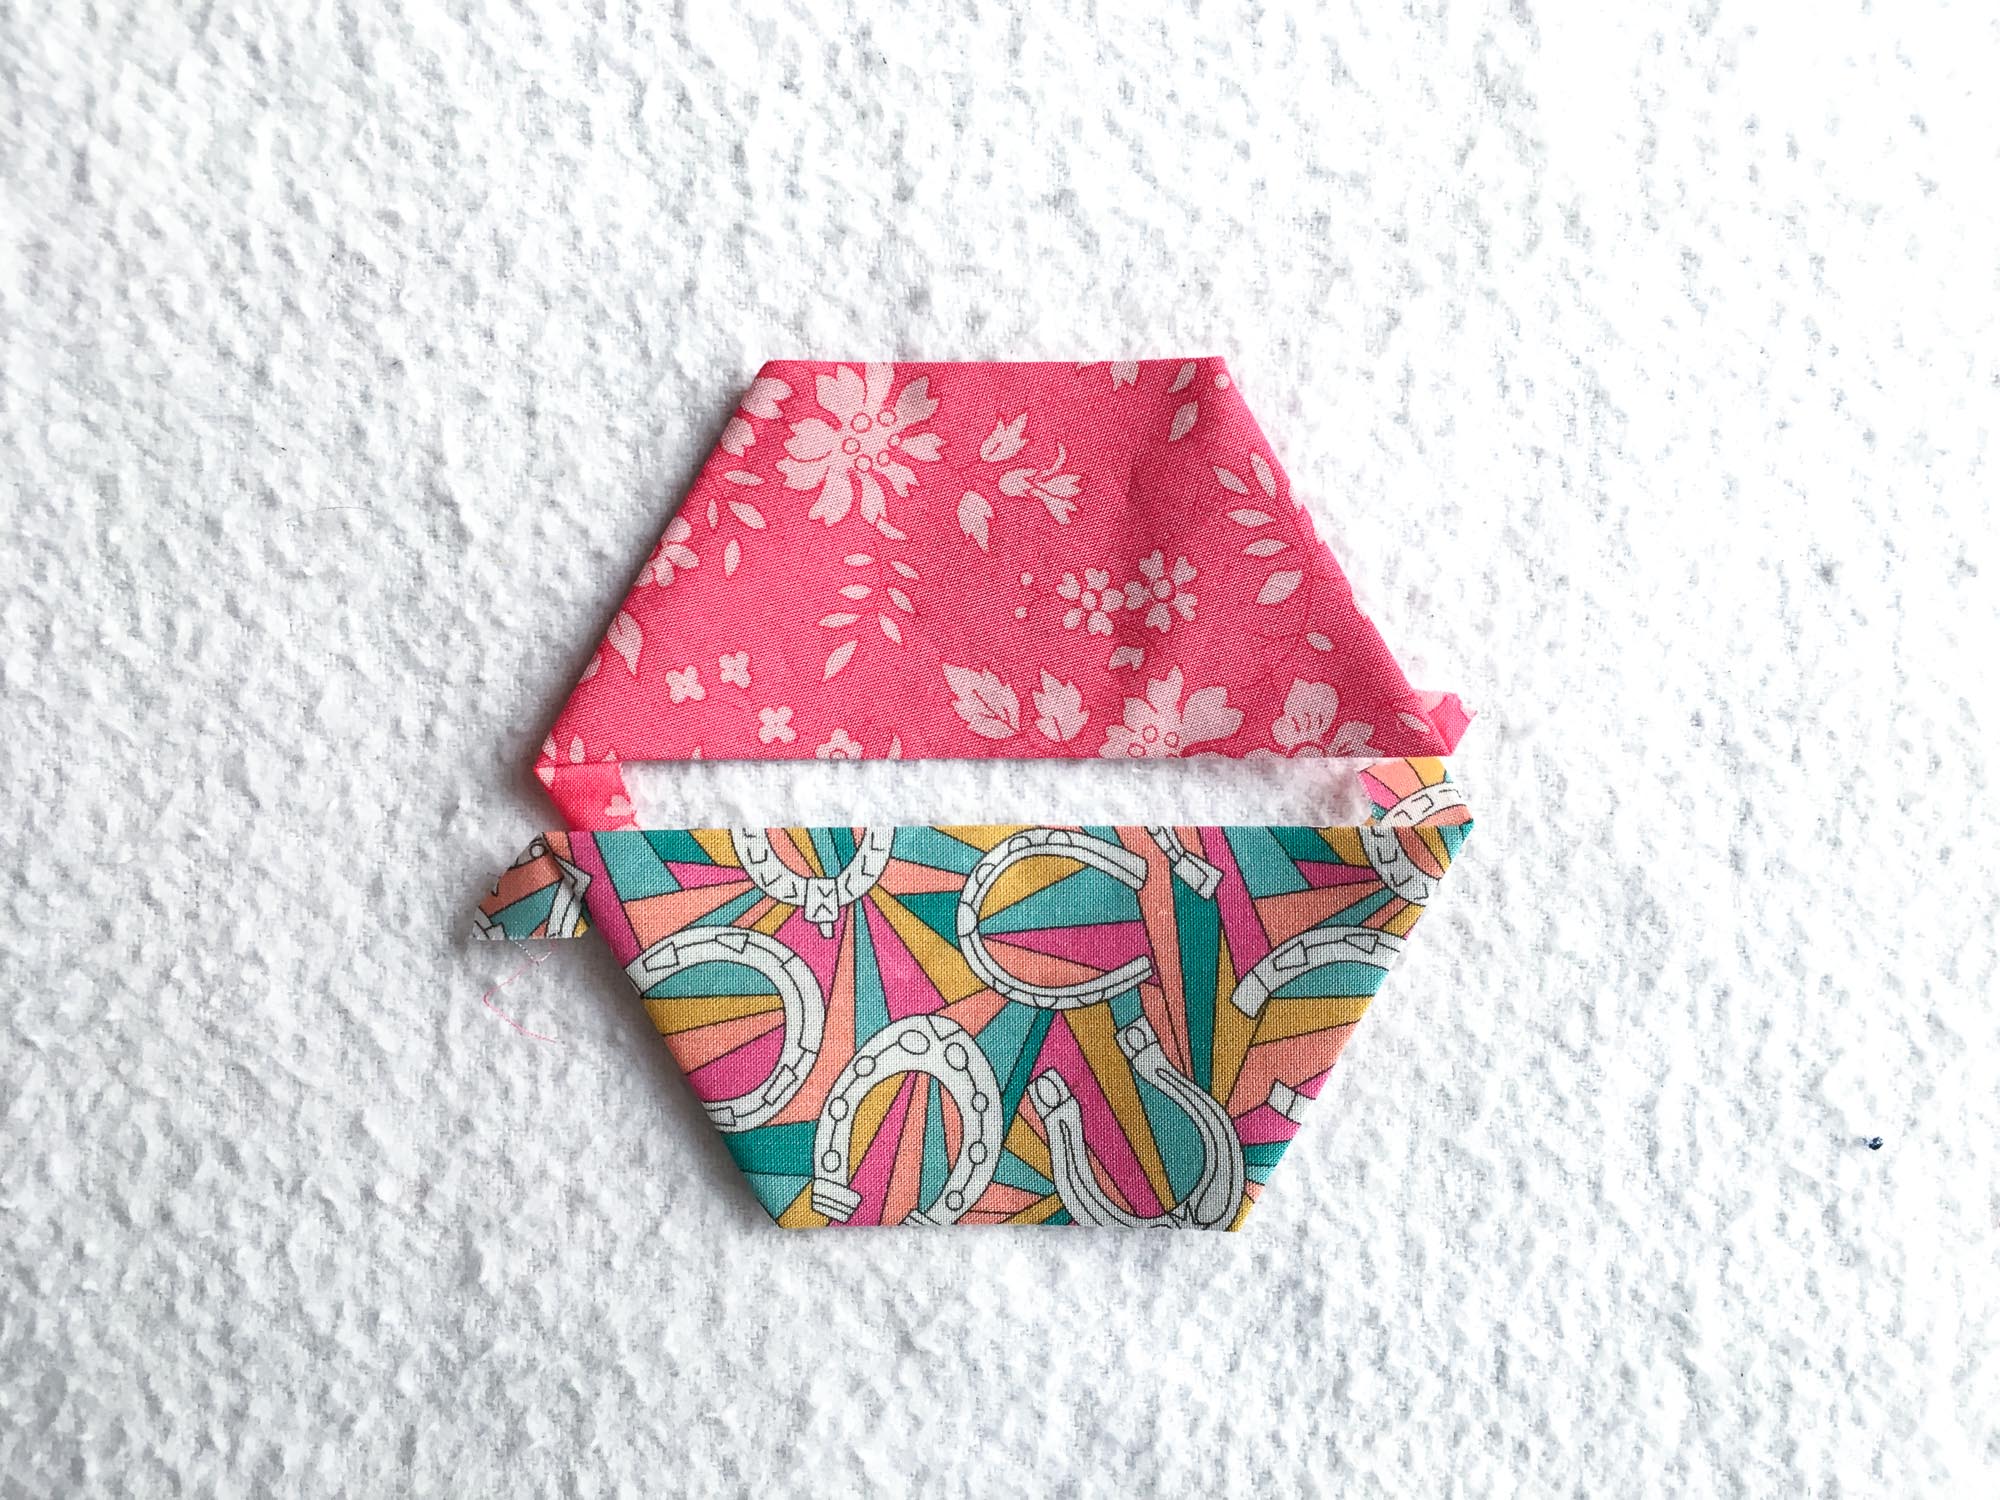
1. Begin by aligning two pieces for stitching.
2. Stitch the seam, securing at the beginning and end of it. (For a more detailed description of this process, check out the EPP Primer: Stitching post.)
3. Align two more pieces for stitching.
4. Repeat steps 2-3, leaving a short bit of thread between pieces.
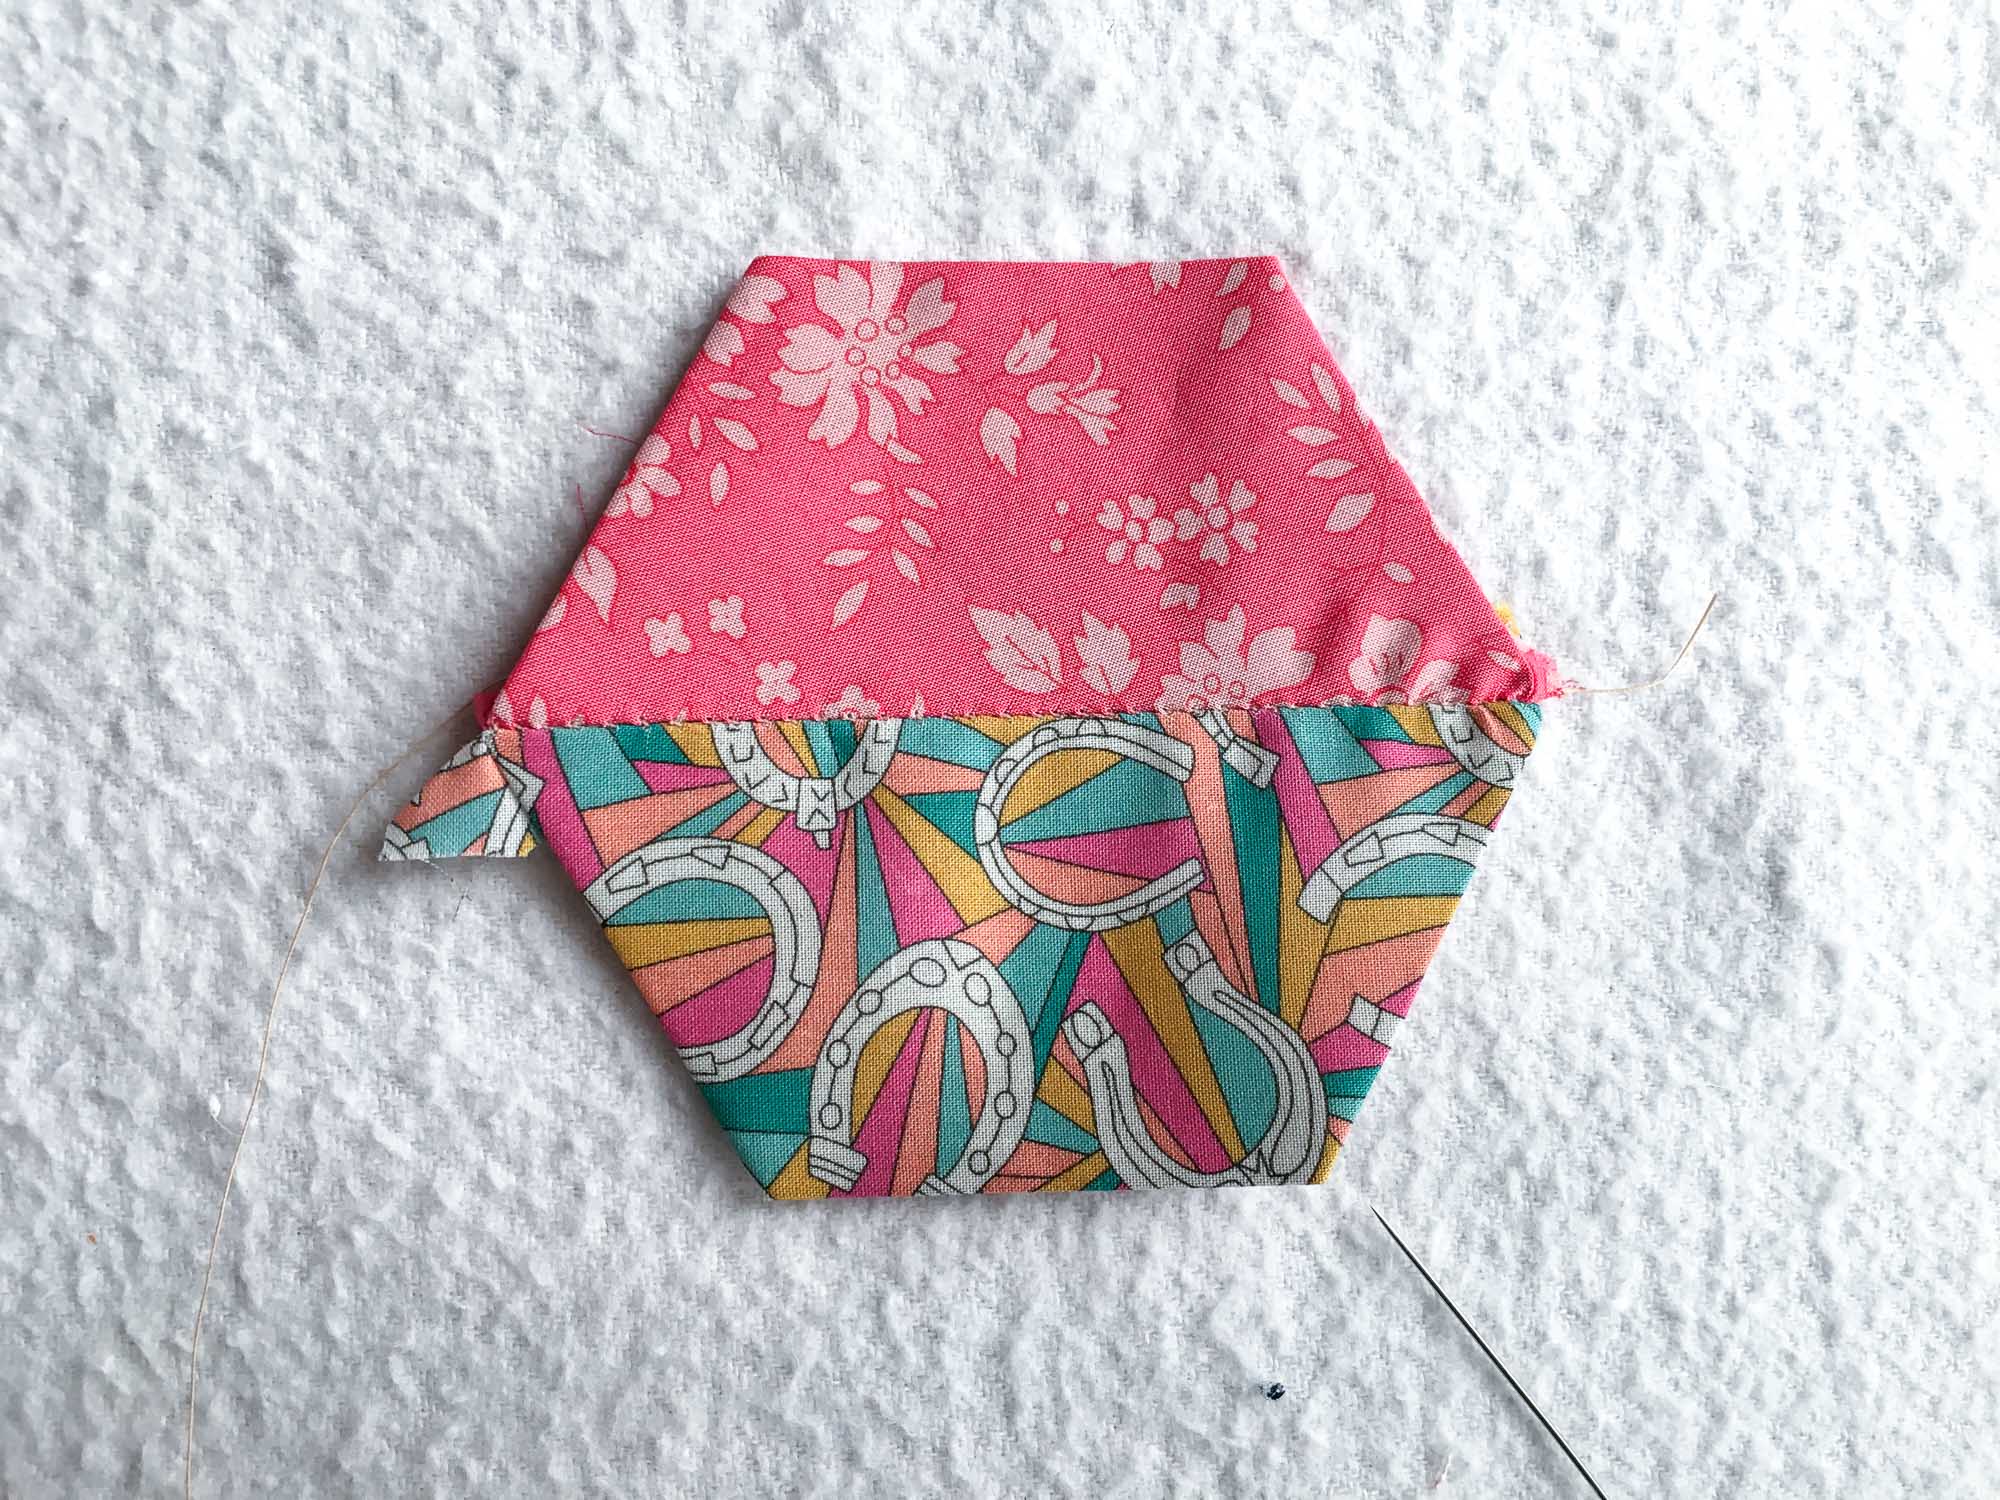
5. You’ll see a “chain” begin to form.
6. When you get to the end of your thread, clip each pair of pieces free from each other, and unfold.
Woohoo! So much more efficient than stopping and starting over after each seam.
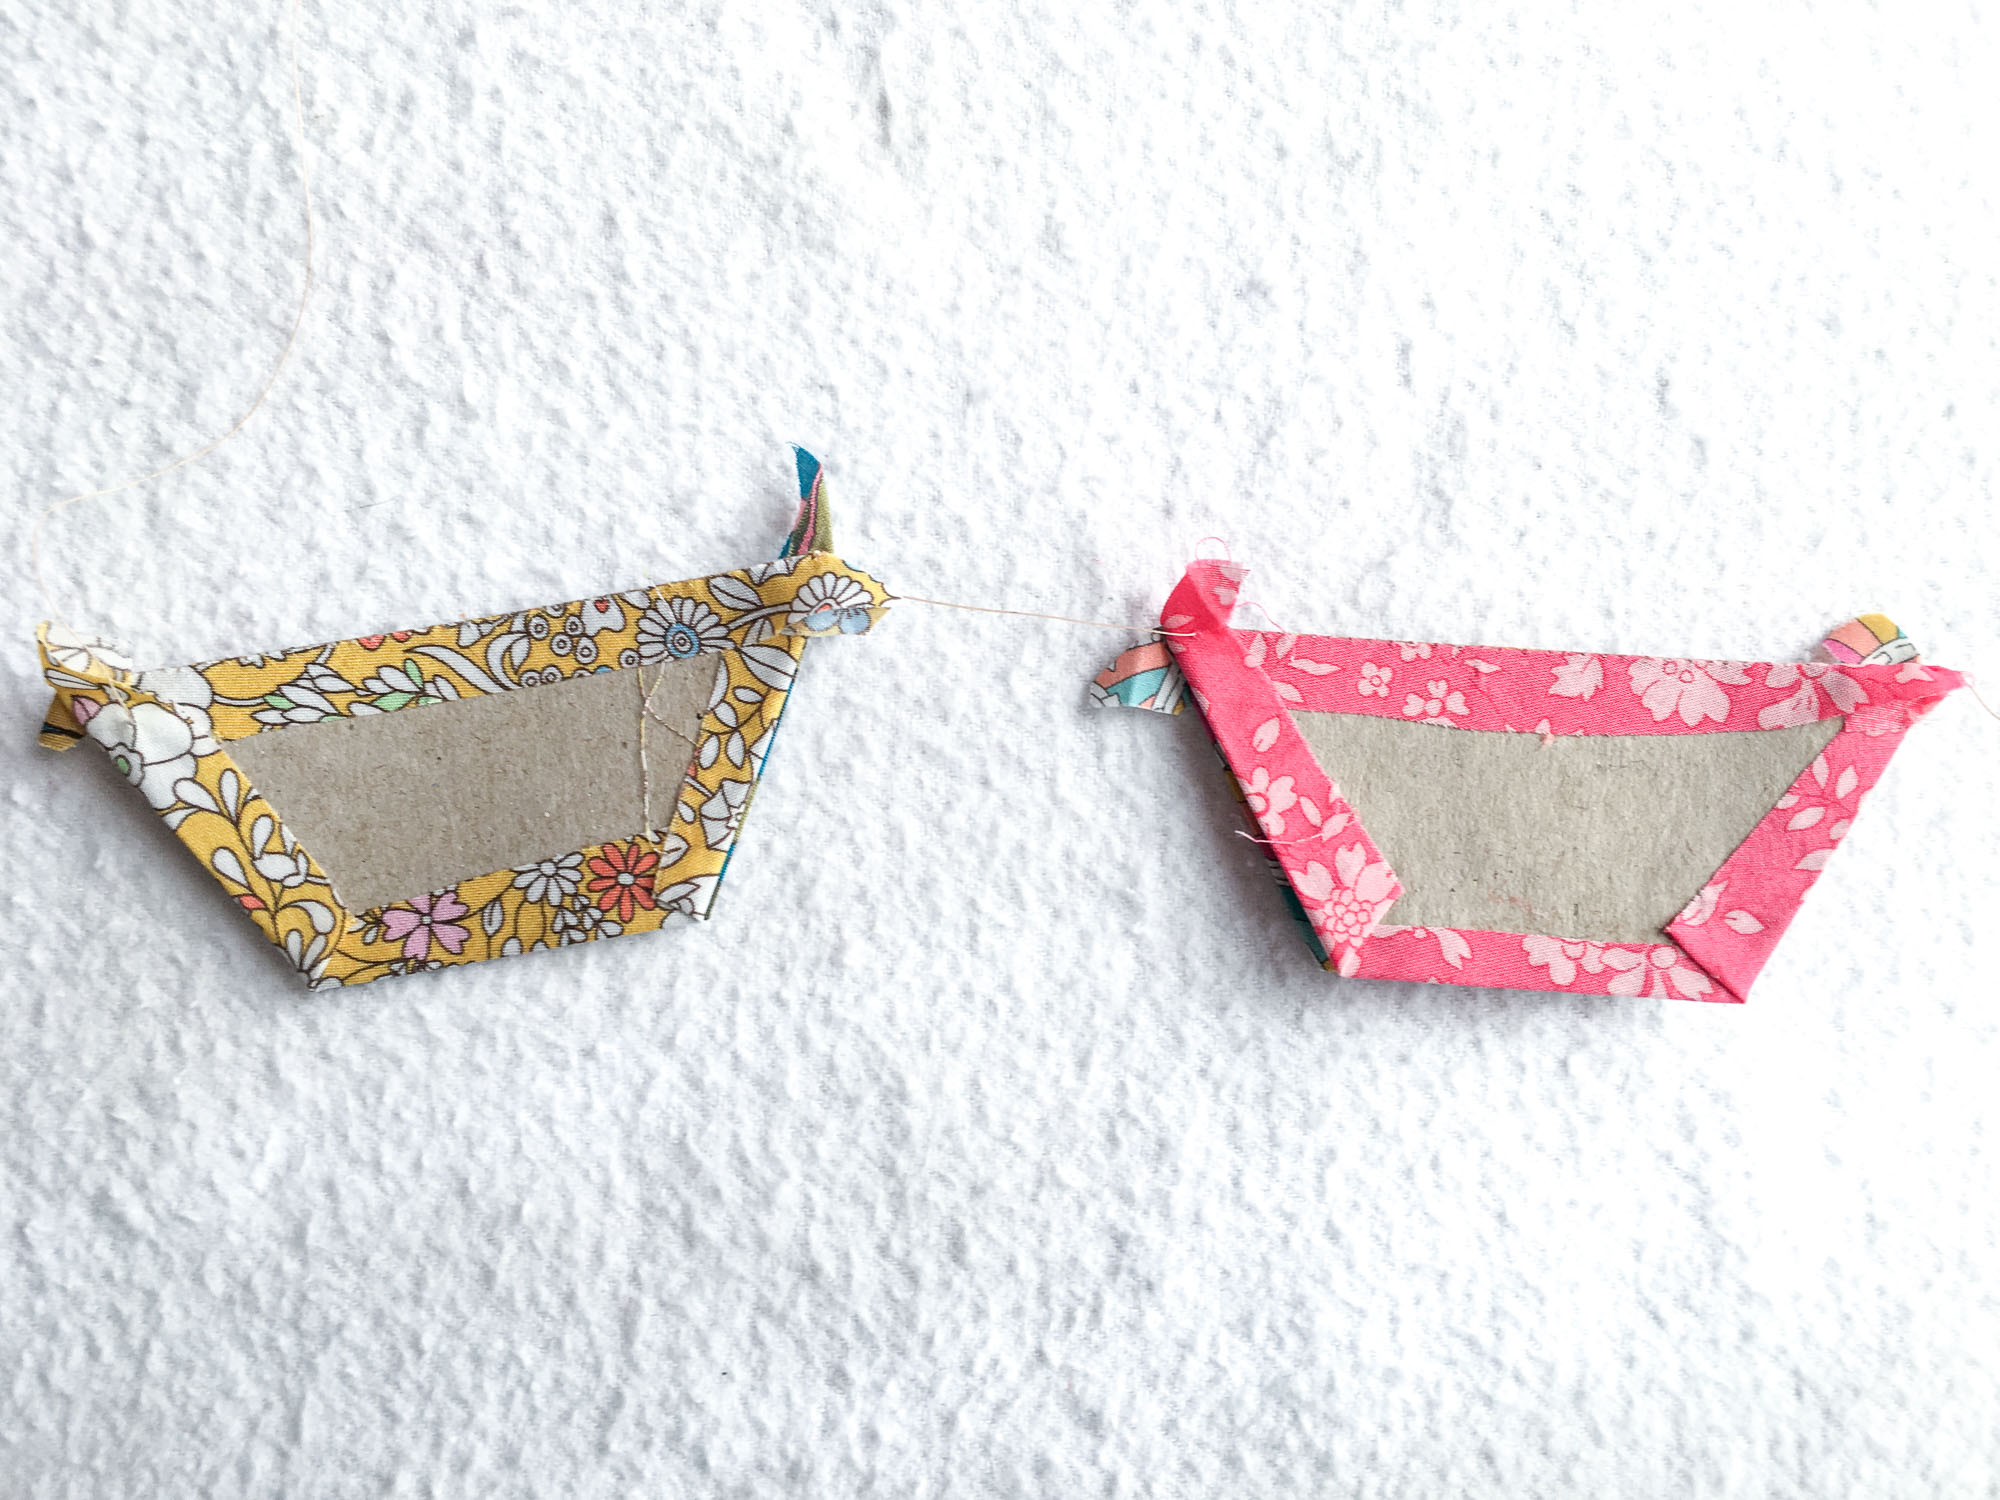
Stitching Continuous Seams
This definitely works well for only stitching two pieces together at a time. However, you can also implement this method when there is a continuous seam where more than one piece can be attached one after another. The “chain” part is the same, but I thought it might be helpful to depict the process with photos, as well.
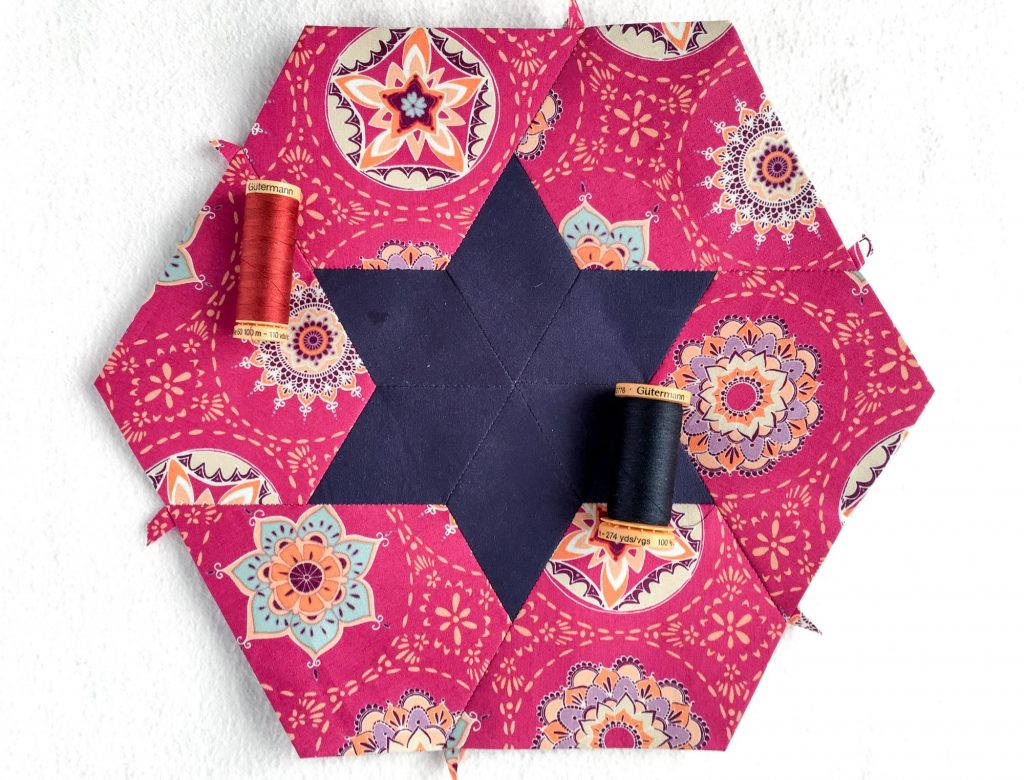
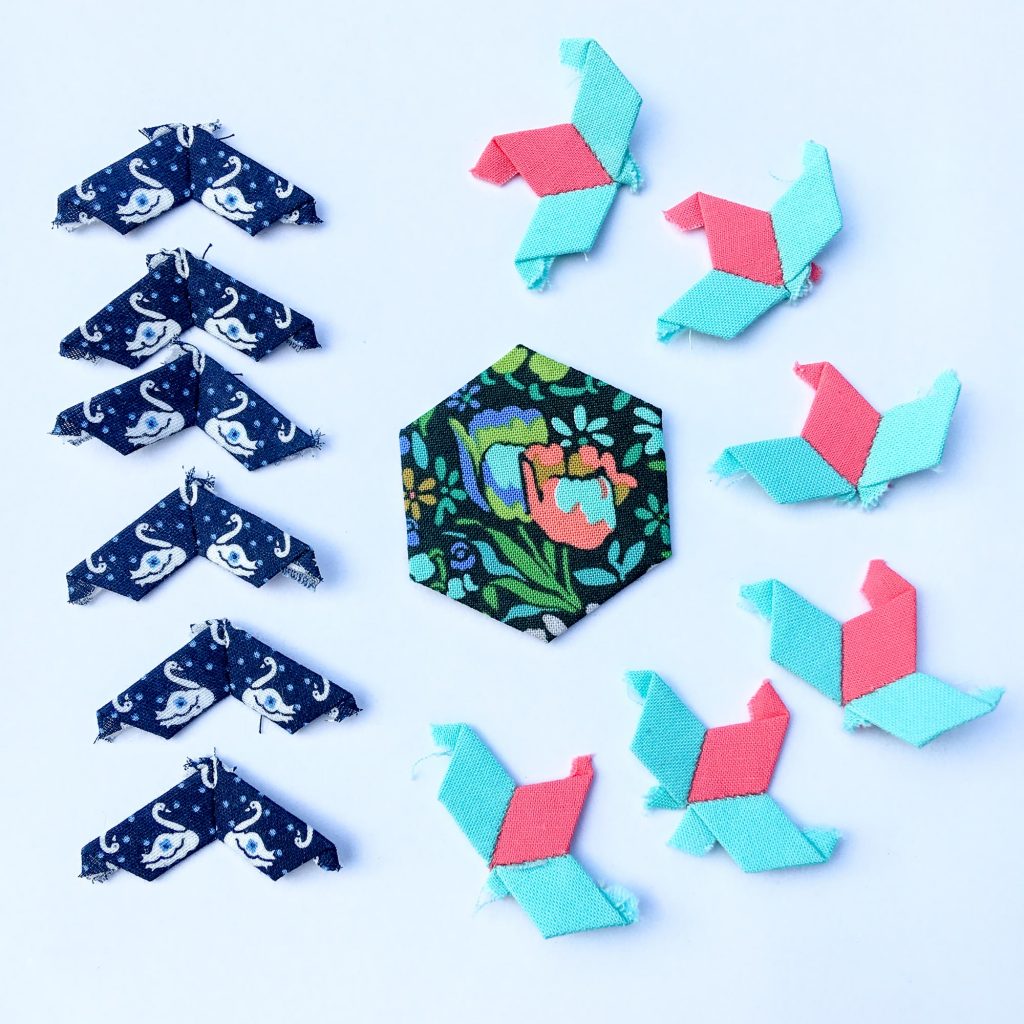
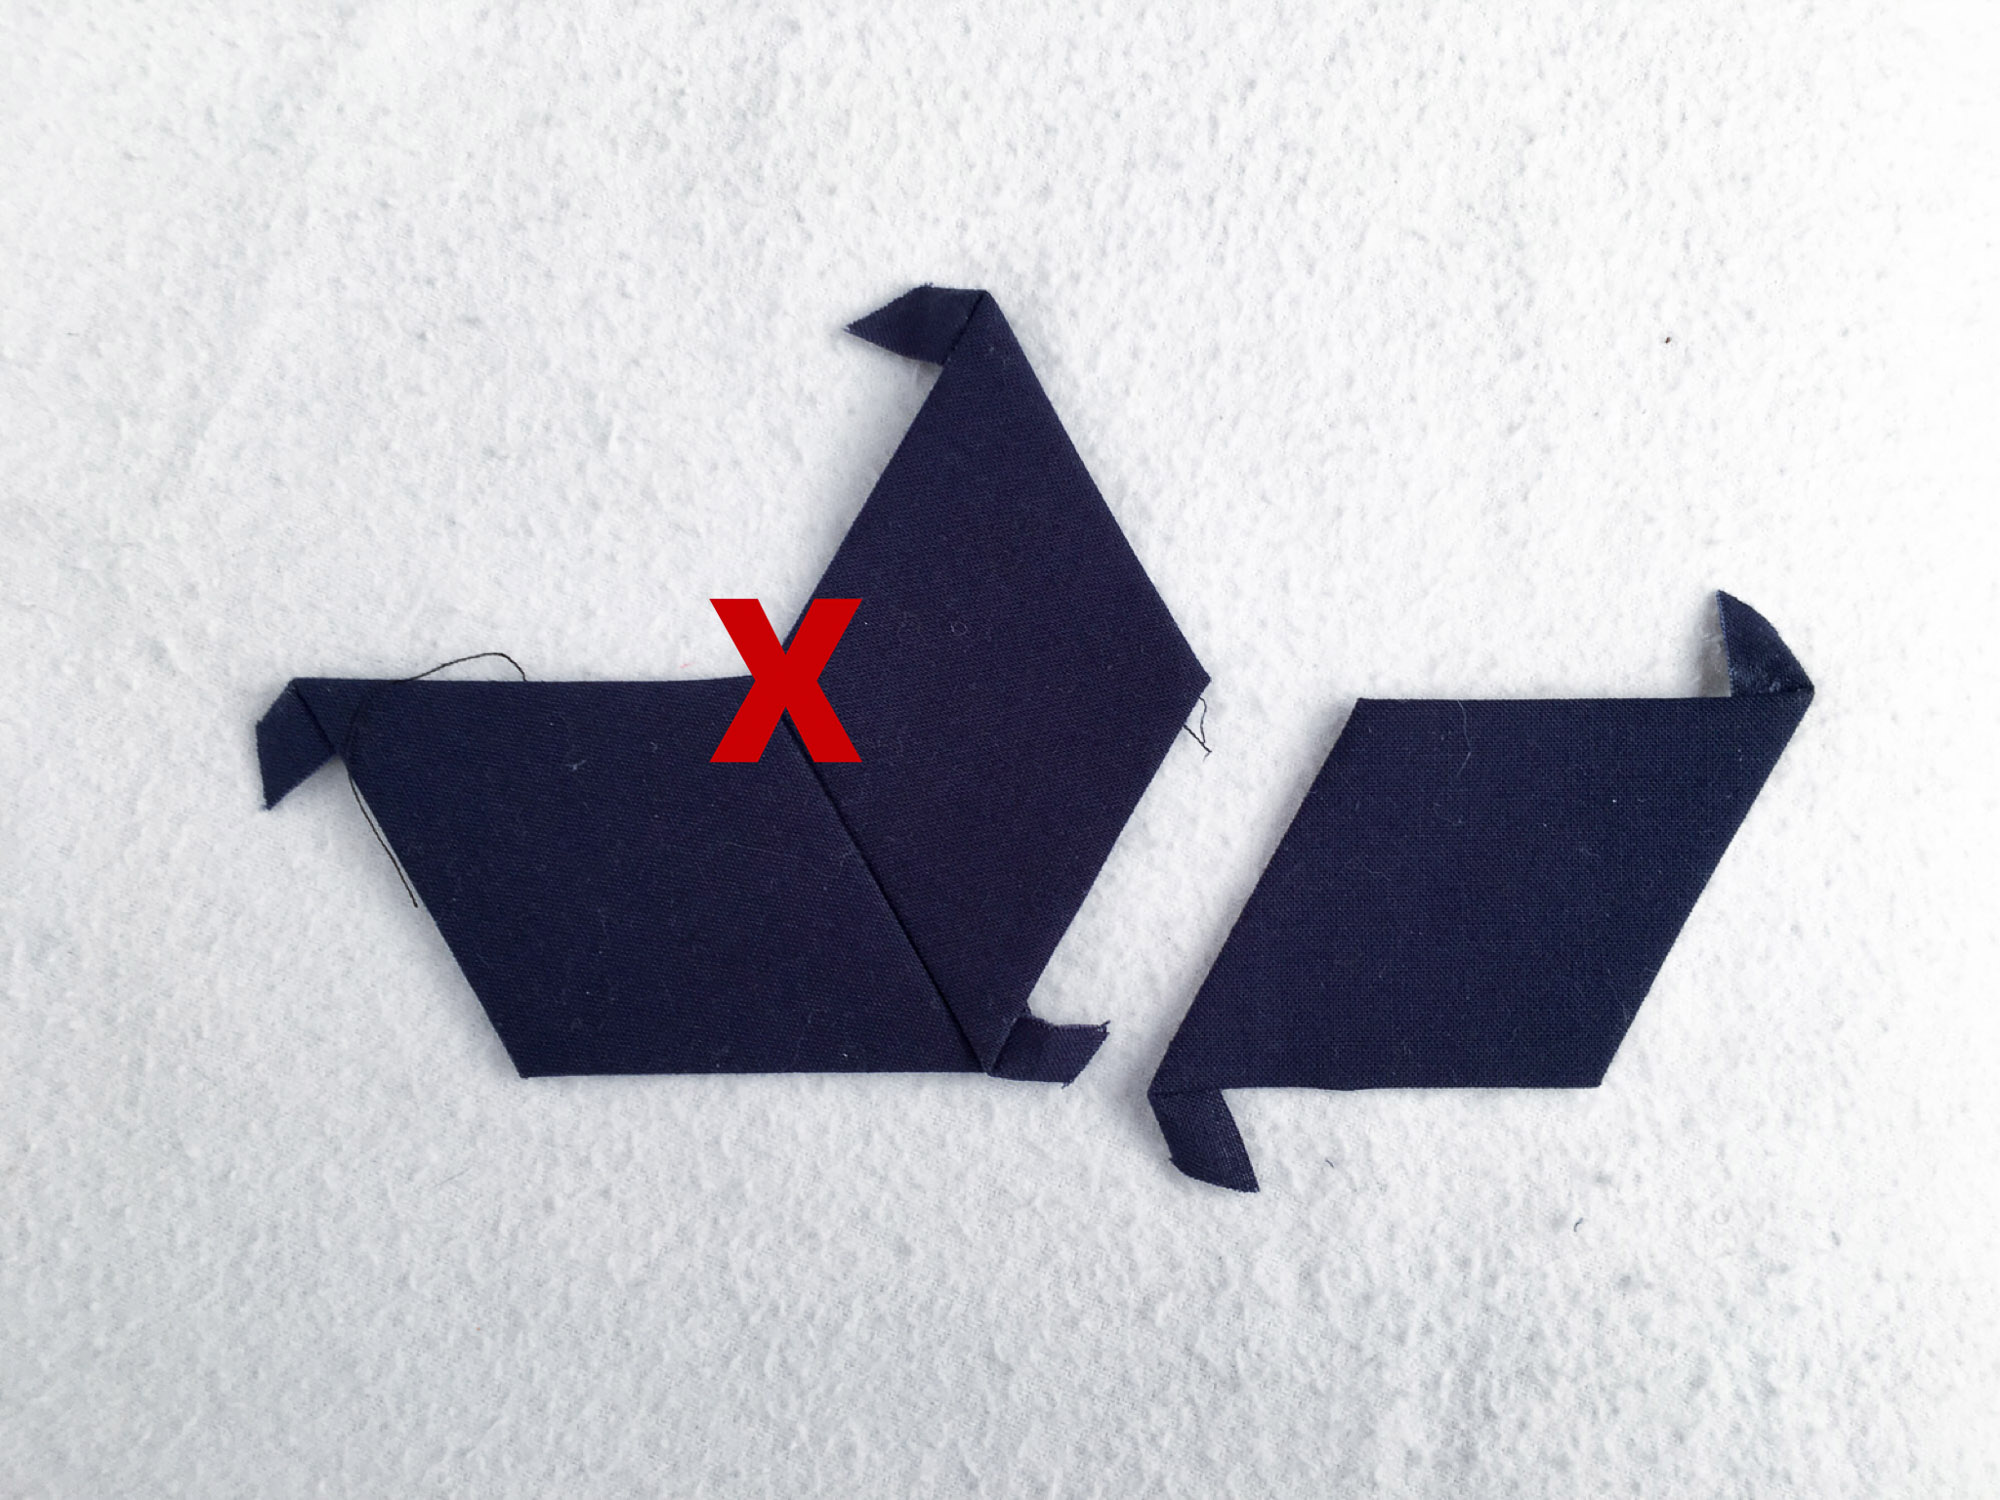
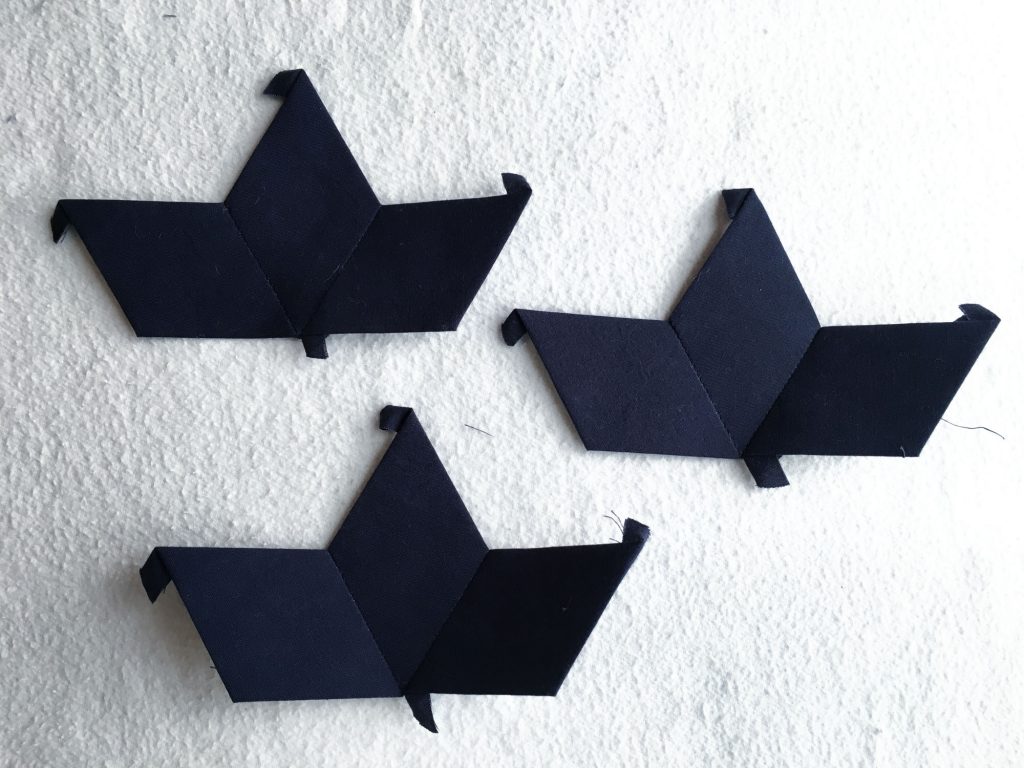
1. Align your pieces in their proper arrangement to create a block.
2. To create this half star, we will be following the “V” seam along the bottom two edges of the central diamond.
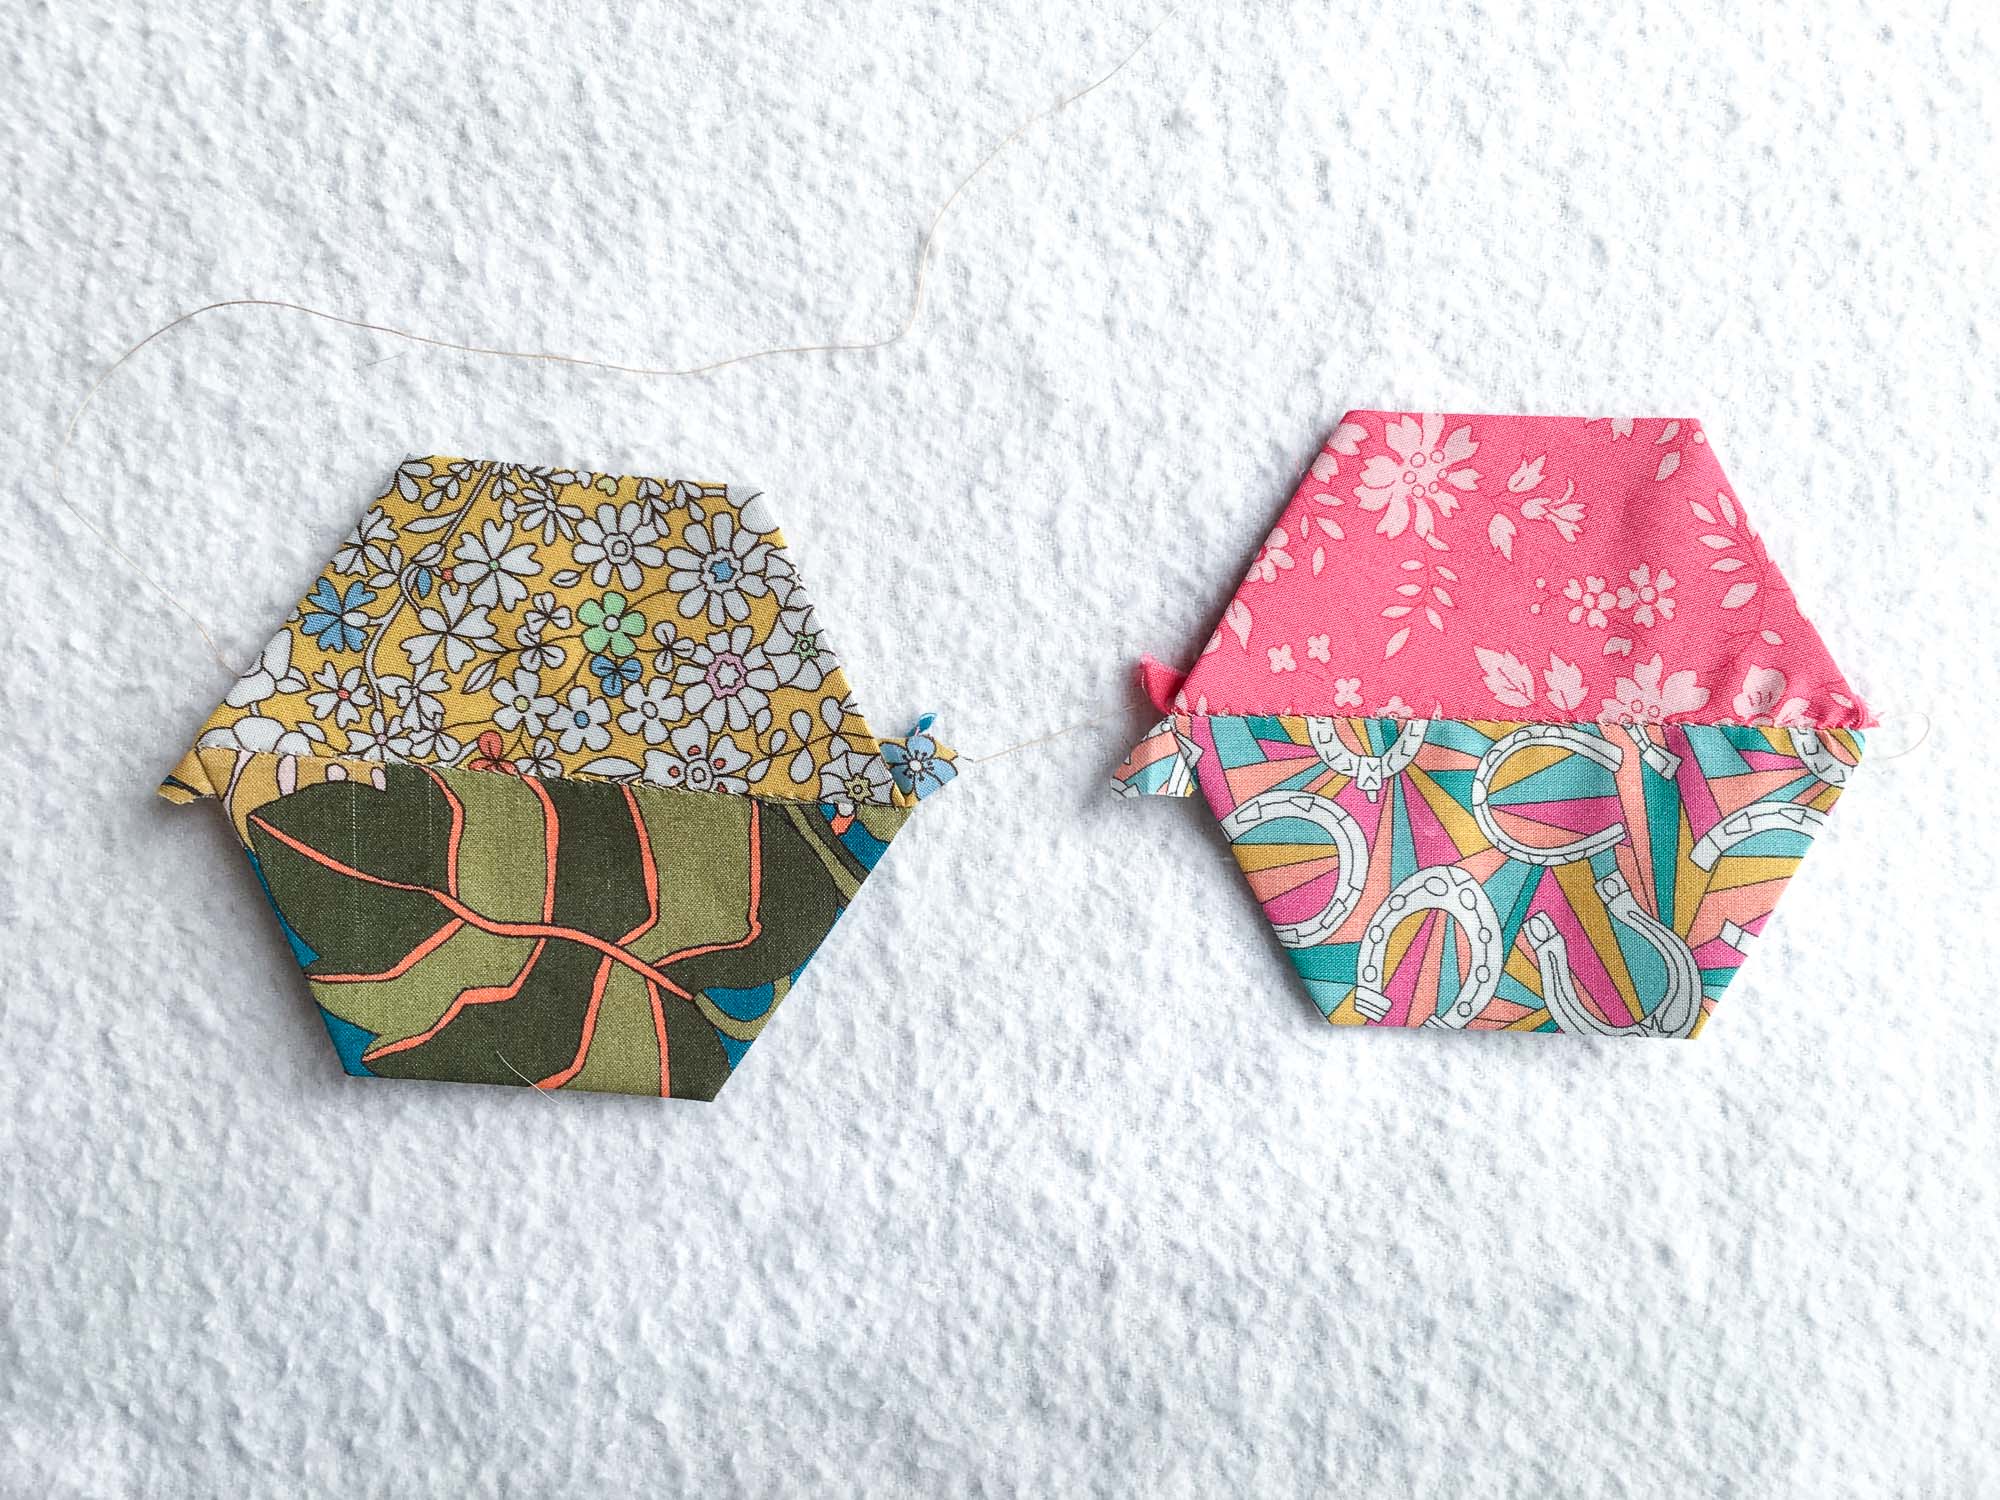
3. Begin by focusing on the left two pieces. Align these for stitching. (Of note: begin with the end of the seam that corresponds with the top of the “V”.)
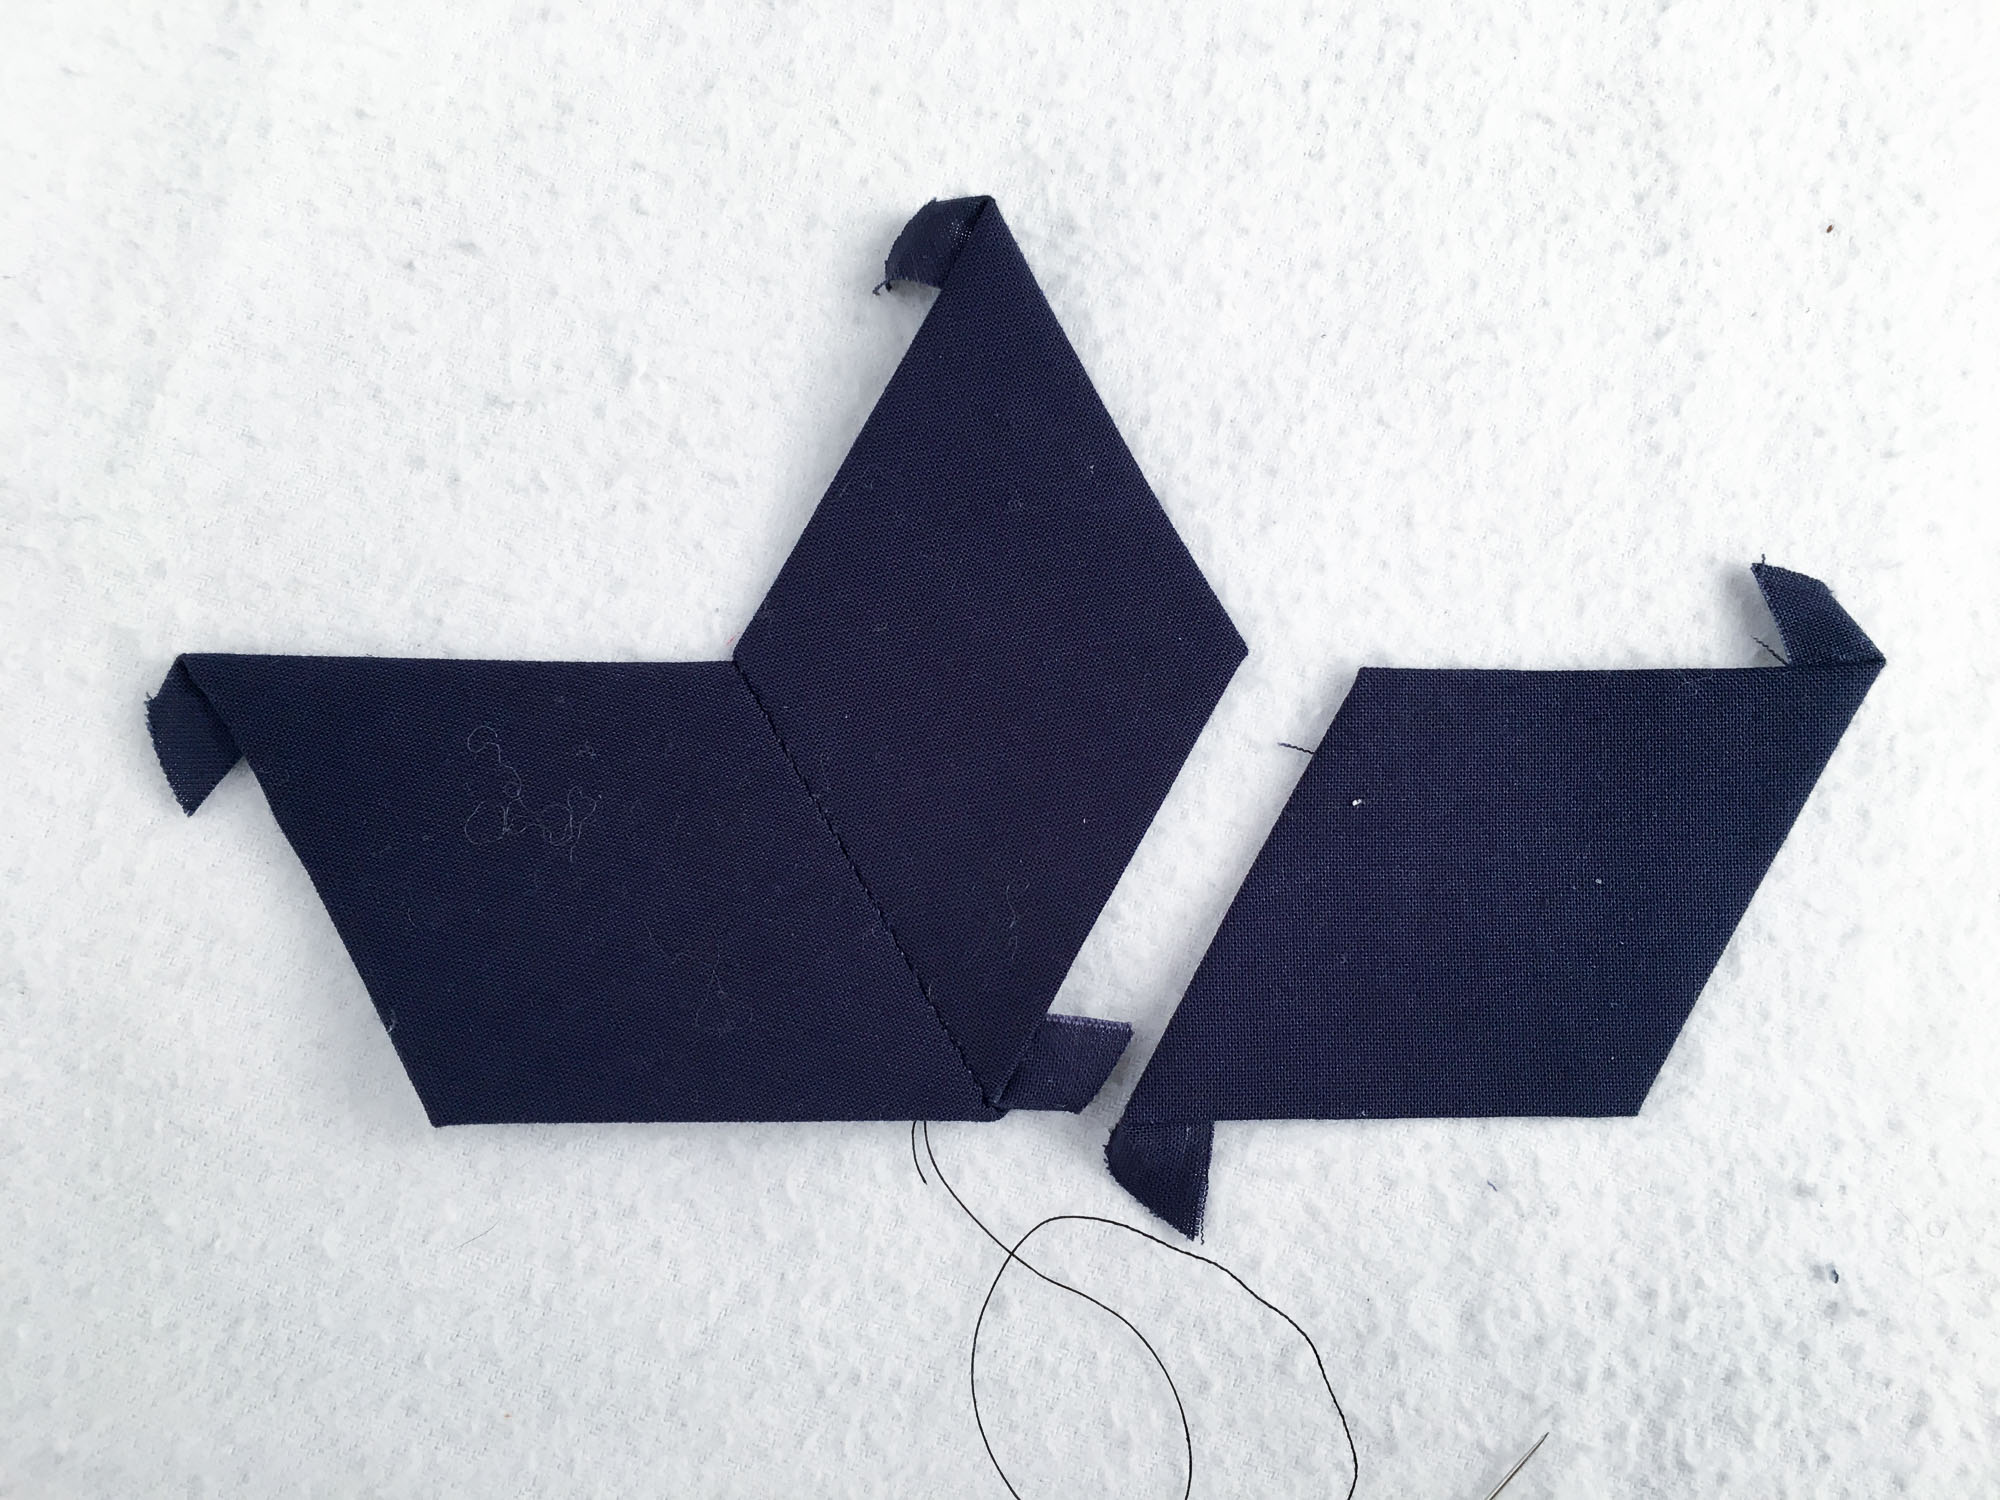
4. Stitch this seam, securing at the beginning and end of the seam. Now, without breaking the thread, align the third diamond in place.
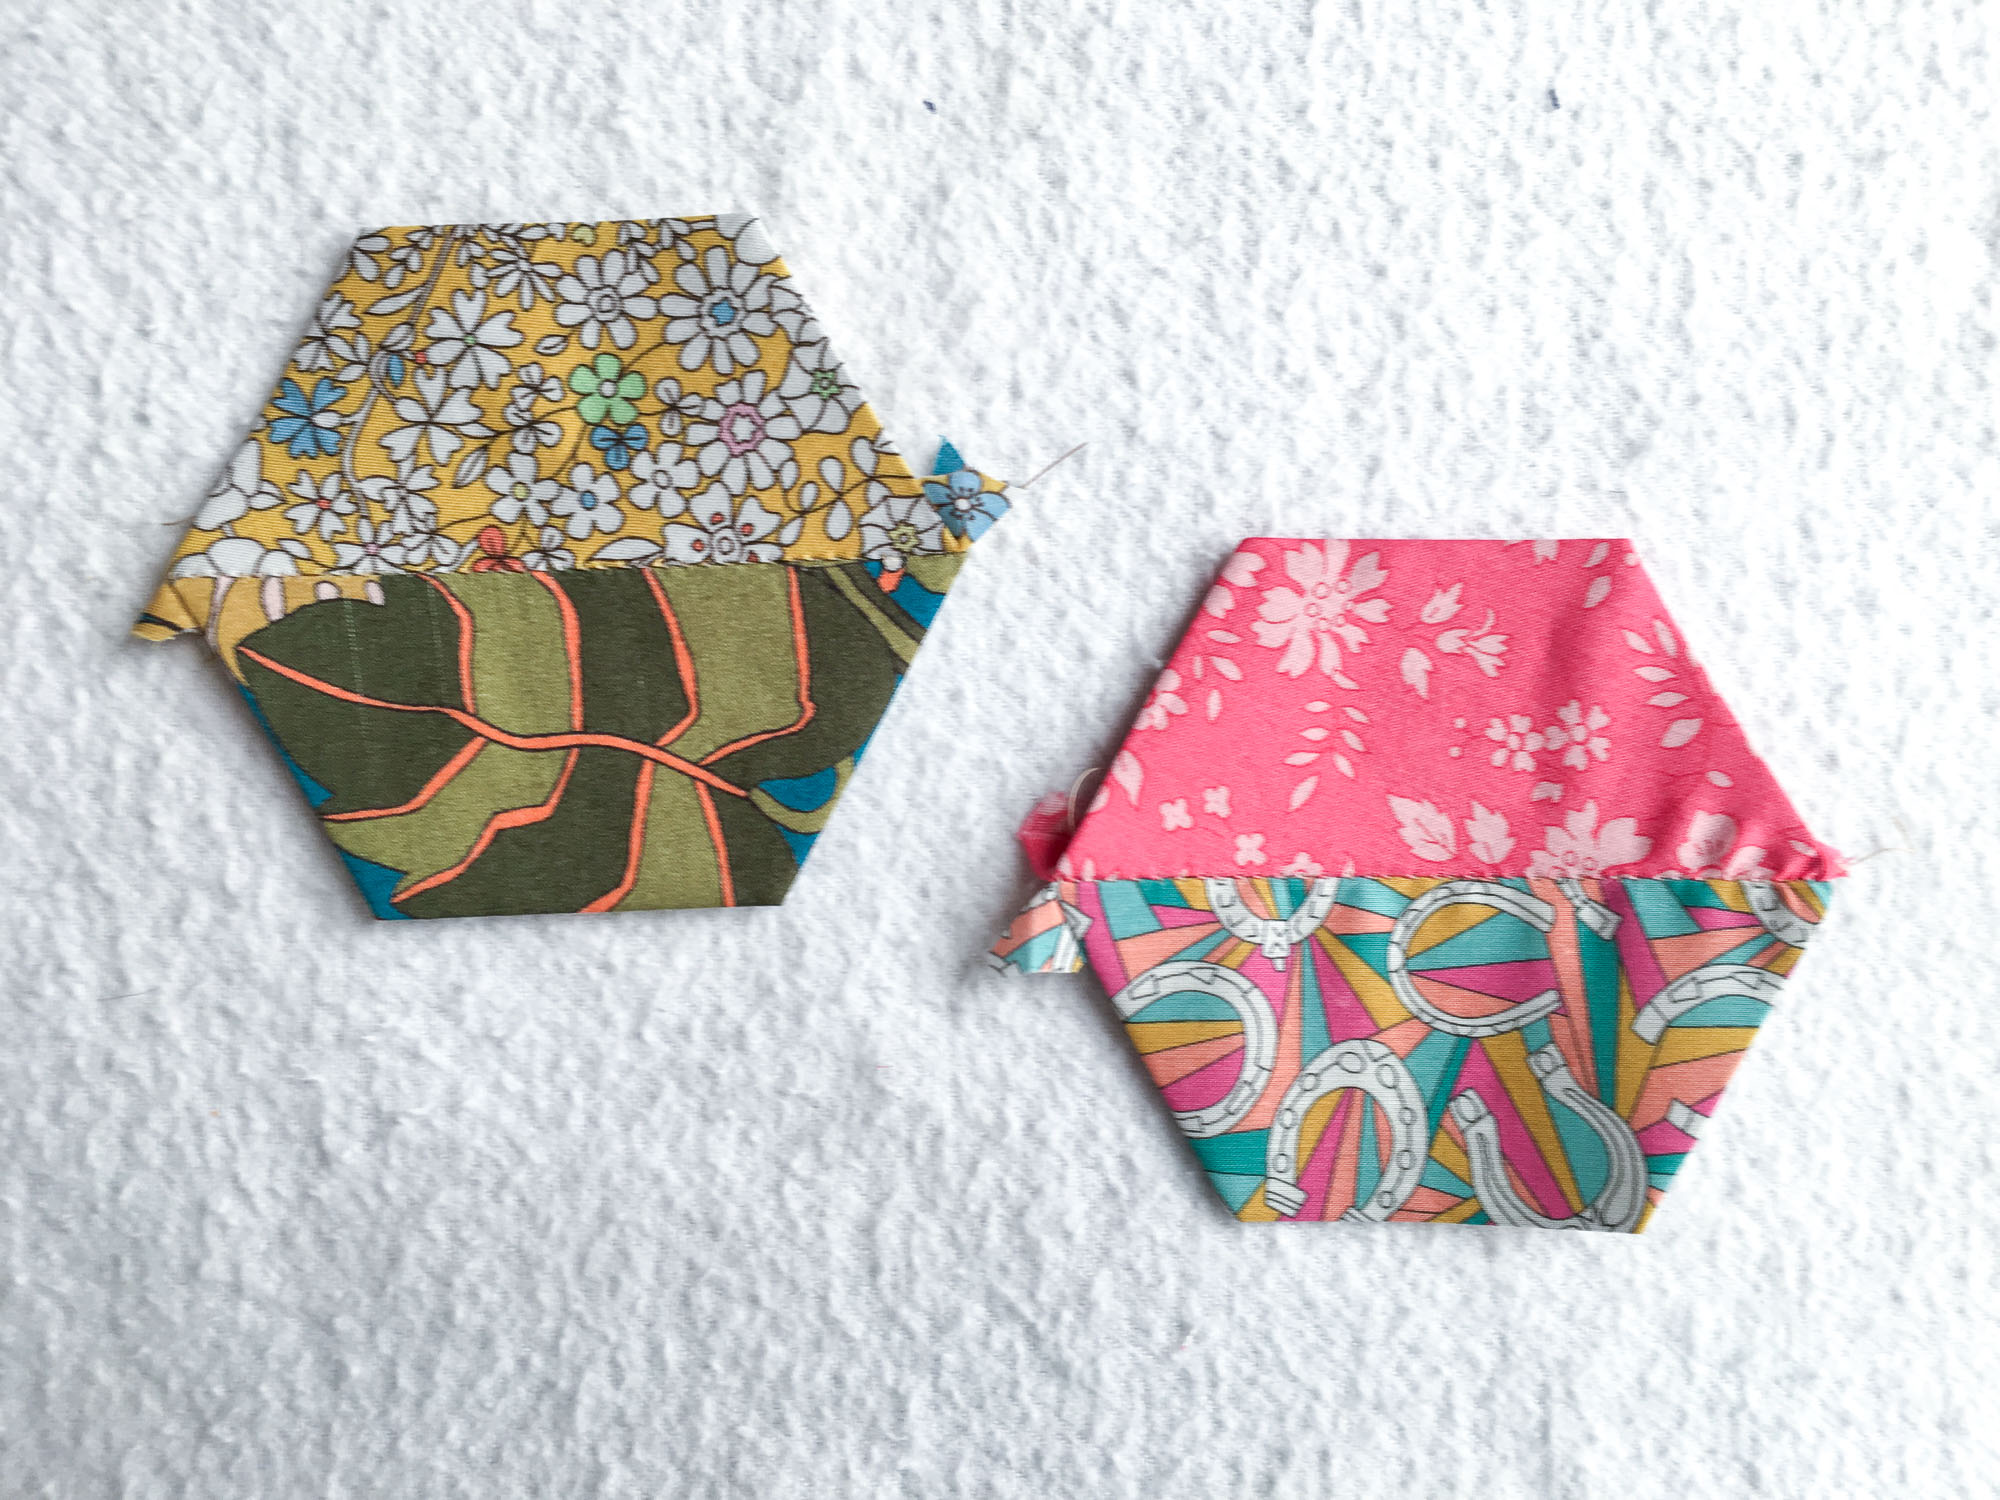
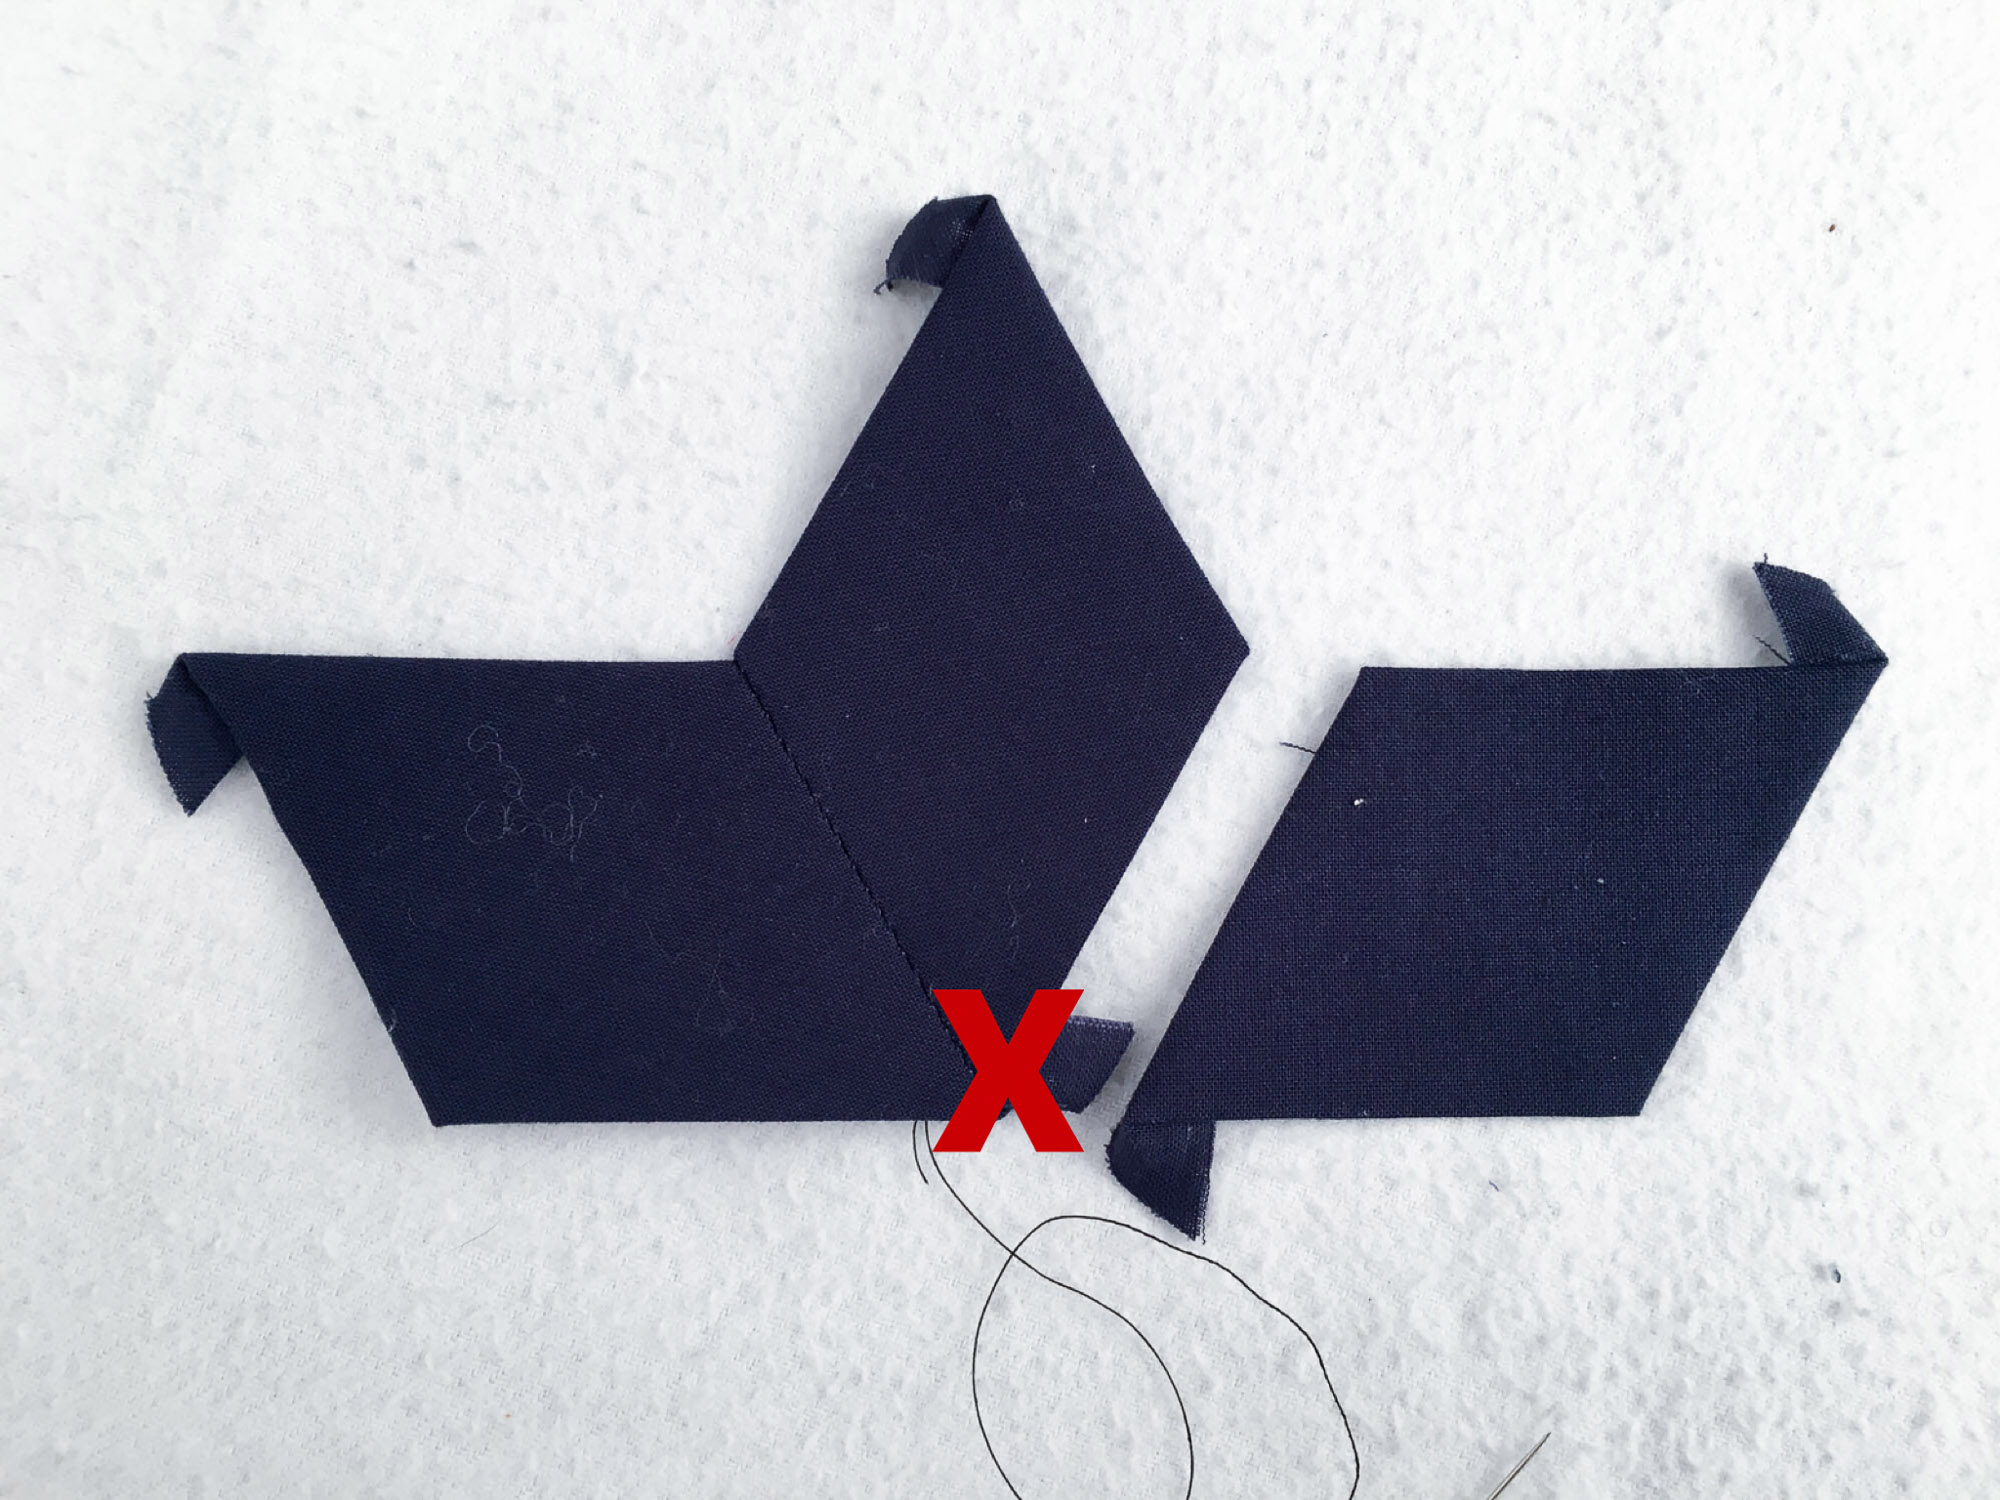
5. Stitch this seam, securing at the beginning and end of the seam, to complete the “V”.
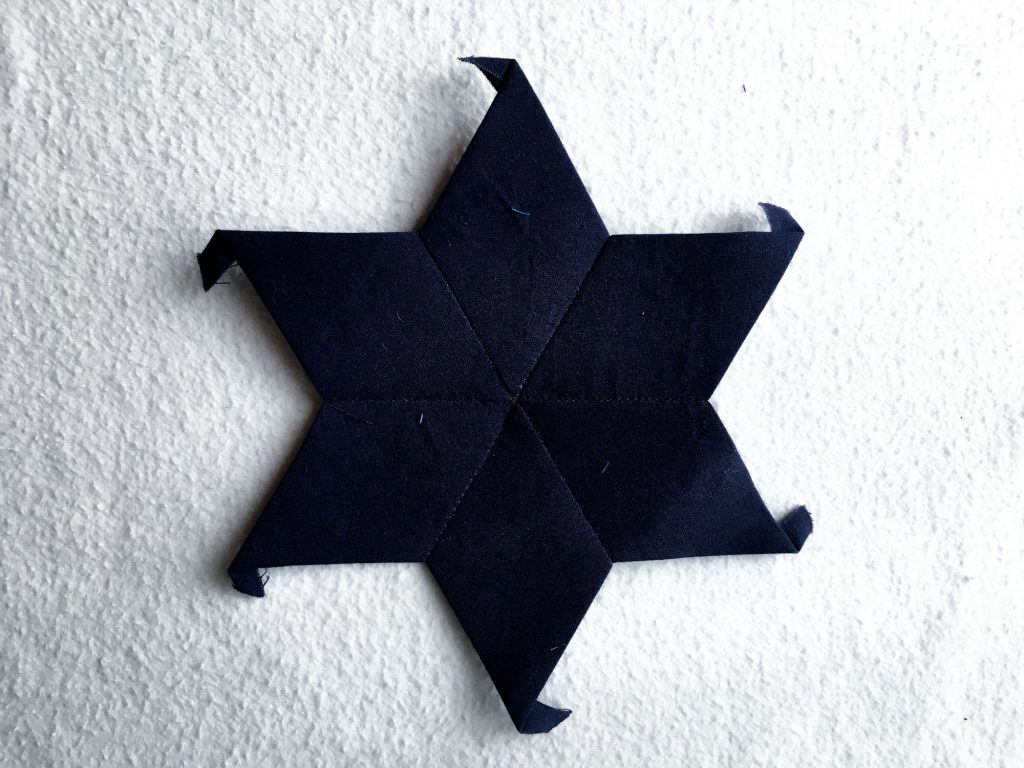
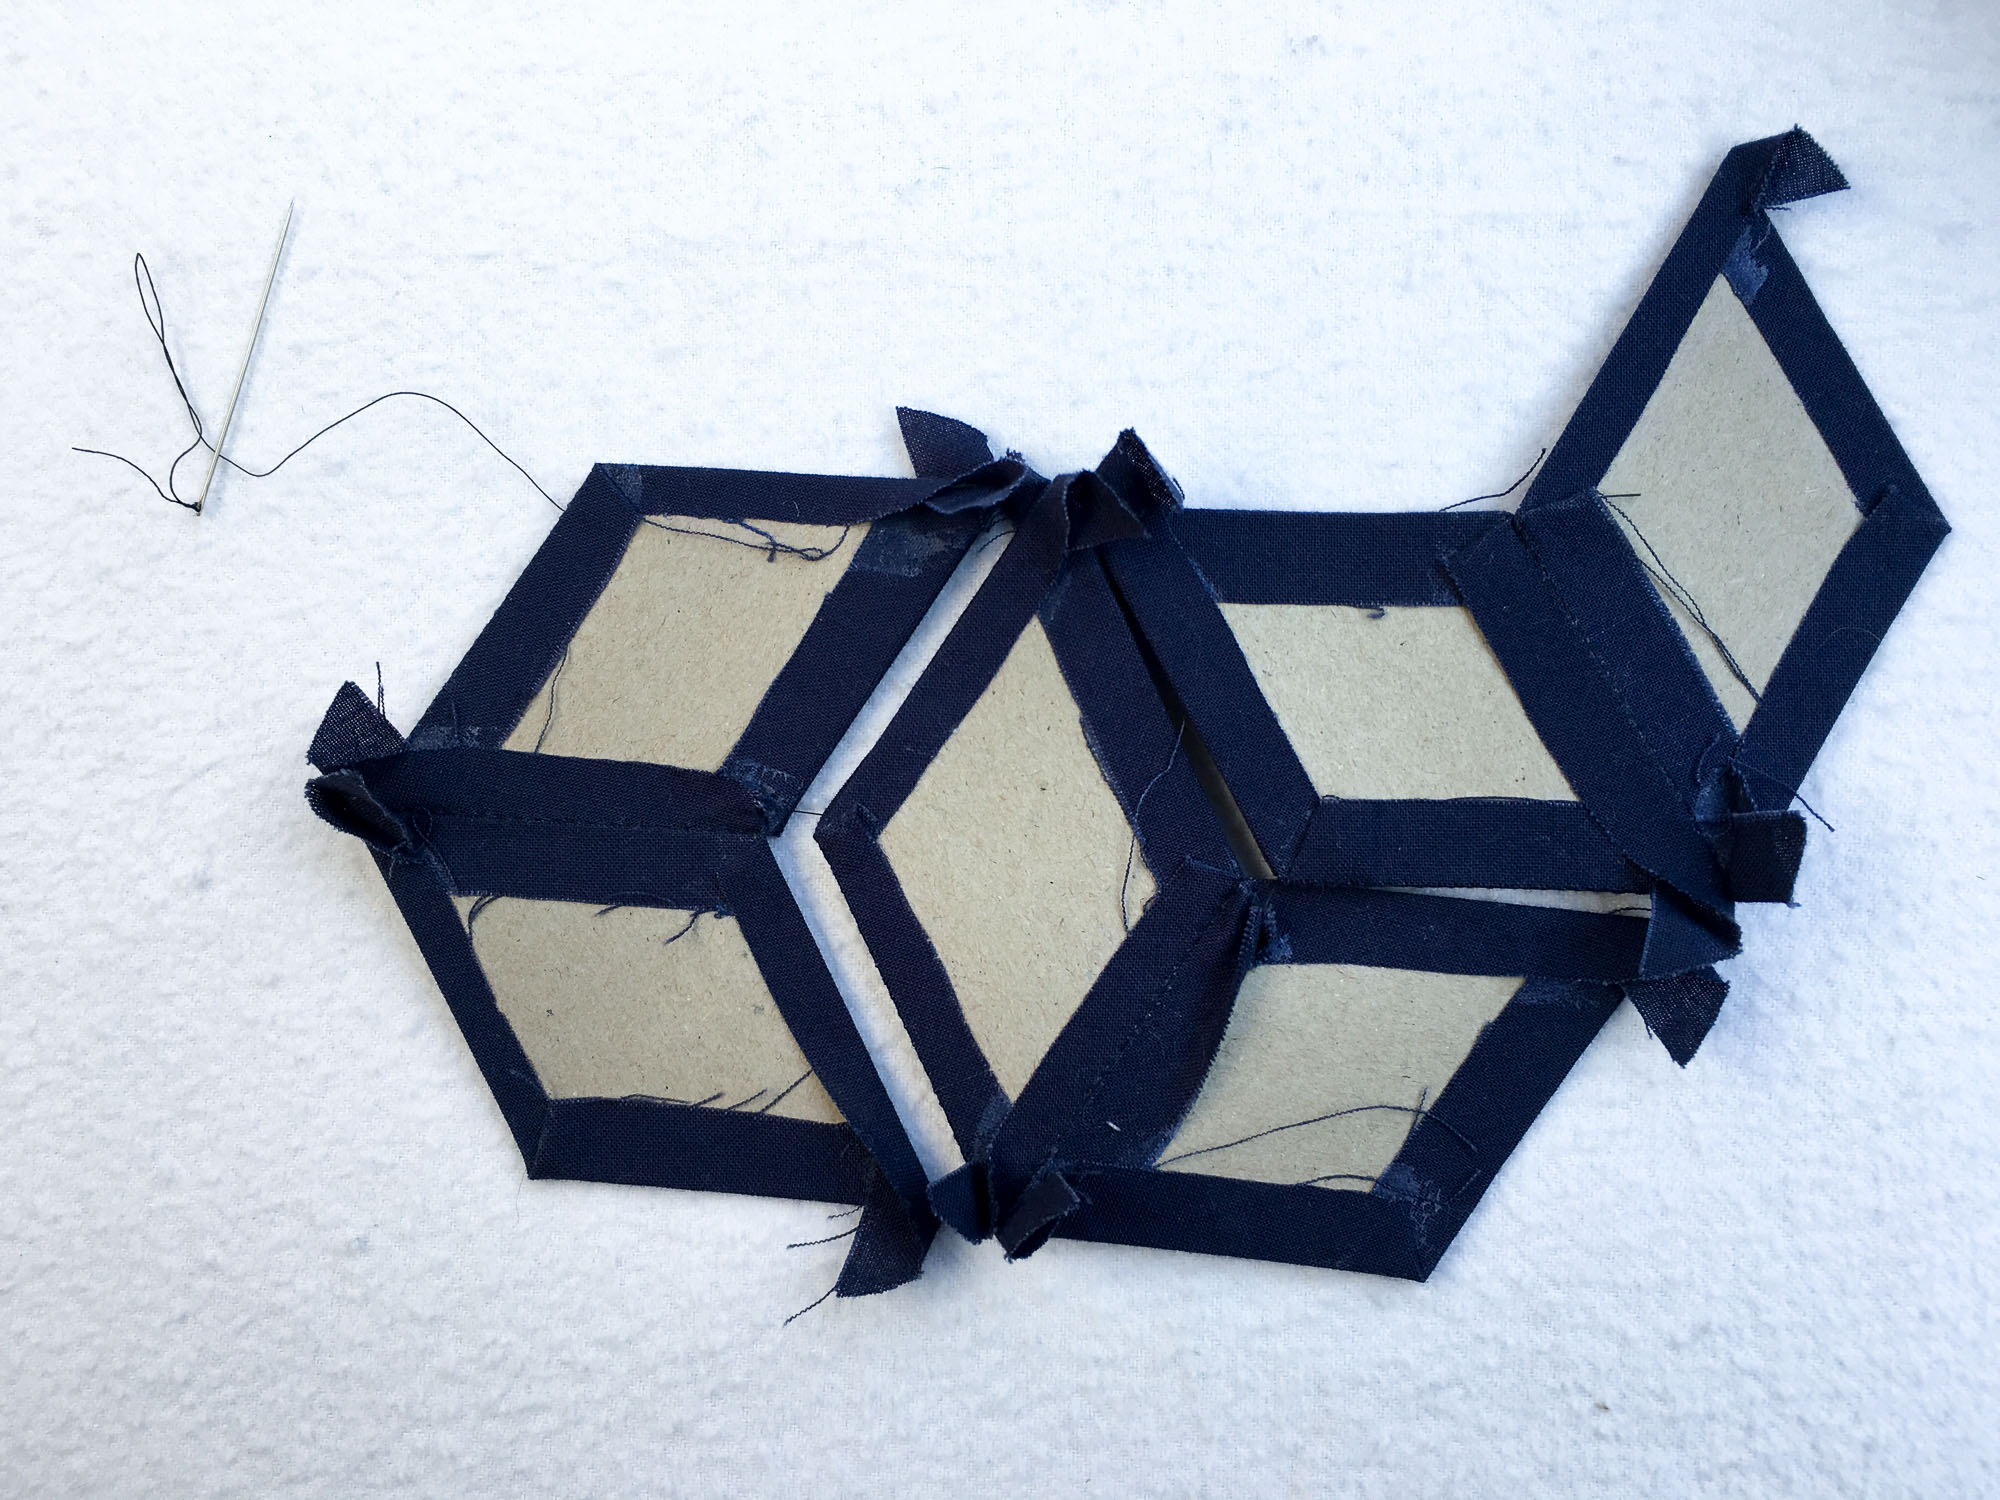
6. Now you have a completed half star! Repeat steps 1-5 for the next half, leaving a short bit of thread between pieces.
7. Continue this process until you reach the end of your thread. Clip each half star from each other, and unfold.
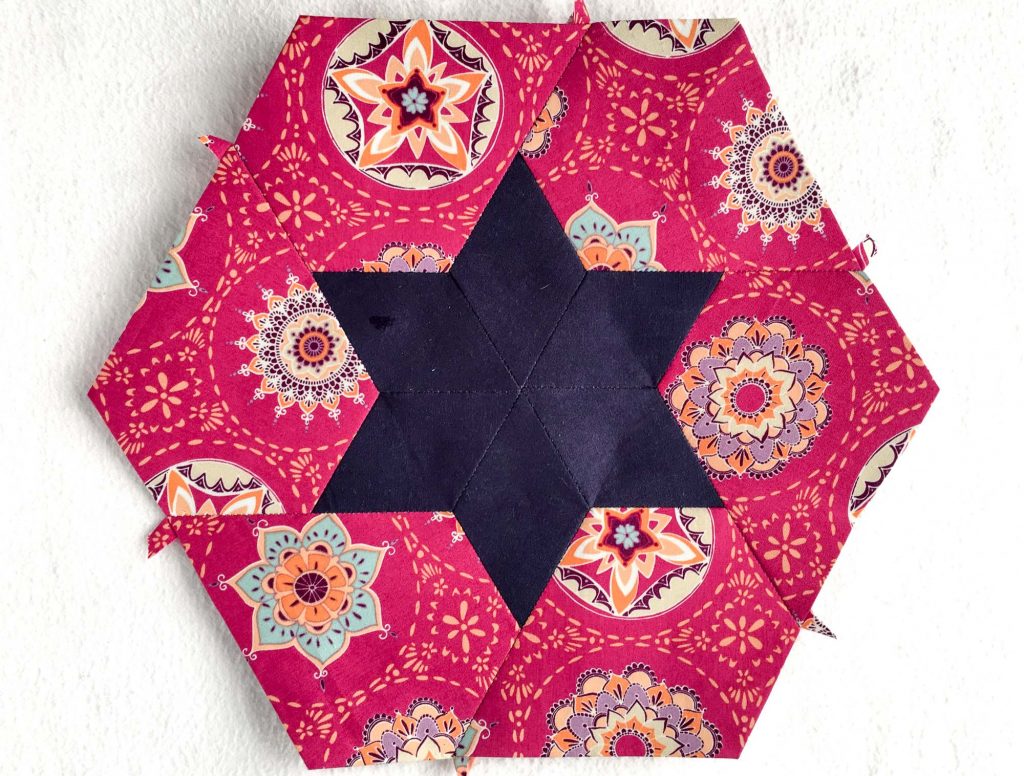
Well done! You can utilize this process to join all of the half stars together, as well. So efficient, right??
(And, if you enjoyed these stitching tips and tricks, be sure to check out a few my favorite EPP hacks in this post!)
What to Expect in the Next Section
I hope that a few of these tidbits will prove helpful to bring a bit more style and efficiency to your stitching life. But, as always, I hope that it frees you up to lean in to the joy and healing of creativity.
In the next and final installment of this series, EPP Pro: Keeping Track of It All, we will wrap things up with a little word on staying organized and keeping track of your EPP in order to maintain motivation and allow space for new inspiration.
Until then, happy stitching!
For future reference, you can always find all of the sections of the EPP Pro series here. Or you can use these handy pins for easy access from Pinterest.
This post may contain affiliate links. You can read my affiliate disclosure here.


2 Responses
Love your explanations .thank you
Oh thank you, Jocelyn! I’m so glad!