This is probably my favorite part of EPP, the stitching. It is rhythmic and mindless, yet you have something beautiful to show for your effort and time. I remember my first experience recognizing the physical relaxation that I sensed while stitching during a particularly stressful season. It was the first time I made a direct connection between an activity and the literal physical tension release that accompanied it. I remember feeling so grateful. I still am.
Stitching has proven a steady friend when seemingly endless seasons of unpredictability have threatened to pull me under. It has become a language of expression when words have failed me. My quilts have become entries in a fabric diary, chronicling my journey. Stitching has been a life coach, a cheerleader, and a reflection back to me that I too was created lovingly with purpose and care.
I hope that as you begin to assimilate EPP into your canon of sewing that you also begin to experience the beauty, and even magic, of stitching.
So let’s get stitching!
Just a friendly reminder that you’ll want to have your pieces all basted and ready to go for this tutorial. If you missed the Basting section of this EPP Primer, you can find that here. Not even sure where to begin? You can find a handy starter supply list here. Don’t forget that I created a FREE printable hexagon template that you can have delivered straight to your inbox here!
One last thing before we begin. I have endeavored to create as aesthetically pleasing a layout as possible with this post in order to enhance readability. As such, desktop users will notice that each step of the tutorial is staggered with an alternating text block and image. If the images appear too small at any time, simply click on the image and a full scale version will pop up.
Stitching Your First Seam
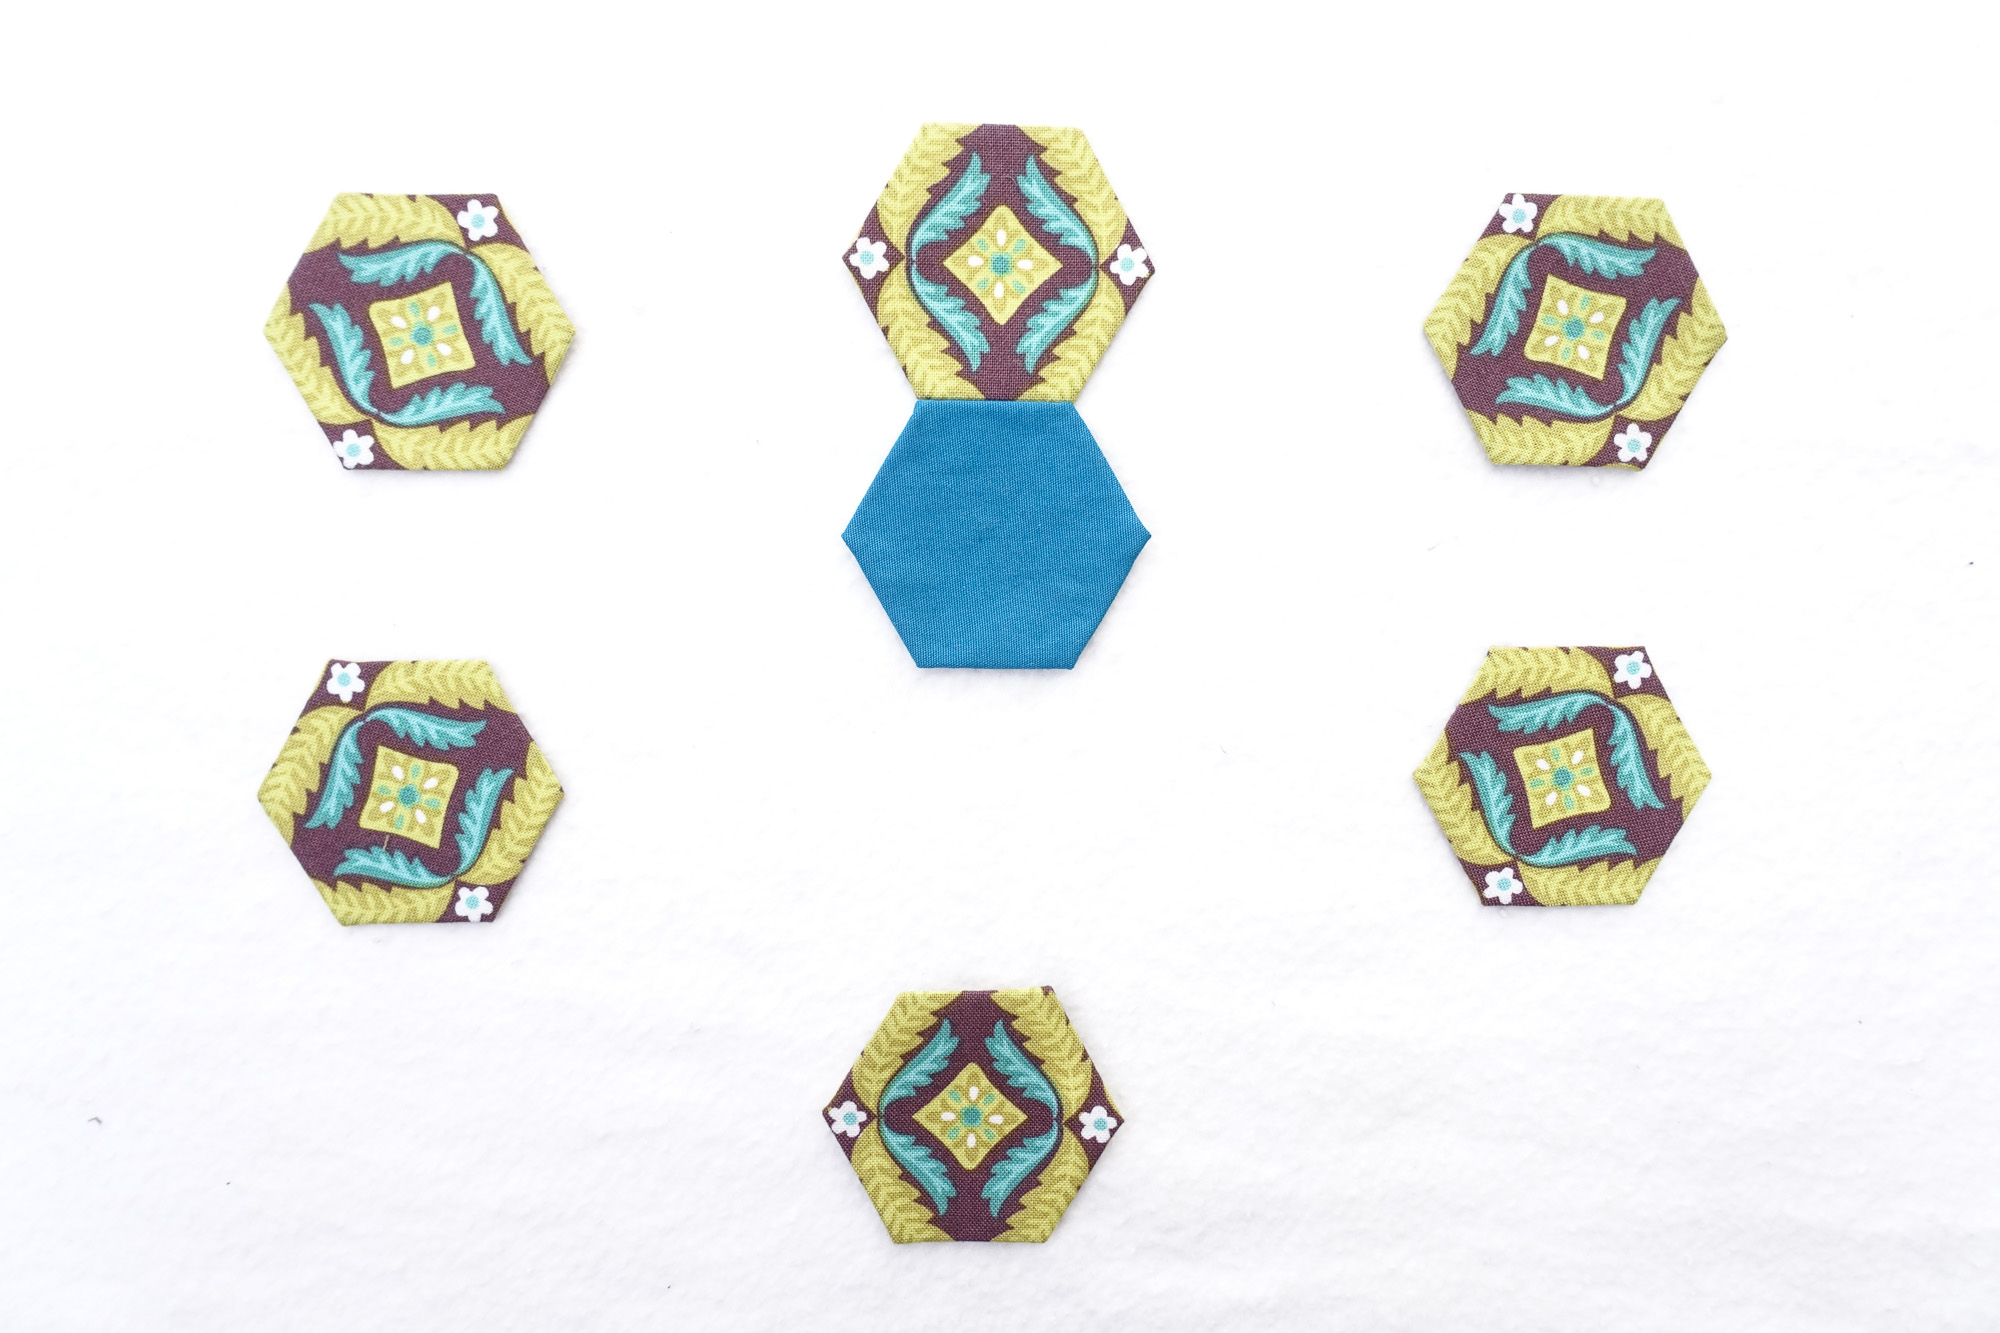
1. Begin by collecting your basted pieces. I like to lay them out in front of me in the design that I have chosen if it is a smaller project. If it is a larger project, keeping a photo on your phone for reference can be really helpful.
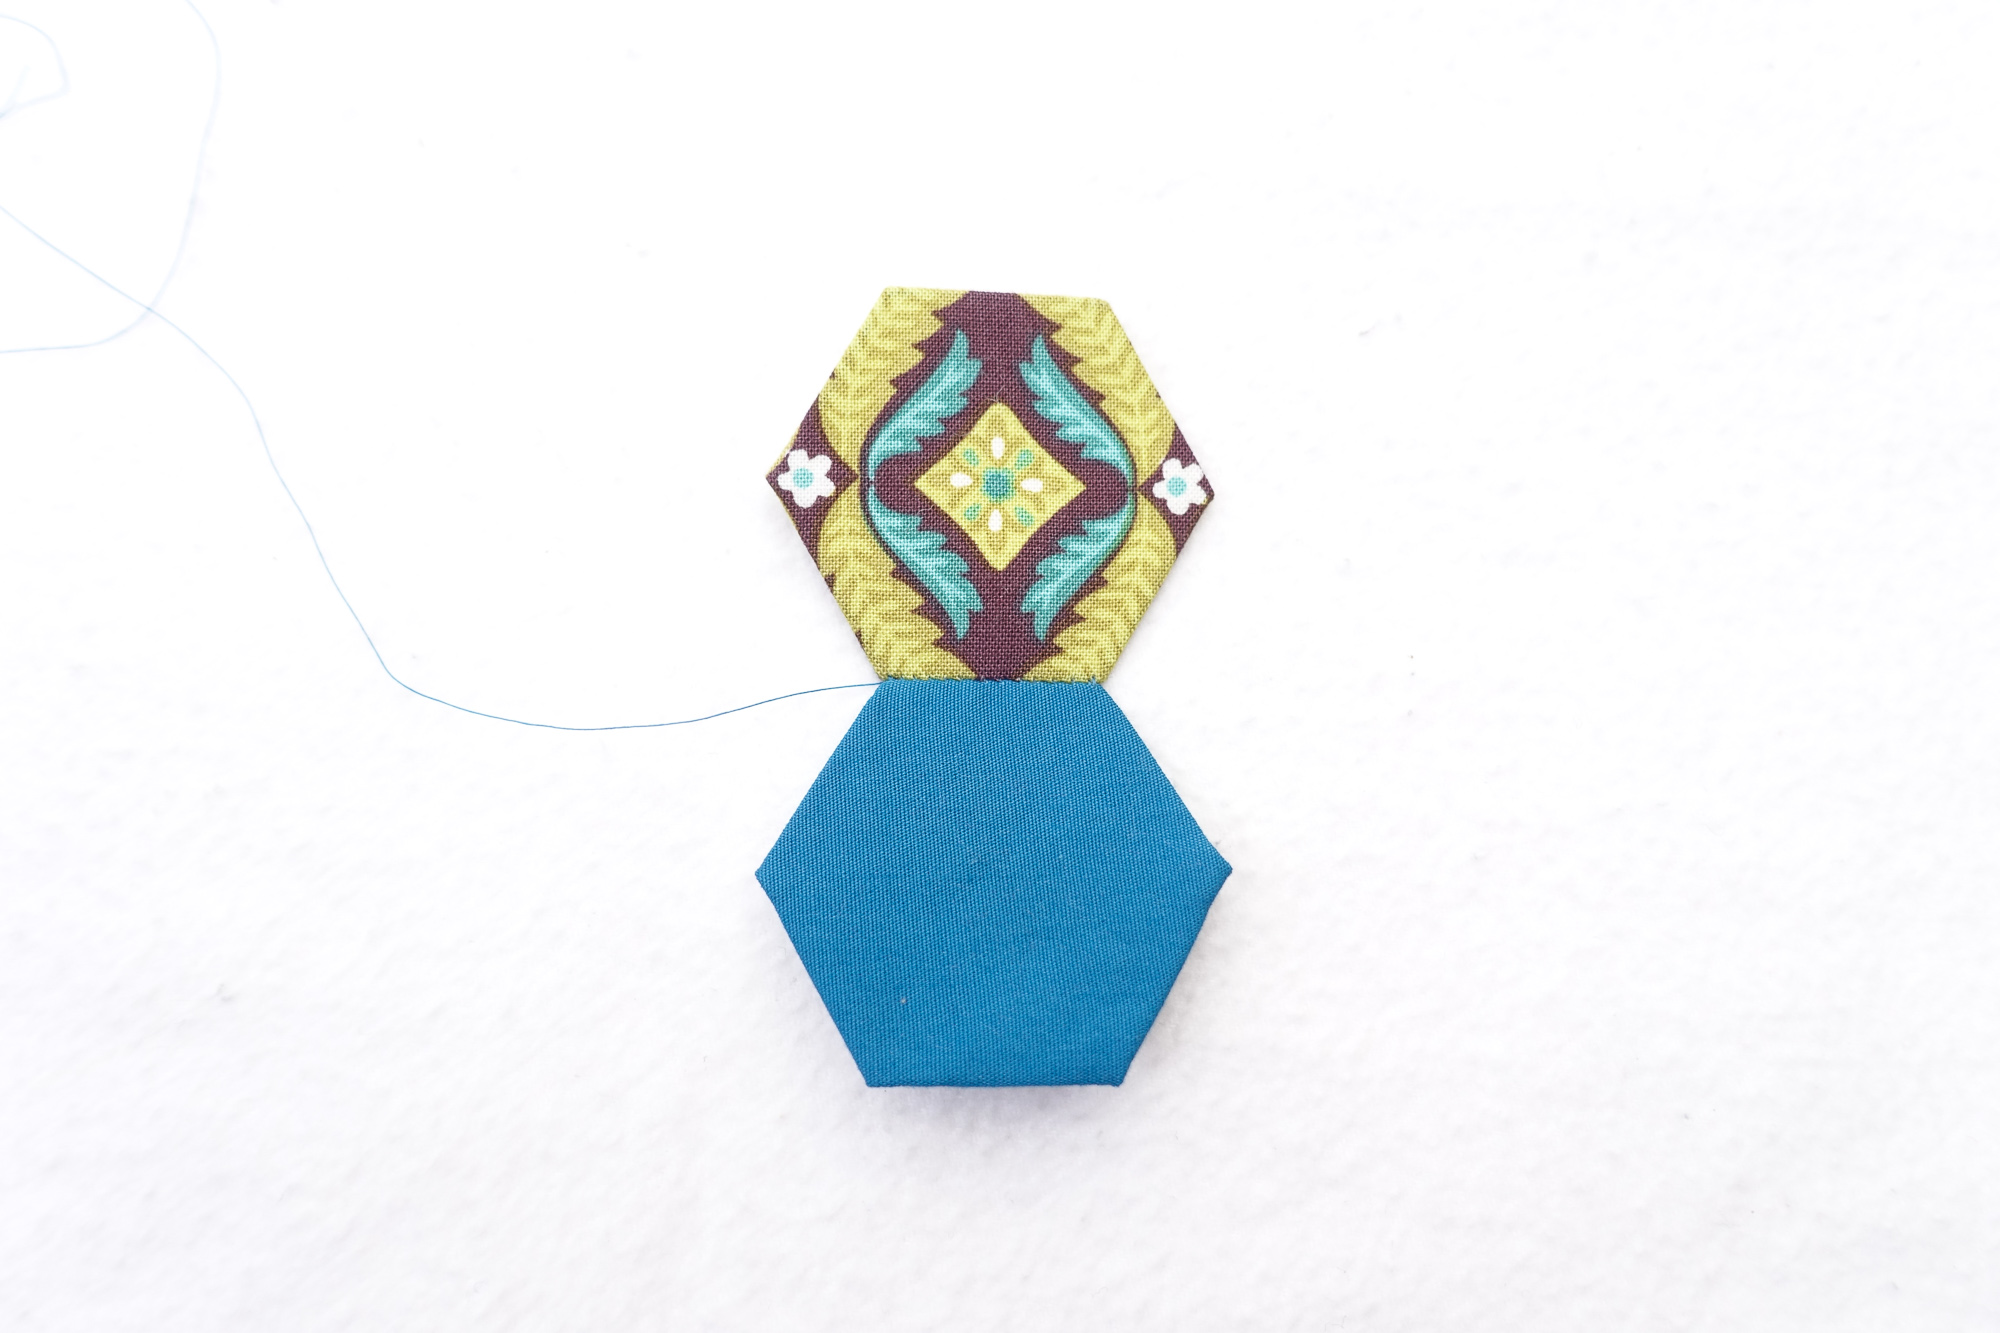
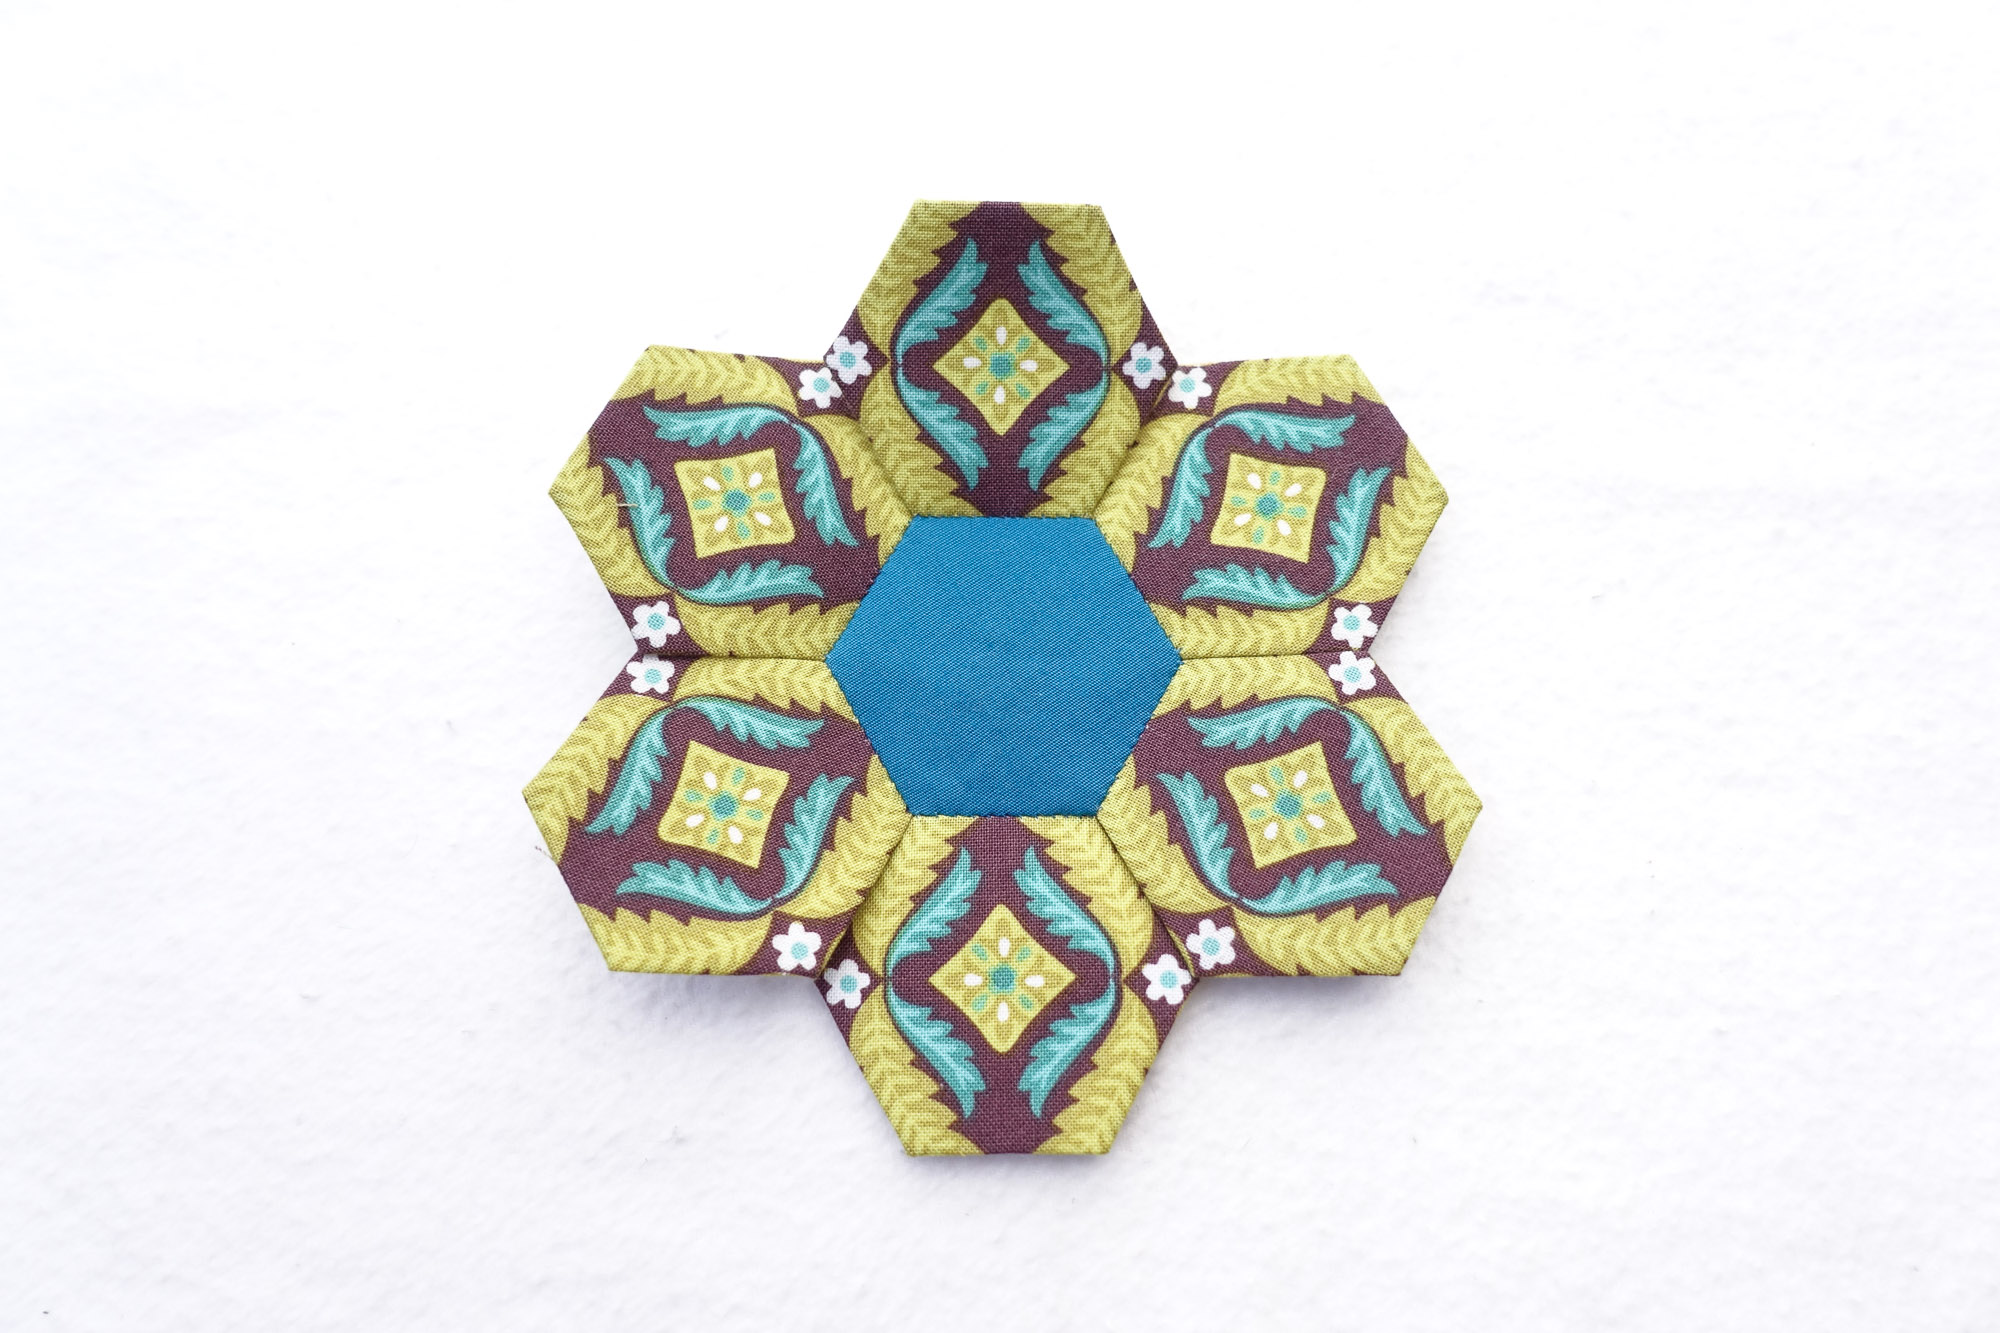
2. Choose two pieces that will be stitched together first. In the example here of a hexie flower, I like to stitch all of the petals to the center hexagon first. So, I will begin by selecting the center hexagon and the top petal.
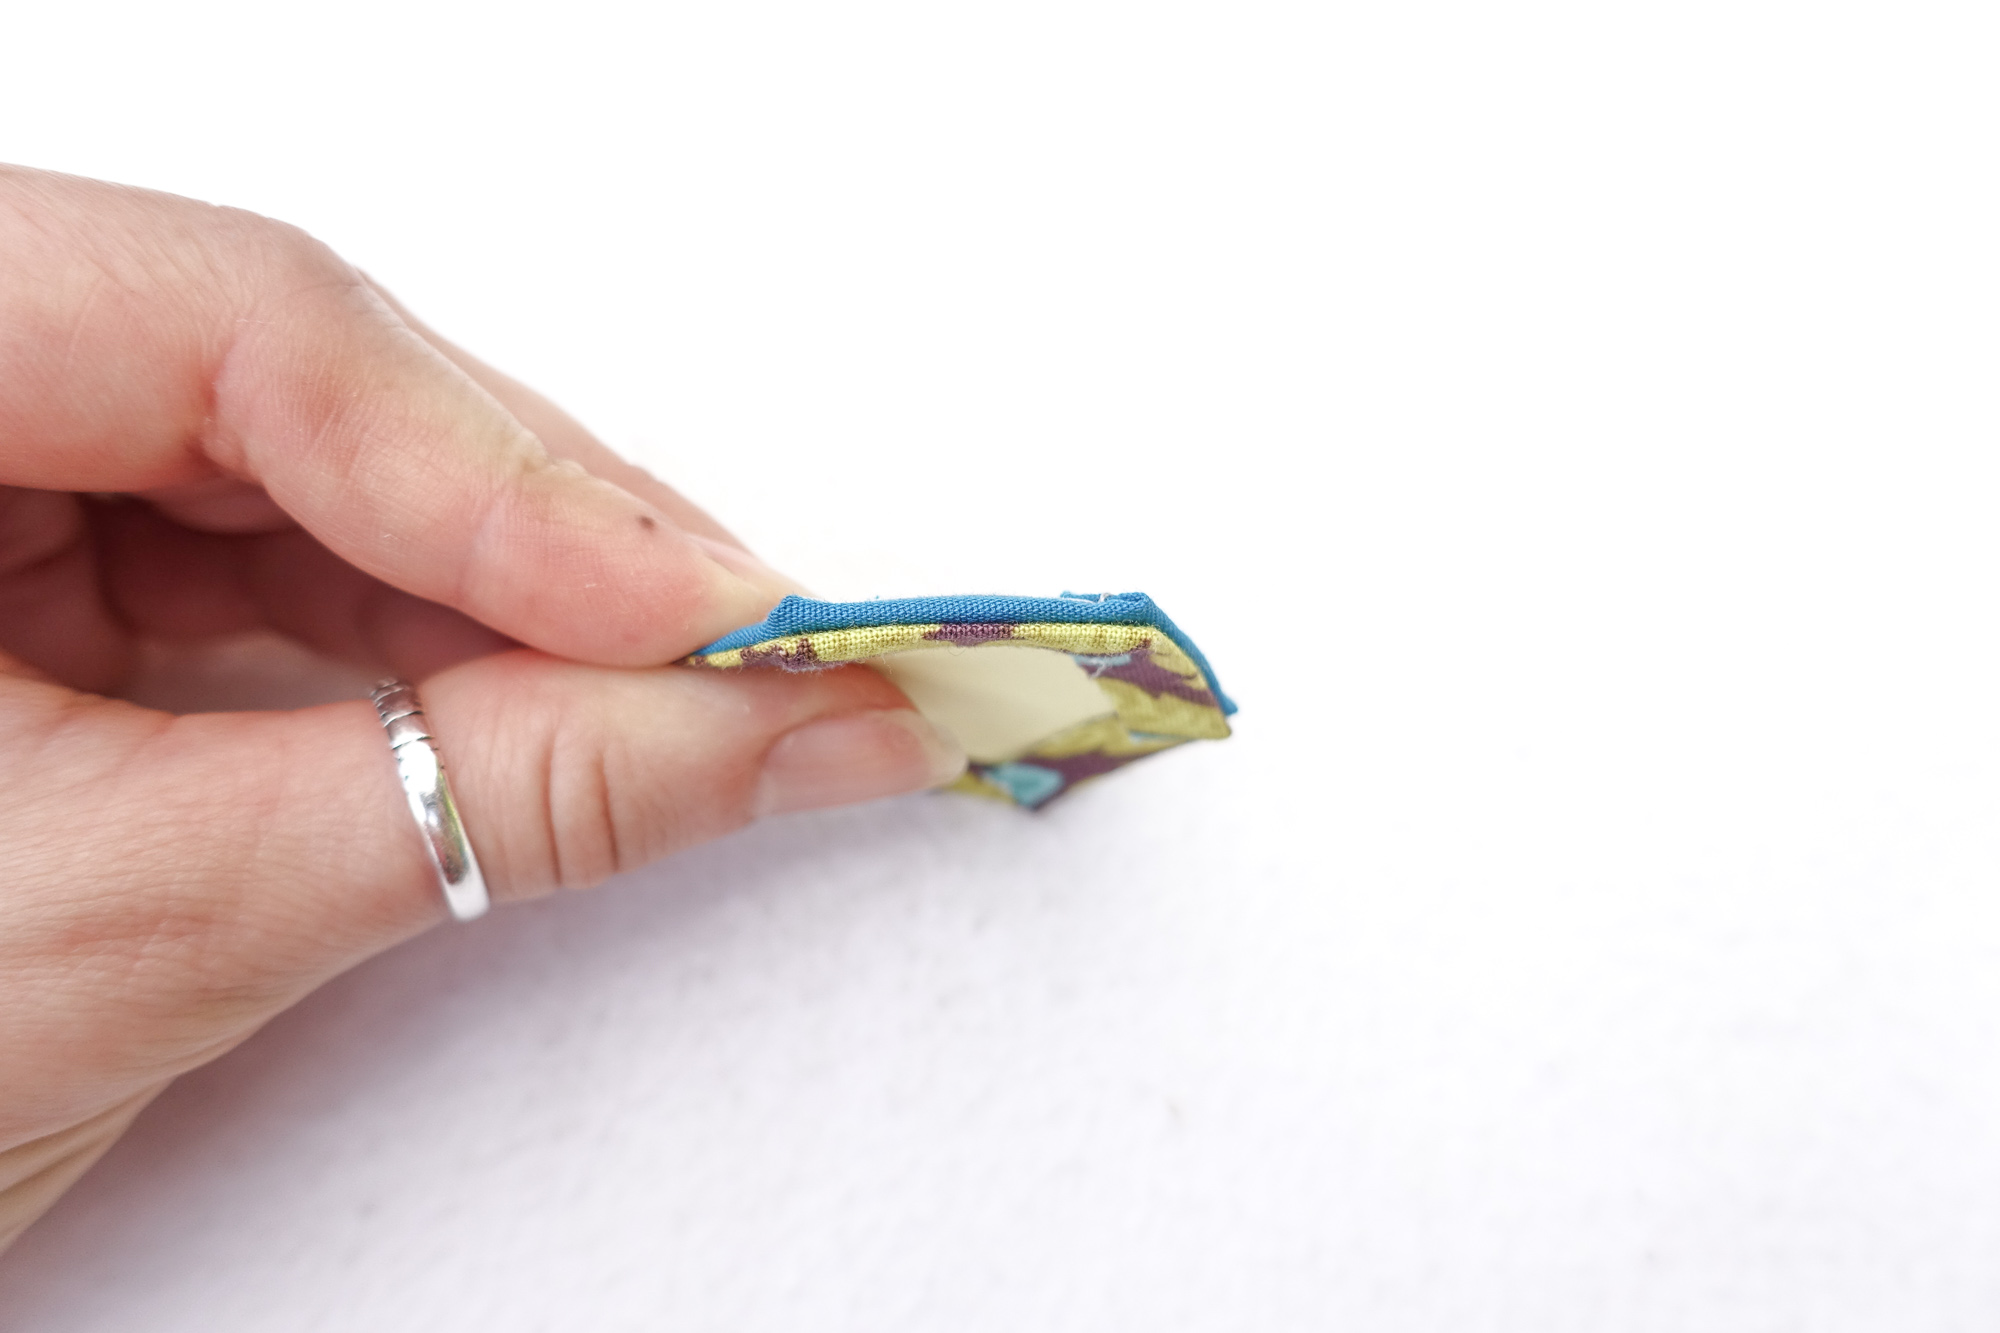
3. Fold the top petal on top of the center hexagon RST (right sides together). The top seam will be the one we are stitching.
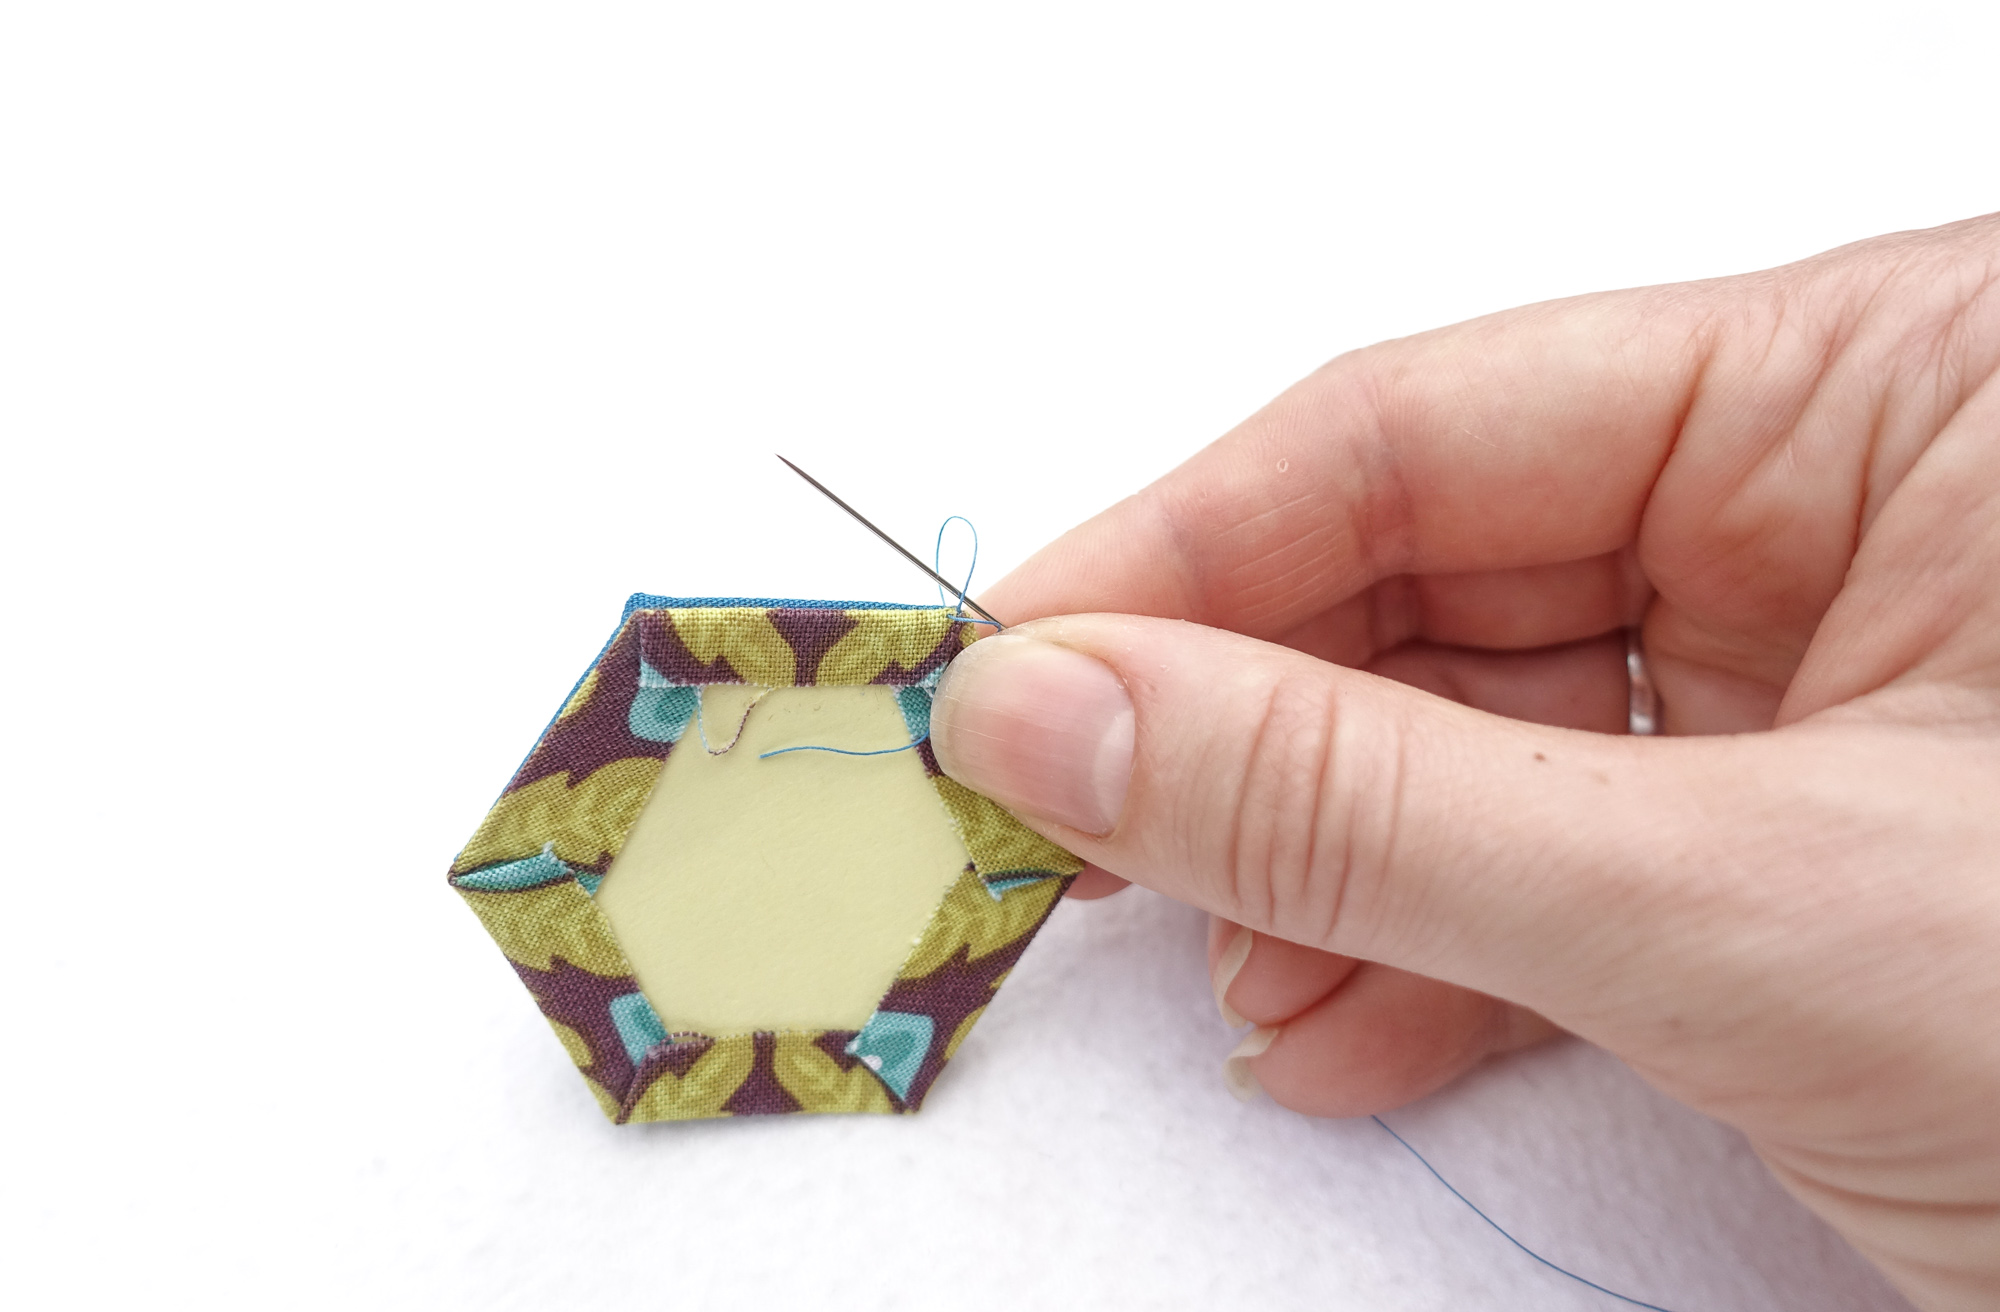
4. Grab your needle and thread. Insert the needle under the seam allowance on the hexagon facing you. Pierce through the right corner of fabric.
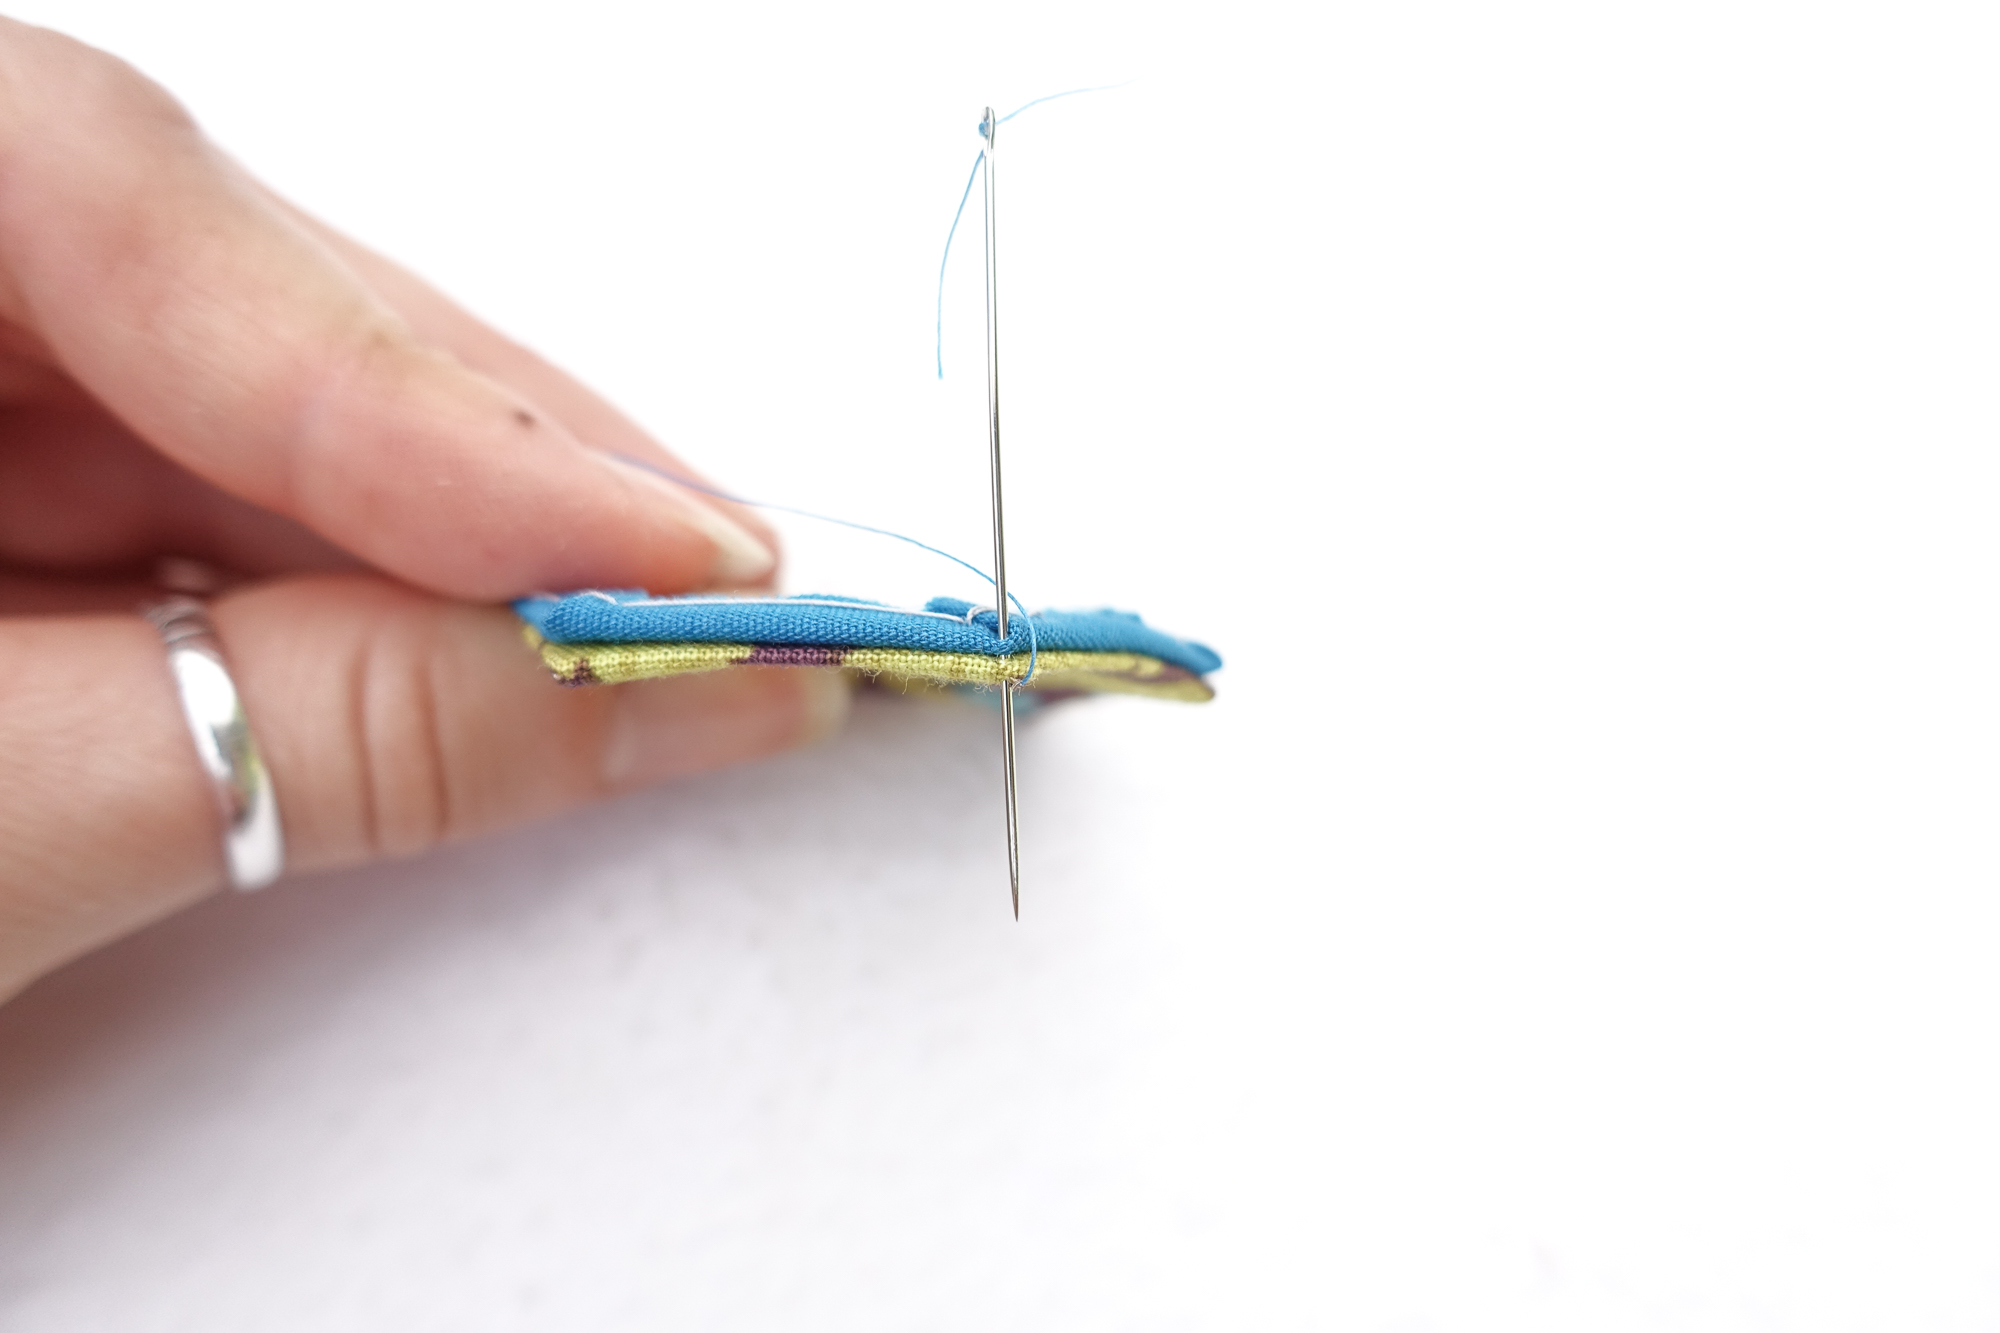
5. Pull the thread until it’s almost to the end, but not all the way through. Then insert the needle perpendicular to the seam, catching a little bit of each hexagon’s seam allowance. Do your best NOT to stitch through the paper.
6. Pull the thread through, creating your first stitch. Repeat step 5 in the same spot to create a securing stitch.
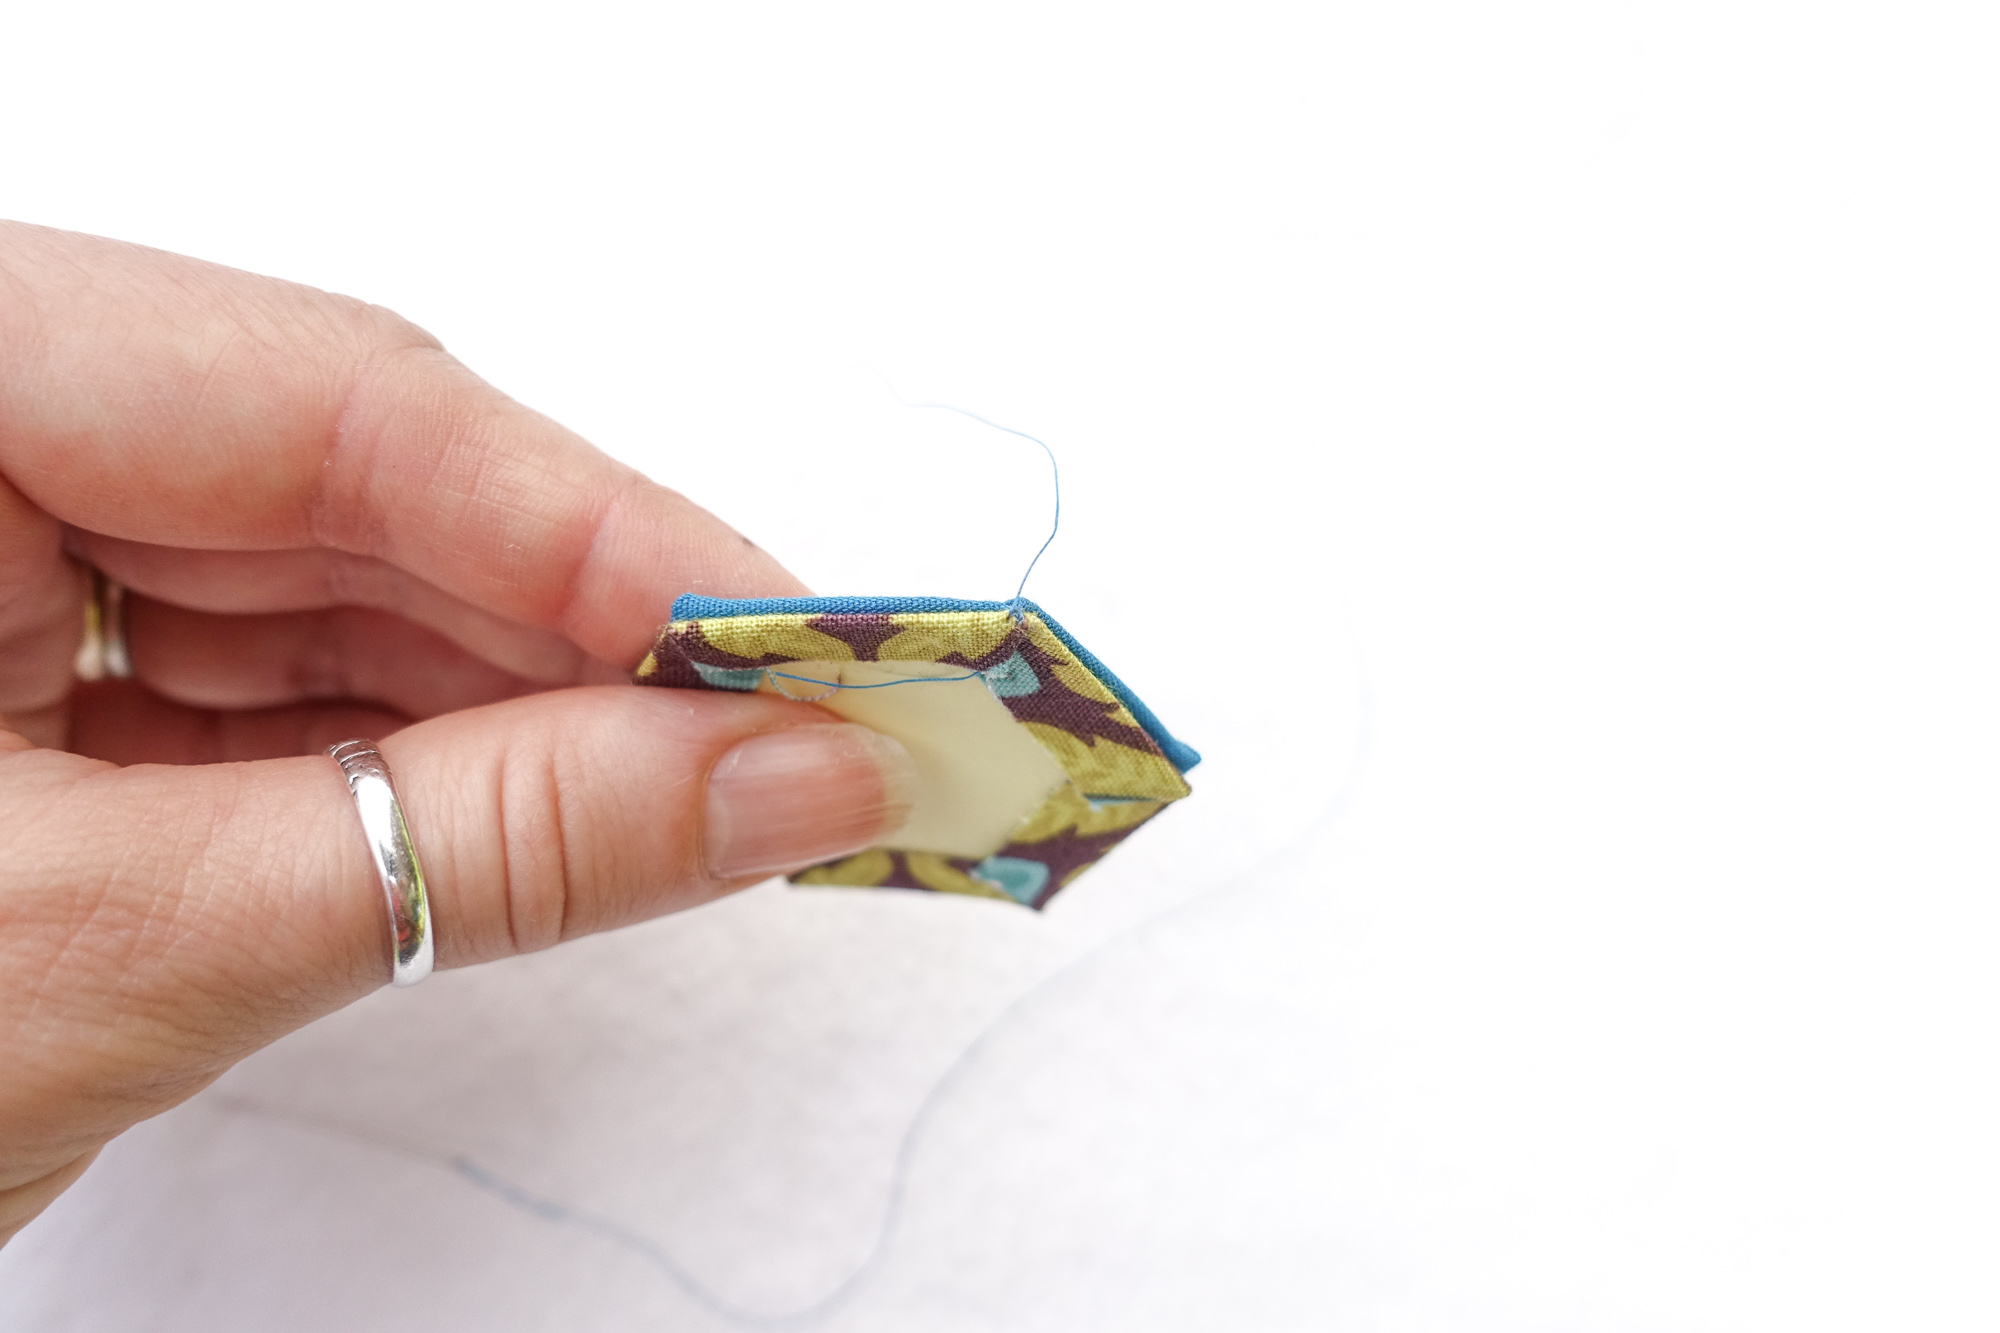
7. Repeat step 5 once more, but before pulling the thread taut, insert your needle through the loop.
8. Pull the thread taut to secure. This creates a little securing knot that will keep your stitches from unraveling beyond this seam if it were ever to come loose.
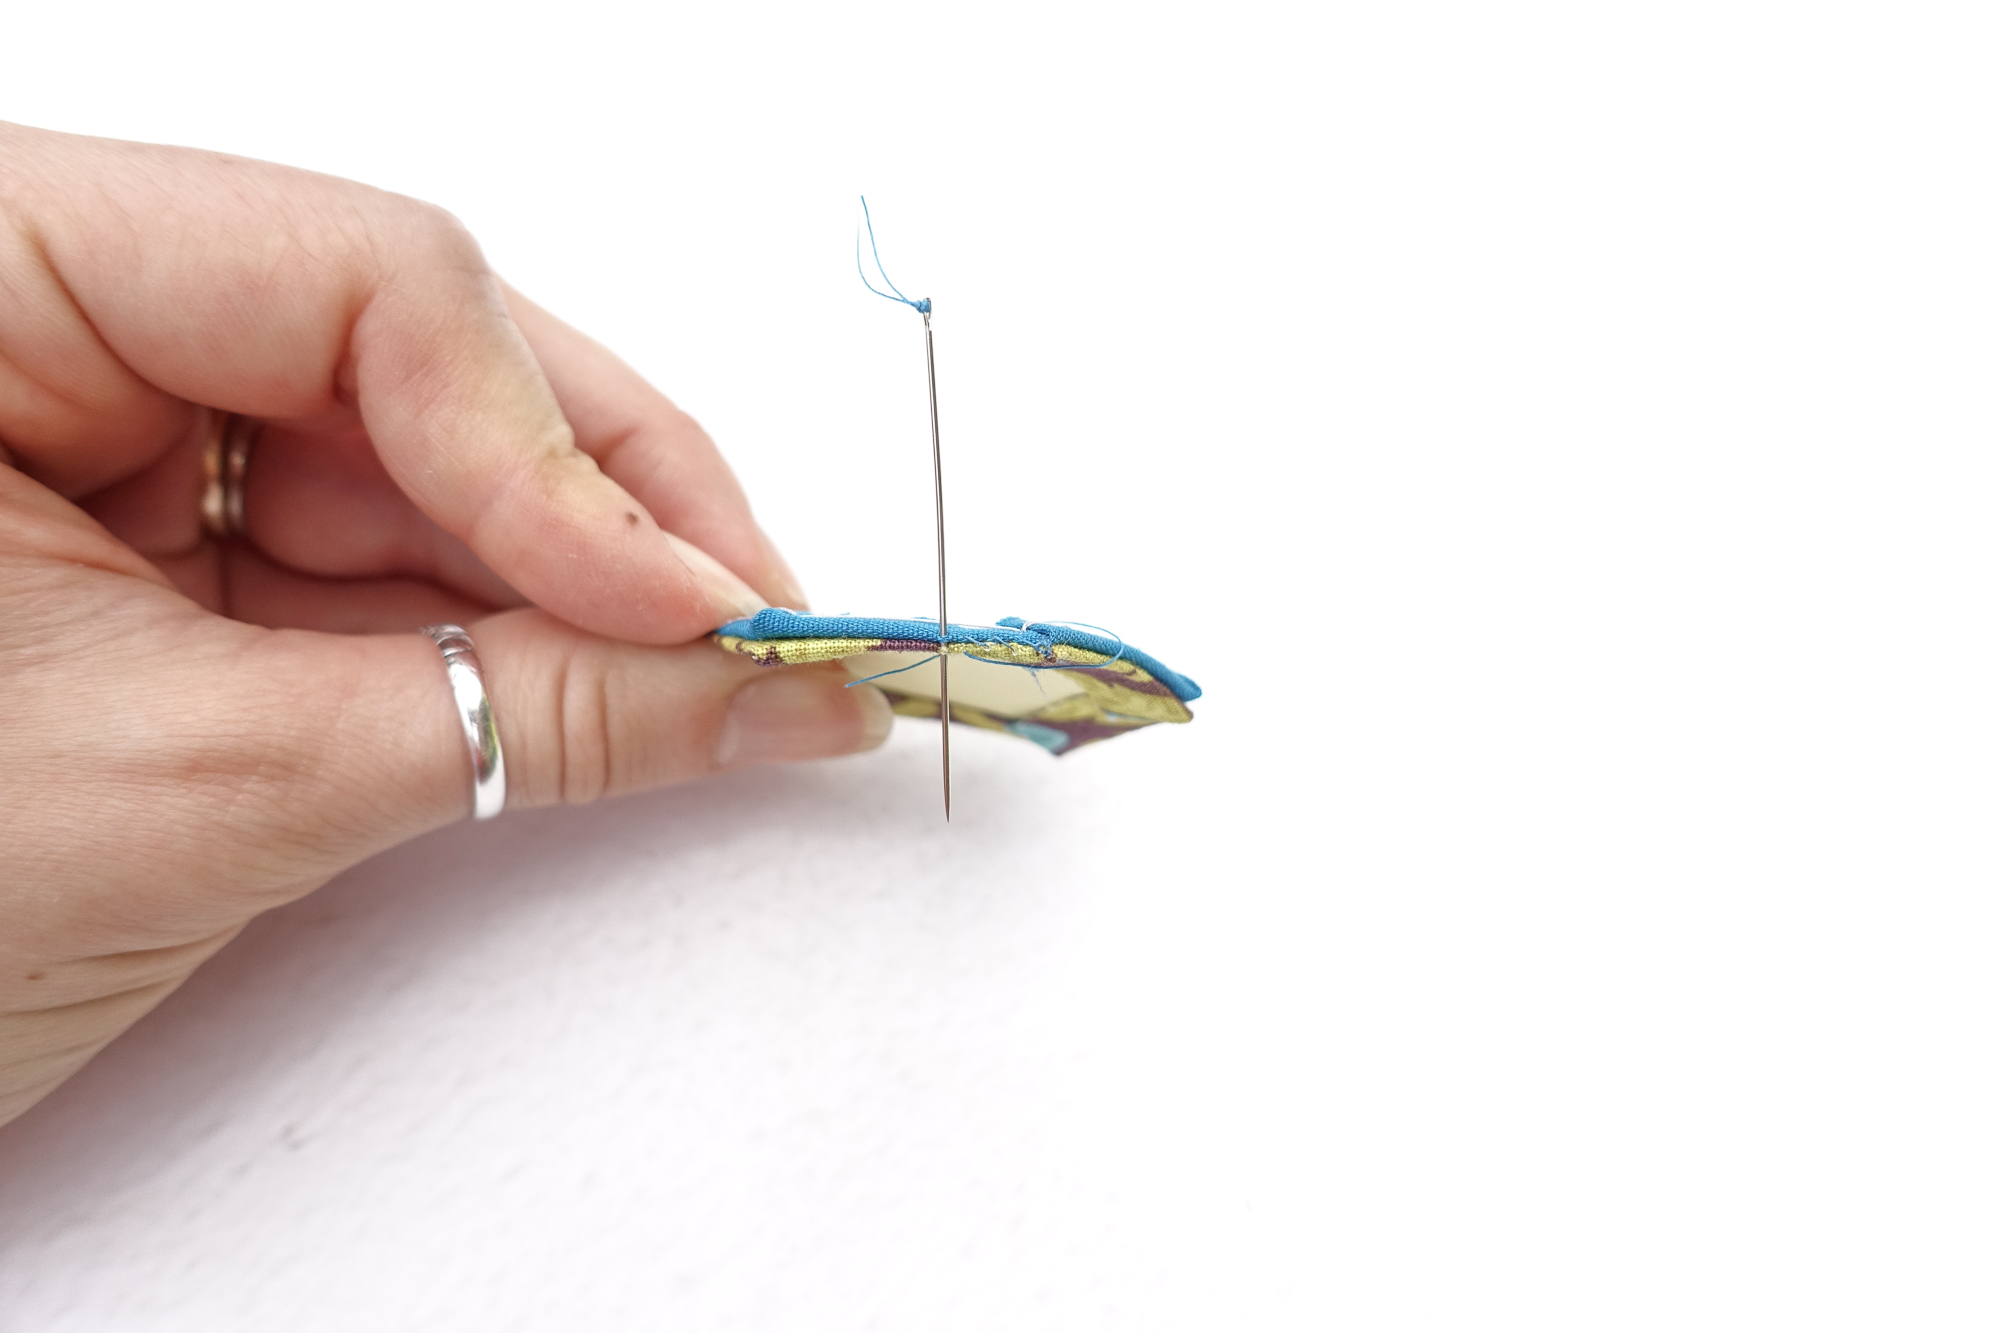
9. Begin whipstitching your seam. Take whipstitches in the same fashion as you created the first stitch. Insert the needle perpendicular to the seam, catching a little bit of each piece’s seam allowance with each stitch. Keeping your needle perpendicular to the seam and pulling each stitch taught will make for tinier, less visible stitches.
Of Note:
You don’t need a million stitches per seam. Between 10-16 stitches per inch should be sufficient. I usually land on about 12-14.
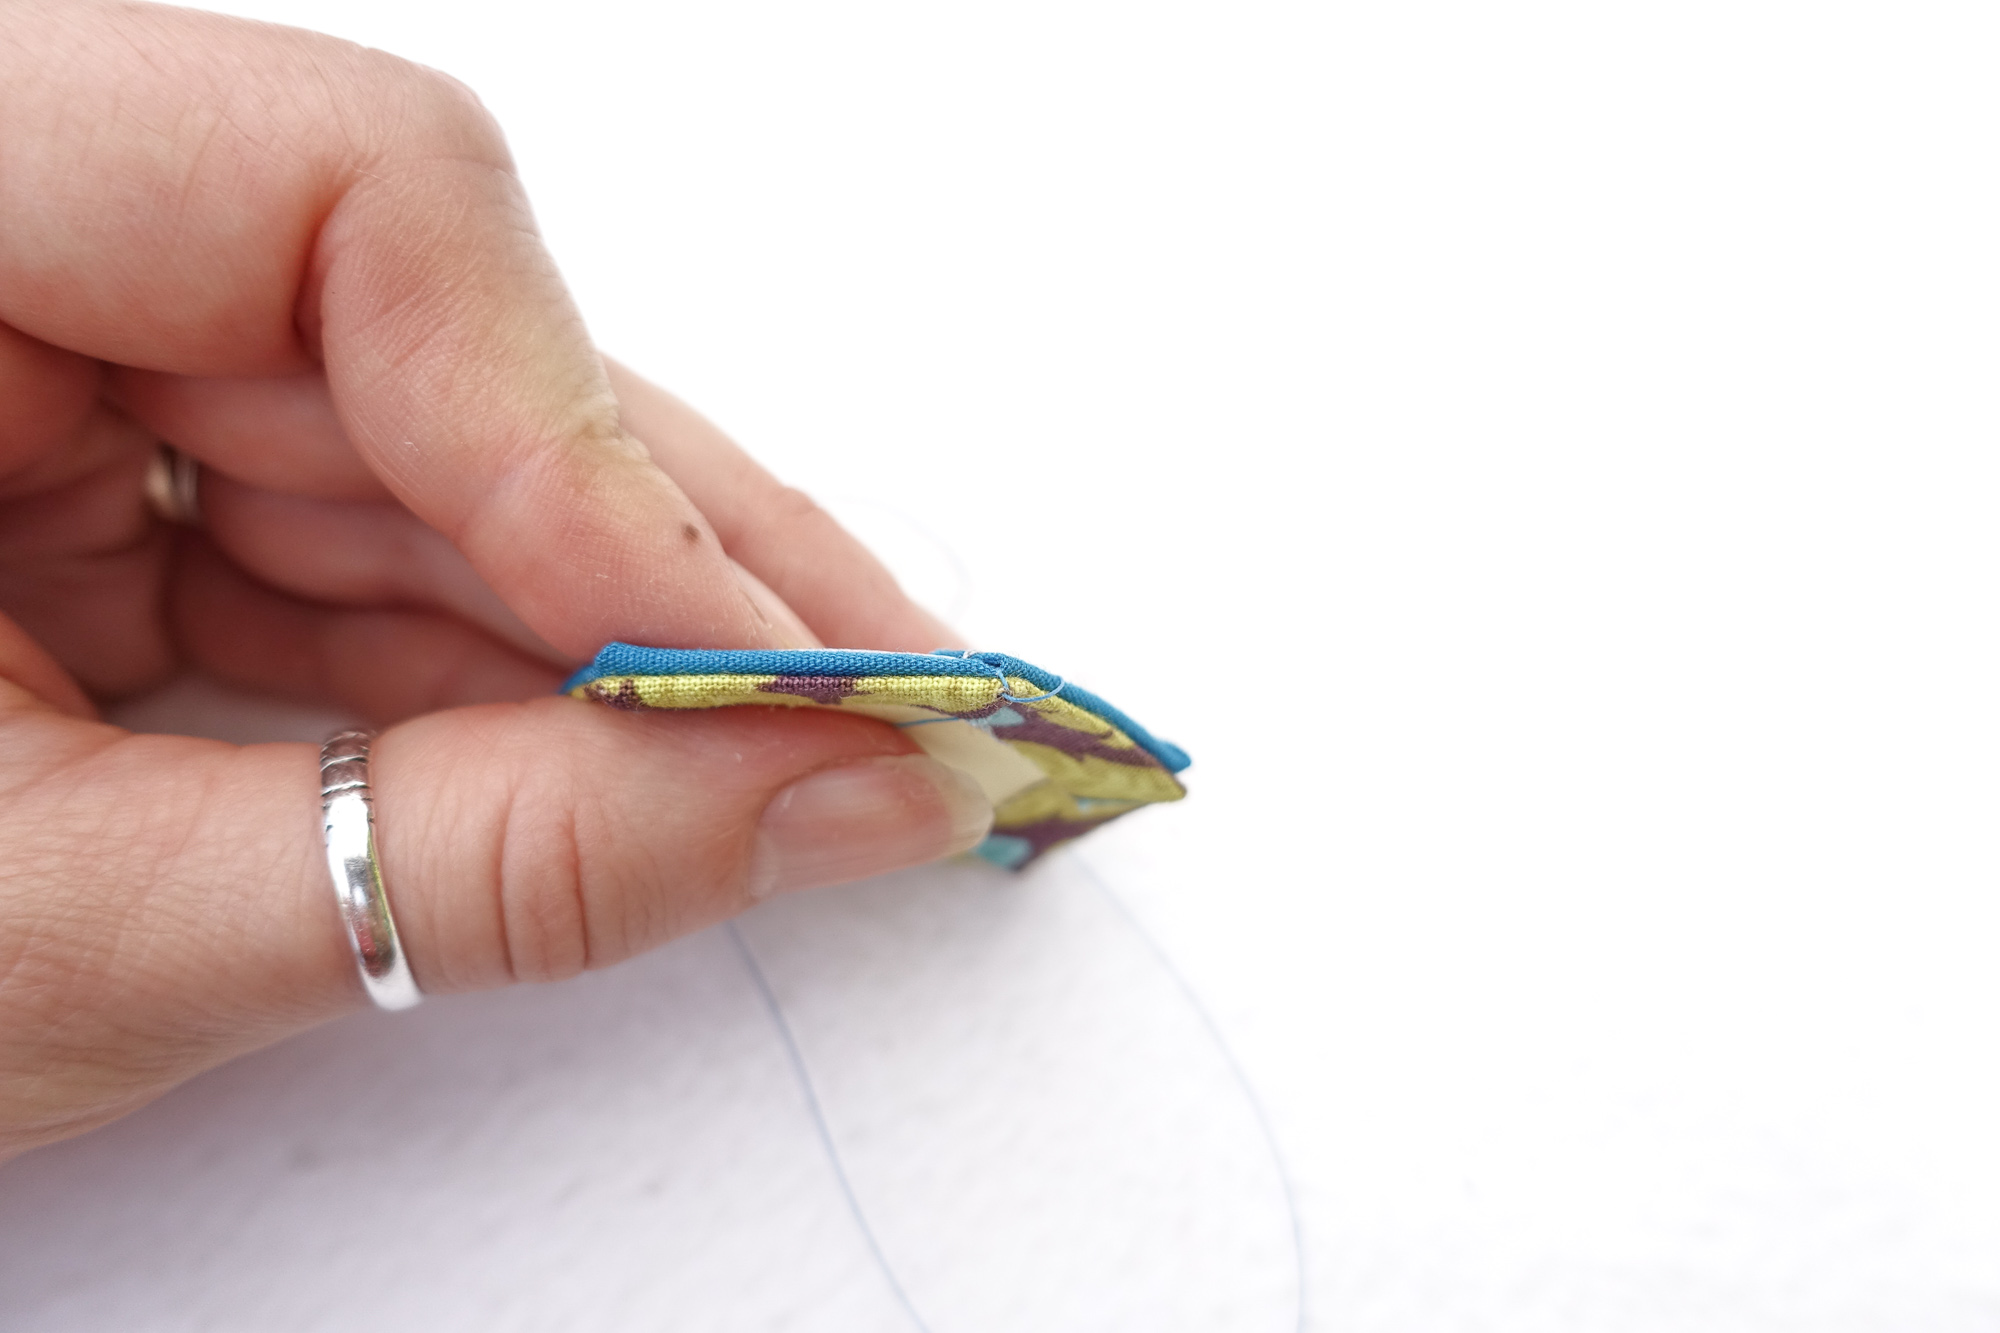
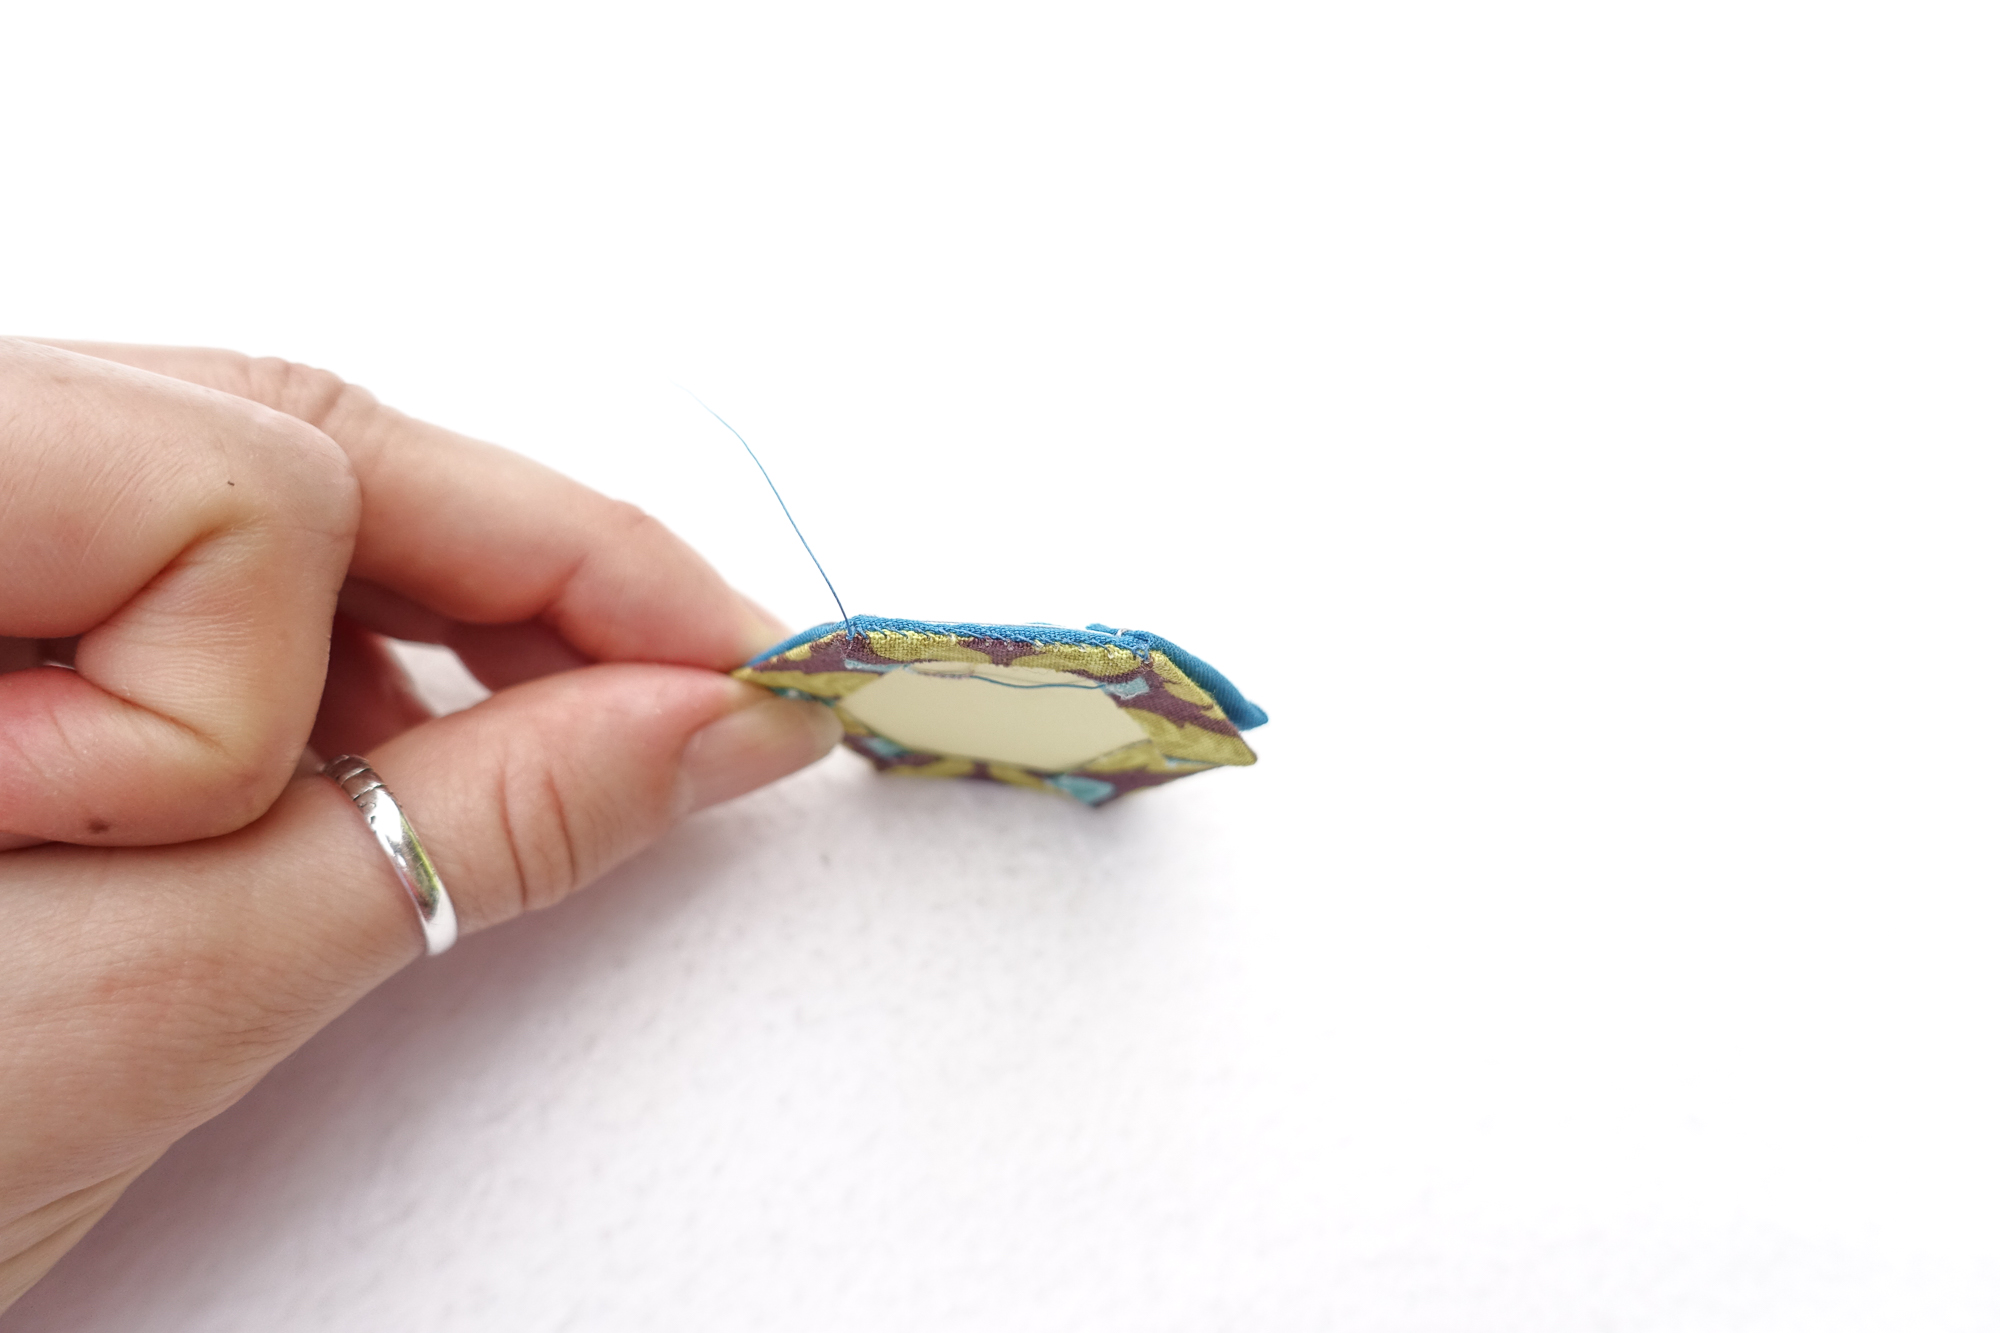
10. When you get to the end of the seam, secure it in the same fashion as you began it by taking 2 whipstitches in the same place and then creating a securing knot in the third stitch.
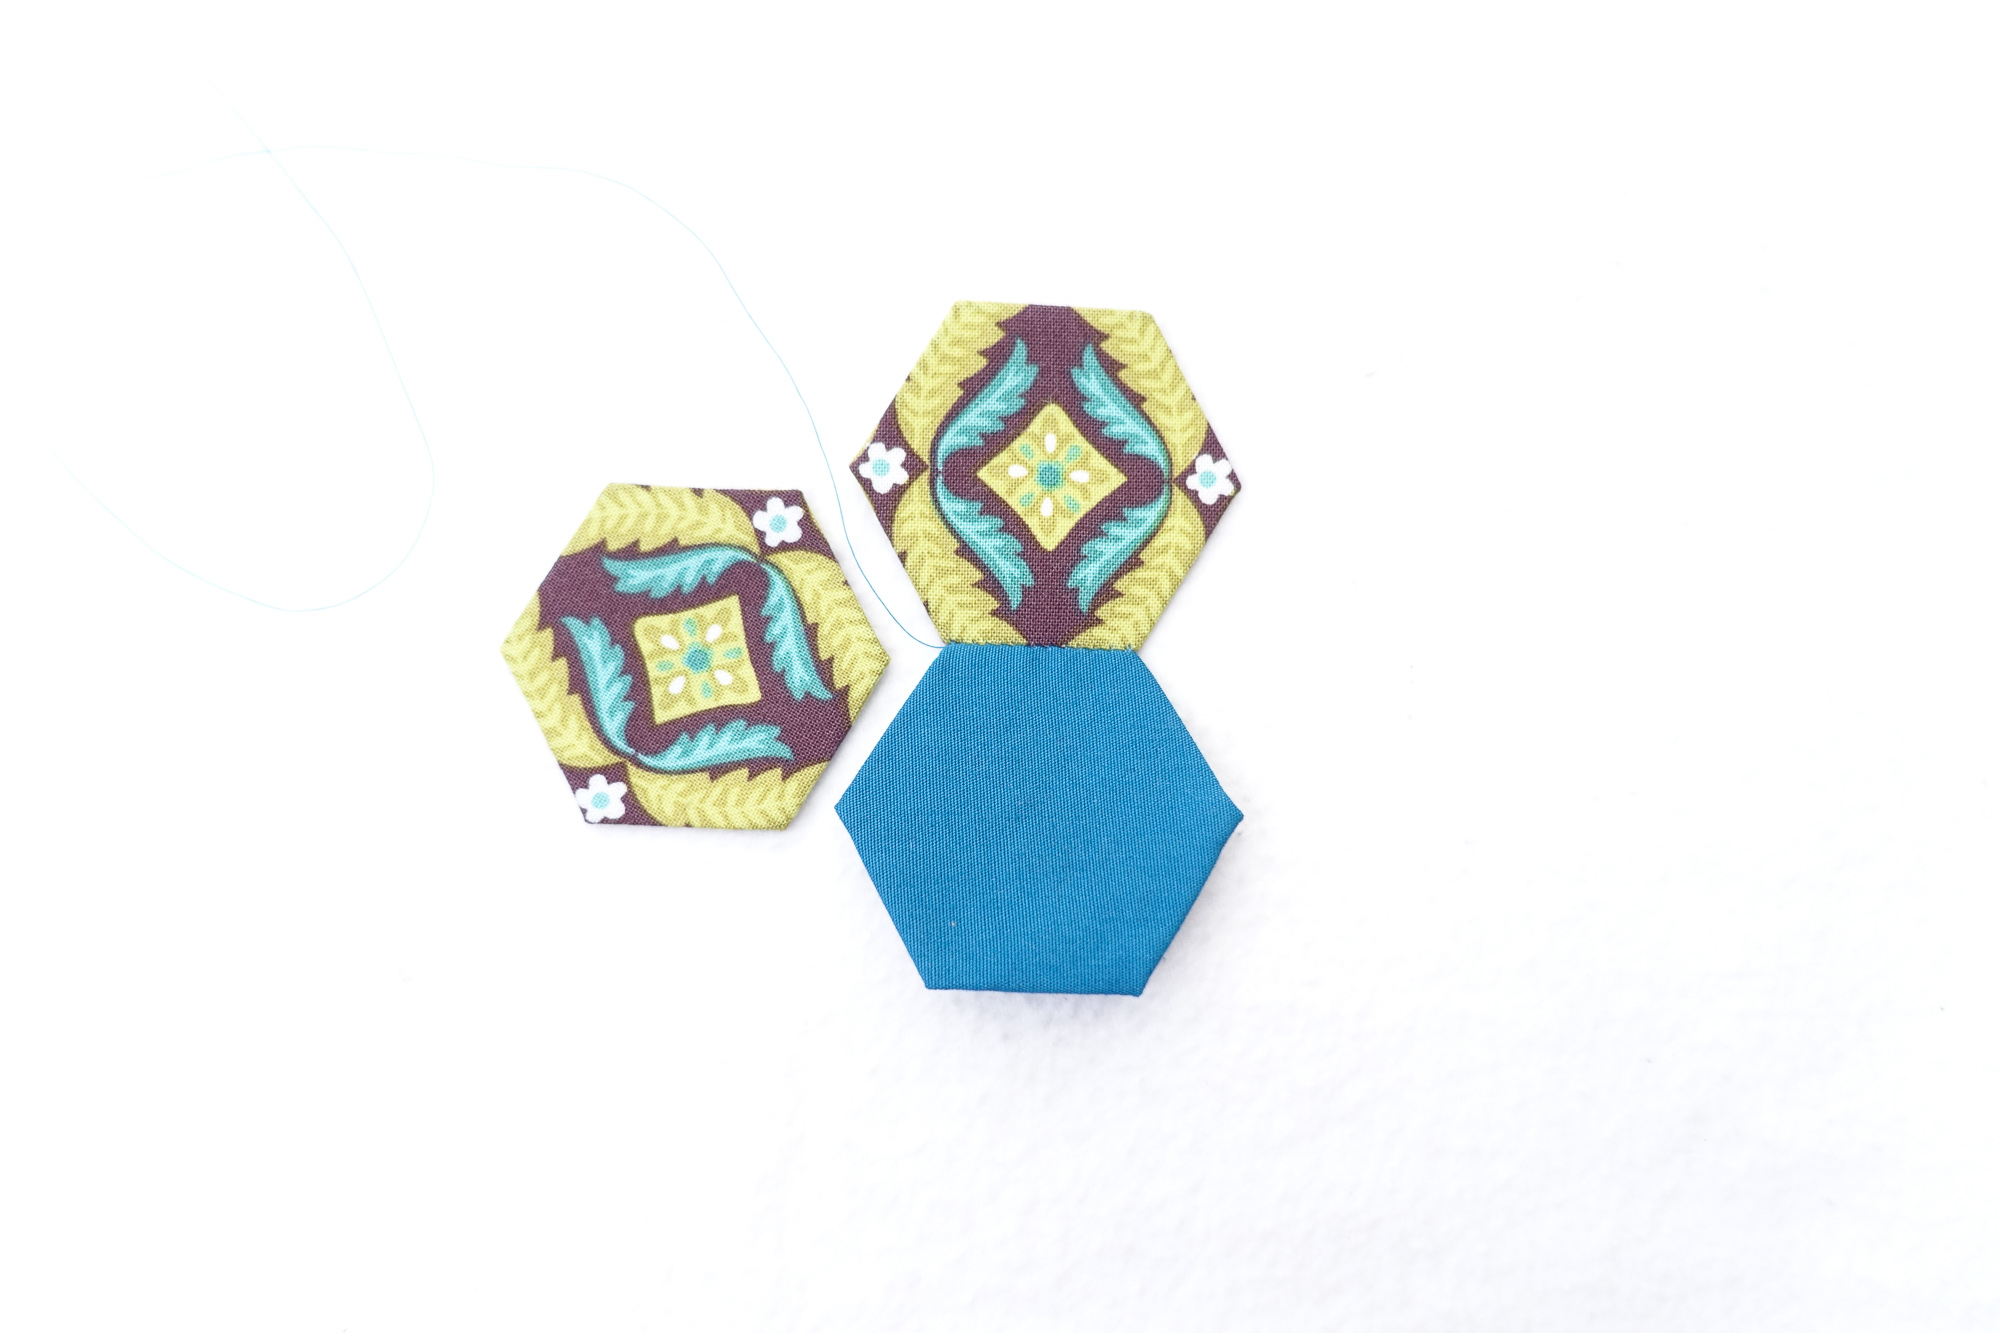
11. Open your pieces to lay flat and admire your work! You’ve just stitched your first seam! This technique will be used for every seam you stitch no matter the size or angle of your pieces. The simplicity of this technique truly makes the possibilities with EPP endless!
How to Complete Stitching a Block
You have already learned the technique to stitch any seam. However, we rarely sew just two patches together in EPP. The following process demonstrates how to complete a block stitched in the round.
1. To continue adding to your flower (i.e. move on to your next seam), grab the next piece and align it in place as it should be positioned in your final design.
Of Note:
I stitch right to left, so I tend to add pieces in a counterclockwise/ anticlockwise fashion when stitching blocks in the round. The concept remains the same regardless of which direction your stitch. Play around with what feels most comfortable to you.
2. Fold the next piece RST with the center hexagon, ensuring that the first piece is out of the way.
3. Begin stitching this seam in the same fashion as the first seam. Insert your needle perpendicular to the seam, catching a little bit of each piece’s seam allowance. Create your securing stitches and stitch the seam, ensuring that you secure it at the end.
4. Continue to attach petals in the same fashion until they are all attached.
Options for Stitching the Petals Together
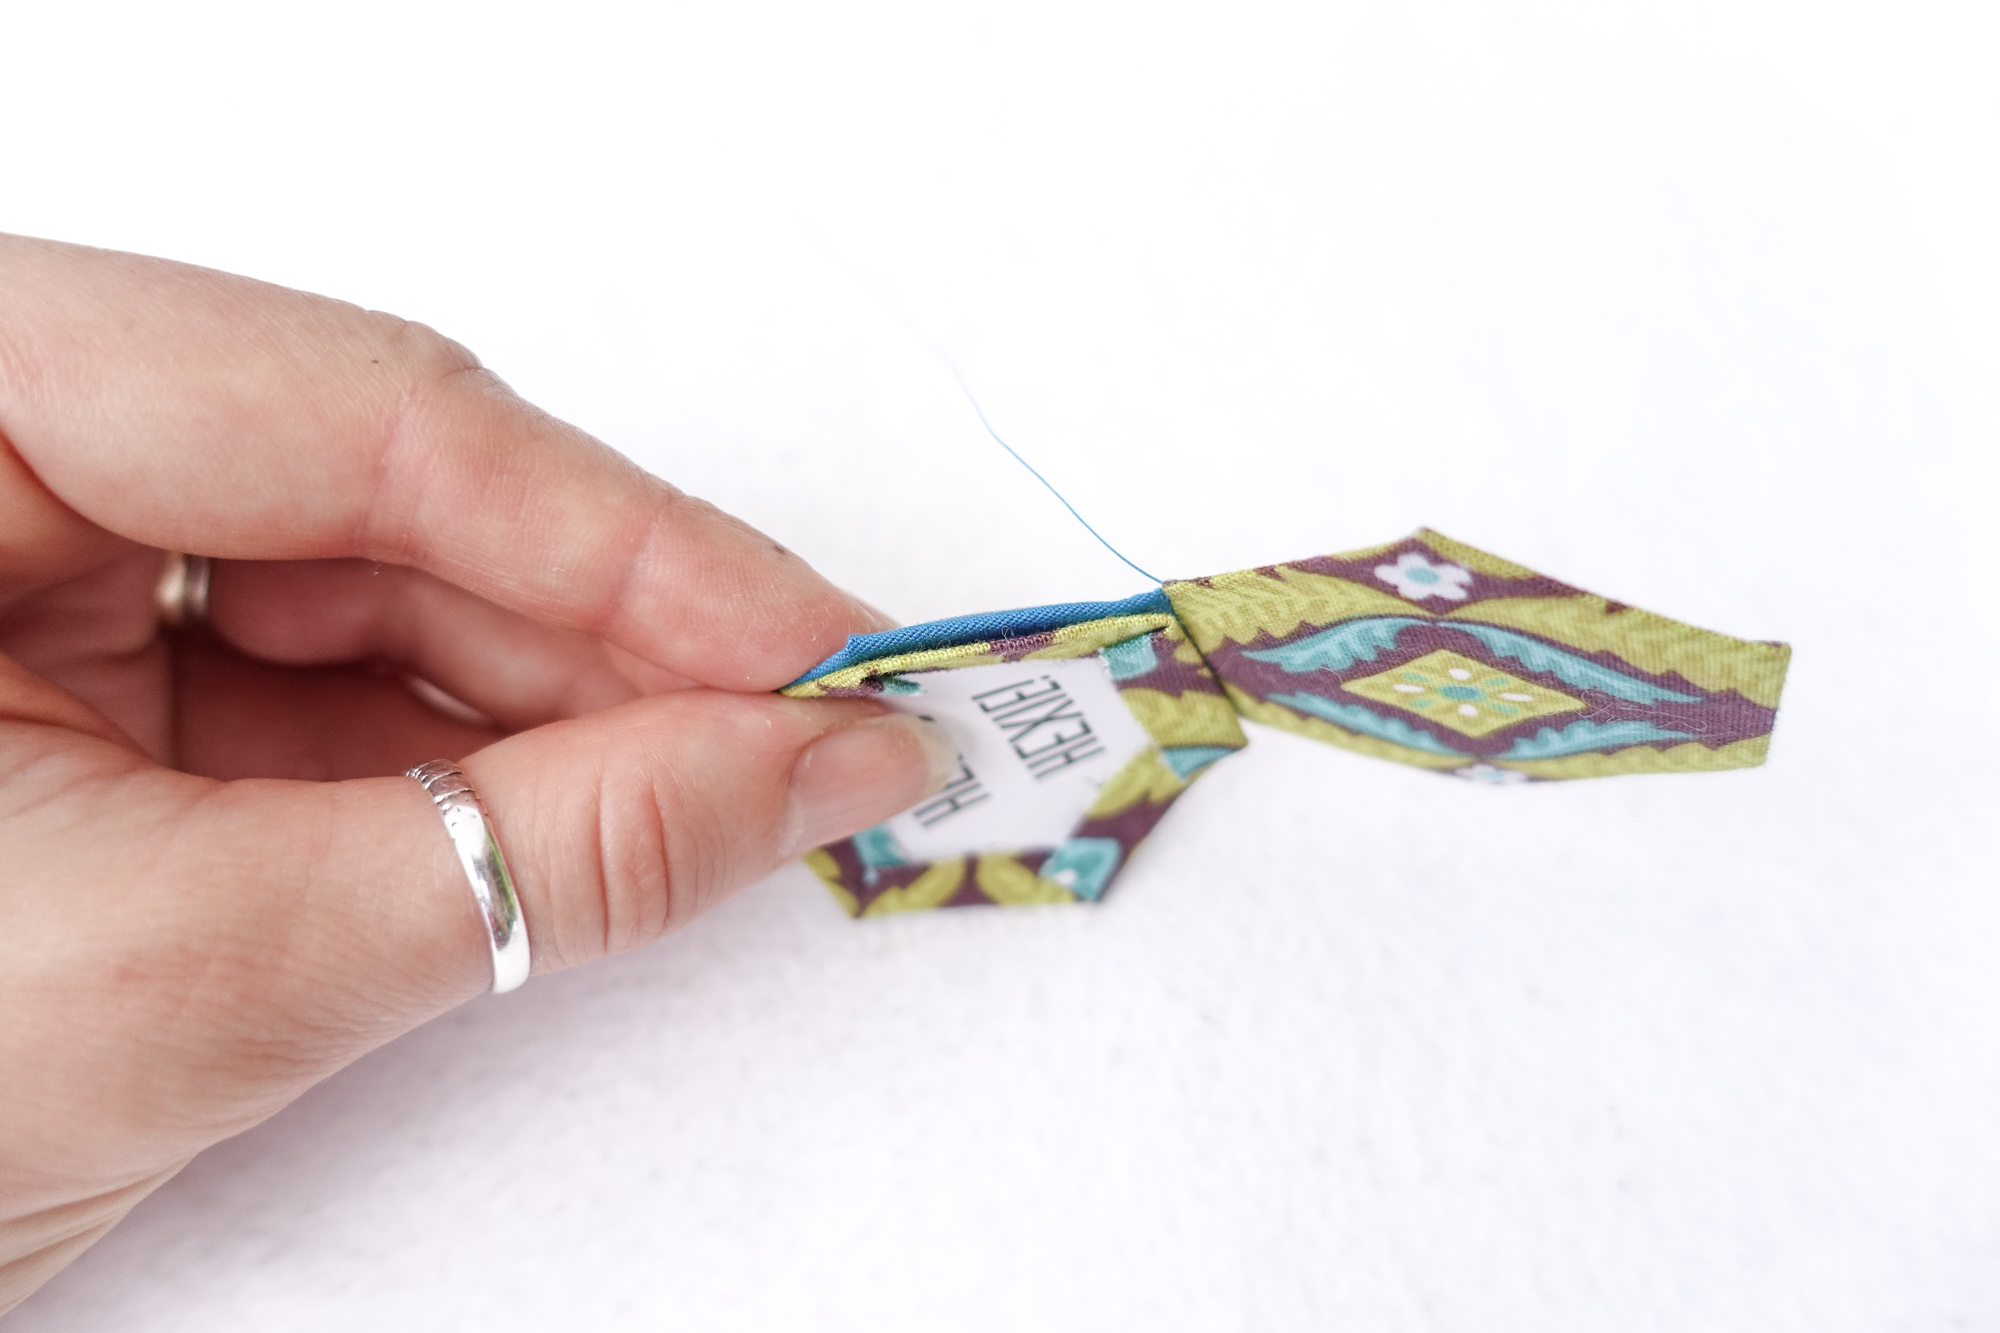
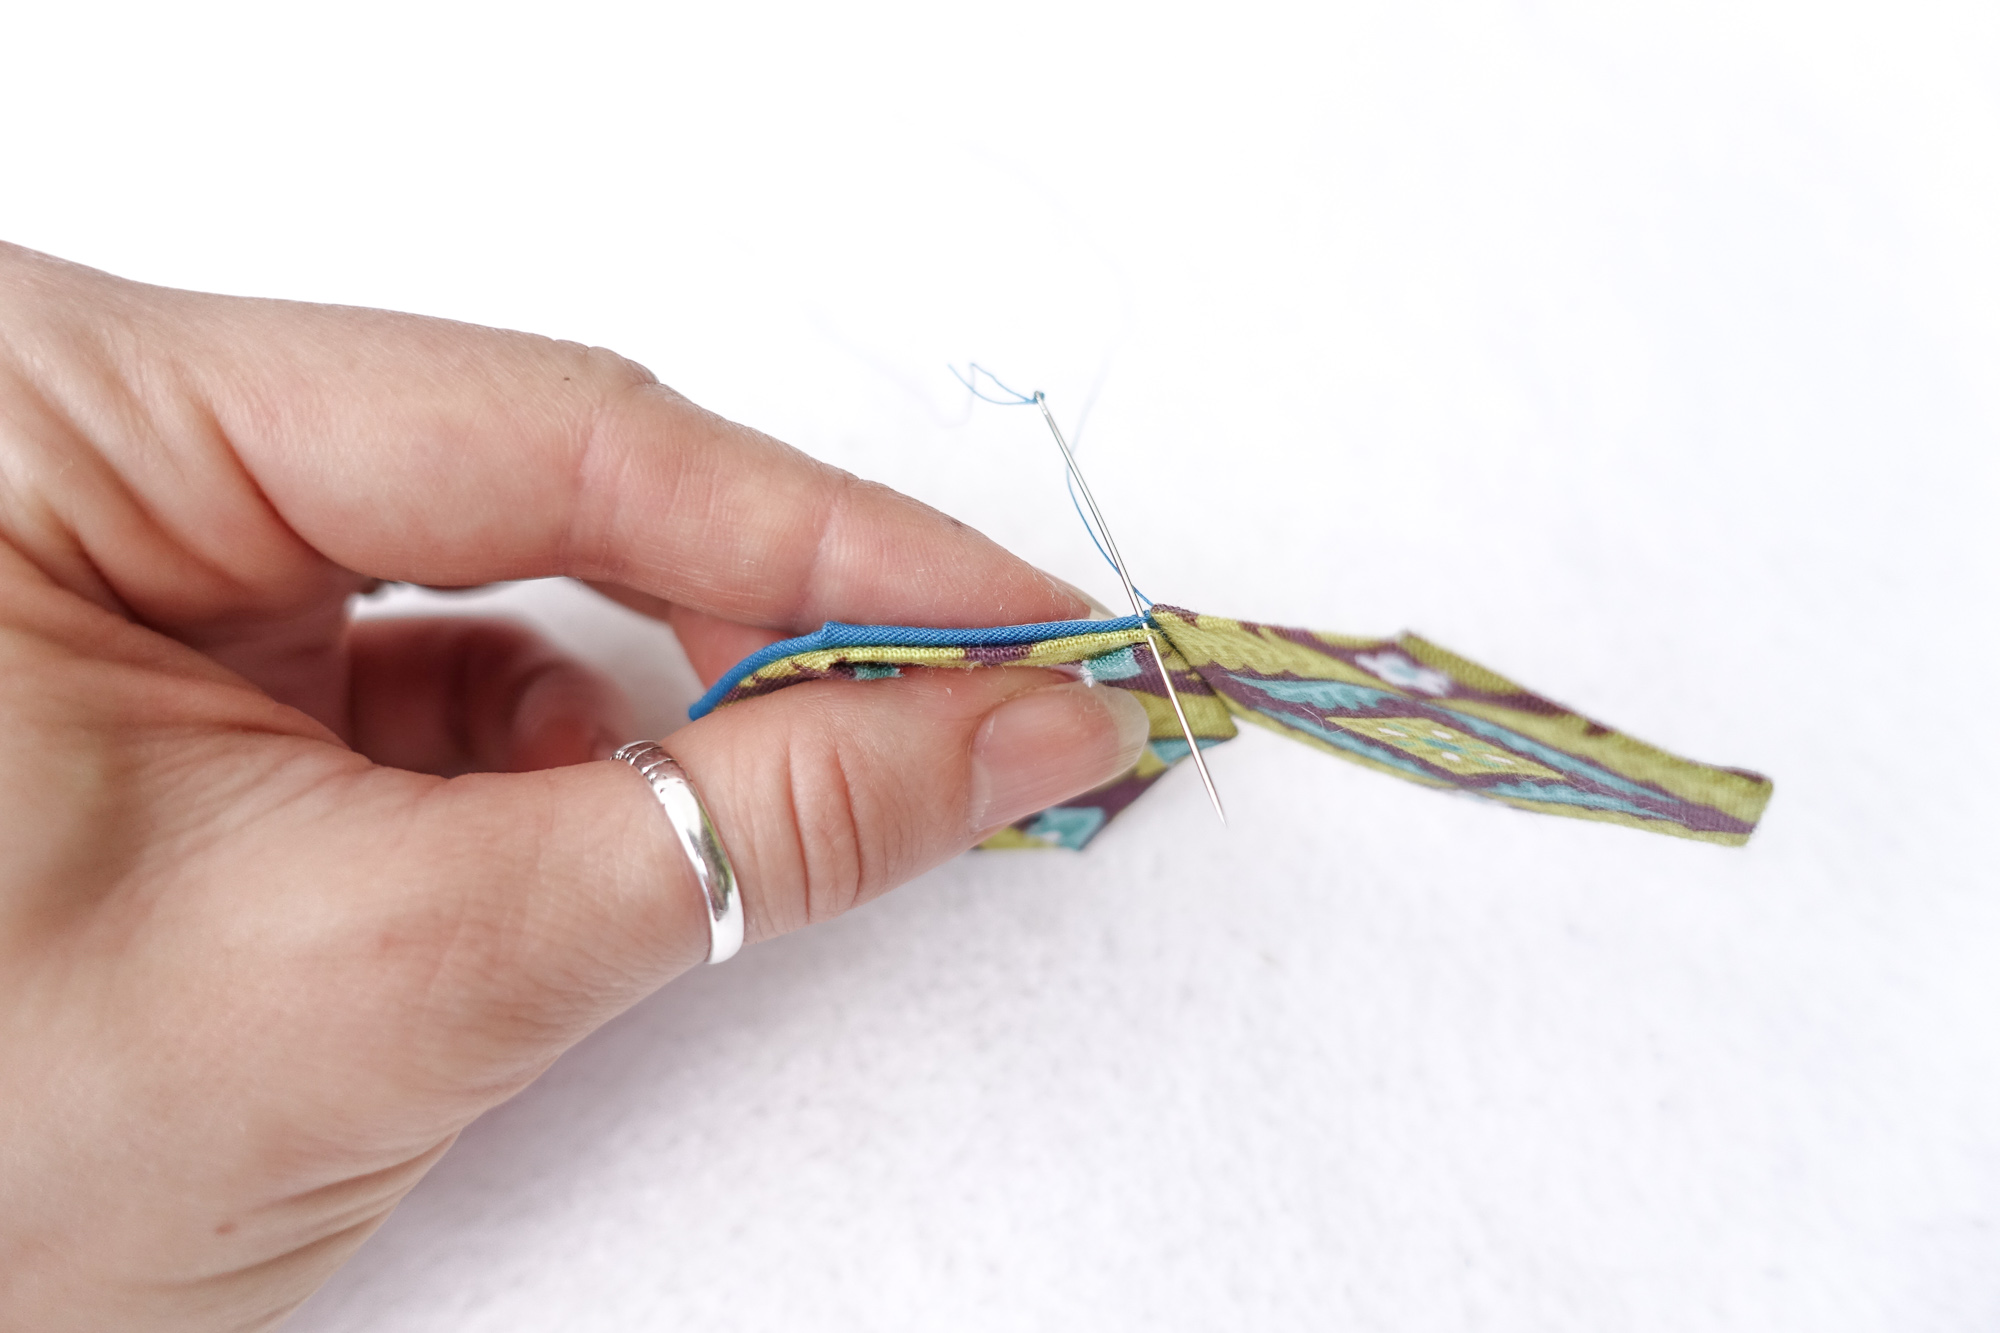
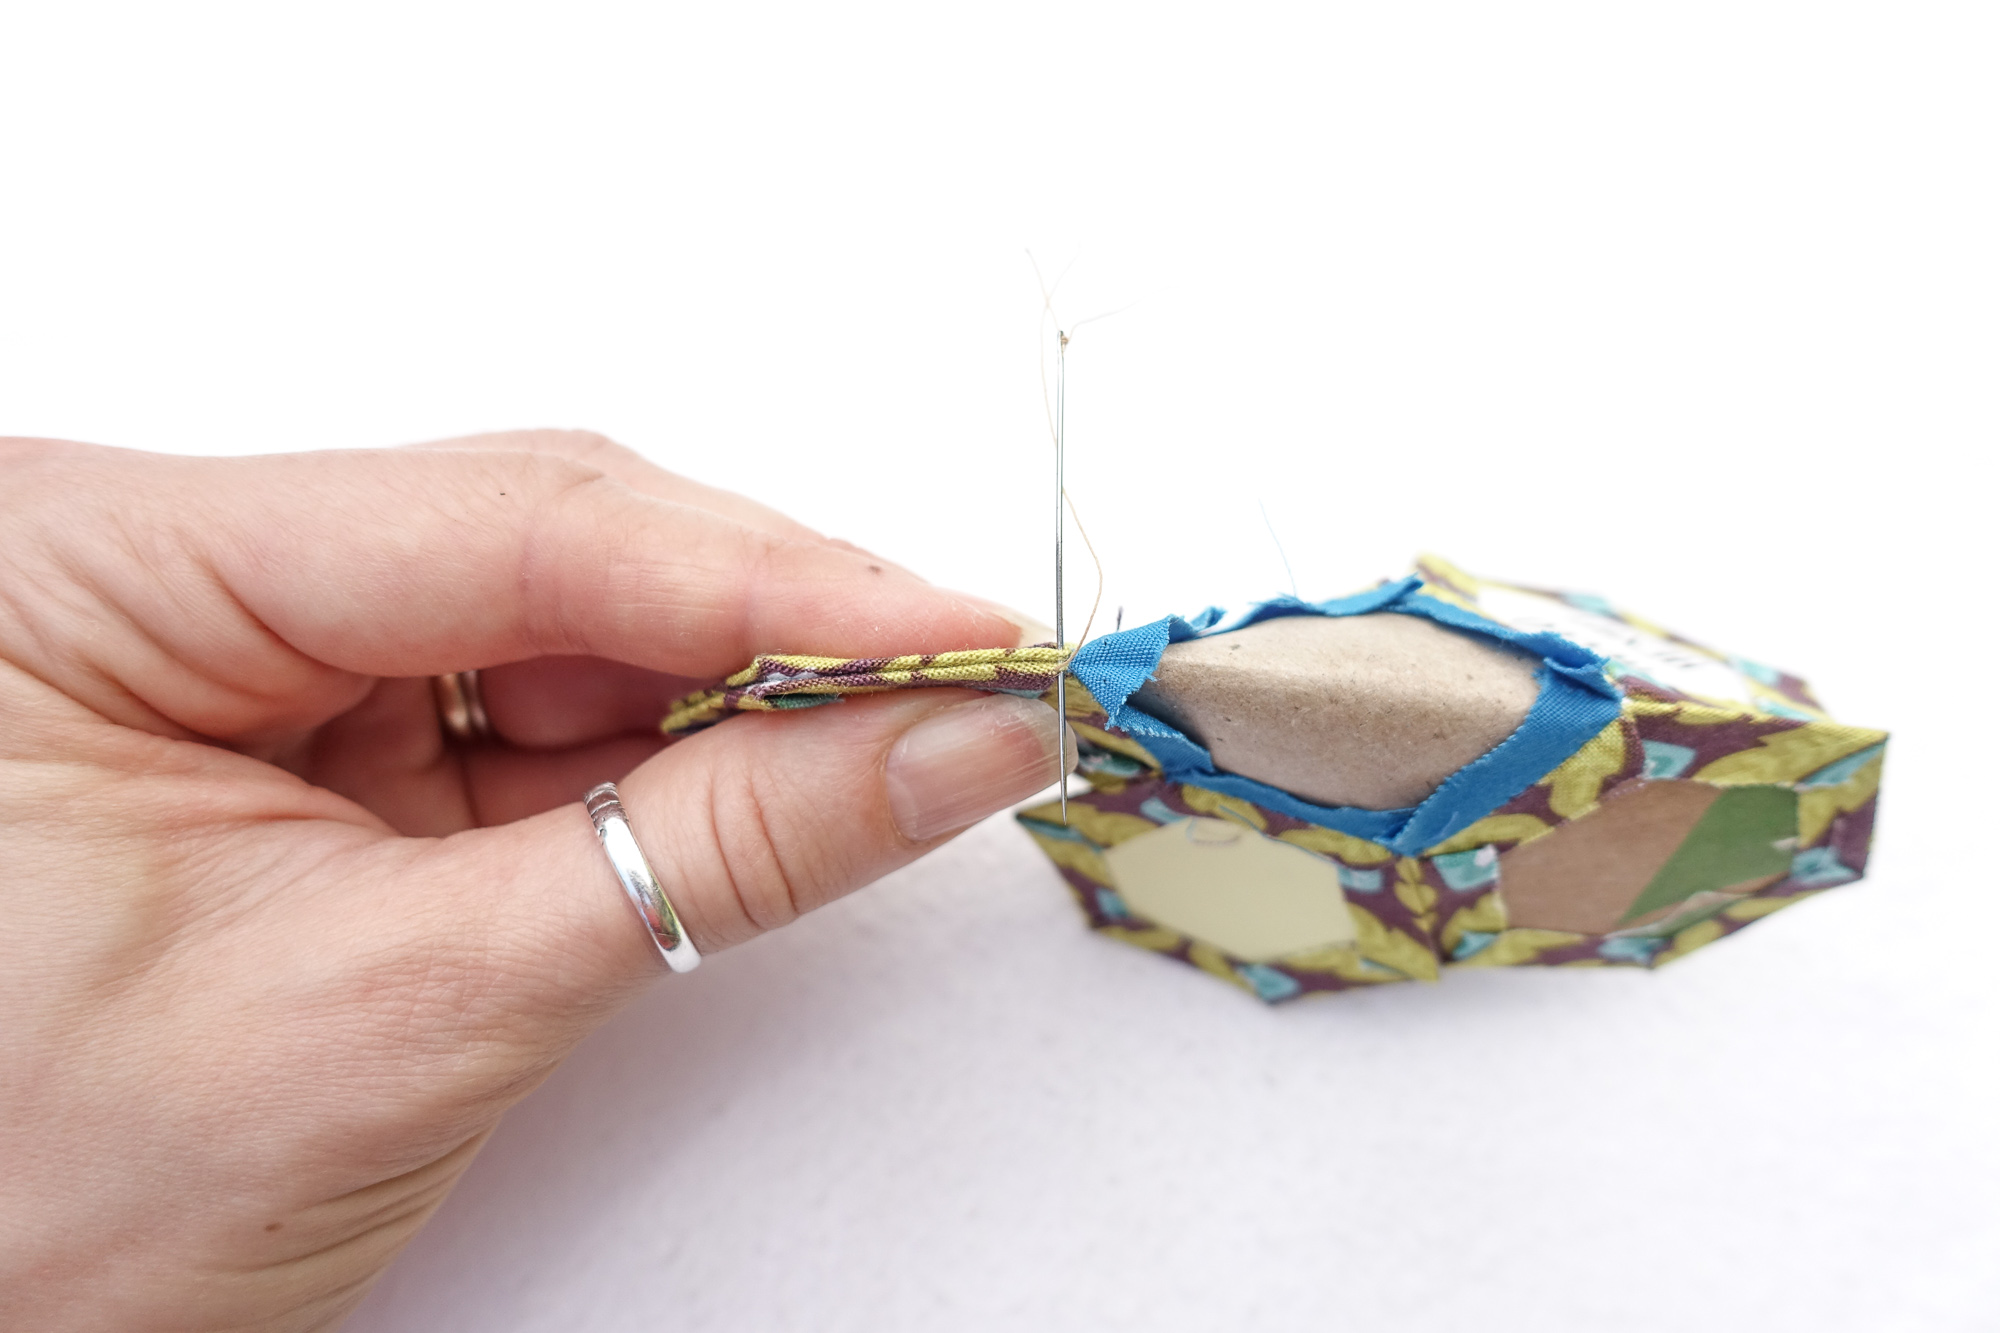
To stitch your petals to each other, stitch from the center outwards. To do this you will have to fold your center hexagon so that you can position the petals RST. At this point you have two options for dealing with your center hexagon.
Leave the Center Paper in Place
Simply fold your center with the paper in, which is perfectly fine, as shown in the photo. Then proceed to stitch your petals together from the center outwards.
Remove the Center Paper
You may remove the center hexagon paper ONLY at this point because it has been stitched into the patchwork on all sides. DO NOT remove the petal paper pieces at this time.
Of Note:
In any EPP project, you must keep the papers in until you have either completed stitching the piece into the patchwork on all sides OR you have completed the project. Removing papers from fully stitched pieces as you go can help make a project easier to handle as the project grows in size.
Once you have removed the center paper ONLY, you can begin stitching the petals together from the center outwards.
If you’re feeling fancy and want to check out a little hack I shared for stitching flower petals together, you can find that post here!
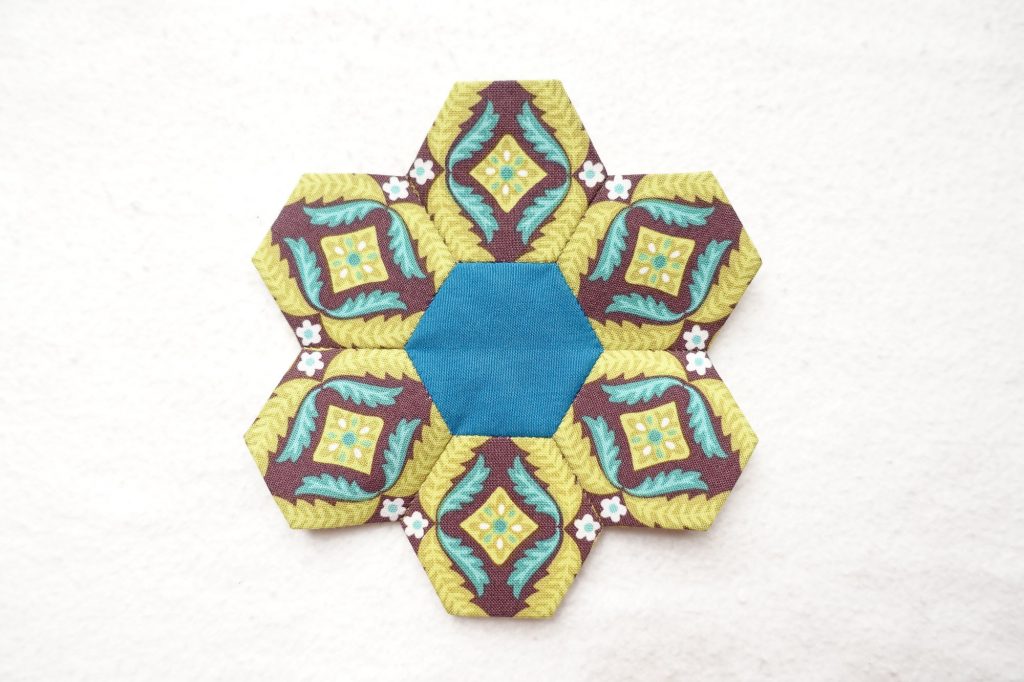
You just completed your first EPP block!
Your flower is now ready to be stitched into further patchwork or appliquéd onto a piece of fabric for further completion.
Jodi Godfrey combines these EPP hexie flowers with applique in her “Small Change” quilts. You can find the PDF pattern in her Tales of Cloth shop here.
Thanks so much for allowing me to be part of your EPP journey. May you experience the beauty of stitching your own journey as you go along.
For future reference, you can always find all of the sections of the EPP Primer here. Or you can use this handy pin for easy access from Pinterest.
This post may contain affiliate links. You can read my affiliate disclosure here.
This has been so helpful, thank you! I have three (newbie) questions…
1. It looks like there is a knot at your needle eye, can you explain how you prefer to thread the needle for these projects? Maybe a quick story in Instagram?
2. Do you use the same thread as you stitch each petal to the center, or do you cut the thread after each petal is stitched?
3. Have you considered a part two to the stiching post, where you share how to stitch two of these flowers together? I’d love to learn that too!
Hi Sarah! I’m so glad you’ve found this helpful! These are some great questions, and I’ll do my best to answer them here and on IG.
1. You’re right, I do a little slip knot at the eye of my needle so that my thread doesn’t slide out. I have a little video on one of my older posts that I’ll tag you in demonstrating how it’s done. I’ll also try to find the original video so I can archive it in my stories. It’s a game changer for EPP, I think!
2. Yes, I maintain my thread as I stitch each petal. I HATE cutting and restarting my thread every time. I’ll try to get a photo/video of how I do it so you can see, but for now, basically what I do is once I finish attaching two petals to each other, I secure the seam, and then without clipping the thread, I simply begin stitching the next two petals together from the inside out as I did with the first set of petals. I continue along this way until I either run out of thread or I’ve attached all of the petals. Then I simply clip the thread that connects each of the petals to each other, and I’m done! The key with this method in particular is securing your seams at the beginning and end of each one. 🙂
3. I hadn’t thought about doing another post stitching them together since I was mostly going for technique, but now you’ve got me thinking! I think that both your previous question about stitching the petals as well as joining blocks would actually make a lot sense to add into the EPP Pro stitching post. I’ll definitely work on it, and let you know what I come up with! In the meantime, that EPP Pro stitching post might be still have a few helpful tricks you might enjoy if you haven’t checked it out already. 🙂 It’s under Tutorials – EPP Pro – Stitching with Style.
Thank you so much for sharing your knowledge, tips and experience. A very surprising and interesting tidbit – the Jot glue stick at The Dollar Tree. I shop there for a variety of things and had not thought to look for glue sticks there. Thank you for that!
Hi Darlene, I’m so glad you found it helpful! I hope you enjoy the glue sticks, too. I have to give full credit to my mom for tipping me off to them, she’s the best bargain hunter I know! Happy stitching!


4 Responses
This has been so helpful, thank you! I have three (newbie) questions…
1. It looks like there is a knot at your needle eye, can you explain how you prefer to thread the needle for these projects? Maybe a quick story in Instagram?
2. Do you use the same thread as you stitch each petal to the center, or do you cut the thread after each petal is stitched?
3. Have you considered a part two to the stiching post, where you share how to stitch two of these flowers together? I’d love to learn that too!
Hi Sarah! I’m so glad you’ve found this helpful! These are some great questions, and I’ll do my best to answer them here and on IG.
1. You’re right, I do a little slip knot at the eye of my needle so that my thread doesn’t slide out. I have a little video on one of my older posts that I’ll tag you in demonstrating how it’s done. I’ll also try to find the original video so I can archive it in my stories. It’s a game changer for EPP, I think!
2. Yes, I maintain my thread as I stitch each petal. I HATE cutting and restarting my thread every time. I’ll try to get a photo/video of how I do it so you can see, but for now, basically what I do is once I finish attaching two petals to each other, I secure the seam, and then without clipping the thread, I simply begin stitching the next two petals together from the inside out as I did with the first set of petals. I continue along this way until I either run out of thread or I’ve attached all of the petals. Then I simply clip the thread that connects each of the petals to each other, and I’m done! The key with this method in particular is securing your seams at the beginning and end of each one. 🙂
3. I hadn’t thought about doing another post stitching them together since I was mostly going for technique, but now you’ve got me thinking! I think that both your previous question about stitching the petals as well as joining blocks would actually make a lot sense to add into the EPP Pro stitching post. I’ll definitely work on it, and let you know what I come up with! In the meantime, that EPP Pro stitching post might be still have a few helpful tricks you might enjoy if you haven’t checked it out already. 🙂 It’s under Tutorials – EPP Pro – Stitching with Style.
Hope this helps a little bit!
Thank you so much for sharing your knowledge, tips and experience. A very surprising and interesting tidbit – the Jot glue stick at The Dollar Tree. I shop there for a variety of things and had not thought to look for glue sticks there. Thank you for that!
Hi Darlene, I’m so glad you found it helpful! I hope you enjoy the glue sticks, too. I have to give full credit to my mom for tipping me off to them, she’s the best bargain hunter I know! Happy stitching!